Now the Pi 3 is running well, with the camera and OpenCV, we need to install the second camera and Pi as slave system.
Previous posts:
[Pi IoT] Plant Health Camera #5 - OpenCV
[Pi IoT] Plant Health Camera #4 - Putting the parts together
[Pi IoT] Plant Health Camera #3 - First steps
[Pi IoT] Plant Health Camera #2 - Unboxing
[Pi IoT] Plant Health Camera #1 - Application
Setup the Raspberry Pi B+
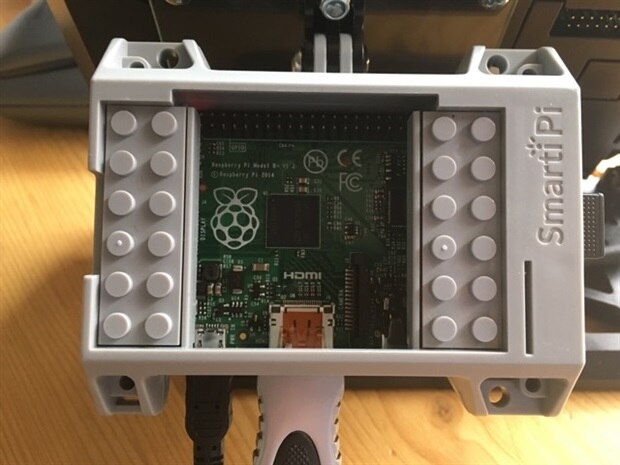
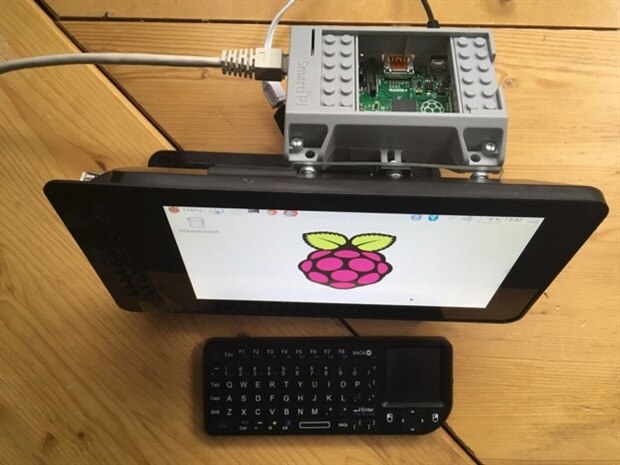
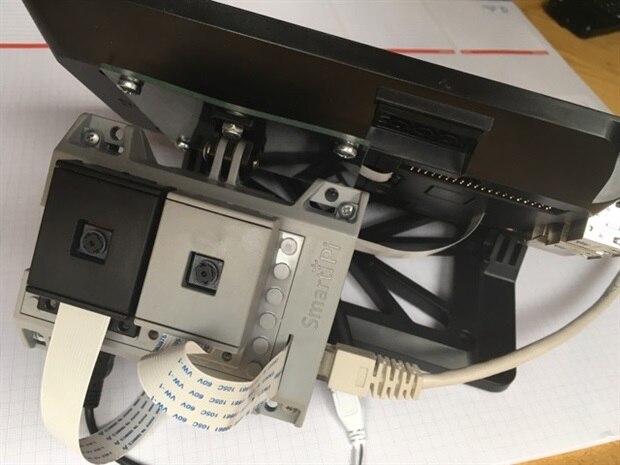
The in the kit supplied Raspberry Pi B+ is used as slave camera unit. I placed it in the grey Smarti Pi 'LEGO' case.
Raspbian is installed from a NOOBS image which I put on a 16G SD card.
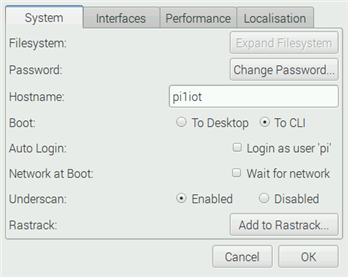
After installation it automatically boots into graphical mode. I made some changes using the Configuration tool.
As hostname I use pi1iot (the other ones hostname is pi3iot). Since we don't need the graphical user interface the Boot option is changed to CLI (Command Line Interface). Also Auto Login is disabled. In the interfaces tab the Camera is enabled, and in the Localization tab the proper timezone is set.
Connecting the cameras
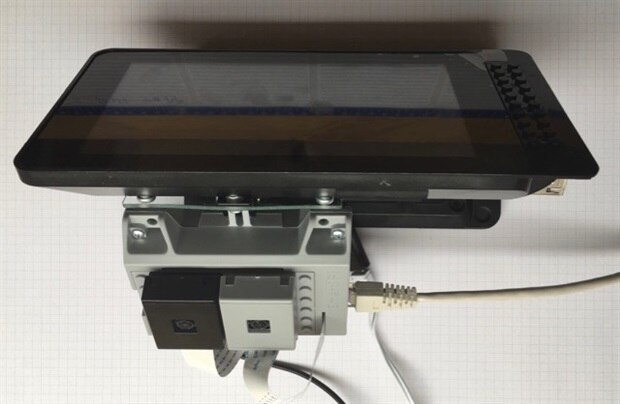
The standard camera cable is too short to connect to the Pi 3, therefore I ordered a longer (30 cm) cable.
The two cameras are placed next to each other on the LEGO cover of the second Pi.
For the time being the second Pi is connected via ethernet.
Connecting the slave Pi
The slave Pi is connected by using the SSHFS file sharing protocol which allows you to mount a Raspberry Pi's filesystem over an SSH session. This works very convenient. In order to set this up I first had to install SSHFS on the client system, the Pi 3 in this case:
pi@pi3iot:~ $ sudo apt-get install sshfs
Then I created a mount point:
pi@pi3iot:~ $ mkdir pi1iot_share
And mounted the seconds pi home directory (user pi):
pi@pi3iot:~ $ sshfs pi@192.168.2.58: pi1iot_share/
The authenticity of host '192.168.2.58 (192.168.2.58)' can't be established.
ECDSA key fingerprint is 12:70:32:f1:cb:45:19:7e:3a:9f:f2:f3:d4:57:5a:c1.
Are you sure you want to continue connecting (yes/no)? yes
pi@192.168.2.58's password:
pi@pi3iot:~ $
Now I logon on the second Pi and take a photo:
pi@pi3iot:~ $ ssh pi@192.168.2.58
pi@192.168.2.58's password:

The programs included with the Debian GNU/Linux system are free software;
the exact distribution terms for each program are described in the
individual files in /usr/share/doc/*/copyright.

Debian GNU/Linux comes with ABSOLUTELY NO WARRANTY, to the extent
permitted by applicable law.
Last login: Fri Jul 29 19:00:17 2016 from gerrit.fritz.box
pi@pi1iot:~ $
pi@pi1iot:~ $ mkdir planthealthcam
pi@pi1iot:~ $ cd planthealthcam/
pi@pi1iot:~/planthealthcam $ raspistill -o cam.jpg
pi@pi1iot:~/planthealthcam $ ls -al
total 3244
drwxr-xr-x  2 pi pi    4096 Jul 29 19:21 .
drwxr-xr-x 19 pi pi    4096 Jul 29 19:00 ..
-rw-r--r--  1 pi pi 3311007 Jul 29 19:21 cam.jpg
pi@pi1iot:~/planthealthcam $
Finally logoff the second pi. We are back at the Pi 3. The image can be found on the mounted share.
pi@pi1iot:~ $ logout
Connection to 192.168.2.58 closed.
pi@pi3iot:~ $
pi@pi3iot:~ $ ls -al pi1iot_share/planthealthcam/
total 3244
drwxr-xr-x 1 pi pi    4096 Jul 29 19:21 .
drwxr-xr-x 1 pi pi    4096 Jul 29 19:00 ..
-rw-r--r-- 1 pi pi 3311007 Jul 29 19:21 cam.jpg
pi@pi3iot:~ $
That's it for now, next step is how to simultaneously take an image with both cameras.
Stay tuned.




-

gpolder
-
Cancel
-
Vote Up
0
Vote Down
-
-
Sign in to reply
-
More
-
Cancel
Comment-

gpolder
-
Cancel
-
Vote Up
0
Vote Down
-
-
Sign in to reply
-
More
-
Cancel
Children