element14 Community
element14 Community
    Register Log In
  • Site
  • Search
  • Log In Register
  • About Us
  • Community Hub
    Community Hub
    • What's New on element14
    • Feedback and Support
    • Benefits of Membership
    • Personal Blogs
    • Members Area
    • Achievement Levels
  • Learn
    Learn
    • Ask an Expert
    • eBooks
    • element14 presents
    • Learning Center
    • Tech Spotlight
    • STEM Academy
    • Webinars, Training and Events
    • Learning Groups
  • Technologies
    Technologies
    • 3D Printing
    • FPGA
    • Industrial Automation
    • Internet of Things
    • Power & Energy
    • Sensors
    • Technology Groups
  • Challenges & Projects
    Challenges & Projects
    • Design Challenges
    • element14 presents Projects
    • Project14
    • Arduino Projects
    • Raspberry Pi Projects
    • Project Groups
  • Products
    Products
    • Arduino
    • Avnet Boards Community
    • Dev Tools
    • Manufacturers
    • Multicomp Pro
    • Product Groups
    • Raspberry Pi
    • RoadTests & Reviews
  • Store
    Store
    • Visit Your Store
    • Choose another store...
      • Europe
      •  Austria (German)
      •  Belgium (Dutch, French)
      •  Bulgaria (Bulgarian)
      •  Czech Republic (Czech)
      •  Denmark (Danish)
      •  Estonia (Estonian)
      •  Finland (Finnish)
      •  France (French)
      •  Germany (German)
      •  Hungary (Hungarian)
      •  Ireland
      •  Israel
      •  Italy (Italian)
      •  Latvia (Latvian)
      •  
      •  Lithuania (Lithuanian)
      •  Netherlands (Dutch)
      •  Norway (Norwegian)
      •  Poland (Polish)
      •  Portugal (Portuguese)
      •  Romania (Romanian)
      •  Russia (Russian)
      •  Slovakia (Slovak)
      •  Slovenia (Slovenian)
      •  Spain (Spanish)
      •  Sweden (Swedish)
      •  Switzerland(German, French)
      •  Turkey (Turkish)
      •  United Kingdom
      • Asia Pacific
      •  Australia
      •  China
      •  Hong Kong
      •  India
      •  Korea (Korean)
      •  Malaysia
      •  New Zealand
      •  Philippines
      •  Singapore
      •  Taiwan
      •  Thailand (Thai)
      • Americas
      •  Brazil (Portuguese)
      •  Canada
      •  Mexico (Spanish)
      •  United States
      Can't find the country/region you're looking for? Visit our export site or find a local distributor.
  • Translate
  • Profile
  • Settings
Pi IoT
  • Challenges & Projects
  • Design Challenges
  • Pi IoT
  • More
  • Cancel
Pi IoT
Blog PiIoT - The MuZIEum project #25 [tech]: Art-a-tronic parts and motors assembling and wiring
  • Blog
  • Forum
  • Documents
  • Polls
  • Files
  • Events
  • Mentions
  • Sub-Groups
  • Tags
  • More
  • Cancel
  • New
  • Share
  • More
  • Cancel
Group Actions
  • Group RSS
  • More
  • Cancel
Engagement
  • Author Author: balearicdynamics
  • Date Created: 17 Dec 2016 1:25 PM Date Created
  • Views 1392 views
  • Likes 4 likes
  • Comments 6 comments
  • assembling
  • l298
  • stepper controller
  • piiot
  • wiring
  • muzieum
  • stepper motor
  • opera
  • gearbest
  • lorenzo merlo
  • art
  • cabling
  • 3d printed
  • linear transductor
  • art-a-tronic
  • psoc
Related
Recommended

PiIoT - The MuZIEum project #25 [tech]: Art-a-tronic parts and motors assembling and wiring

balearicdynamics
balearicdynamics
17 Dec 2016

After a series of timeline delays due a lot of (several) personal troubles I can restart the publication of the project blog posts with some smart updates. The project is near to be finished and in few days also the presentation location and dates will be official.

Full 3D printed

image

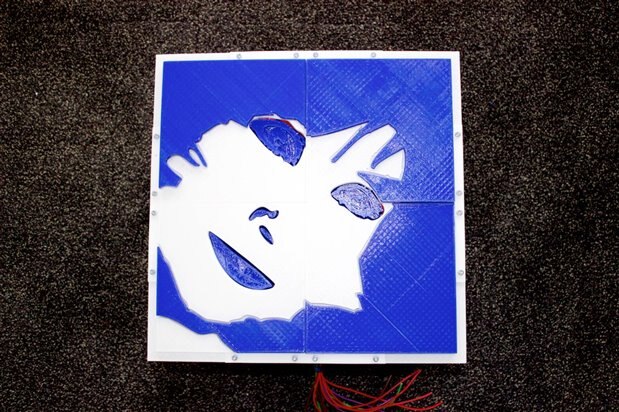
The Art-a-tronic opera is totally 3D printed and the final assembly has been finished. To make the final moving object (35x35x20 cm size) it was necessary to design 28 different mechanical parts resulting in 41 different printed pieces:

  • 13 White parts: the image background
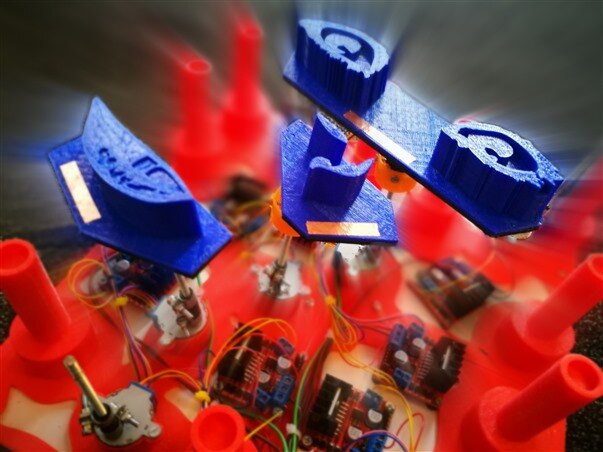
  • 7 Blue parts: the moving shapes of the image
  • 11 Black parts: elements and supports to make the blue parts moving
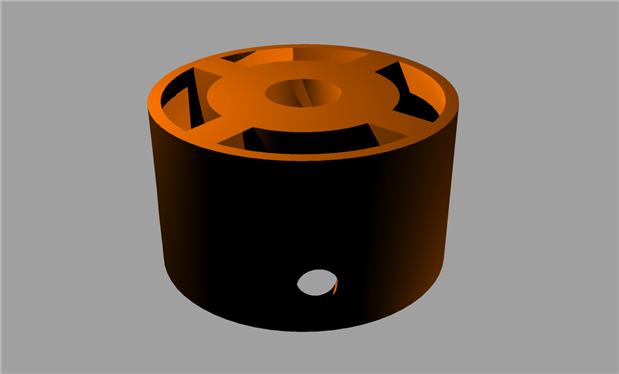
  • 7 Orange parts: to lock the special nut moved by the vertical axis
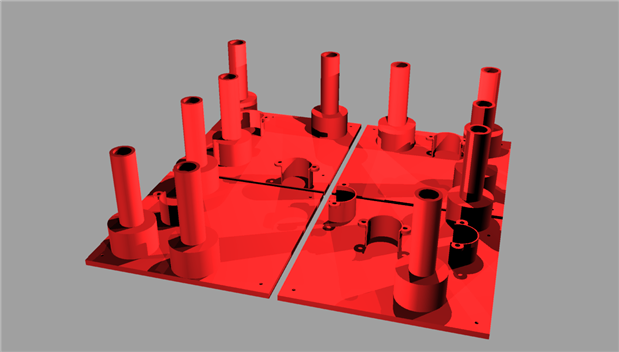
  • 4 Red parts: to create the support base and the stepper motors support to the bottom of the moving elements.


{gallery} Components design

image

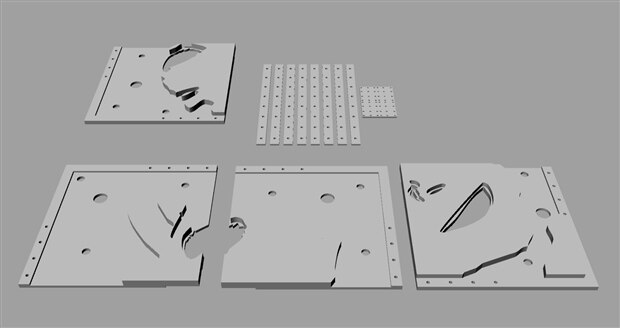
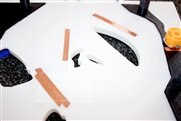
The white parts composing the background exposed surface (35x35 cm)

image

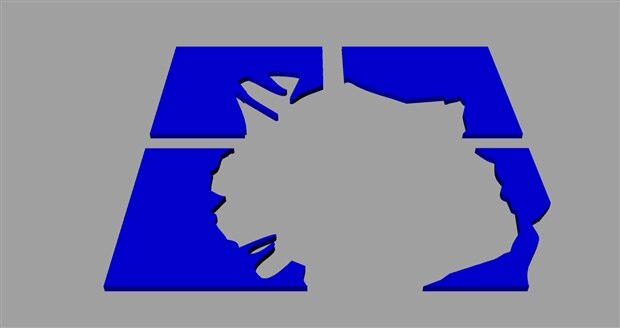
The four blue parts composing the main shape. These parts moves toward the viewer laying on the white background

image

The three blue parts composing the image details (eyes, nose and lips). These parts moves inside the background holes from the bottom of the base

image

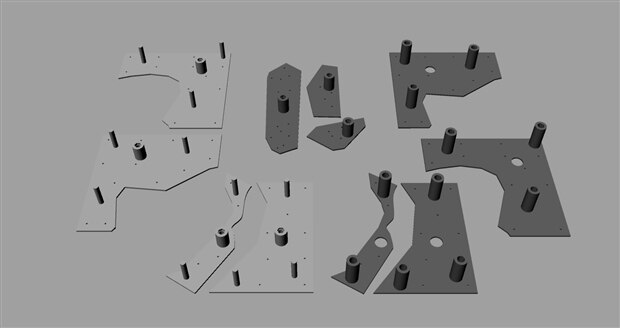
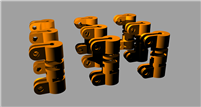
The eleven black parts supporting the blue parts movements

image

The four red parts. When assembled these are the main base of the entire structure.

image

The special nut motion screw holder, top view

image

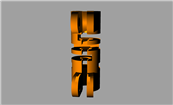
The special nut motion screw holder, bottom view


The images below shows some details of the final assembly

imageimage

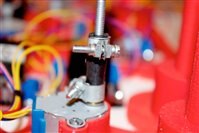
Every vertical moving part has an actuator built with a 28BYJ-48 geared stepper motor controlled by a LM298 motor controller; a total of 7 steppers + 7 controllers.

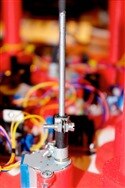
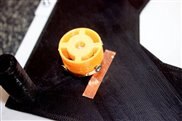
Stepper screw holder changes

imageimageimage

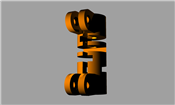
As shown in the above images the original design for the stepper screw holder was 3D printer components too. The reason was the difficulty to find on the market similar metal components cheap and of the exact measure to fit the design. An easier solutions has been adopted instead as I have found strong and semi-flexible small hose: this material common use if for fuel and gasoline, so it is also resistant including temperature and solvents. And easy to manage and cut too. The images below shows in detail shows the final assembly.

imageimage

imageimage

Cabling the system

As show in the previous images, every stepper motor and controller are already connected together and fit inside the base. Then there are three different wiring solutions to be adopted: powering the system, controlling the motors and controlling the end-stop switches.

image

The final aspect as should appear (not yet boxed) to the visitor is shown in the image above.

Below the top view of the base with the stepper motors connected to the controllers and the powering cables. The motor controllers also provide a 5Vcc output and are used for all accessory powering than the motors.

image

End-stop switches

A special solution was needed to control the position of the mobile components, including the auto-zero finding. The three components that raise from the bottom has their zero point at the max height while the rest of the image mobile parts (the four blue ones) has their zero point laying on the white background surface. The startup sequence should include the initial auto zero position then parts are moved to their standby level. The form factor and the kind of end of stroke makes it impossible to use common end-stop switches as we are used to see in the 3D printers, mill machines etc.

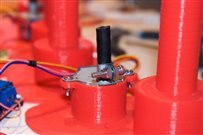
Custom end-stop switches has been created with copper wire glued (with conductive glue) on both sides of the contact surfaces. The images below show ow the cabling has been setup on the bottom side of the white background.

imageimage

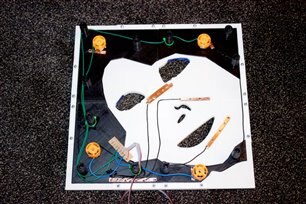
The nut holder is also used as the end-stop contact. This means that the auto-zero is inverted respect the lower position, but this is a bare question of the software on the microcontroller.

imageimageimage

image

Using the same method the three bottom components has been set with their end-stop custom switches.

  • Sign in to reply

Top Comments

  • balearicdynamics
    balearicdynamics over 8 years ago in reply to rhe123 +2
    Thank you Robin! Yes I am. There was a series of orginzation problems but this project is almost wide and the last thng I don't like to do is to finish it. Tomorrow a fly-day then I will continue posting…
  • DAB
    DAB over 8 years ago +1
    Great build. DAB
  • Jan Cumps
    Jan Cumps over 8 years ago +1
    Very nice, Enrico. And impressive. Are you confident that the end-contacts you made will survive the rough life in a public area? I'm worried that they will become crusty after some decent use.
Parents
  • rhe123
    rhe123 over 8 years ago

    Great to see you're back on track balearicdynamics! Good luck with finishing up this nice project image

    • Cancel
    • Vote Up +1 Vote Down
    • Sign in to reply
    • More
    • Cancel
  • balearicdynamics
    balearicdynamics over 8 years ago in reply to rhe123

    Thank you Robin!


    Yes I am. There was a series of orginzation problems but this project is almost wide and the last thng I don't like to do is to finish it. Tomorrow a fly-day then I will continue posting. The plan is to have all finished before the end of next January (Just ready for a new challenge image )


    Enrico

    • Cancel
    • Vote Up +2 Vote Down
    • Sign in to reply
    • More
    • Cancel
Comment
  • balearicdynamics
    balearicdynamics over 8 years ago in reply to rhe123

    Thank you Robin!


    Yes I am. There was a series of orginzation problems but this project is almost wide and the last thng I don't like to do is to finish it. Tomorrow a fly-day then I will continue posting. The plan is to have all finished before the end of next January (Just ready for a new challenge image )


    Enrico

    • Cancel
    • Vote Up +2 Vote Down
    • Sign in to reply
    • More
    • Cancel
Children
No Data
element14 Community

element14 is the first online community specifically for engineers. Connect with your peers and get expert answers to your questions.

  • Members
  • Learn
  • Technologies
  • Challenges & Projects
  • Products
  • Store
  • About Us
  • Feedback & Support
  • FAQs
  • Terms of Use
  • Privacy Policy
  • Legal and Copyright Notices
  • Sitemap
  • Cookies

An Avnet Company © 2025 Premier Farnell Limited. All Rights Reserved.

Premier Farnell Ltd, registered in England and Wales (no 00876412), registered office: Farnell House, Forge Lane, Leeds LS12 2NE.

ICP 备案号 10220084.

Follow element14

  • X
  • Facebook
  • linkedin
  • YouTube