


Previously I discussed about designing a dashboard using Freeboard and setting up a MQTT Broker with Websockets enabled. In this post, I'm going to use both of them and create a dashboard for visualizing data coming through an MQTT stream. If you don't want to set up your on MQTT broker, I found a open broker from HiveMQ handy. You can connect to it using broker.hivemq.com at port 8000 for websockets connection and port 1883 for normal connection. More info can be found here. Since the dashboard will be running at client end, we'll be using as JS MQTT client with websockets connection.

Setting up freeboard for receiving MQTT packets was a little pain. There is no official plugins available. I found a descent plugin at https://github.com/alsm/freeboard-mqtt but it was not really what I want. I has quite a few draw backs:
- It was not working for me. (I still don't know why
 - might be the way they use connect to broker )
 - It can support only one topic subscription. This is was a little annoying to me as for each topic I need to create a datasource - which in turn creates one client per topic

- Not easy to select the fields in data source


So I decided to create my own plugin using it as a starting point. I wanted to be able to subscribe to multiple topics from one client, easiness in selecting datasources for widgets and with possibility of wildcard subscriptions. The new plugin is used in this blog post for all MQTT subscriptions. Currently I resides inside my main dashboard repository but I'm looking forward to spin it off this project and make it itself a fully fledged project by the end of this challenge. In this post, I'm planning to show only how to use the plugin. I'm not planning to cover the technicalities of writing freeboard plugins or how to set up them. If you want to use this plugin in your project, simple copy the plugin under 'www/freeboard/plugins/thirdparty/freeboard-mqtt-paho' of the git repo and follow the instructions here.
Setting up Freeboard
A whole working setup of the dashboard along with nodejs sever is available in my github. Clone it and it will setup everything. You can run this in your pc or raspberry pi. I'm running this from my Pi3 as this will in future serve as the hub for my network.
To clone the repository, go to some location in your computer/raspberry pi and
$ git clone https://github.com/v-i-s-h/PiIoT-dashboard.git
Then navigate to the repo directory and install the dependencies using
$ cd PiIoT-dashboard
$ npm install
This will install the dependencies required to host the dashboard. Inside this directory, you will find a modified version of Freeboard at /www/freeboard/ and my mqtt-plugin inside www/freeboard/plugins/thirdparty/freeboard-mqtt-paho/mqtt.paho.plugin.js
Now you can start the dashboard by
$ node server.js 8080
You can get something similar to:

Now you can go to your browser and type <Pi's IP:8080> to load freeboard:

Adding MQTT Client Data source
Now we can go on to create our own MQTT Datasource. Go to [ADD] and Select 'Paho MQTT Client'.
Now fill in the details such as broker address and topics to subscribe. You can subscribe to multiple topics separated by semi-column. No way for user authentication is available in plugin right now. Also enable 'JSON ENABLED' if your messages are json encoded. For now, I'm dealing with simple text messages. In this dashboard, I wish to monitor the data from three sensors. Each sensor will publish data in topic '/user/vish/test/sensorX' where X can be 0/1/2. That are the topics I'm subscribing to in this screenshot, seperated by semi column.
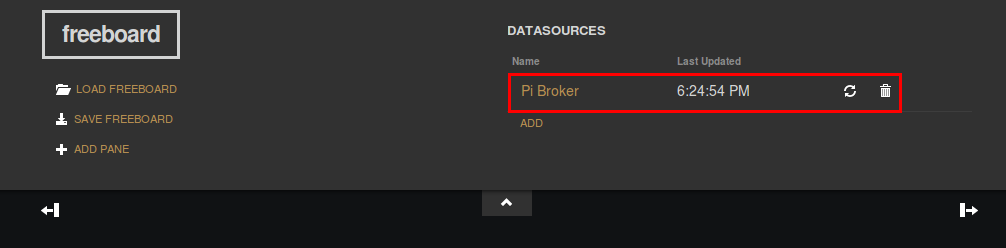
Click 'Save' once you are finished. Now you will be able to see it in your Datasources.
Adding widgets
Now I'll go to add three guage meters and three sparklines for values from three sensors. Video below shows the procedure for adding these widgets.
Testing
We are now ready to go. In order to test the setup, I wrote a small shell script to mock the sensors. It will publish random data on the topics mentioned above. This will be enough to test whether our dashboard is getting updated correctly. Shell script is given below:
# Script to publish random sensor values to MQTT broker
BROKER=<insert broker address>
PORT=1883   # Default port is 1883
for i in {1..5}
do
    mosquitto_pub -t "/user/vish/test/sensor0" -m $((RANDOM%101)) -h $BROKER -p $PORT;    sleep 1;
    mosquitto_pub -t "/user/vish/test/sensor1" -m $((RANDOM%101)) -h $BROKER -p $PORT;    sleep 1;
    mosquitto_pub -t "/user/vish/test/sensor2" -m $((RANDOM%101)) -h $BROKER -p $PORT;    sleep 1;
done
Now save this as mock_sensors.sh, make them executable and run:
$ chmod mock_sensors.sh
$ ./mock_sensors.sh
Below is a video of the test.
That's it. Now we are able to visualize data streaming through MQTT broker in freeboard.
Happy hacking,
vish