element14 Community
element14 Community
    Register Log In
  • Site
  • Search
  • Log In Register
  • About Us
  • Community Hub
    Community Hub
    • What's New on element14
    • Feedback and Support
    • Benefits of Membership
    • Personal Blogs
    • Members Area
    • Achievement Levels
  • Learn
    Learn
    • Ask an Expert
    • eBooks
    • element14 presents
    • Learning Center
    • Tech Spotlight
    • STEM Academy
    • Webinars, Training and Events
    • Learning Groups
  • Technologies
    Technologies
    • 3D Printing
    • FPGA
    • Industrial Automation
    • Internet of Things
    • Power & Energy
    • Sensors
    • Technology Groups
  • Challenges & Projects
    Challenges & Projects
    • Design Challenges
    • element14 presents Projects
    • Project14
    • Arduino Projects
    • Raspberry Pi Projects
    • Project Groups
  • Products
    Products
    • Arduino
    • Avnet Boards Community
    • Dev Tools
    • Manufacturers
    • Multicomp Pro
    • Product Groups
    • Raspberry Pi
    • RoadTests & Reviews
  • Store
    Store
    • Visit Your Store
    • Choose another store...
      • Europe
      •  Austria (German)
      •  Belgium (Dutch, French)
      •  Bulgaria (Bulgarian)
      •  Czech Republic (Czech)
      •  Denmark (Danish)
      •  Estonia (Estonian)
      •  Finland (Finnish)
      •  France (French)
      •  Germany (German)
      •  Hungary (Hungarian)
      •  Ireland
      •  Israel
      •  Italy (Italian)
      •  Latvia (Latvian)
      •  
      •  Lithuania (Lithuanian)
      •  Netherlands (Dutch)
      •  Norway (Norwegian)
      •  Poland (Polish)
      •  Portugal (Portuguese)
      •  Romania (Romanian)
      •  Russia (Russian)
      •  Slovakia (Slovak)
      •  Slovenia (Slovenian)
      •  Spain (Spanish)
      •  Sweden (Swedish)
      •  Switzerland(German, French)
      •  Turkey (Turkish)
      •  United Kingdom
      • Asia Pacific
      •  Australia
      •  China
      •  Hong Kong
      •  India
      •  Korea (Korean)
      •  Malaysia
      •  New Zealand
      •  Philippines
      •  Singapore
      •  Taiwan
      •  Thailand (Thai)
      • Americas
      •  Brazil (Portuguese)
      •  Canada
      •  Mexico (Spanish)
      •  United States
      Can't find the country/region you're looking for? Visit our export site or find a local distributor.
  • Translate
  • Profile
  • Settings
PiCasso Design Challenge
  • Challenges & Projects
  • Design Challenges
  • PiCasso Design Challenge
  • More
  • Cancel
PiCasso Design Challenge
Blog PiCasso Adapting Art to Viewers:  Mechanical Complete, Blog #8
  • Blog
  • Forum
  • Documents
  • Polls
  • Files
  • Events
  • Mentions
  • Sub-Groups
  • Tags
  • More
  • Cancel
  • New
  • Share
  • More
  • Cancel
Group Actions
  • Group RSS
  • More
  • Cancel
Engagement
  • Author Author: fmilburn
  • Date Created: 23 Apr 2019 5:45 AM Date Created
  • Views 2703 views
  • Likes 10 likes
  • Comments 14 comments
  • picasso
  • 3D Printing
  • image recognition
  • picasso_design
  • raspberry pi camera v2
  • raspberry pi 3b+
  • ai
  • art
  • picasso_design_challenge
  • pi face
Related
Recommended

PiCasso Adapting Art to Viewers:  Mechanical Complete, Blog #8

fmilburn
fmilburn
23 Apr 2019

Art is often made to appeal to a specific set of viewers.  This is the 8th blog in a series exploring the idea of using AI to recognize a viewer and adapt art to their age or interest.  The intent is to encourage early art appreciation while being attractive to all household members.

image

Image recognition has advanced and the build deemed acceptable for a prototype.


Tidying the Build


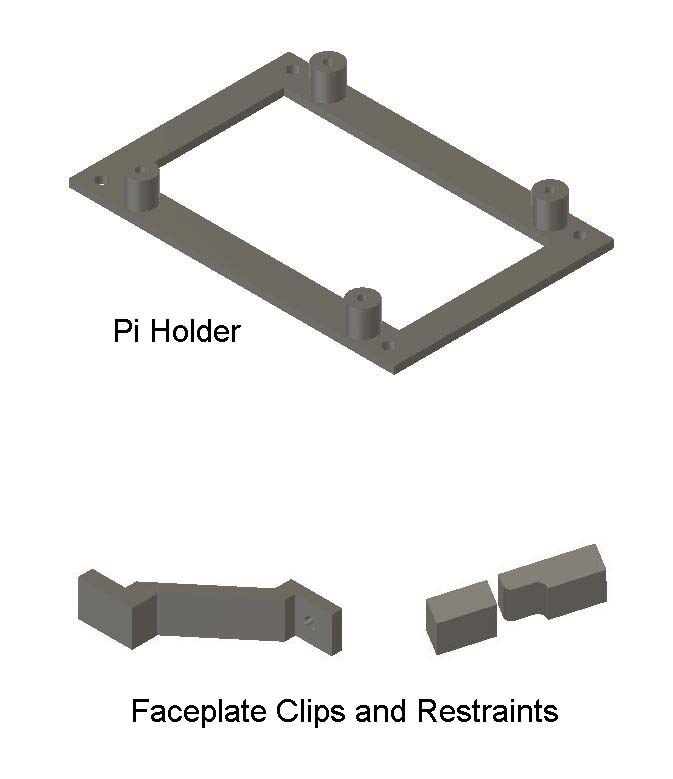
For the time being I have simplified the enclosure on the back side of the display.  This leaves wiring exposed if viewed from the back but at the same time it enables easier access while getting things sorted and does not detract visually from the front side of the prototype.  A new mount for the second Raspberry Pi (which runs the image recognition) was printed and screwed into place.  Clips and tabs were printed to secure the faceplate to the monitor and stand.  Everything is now glued and screwed together and acceptably sturdy.

image

With the mount, tabs, clips and restraints in place it looks like this from the backside:

image

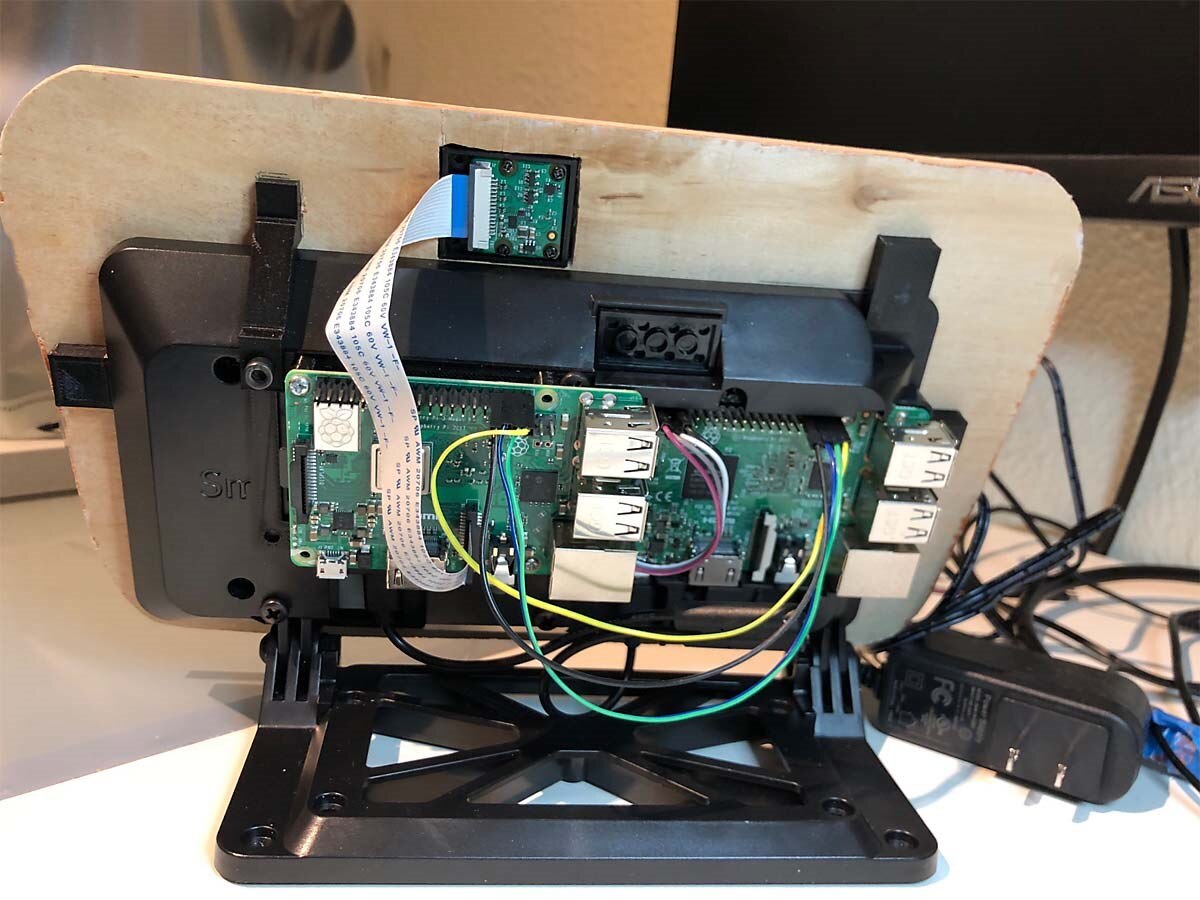
Working with a second Raspberry PI has made things more complicated than originally imagined.  For example there are mechanical complications to strapping a second Pi to the back and resulting space / access issues.  Power is an issue since two USB supplies are required.  Software development is more tedious.   As will be discussed below however, the Pi doing the image recognition is fully loaded and trying to do that and run art displays with a single Pi would bog things down.


Image Recognition


The training set currently consists of 8 persons and 24 photos.  The tradeoff is frame rate Vs. accuracy with the frame rate at a bit more than 4 frames per second with 24 photos.  Recognition is limited to head on and deteriorates if lighting changes or for all sorts of other things like my granddaughter's hair is hanging straight instead of in a ponytail.  It is best at recognizing me, I suspect because I am the only one that wears glasses.  When it errs with children, it tends to identify them as my youngest granddaughter.  With the other adults in the dataset, they are usually "unrecognized" faces mostly because the training set is sparser on them.  I will continue working on this but suspect it will continue to be a weakness.


Software Development


Slogging through the software is the least fun part.  Not being a Linux guy, I haven't been able to get the Pi running the vision recognition to run the Python script at startup.  I  have tried modifying rc.local and creating a unit file in systemd without success using the directions in this link. If anyone has a good tutorial to run a Python script continuously from startup then I would appreciate the link.  Otherwise I can always do it from the command line.  Anyway, pretty sure I am just doing something boneheaded and need to work through it more carefully.  The other software chore is to get the Pi on the video side doing the displays with a bit more panache.


The Ballerina


This is the fun part image.   I knew my granddaughter would want a box like the robot box I gave her brother.  She said she wanted a ballerina and here is her drawing.

image

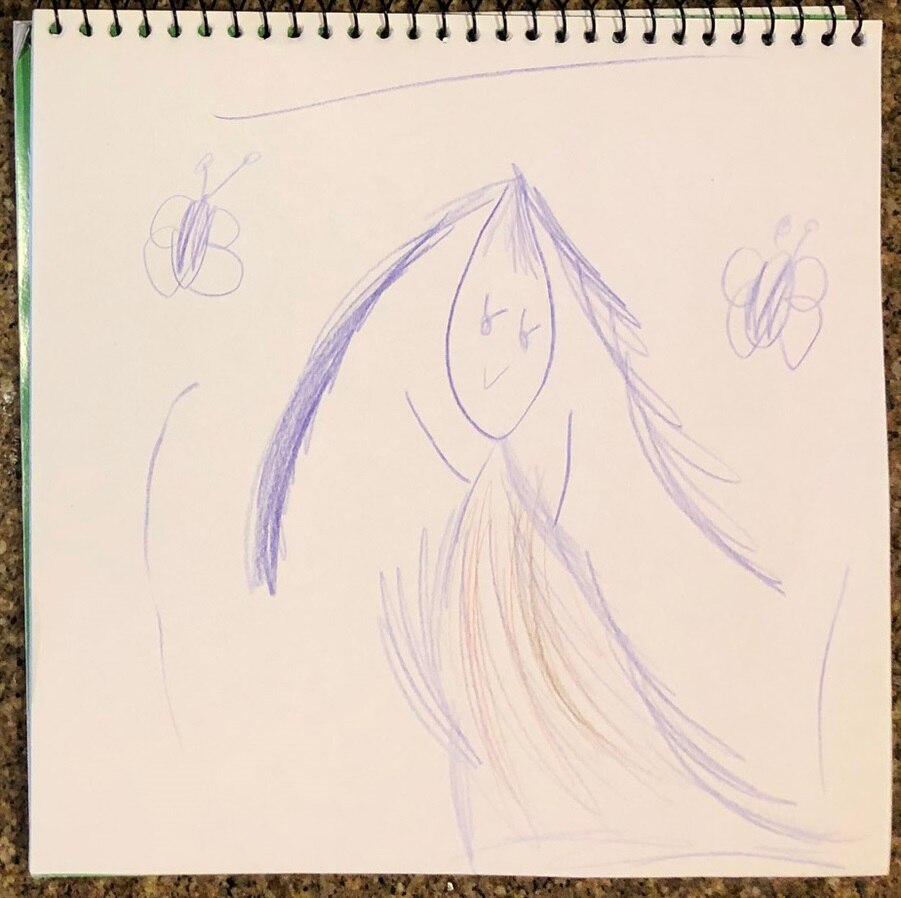
I like the free flowing lines and simplicity.


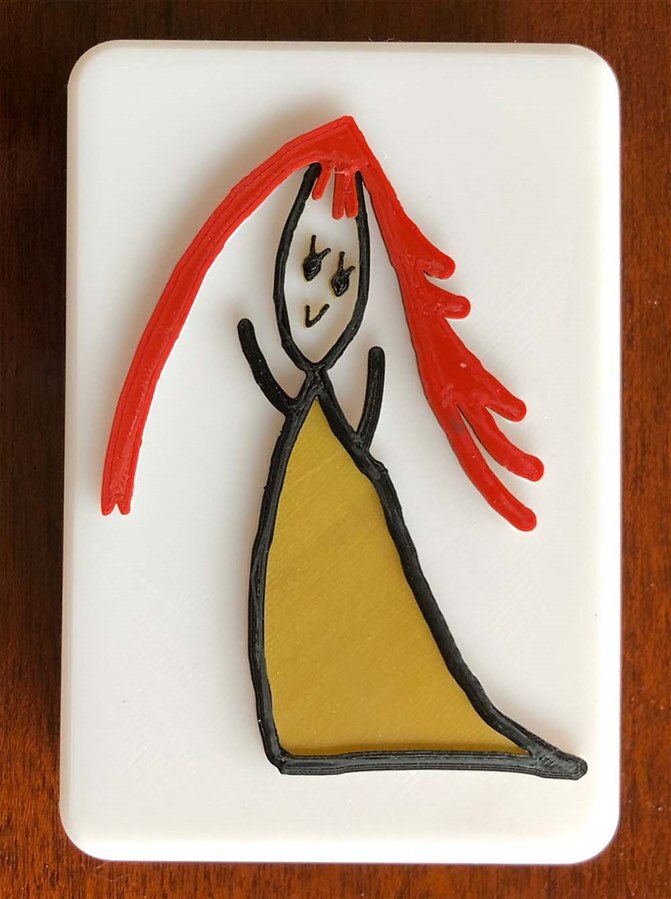
For this print, 4 colors will be used.  Since my printer only has one print head, each color will have its own layer, and subsequent colors laid down on top of it.  The printer can do layer heights of 0.1, 0.2, or 0.3 mm.  A minimum of 2 layers (and maybe more) is needed to get good color.  I elected to use 0.2 mm layer height while printing and 0.6 mm layer thickness for each color, so 3 layers.  The total thickness of the figure is 2.4 mm. 


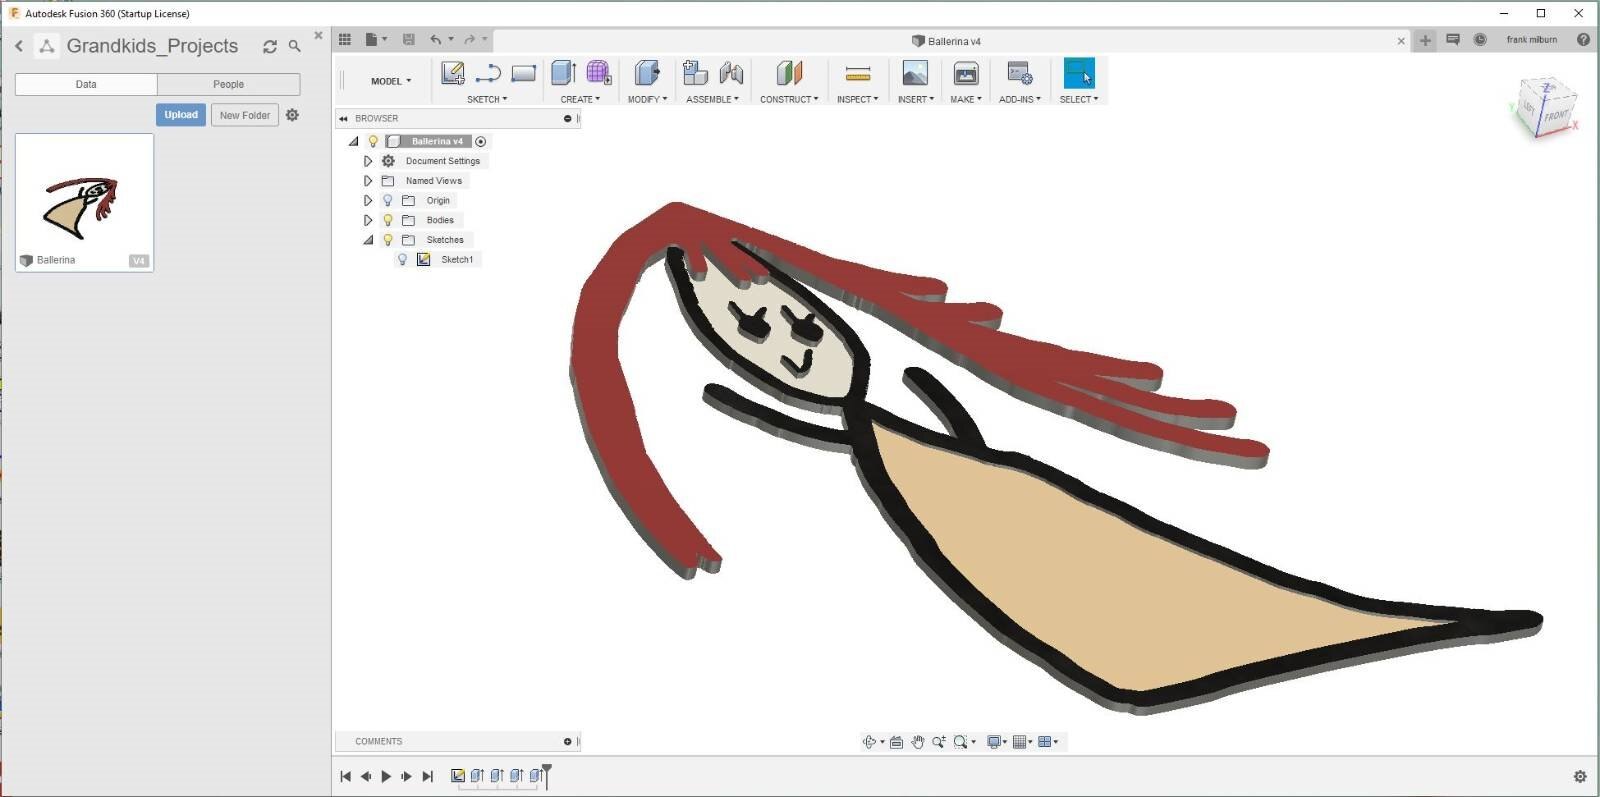
Her pencil sketch was scanned in and outlined in Photoshop and then converted to a SVG file at online-convert.com. I have been using Photoshop due to familiarity but I am familiar enough with Fusion 360 now that I will trying going straight to it next time.  The trick is to simplify the drawings and give adequate thickness to the lines such that the 3D printer can handle it.

image


The SVG file was pulled into Fusion 360 and the color layers extruded as described above.  The white layer covers the entire print, then the gold layer is on top of it followed by the black layer and the red layer.

image

When printing, I manually pause the print at each new color layer and change the filament before restarting.  And this is the result.

image

The boxes are kind of peripheral to the project but have been well received by the kids.  It made me think that a music box might be a fun project as well.  My granddaughter told me that she had done "stop motion" movies at school.  Maybe we can use a Pi to make a stop motion movie with "The Ballerina".  Another idea is to print something that can pop up when the baby is in view - either driven by the pi face or maybe a servo.  Doing art with the kids is so much fun I may not get around to doing anything for adults.


Upcoming Work


  • Improve image recognition
  • Write Python script to drive the monitor and control the art output
  • Continue developing art


Thanks for reading - comments and suggestions are always welcome - especially on how to get a Python script to run when a Pi is booting.


Other Posts in this Series

PiCasso Adapting Art to Viewers: Introduction  Blog #1

PiCasso Adapting Art to Viewers: OpenCV Face Detection, Blog #2

PiCasso Adapting Art to Viewers: Cabinet Design, Blog #3

PiCasso Adapting Art to Viewers: Pi talks to Pi, Blog #4

PiCasso Adapting Art to Viewers: Grandpa Shark, Blog #5

PiCasso Adapting Art to Viewers: More on Cabinet Design, Blog #6

PiCasso Adapting Art to Viewers:  New Art, Blog #7

  • Sign in to reply

Top Comments

  • jc2048
    jc2048 over 6 years ago +7
    I like the printed figures. They'd certainly be an interesting way to do stop-motion animation. For each of the sculptures I've done I edited the cron table to run the script at boot-up (cron is a scheduler…
  • balearicdynamics
    balearicdynamics over 6 years ago +6
    Nice update, things become more complex and the project more intriguing...
  • dubbie
    dubbie over 6 years ago +6
    Good 3D design and printing to get the two Pis mounted together nicely. Good colour 3D printing. Dubbie
  • fmilburn
    fmilburn over 6 years ago in reply to balearicdynamics

    Thanks for the explanations and help Enrico!  I have blundered into a solution as described below.  I will remember the try/throw recover approach.

    • Cancel
    • Vote Up +2 Vote Down
    • Sign in to reply
    • More
    • Cancel
  • fmilburn
    fmilburn over 6 years ago in reply to jc2048

    I understand the source of my problem now.  OpenCV was cratering when requested to display the current image in a window during startup - it apparently does not like doing this. After commenting that line out it appears to run OK.  I do not intend to display that image anyway once everything is working and had left it in for debugging so it is not a problem for this application.  Thanks again for the tip on crontab.

    • Cancel
    • Vote Up +3 Vote Down
    • Sign in to reply
    • More
    • Cancel
  • balearicdynamics
    balearicdynamics over 6 years ago in reply to fmilburn

    Hello Frank, to manage a forever process using cron sometime things are a bit more complicates. I suggest that you use the try/throw with a recovery approach when the application crashes anyway. And when you intercept the error - if it occurs - you should close all the open hardware channels/connections, etc.

    Then - this is just the case - instead of setting only the launch of the process in the crontab to activate a service with the option in the service configuration that the process should restart if it stops.


    Using the & does only mean to launch a process and come back. But when the bash starts the process in this way it returns the PID so you can kill it if the associated program hands. When a program stops it just finish running but it does not mean that things are close regularly. You can launch the questioned program from a Bash command collecting the PID. If the program ends with a different return code than 0 it has not terminated in a normal way so you can process the return code and first of all kill the associated batch process.


    Enrico

    • Cancel
    • Vote Up +3 Vote Down
    • Sign in to reply
    • More
    • Cancel
  • fmilburn
    fmilburn over 6 years ago in reply to jc2048

    crontab did get the script running at startup but python must be throwing an error that prevents it from continuing to run.  I know it is not running because the task manager does not list it.  I added an "&" at the end of the command in crontab as that is supposed to allow the boot to continue normally but it made no difference.  I can tell that it did try to run the python script because I get a warning that the GPIO pins had already been set (one of the first things my Python script does) when I execute the script from the command line.  So I still have some detective work to do....

    • Cancel
    • Vote Up +2 Vote Down
    • Sign in to reply
    • More
    • Cancel
  • fmilburn
    fmilburn over 6 years ago in reply to three-phase

    Thanks Donald!   I will get there one way or another image

    • Cancel
    • Vote Up +2 Vote Down
    • Sign in to reply
    • More
    • Cancel
>
element14 Community

element14 is the first online community specifically for engineers. Connect with your peers and get expert answers to your questions.

  • Members
  • Learn
  • Technologies
  • Challenges & Projects
  • Products
  • Store
  • About Us
  • Feedback & Support
  • FAQs
  • Terms of Use
  • Privacy Policy
  • Legal and Copyright Notices
  • Sitemap
  • Cookies

An Avnet Company © 2025 Premier Farnell Limited. All Rights Reserved.

Premier Farnell Ltd, registered in England and Wales (no 00876412), registered office: Farnell House, Forge Lane, Leeds LS12 2NE.

ICP 备案号 10220084.

Follow element14

  • X
  • Facebook
  • linkedin
  • YouTube