element14 Community
element14 Community
    Register Log In
  • Site
  • Search
  • Log In Register
  • Community Hub
    Community Hub
    • What's New on element14
    • Feedback and Support
    • Benefits of Membership
    • Personal Blogs
    • Members Area
    • Achievement Levels
  • Learn
    Learn
    • Ask an Expert
    • eBooks
    • element14 presents
    • Learning Center
    • Tech Spotlight
    • STEM Academy
    • Webinars, Training and Events
    • Learning Groups
  • Technologies
    Technologies
    • 3D Printing
    • FPGA
    • Industrial Automation
    • Internet of Things
    • Power & Energy
    • Sensors
    • Technology Groups
  • Challenges & Projects
    Challenges & Projects
    • Design Challenges
    • element14 presents Projects
    • Project14
    • Arduino Projects
    • Raspberry Pi Projects
    • Project Groups
  • Products
    Products
    • Arduino
    • Avnet Boards Community
    • Dev Tools
    • Manufacturers
    • Multicomp Pro
    • Product Groups
    • Raspberry Pi
    • RoadTests & Reviews
  • Store
    Store
    • Visit Your Store
    • Choose another store...
      • Europe
      •  Austria (German)
      •  Belgium (Dutch, French)
      •  Bulgaria (Bulgarian)
      •  Czech Republic (Czech)
      •  Denmark (Danish)
      •  Estonia (Estonian)
      •  Finland (Finnish)
      •  France (French)
      •  Germany (German)
      •  Hungary (Hungarian)
      •  Ireland
      •  Israel
      •  Italy (Italian)
      •  Latvia (Latvian)
      •  
      •  Lithuania (Lithuanian)
      •  Netherlands (Dutch)
      •  Norway (Norwegian)
      •  Poland (Polish)
      •  Portugal (Portuguese)
      •  Romania (Romanian)
      •  Russia (Russian)
      •  Slovakia (Slovak)
      •  Slovenia (Slovenian)
      •  Spain (Spanish)
      •  Sweden (Swedish)
      •  Switzerland(German, French)
      •  Turkey (Turkish)
      •  United Kingdom
      • Asia Pacific
      •  Australia
      •  China
      •  Hong Kong
      •  India
      •  Korea (Korean)
      •  Malaysia
      •  New Zealand
      •  Philippines
      •  Singapore
      •  Taiwan
      •  Thailand (Thai)
      • Americas
      •  Brazil (Portuguese)
      •  Canada
      •  Mexico (Spanish)
      •  United States
      Can't find the country/region you're looking for? Visit our export site or find a local distributor.
  • Translate
  • Profile
  • Settings
Pi Chef Design Challenge
  • Challenges & Projects
  • Design Challenges
  • Pi Chef Design Challenge
  • More
  • Cancel
Pi Chef Design Challenge
Blog Automatic Dough Shaper - Blog #11
  • Blog
  • Forum
  • Documents
  • Polls
  • Files
  • Events
  • Mentions
  • Sub-Groups
  • Tags
  • More
  • Cancel
  • New
  • Share
  • More
  • Cancel
Group Actions
  • Group RSS
  • More
  • Cancel
Engagement
  • Author Author: a_davis_22
  • Date Created: 1 Apr 2018 7:37 AM Date Created
  • Views 1091 views
  • Likes 7 likes
  • Comments 4 comments
  • food
  • cookie
  • automatic dough shaper
  • nema17
  • roller
  • wood
  • pan
  • jb weld
  • diy cnc
Related
Recommended

Automatic Dough Shaper - Blog #11

a_davis_22
a_davis_22
1 Apr 2018

First I’ll give the hardware update and then the electrical.


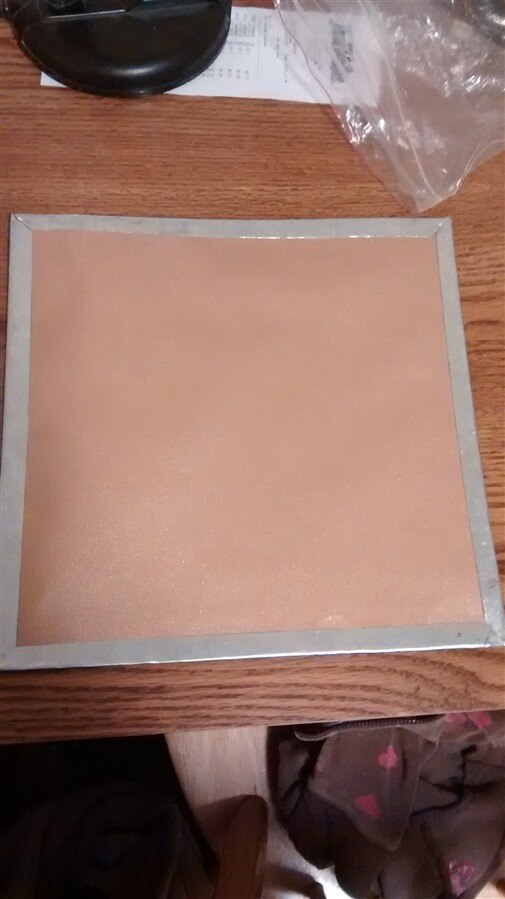
For this project to work right, I need to be able to roll the dough out on the pan and have it come off well when it’s done cooking. So I went to the store and bought a non-stick mat. The dough rolled out really well on this mat, but the mat did not stay on the pan. So I made my own pan out of a galvanized steel sheet. I cut the mat a little shorter than 11”, cut off the corners of the steel sheet, and bent the edges of the steel around it.


image


image


image

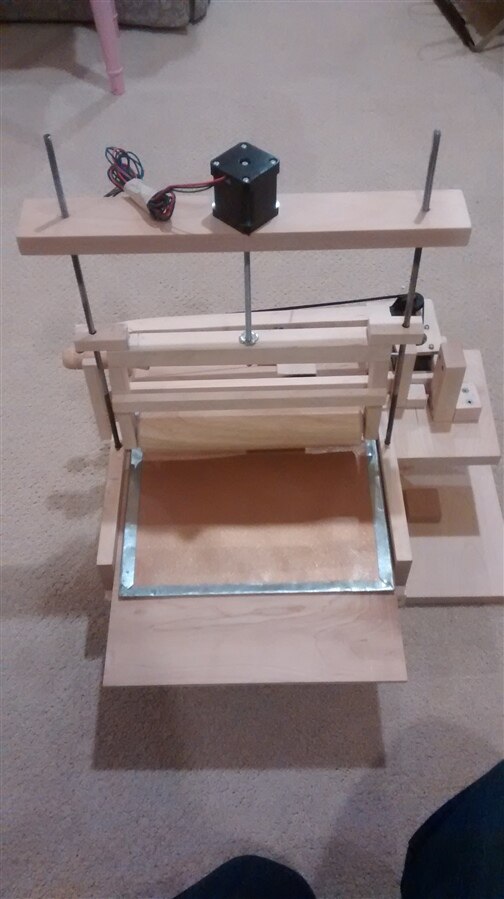
I re-did the roller set-up. I mounted two rods vertically into the sides of my base for everything to slide on. The roller has two holes on the ends for it to move along the rods and a tree nut in the middle for the screw to control how it moves up and down.


image


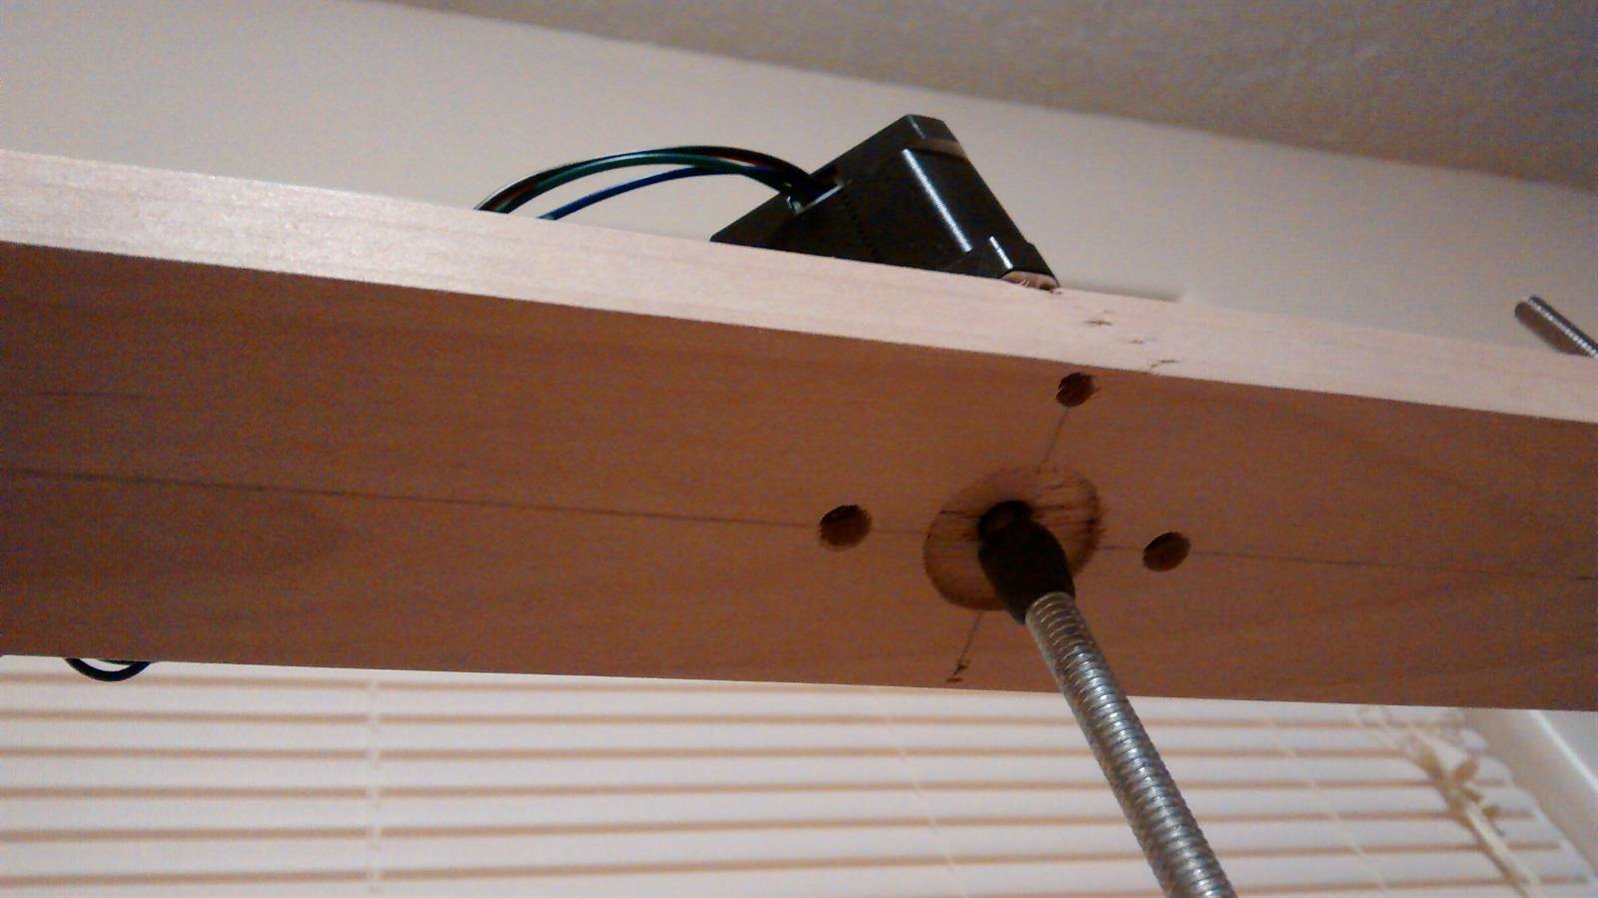
I mounted the motor above the roller to a block of wood which also sits on the rods. The rods are threaded at the top and there are nuts that hold this upper board in place.


image


I figured the best way to attach the screw would be to weld it to the motor shaft, but I’ve never learned how to weld. So JB Water Weld seemed the best option for me. It is a putty that hardens and is water resistant. The roller moves up and down quite well.


image


Since I was running out of time (and materials), I had use the rods that were originally intended for the x-axis. I then used the rolling pin rod for the x-axis. This proved to be a good decision because it was already glued into the handle and made it much easier to attach.


image


For the z-axis, I decided that I didn’t want a drill bit cutting into my cookie dough because it would leave a bunch of little bits of cookie dough all over. A better solution would just push the dough out of the way. For this I decided a small hex wrench would be perfect. I bent it straight and pushed it through the end of a nifty little nut I found at the hardware store. I used JB Water Weld to hold it in place and connect it to the shaft of a DC motor.


image


After deciding to ditch the oven control, I went back to working with the motors. When I first tested the motors out I had gotten it to work, but I realized that I needed to set the current limit. So I looked up a youtube video and calculated my Vref to be 1.12V. I had previously disconnected the motor, so I re-wired it properly and went forward. This time, instead of moving, my motor just beeped at me. A really loud long beep. So I switched out my motor driver board with a different one and my motor just vibrated. I tried adjusting the current limiting potentiometer, but I'm pretty sure I broke it. I thought that maybe I had my wires connected wrong, so I switched them and stuff started smoking again. I ordered new driver boards and motors, but they haven’t arrived yet. So on the hope that it might still work I kept trying. I tested everything, and finally I decided to test the motors by driving them manually. Only one coil would work. Finally I realized I had a broken wire. I just didn’t know because, on the outside, it looked just fine. After I replaced that wire the motor moved. Then I went to test out the driver boards and found that I really had done bad things to them and only one would work.


You don't have permission to edit metadata of this video.
Edit media
x
image
Upload Preview
image


You don't have permission to edit metadata of this video.
Edit media
x
image
Upload Preview
image


I didn't finish. I got close, but I couldn't get replacement parts in time. When I do finish, I'll post about it even though it won't count for the competition.


I have learned so much through this project. I'm really grateful to have had this competition because it pushed me and gave me greater confidence.

  • Sign in to reply

Top Comments

  • aspork42
    aspork42 over 7 years ago +4
    Nooo! You’re Too close to stop! Take a few days break then finish up when the parts arrive! I want to see it go!
  • three-phase
    three-phase over 7 years ago +1
    Well done for getting the project this far, the mechanical build looks great. You will be able to put all you have learned to good use for other projects. Kind regards
  • beacon_dave
    beacon_dave over 7 years ago +1
    Perhaps check out the MPCNC design for motor coupling ideas: https://www.v1engineering.com/assembly/z-mount/ That design either uses a standard metal flexible coupler if using a Prusa style lead screw…
  • aspork42
    aspork42 over 7 years ago

    Nooo! You’re Too close to stop! Take a few days break then finish up when the parts arrive! I want to see it go!

    • Cancel
    • Vote Up +4 Vote Down
    • Sign in to reply
    • More
    • Cancel
  • genebren
    genebren over 7 years ago

    AnnaLisa,

    You did a great job throughout your project in solving problems as they came up.  When we step outside of our comfort zones and try new things, we will mostly likely face problems that we never knew existed. If we attack those problems we learn far more than we would have if we had not tried.  Hopefully your experiences and new knowledge will take you far!

    Good Job!

    Gene

    • Cancel
    • Vote Up 0 Vote Down
    • Sign in to reply
    • More
    • Cancel
  • beacon_dave
    beacon_dave over 7 years ago

    Perhaps check out the MPCNC design for motor coupling ideas:

    https://www.v1engineering.com/assembly/z-mount/


    That design either uses a standard metal flexible coupler if using a Prusa style lead screw or alternatively thy recommend a 3D-printed  'pineapple' coupler if attaching to stock threaded rod:

    https://cdn.thingiverse.com/renders/cf/ac/67/d2/99/f7a9a595cc01d6f98de1853e1284f5a8_preview_featured.jpg

    • Cancel
    • Vote Up +1 Vote Down
    • Sign in to reply
    • More
    • Cancel
  • three-phase
    three-phase over 7 years ago

    Well done for getting the project this far, the mechanical build looks great.


    You will be able to put all you have learned to good use for other projects.


    Kind regards

    • Cancel
    • Vote Up +1 Vote Down
    • Sign in to reply
    • More
    • Cancel
element14 Community

element14 is the first online community specifically for engineers. Connect with your peers and get expert answers to your questions.

  • Members
  • Learn
  • Technologies
  • Challenges & Projects
  • Products
  • Store
  • About Us
  • Feedback & Support
  • FAQs
  • Terms of Use
  • Privacy Policy
  • Legal and Copyright Notices
  • Sitemap
  • Cookies

An Avnet Company © 2025 Premier Farnell Limited. All Rights Reserved.

Premier Farnell Ltd, registered in England and Wales (no 00876412), registered office: Farnell House, Forge Lane, Leeds LS12 2NE.

ICP 备案号 10220084.

Follow element14

  • X
  • Facebook
  • linkedin
  • YouTube