Base and Platform:
I decided that this machine could mostly be built out of wood. My father-in-law owns a cabinet shop, so I just used scrap pieces and built it there. For the base, I wanted to use a box, but the one I found was pretty heavy and bulky and didn't allow for easily adding things to the inside. I decided it would be best to just build my own. My husband actually did most of the construction from my instructions. As you can see from the pictures, the base was formed by mounting two 11"x 4 3/4" boards facing each other on top of boards 3/4" thick. These walls are separated by 11 inches. The whole thing was put together with pin nails and screws.
I found some old drawer rails that I thought I could attach to the platform and the base, but they turned out to be way too long. So I took them apart and discovered these little roller pieces.
I decided I could put them on a block of wood and attached that where I would have put the hinges. The top of that block was up 4 1/2" from the bottom of the base. The platform slid easily across the makeshift rails.
We drilled a 3/4" hole centered longways (5 1/2" from the edge), and 1 1/2" from the bottom on both boards for the rod that will control the platform movement. It turned out to be a little too small, so we sanded it to size.
Then a couple of boards were attached as shelves for the electronics.
I realized later that the platform I had cut was actually too small. It will need to be 11"x15" in order to allow the whole pan to move under both the roller and the cutting head.
X-Axis:
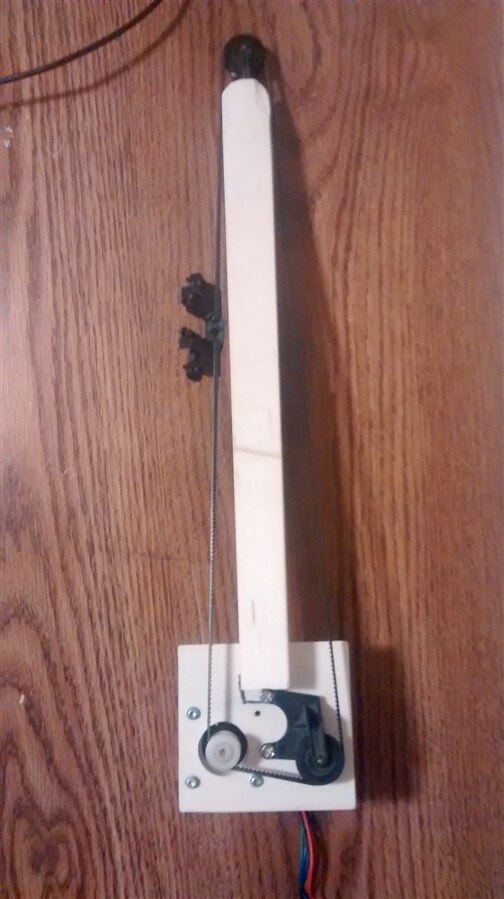
I had a timing belt and some pulleys from an old printer I had dismantled a while ago and I decided to use this for the x-axis. I thought I could just put the timing pulley right on the motor shaft, but it turned out that the hole in the pulley was too small. I tried drilling the hole bigger, but I was afraid of removing too much material. So I decided to try heating up the hole with a heat gun and then smashing it onto the shaft. I put a piece of tin foil over the opening of heat gun and poked a hole in it so that the hot air would only heat up where I wanted.
After a little experimentation with that I tried heating the shaft of the motor instead. I had gotten the timing pulley on the shaft a little bit and as the shaft heated up, I hit the pulley with a hammer until it was on as far as I wanted. It ended up a little crooked, but I think it will be okay.
I assembled the whole thing around a long, skinny block of wood. On one end I drilled a hole for a pulley. On the other end, I attached a flat board and screwed the motor and other pulley to that. I didn't realize that the belt wouldn't have enough room to move, so I'll have to shave the end of the block down to allow it to move freely.
This post has been rather long with all the pictures, so I'll finish up the assembly in another post.


Top Comments
-

genebren
-
Cancel
-
Vote Up
+1
Vote Down
-
-
Sign in to reply
-
More
-
Cancel
Comment-

genebren
-
Cancel
-
Vote Up
+1
Vote Down
-
-
Sign in to reply
-
More
-
Cancel
Children