element14 Community
element14 Community
    Register Log In
  • Site
  • Search
  • Log In Register
  • Community Hub
    Community Hub
    • What's New on element14
    • Feedback and Support
    • Benefits of Membership
    • Personal Blogs
    • Members Area
    • Achievement Levels
  • Learn
    Learn
    • Ask an Expert
    • eBooks
    • element14 presents
    • Learning Center
    • Tech Spotlight
    • STEM Academy
    • Webinars, Training and Events
    • Learning Groups
  • Technologies
    Technologies
    • 3D Printing
    • FPGA
    • Industrial Automation
    • Internet of Things
    • Power & Energy
    • Sensors
    • Technology Groups
  • Challenges & Projects
    Challenges & Projects
    • Design Challenges
    • element14 presents Projects
    • Project14
    • Arduino Projects
    • Raspberry Pi Projects
    • Project Groups
  • Products
    Products
    • Arduino
    • Avnet & Tria Boards Community
    • Dev Tools
    • Manufacturers
    • Multicomp Pro
    • Product Groups
    • Raspberry Pi
    • RoadTests & Reviews
  • About Us
  • Store
    Store
    • Visit Your Store
    • Choose another store...
      • Europe
      •  Austria (German)
      •  Belgium (Dutch, French)
      •  Bulgaria (Bulgarian)
      •  Czech Republic (Czech)
      •  Denmark (Danish)
      •  Estonia (Estonian)
      •  Finland (Finnish)
      •  France (French)
      •  Germany (German)
      •  Hungary (Hungarian)
      •  Ireland
      •  Israel
      •  Italy (Italian)
      •  Latvia (Latvian)
      •  
      •  Lithuania (Lithuanian)
      •  Netherlands (Dutch)
      •  Norway (Norwegian)
      •  Poland (Polish)
      •  Portugal (Portuguese)
      •  Romania (Romanian)
      •  Russia (Russian)
      •  Slovakia (Slovak)
      •  Slovenia (Slovenian)
      •  Spain (Spanish)
      •  Sweden (Swedish)
      •  Switzerland(German, French)
      •  Turkey (Turkish)
      •  United Kingdom
      • Asia Pacific
      •  Australia
      •  China
      •  Hong Kong
      •  India
      •  Korea (Korean)
      •  Malaysia
      •  New Zealand
      •  Philippines
      •  Singapore
      •  Taiwan
      •  Thailand (Thai)
      • Americas
      •  Brazil (Portuguese)
      •  Canada
      •  Mexico (Spanish)
      •  United States
      Can't find the country/region you're looking for? Visit our export site or find a local distributor.
  • Translate
  • Profile
  • Settings
Pi Chef Design Challenge
  • Challenges & Projects
  • Design Challenges
  • Pi Chef Design Challenge
  • More
  • Cancel
Pi Chef Design Challenge
Blog Automatic Dough Shaper - Blog #7 Mechanical Construction Part 1
  • Blog
  • Forum
  • Documents
  • Polls
  • Files
  • Events
  • Mentions
  • Sub-Groups
  • Tags
  • More
  • Cancel
  • New
  • Share
  • More
  • Cancel
Group Actions
  • Group RSS
  • More
  • Cancel
Engagement
  • Author Author: a_davis_22
  • Date Created: 15 Mar 2018 4:46 AM Date Created
  • Views 597 views
  • Likes 8 likes
  • Comments 2 comments
  • automatic dough shaper
  • diy cnc
Related
Recommended

Automatic Dough Shaper - Blog #7 Mechanical Construction Part 1

a_davis_22
a_davis_22
15 Mar 2018

Base and Platform:

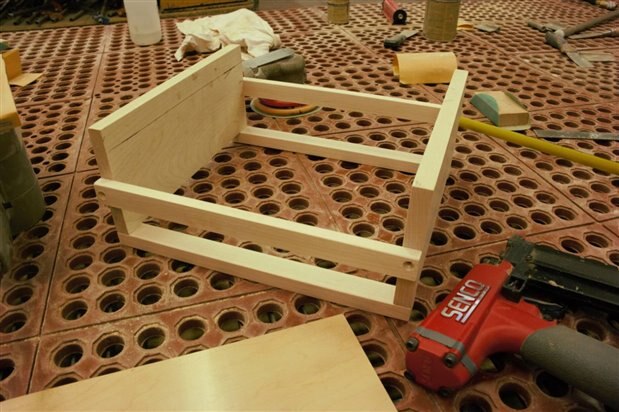
I decided that this machine could mostly be built out of wood. My father-in-law owns a cabinet shop, so I just used scrap pieces and built it there. For the base, I wanted to use a box, but the one I found was pretty heavy and bulky and didn't allow for easily adding things to the inside. I decided it would be best to just build my own. My husband actually did most of the construction from my instructions. As you can see from the pictures, the base was formed by mounting two 11"x 4 3/4" boards facing each other on top of boards 3/4" thick. These walls are separated by 11 inches. The whole thing was put together with pin nails and screws.


image


I found some old drawer rails that I thought I could attach to the platform and the base, but they turned out to be way too long. So I took them apart and discovered these little roller pieces.


image


I decided I could put them on a block of wood and attached that where I would have put the hinges. The top of that block was up 4 1/2" from the bottom of the base. The platform slid easily across the makeshift rails.


image


image


We drilled a 3/4" hole centered longways (5 1/2" from the edge), and 1 1/2" from the bottom on both boards for the rod that will control the platform movement. It turned out to be a little too small, so we sanded it to size.


image


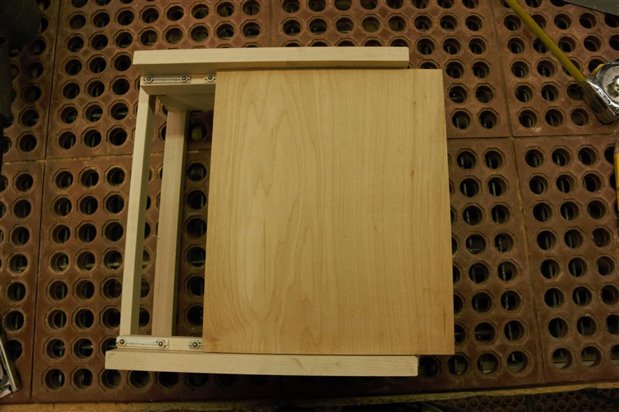
Then a couple of boards were attached as shelves for the electronics.


image


I realized later that the platform I had cut was actually too small. It will need to be 11"x15" in order to allow the whole pan to move under both the roller and the cutting head.


X-Axis:

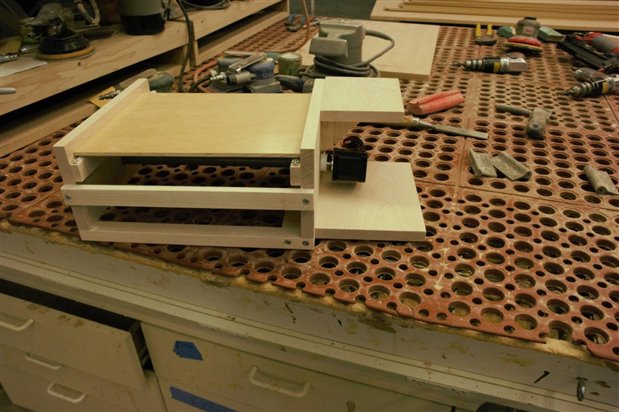
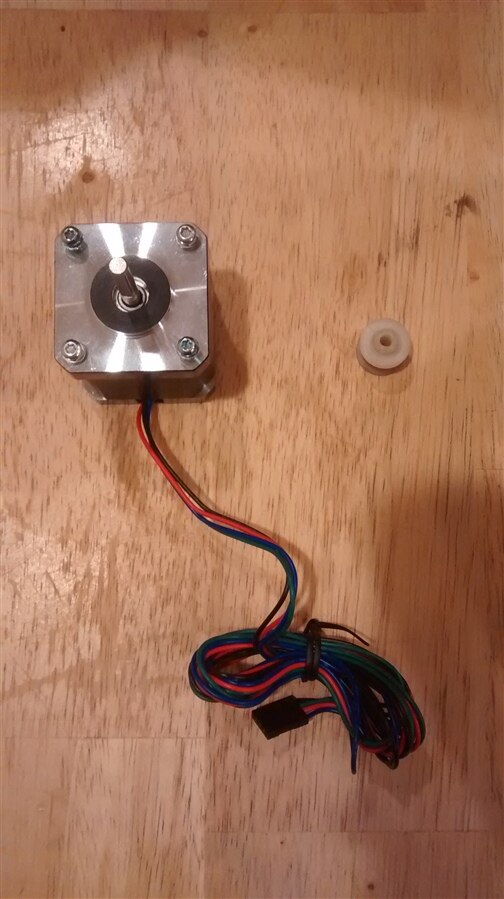
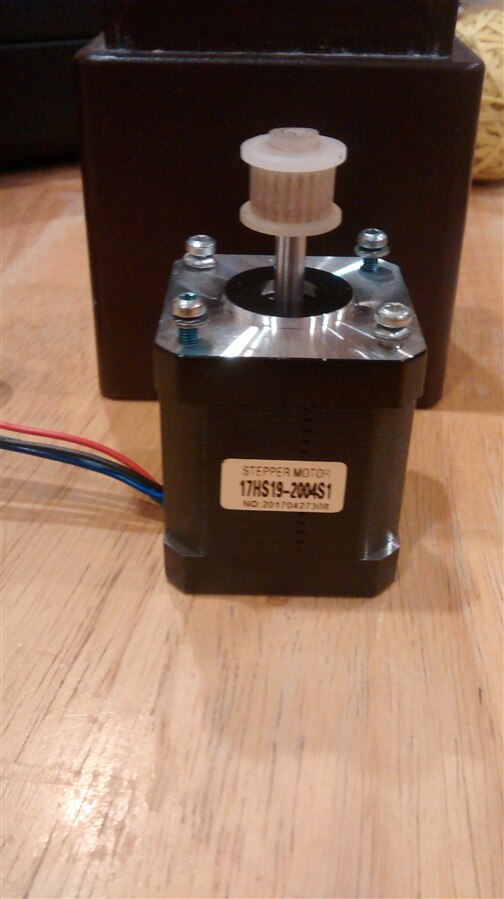
I had a timing belt and some pulleys from an old printer I had dismantled a while ago and I decided to use this for the x-axis. I thought I could just put the timing pulley right on the motor shaft, but it turned out that the hole in the pulley was too small. I tried drilling the hole bigger, but I was afraid of removing too much material. So I decided to try heating up the hole with a heat gun and then smashing it onto the shaft. I put a piece of tin foil over the opening of heat gun and poked a hole in it so that the hot air would only heat up where I wanted.


image


image


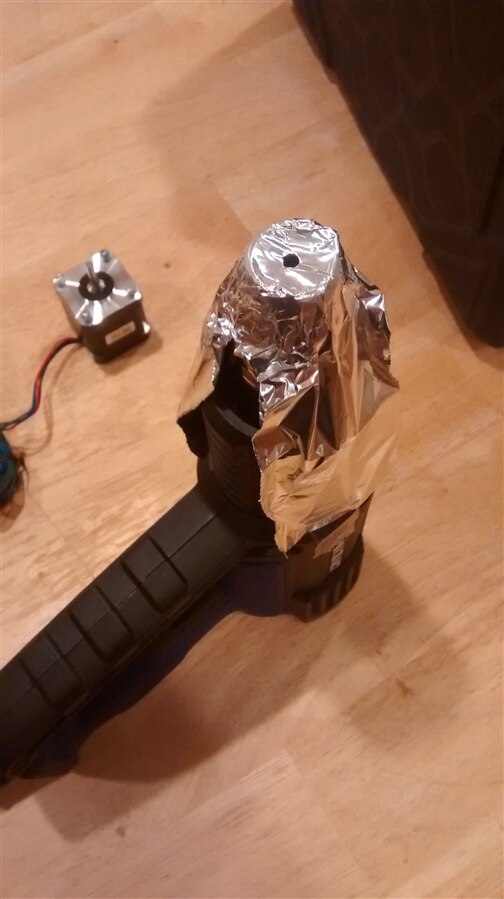
After a little experimentation with that I tried heating the shaft of the motor instead. I had gotten the timing pulley on the shaft a little bit and as the shaft heated up, I hit the pulley with a hammer until it was on as far as I wanted. It ended up a little crooked, but I think it will be okay.


image


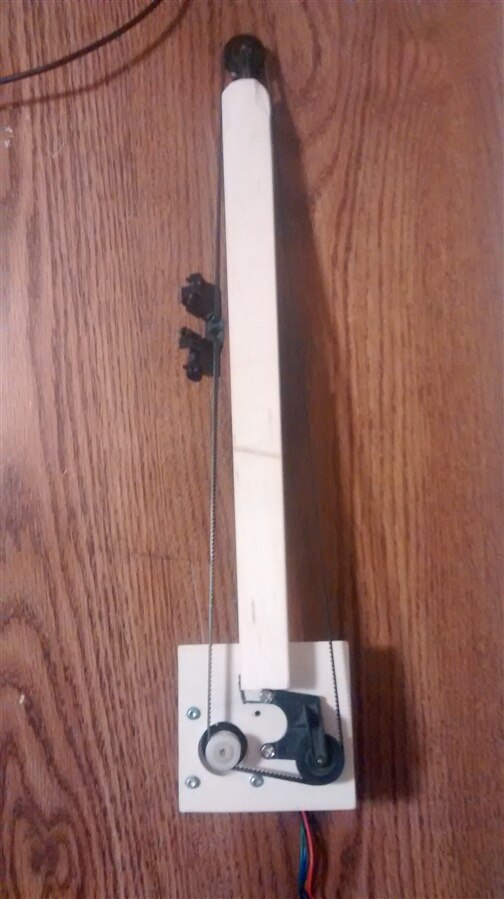
I assembled the whole thing around a long, skinny block of wood. On one end I drilled a hole for a pulley. On the other end, I attached a flat board and screwed the motor and other pulley to that. I didn't realize that the belt wouldn't have enough room to move, so I'll have to shave the end of the block down to allow it to move freely.


image


This post has been rather long with all the pictures, so I'll finish up the assembly in another post.

  • Sign in to reply

Top Comments

  • genebren
    genebren over 7 years ago +1
    Great progress on you project. It looks like you are moving along nicely and solving a lot of problems as you move forward. Good luck on the rest of your build. Gene
  • three-phase
    three-phase over 7 years ago

    Good start to the project build, hope the rest goes well for you.


    Kind regards

    • Cancel
    • Vote Up 0 Vote Down
    • Sign in to reply
    • More
    • Cancel
  • genebren
    genebren over 7 years ago

    Great progress on you project.  It looks like you are moving along nicely and solving a lot of problems as you move forward.  Good luck on the rest of your build.

    Gene

    • Cancel
    • Vote Up +1 Vote Down
    • Sign in to reply
    • More
    • Cancel
element14 Community

element14 is the first online community specifically for engineers. Connect with your peers and get expert answers to your questions.

  • Members
  • Learn
  • Technologies
  • Challenges & Projects
  • Products
  • Store
  • About Us
  • Feedback & Support
  • FAQs
  • Terms of Use
  • Privacy Policy
  • Legal and Copyright Notices
  • Sitemap
  • Cookies

An Avnet Company © 2025 Premier Farnell Limited. All Rights Reserved.

Premier Farnell Ltd, registered in England and Wales (no 00876412), registered office: Farnell House, Forge Lane, Leeds LS12 2NE.

ICP 备案号 10220084.

Follow element14

  • X
  • Facebook
  • linkedin
  • YouTube