Firstly, I would like to apologise in the tardiness of having my second blog uploaded. As Murphy’s Law always does I experienced a catastrophic kitchen accident that resulted in wine being spilled on my laptop… Maybe I should be concentrating on build a “Self Balancing Wine Glass”??
Expect a more thorough explanation and more photos when I build the second sensor unit and either edit this blog with the additional information, or another blog in-line.
Goals for this Blog
So, welcome back to my little project. Thanks to Newark and Element 14 - my kit finally arrived, along with the few extra bits and pieces I needed - such as a case, RaspberryPi Zero W, temp sensors and components to go…
Also thanks to the comments and support to those fellow engineers that have already commented on my first post. A couple of you asked about the process of automation and and regulations. After a quick chat with the in-laws, the only requirement they have is to ensure the temperature is recorded prior to first food being removed for use each day, temperature recording at end of day and a monthly calibration check to ensure the thermometer is within specification. For this, they have been using another digital thermometer and comparing to the already fixed cool room thermometer and fridge thermometers. Another suggestion was to install a door sensor - this will be something I will look at as an extra option.
Finally, there were suggestions to utilise a NFC reader to log who conducted the check and also for as an access logging. At this stage I probably won’t be looking at this as an option - time pending really, as the staffing is not that large and it is the responsibility of the shift manager to ensure alarms are acknowledged and responded to.
For this week, I plan to have the majority of the electronics completed, with testing happening as I go. This will include the build of the DS18B20 sensor leads, installation of the units into their appropriate housings and will also include remote sensor builds.
Master Unit
So there will be just a slight change in design from original concept Originally I was going to have the master unit also operate as a sensor But due to the lateness in the arrival of my kit it was not going to allow enough time to get a PCB manufacture to allow the splitting of the SPI port to allow the use of the 4DPI-24-HAT4DPI-24-HAT and and DS18B20
Now I will using the main unit only as the primary display logging reporting etc So for this I will only be using the Raspberry Pi 3 and the 4DPI-24-HAT4DPI-24-HAT a case and that will be all
A late addition - a small speaker to function as a audible buzzer to grab the attention of the operator.
Sensor Units
The sensor unit will be based on the Raspberry Pi Zero W, and include a DS18B20 temperature sensor, and after a quick design thought (thanks to others) a magnetic reed switch as a door sensor.
One of the advantages of using the DS18B20 sensor is they are utilise the “One-Wire” protocol and include a unique identification code. This will allow more than one sensor per Raspberry Pi Zero W to for use in Fridge / Freezer type scenarios or colocated cooling appliances (even ambient monitoring)
With that in mind, the only other comment required for the temperature sensor is a 4.7k resistor to go between the Data and Power pin. Only one resistor is required for the whole “One-Wire” network, so then the next sensor is simply connected in parallel.
To allow the operator to know the operation of the sensor, A tri colour LED will be installed showing basic operational states. A 330ohm resistor is connected to both anode pins of the LED.
As suggested by others, I will include the provision for a Magnetic Reed switch. This only requires a 10k resistor to tie the normally open switch pin to keep the pin from “floating” and tie it high.
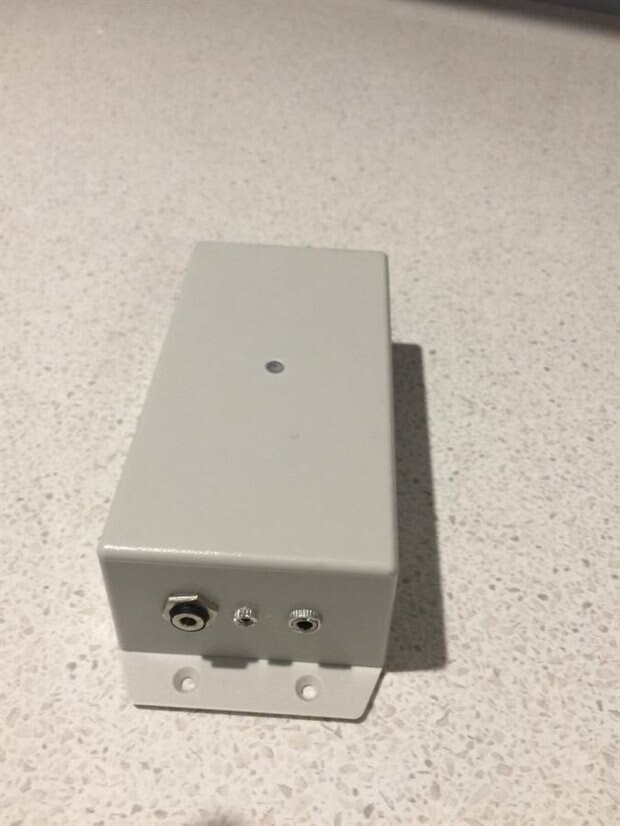
As I mentioned earlier, I will update or re-blog a more thorough build for the sensor as there is some fun details to be included. But as an interim here is a photo of the completed unit - product labels are hopefully on there way.
What Is Next…
My next blog, will hopefully be out in the next couple of days where I will be starting the software install and configuration of the Master Unit.


Top Comments
-

aspork42
-
Cancel
-
Vote Up
+1
Vote Down
-
-
Sign in to reply
-
More
-
Cancel
Comment-

aspork42
-
Cancel
-
Vote Up
+1
Vote Down
-
-
Sign in to reply
-
More
-
Cancel
Children