


Blog List:
1. Raspberry Pi-based Experiment Logger and Analyzer with Remote Lab Control
2. Raspberry Pi-based Experiment Logger: Glimpses of the Kit
3. Raspberry Pi-based Experiment Logger: Wiring up Raspberry Pi 4 B
4. Raspberry Pi-based Experiment Logger: System Concept & Workflow
5. Raspberry Pi-based Experiment Logger and Analyzer with Remote Lab Control: Ready, Set, Go!
Introduction:
As explained in the previous blogs, I will go about building the final project. In this blog, we will get the project running and see our remote lab in action!
First, we will setup the DHT 11 for sensor readings. Then we setup the Servo to do any kind of action in the lab. Once these two things are done, we will also look into various ways to interface with them like a GUI.
After that we will do data logging and analysis using Python on the Raspberry Pi. This will include things like creating excel sheets of data and plots to represent it visually.
Final and the most crucial part of the project is the remote access and control. For this we will go through multiple methods and understand what best suits our remote lab requirements.
Prerequisites:
I needed to install Python to make this project. So, we need to install it first using "sudo python setup.py install"
Additionally, I had to install openpyxl for reading and writing to excel files using Python - "pip install openpyxl"
We need to enable Remote GPIO by going the Raspberry Pi Configurator.
Sensor Interface:
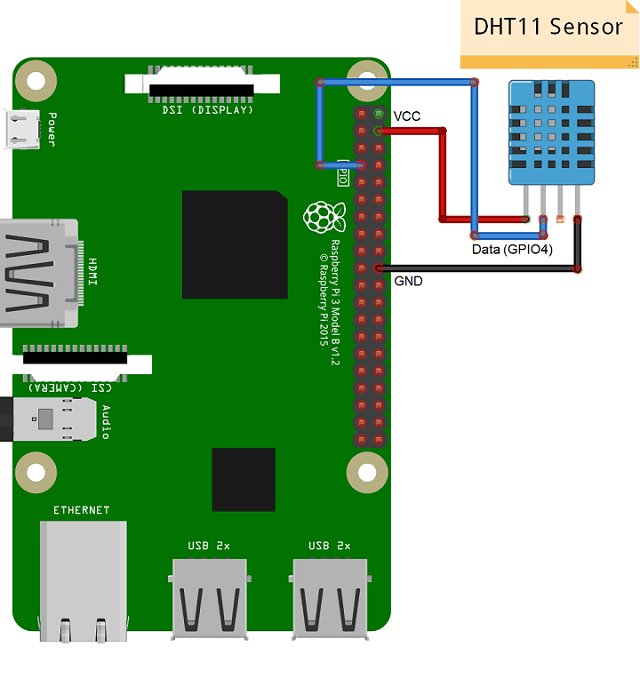
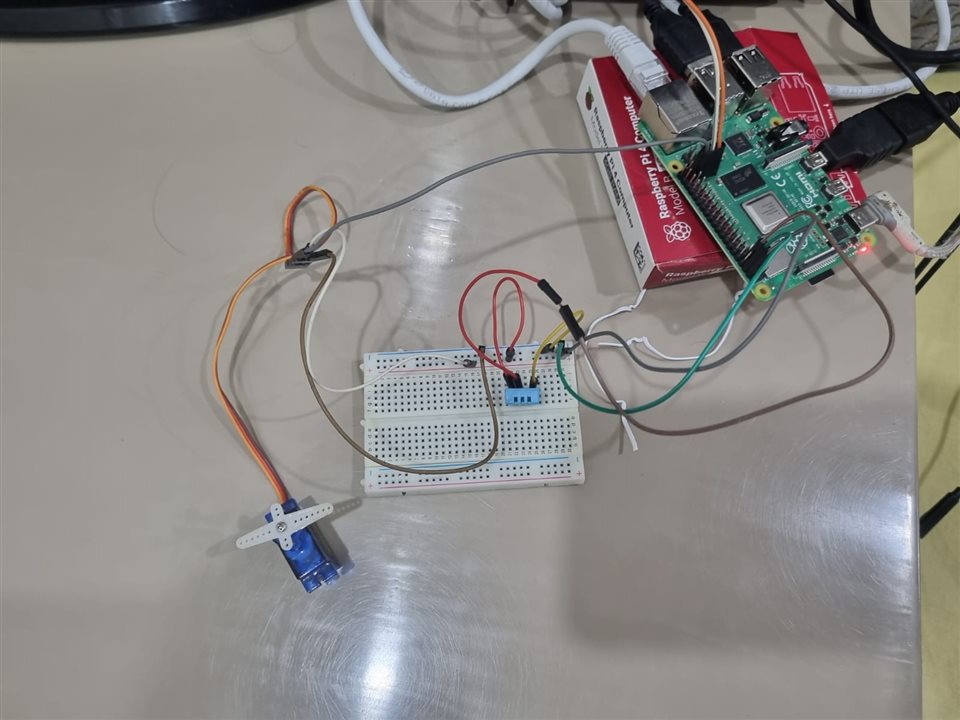
For using DHT11, I used Adafruit_Python_DHT library. This sensor allows collection of temperature and humidity data.
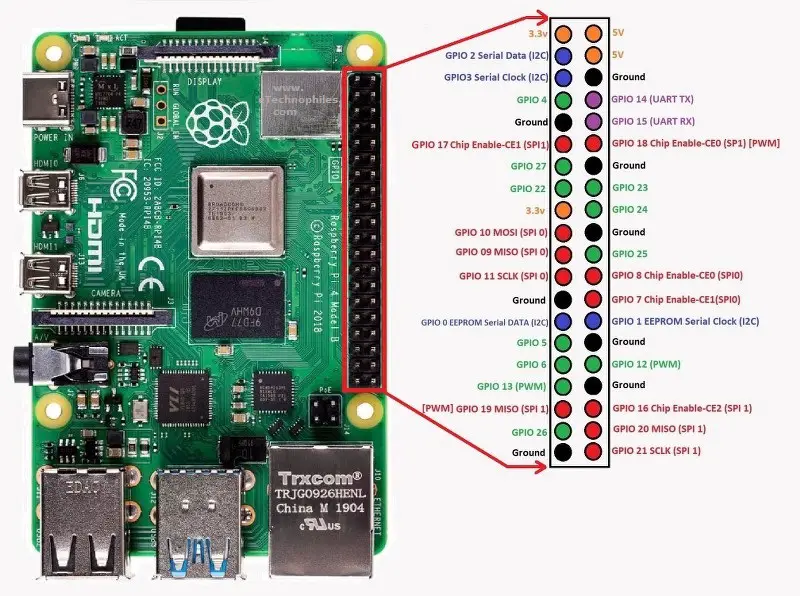
DHT 11 Data pin is connected to GPIO pin 4 on Raspberry Pi. Ground and VCC are connected to their respective pins as well.

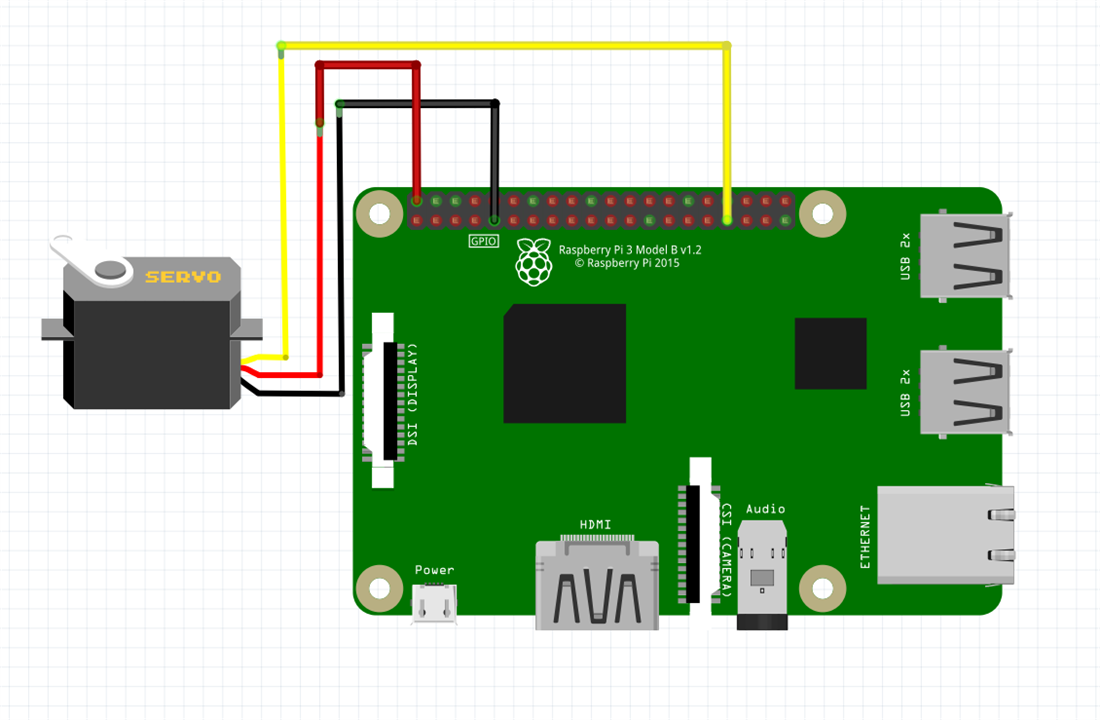
Diagram:
Code:
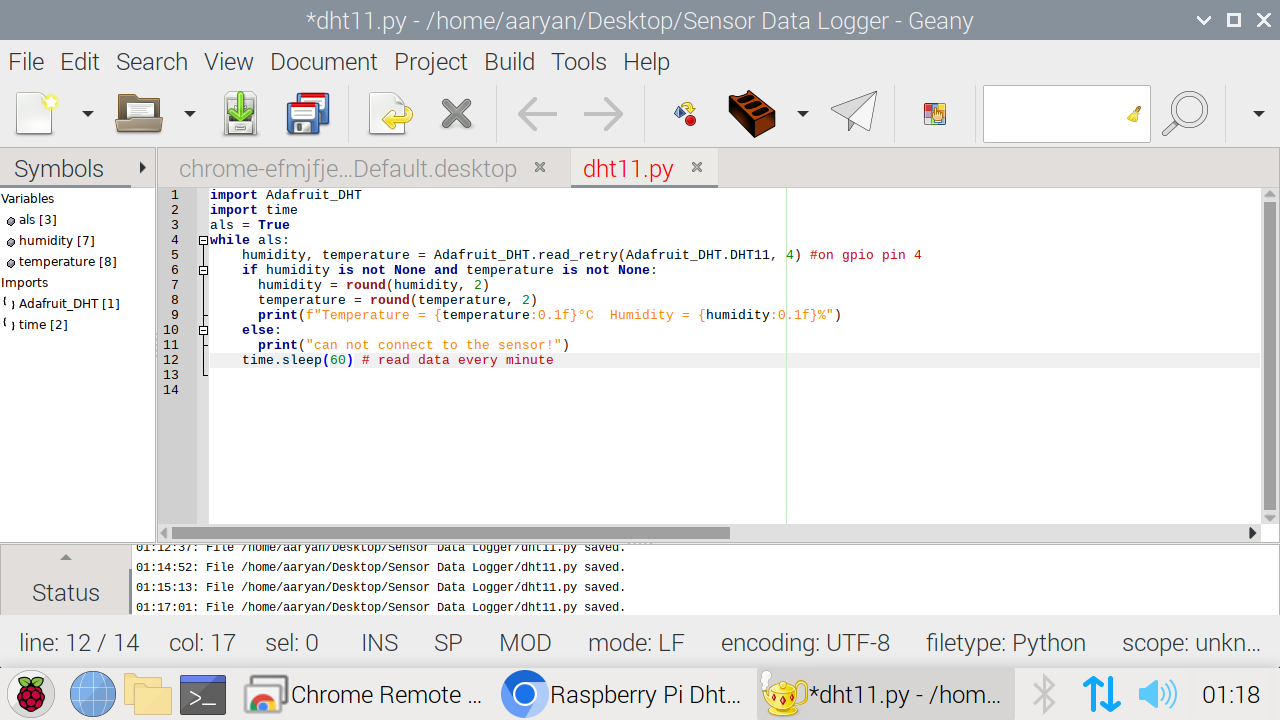
import Adafruit_DHT
import time
als = True
while als:
humidity, temperature = Adafruit_DHT.read_retry(Adafruit_DHT.DHT11, 4) #on gpio pin 4
if humidity is not None and temperature is not None:
humidity = round(humidity, 2)
temperature = round(temperature, 2)
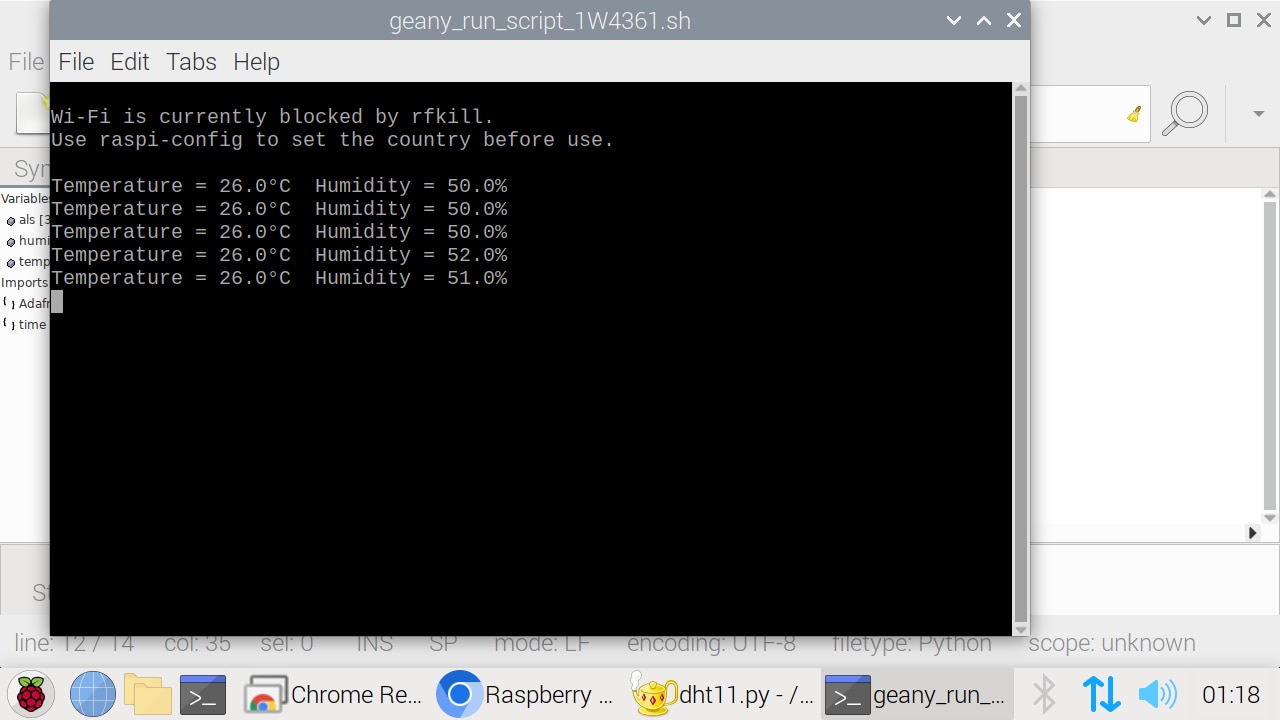
print(f"Temperature = {temperature:0.1f}°C Humidity = {humidity:0.1f}%")
else:
print("can not connect to the sensor!")
time.sleep(60) # read data every minute
P.S. - I dropped the idea of using the Flusso Mass flow sensor as the software only works on windows 10.
Control System:
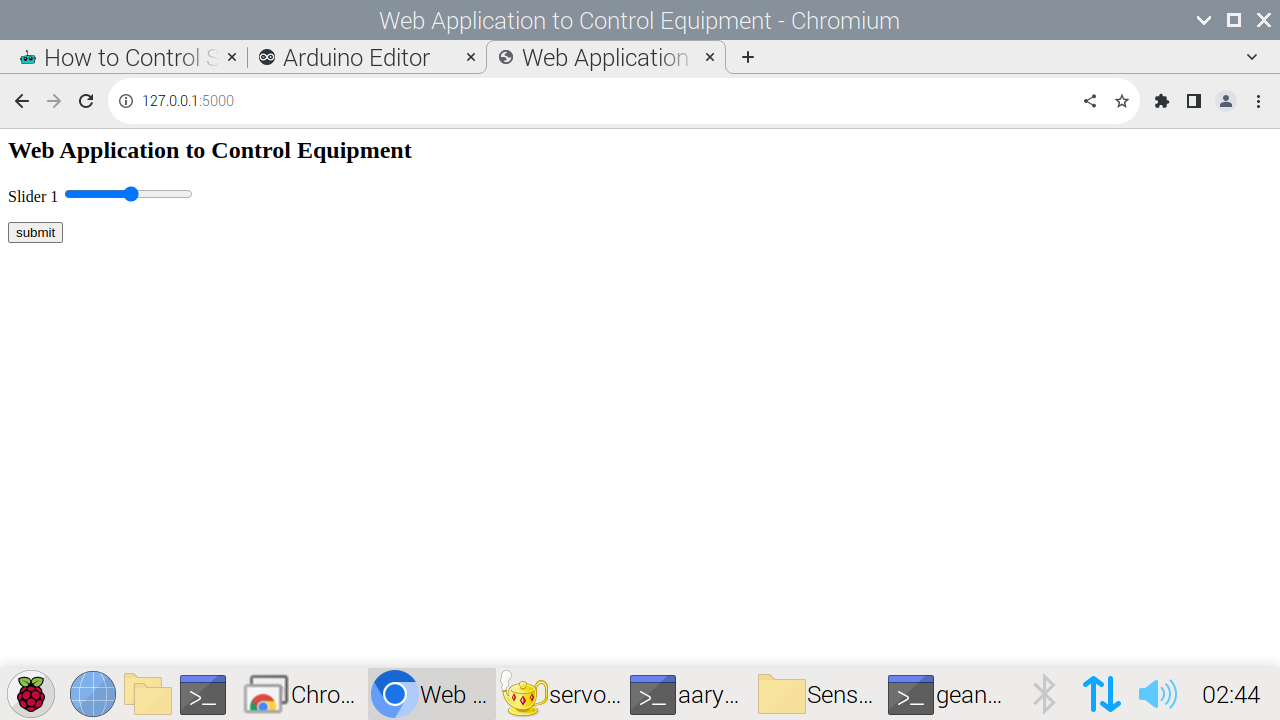
We connect the servo to pin 26 on the Raspberry Pi. We use a flask web interface to provide a GUI to control the servo's angular movement through a slider.
This can also have a floating point number option as well depending on the kind of equipment we are trying to control.
We use "python app.py" to run the app on http://127.0.0.1:5000/ port.
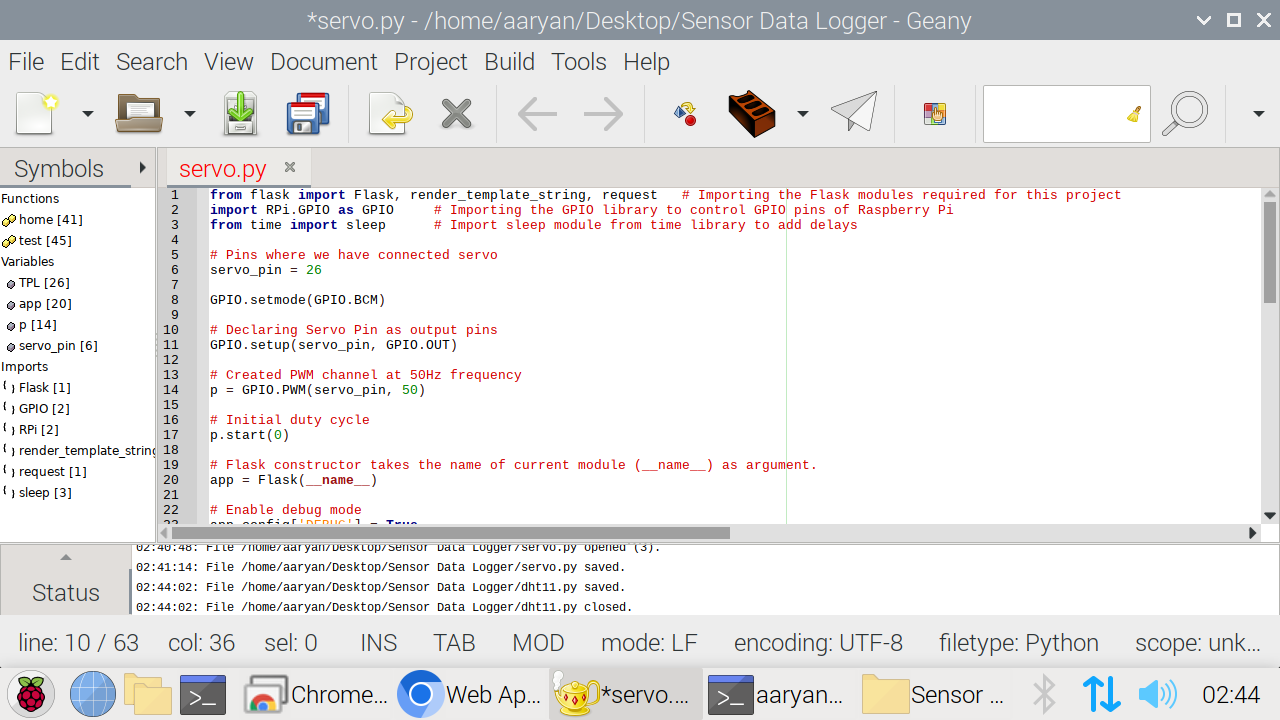
Code:
from flask import Flask, render_template_string, request   # Importing the Flask modules required for this project
import RPi.GPIO as GPIO     # Importing the GPIO library to control GPIO pins of Raspberry Pi
from time import sleep      # Import sleep module from time library to add delays

# Pins where we have connected servo
servo_pin = 26

GPIO.setmode(GPIO.BCM)

# Declaring Servo Pin as output pins
GPIO.setup(servo_pin, GPIO.OUT)

# Created PWM channel at 50Hz frequency
p = GPIO.PWM(servo_pin, 50)

# Initial duty cycle
p.start(0)

# Flask constructor takes the name of current module (__name__) as argument.
app = Flask(__name__)

# Enable debug mode
app.config['DEBUG'] = True

# Store HTML code
TPL = '''
<html>
    <head><title>Web Application to Control Equipment </title></head>
    <body>
    <h2>Web Application to Control Equipment</h2>
        <form method="POST" action="test">
            <p>Slider 1 <input type="range" min="1" max="12.5" name="slider1" /> </p>
            <input type="submit" value="submit" />
        </form>
    </body>
</html>
'''

# which URL should call the associated function.
@app.route("/")
def home():
    return render_template_string(TPL)

@app.route("/test", methods=["POST"])
def test():
    # Get slider Value
    slider1 = request.form["slider1"]

    # Change duty cycle
    p.ChangeDutyCycle(float(slider1))

    # Give servo some time to move
    sleep(1)

    # Pause the servo
    p.ChangeDutyCycle(0)

    return render_template_string(TPL)

# Run the app on the local development server
if __name__ == "__main__":
    app.run()


Data Logging and Analysis:
I needed to install Libre Office to read xlsx and csv file (https://pimylifeup.com/raspberrypi-libreoffice/)
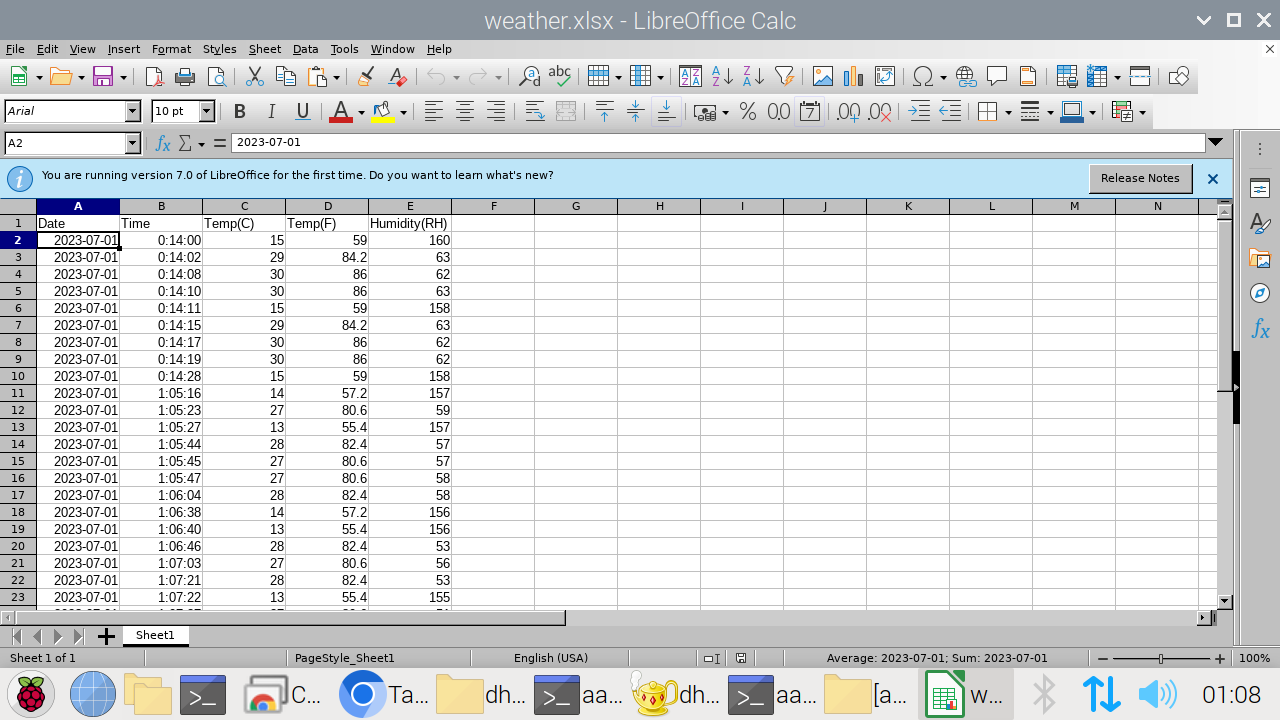
Then, I logged the DHT11 data in the xlsx file which can be accessed later on for analysis and experiment results. This allows automatic experiment readings that can be connected to analysis and inference pipelines as well.
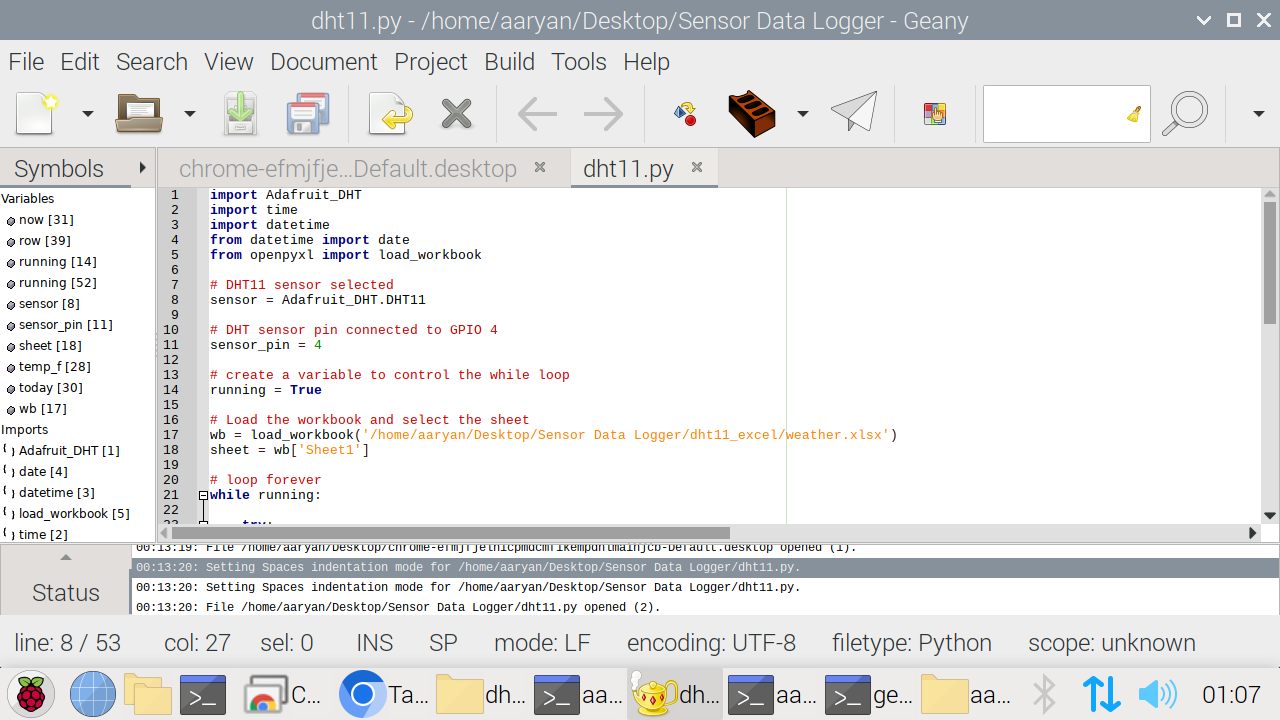
Code:
import Adafruit_DHT
import time
import datetime
from datetime import date
from openpyxl import load_workbook
# DHT11 sensor selected
sensor = Adafruit_DHT.DHT11
# DHT sensor pin connected to GPIO 4
sensor_pin = 4
# create a variable to control the while loop
running = True
# Load the workbook and select the sheet
wb = load_workbook('/home/aaryan/Desktop/Sensor Data Logger/dht11_excel/weather.xlsx')
sheet = wb['Sheet1']
# loop forever
while running:
try:
# read the humidity and temperature
humidity, temperature = Adafruit_DHT.read_retry(sensor, sensor_pin)
# The line below converts to Fahrenheit
temp_f = temperature * 9/5.0 + 32
today = date.today()
now = datetime.datetime.now().time()
if humidity is not None and temperature is not None:
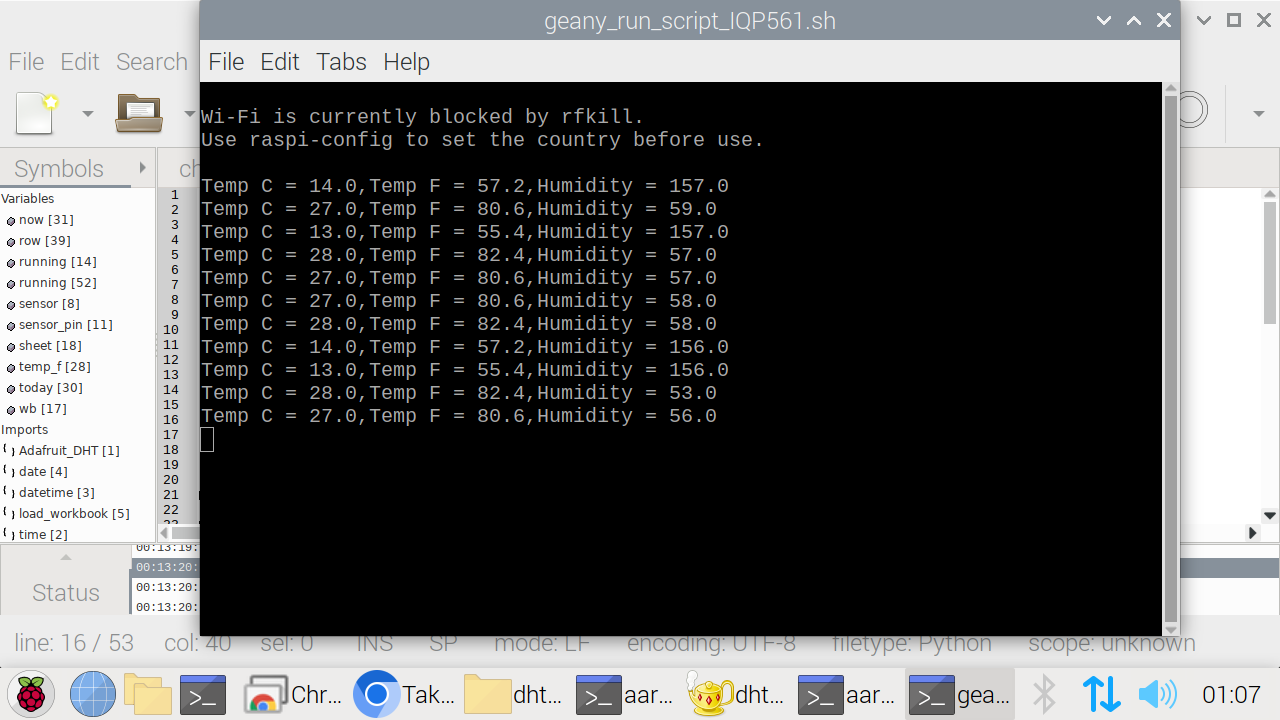
#print temperature and humidity
print('Temp C = ' + str(temperature) +','+ 'Temp F = ' + str(temp_f) +',' + 'Humidity = ' + str(humidity))
# update data to excel sheet
row = (today, now, temperature, temp_f, humidity)
sheet.append(row)
time.sleep(1)
# The workbook is saved!
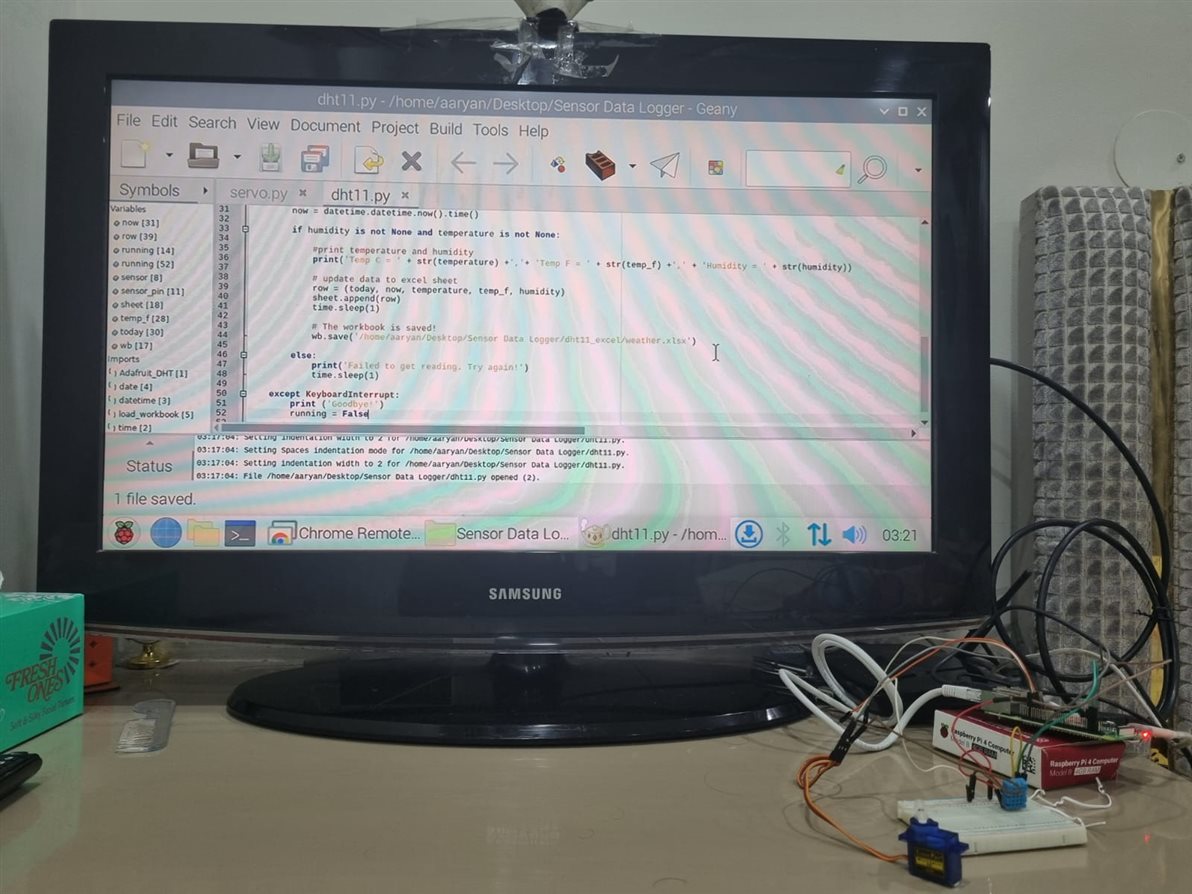
wb.save('/home/aaryan/Desktop/Sensor Data Logger/dht11_excel/weather.xlsx')
else:
print('Failed to get reading. Try again!')
time.sleep(1)
except KeyboardInterrupt:
print ('Goodbye!')
running = False
Remote Access & Control:
I tried using Chrome Remote Desktop for accessing the Raspberry Pi as it offers good performance and ease of setup. But that failed as it does not support Raspbian OS.
After that I was considering the VNC Viewer but that is paid so I didn't go ahead with that solution.
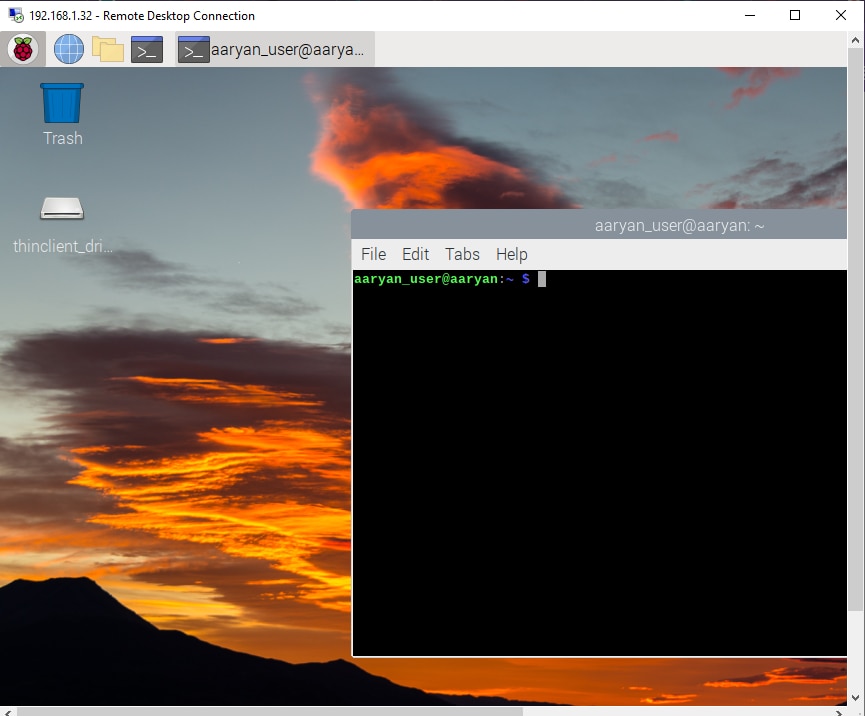
Finally, I tried using Windows Remote Desktop Connection using the local IP Address (For proper remote use we would need to have a static IP Address to access the Pi). This worked well and I was able to access the Pi remotely and get complete administrative access as well.
You can have a look at this video for the detailed steps for the setup: https://www.youtube.com/watch?v=0I5DYtx2WKQ&ab_channel=educ8s.tv
Now, this solution is appropriate for administrators or for small remote labs where only a few people are accessing it. For providing it as rental remote lab or for a school/university, we can build a web portal which is beyond the scope of this project. So, that's something to look out for in the future.
We can now see the results, collect data, run various sensors or actuators connected to the Pi remotely!
Conclusion:
Finally, I conclude this series of blogs on the Raspberry Pi 4 B and building a Remote, Autonomous Lab using it. In this series, we learned more about the kit, the system concept & workflow and finally the building process and the lab in action. This project allows us to collect sensor data in a file and also perform analysis on it. It also allows to control equipment in the lab using a servo. We can also run our custom experiments with various sensors, actuators etc connected to the Pi using its various USB ports and the GPIO pins. We can do all this remotely using a remote setup. Now, one thing I think should be added to the project in the future is a web interface for remote action. This can be done through a flask server and a UI to interface with the Pi remotely using credentials. This will allow better and more secure usage of the remote lab system.
Resources:
https://www.electronicwings.com/raspberry-pi/dht11-interfacing-with-raspberry-pi
https://maker.pro/raspberry-pi/tutorial/how-to-control-servo-motors-through-a-raspberry-pi-and-flask
https://iotstarters.com/dht11-data-logger-using-raspberry-pi-and-python-code/?expand_article=1
https://www.youtube.com/watch?v=PNbsyHocM2U&ab_channel=logMaker360
https://randomnerdtutorials.com/raspberry-pi-web-server-using-flask-to-control-gpios/

