


Blog List:
1. Raspberry Pi-based Experiment Logger and Analyzer with Remote Lab Control
2. Raspberry Pi-based Experiment Logger: Glimpses of the Kit
3. Raspberry Pi-based Experiment Logger: Wiring up Raspberry Pi 4 B
4. Raspberry Pi-based Experiment Logger: System Concept & Workflow
5. Raspberry Pi-based Experiment Logger and Analyzer with Remote Lab Control: Ready, Set, Go!
Introduction:
In the previous blogs, we got introduced to the project plan, details about the kit and getting started with the Raspberry Pi 4 B. In this blog, I will go further into the system concept and workflow.
System Concept:
The proposed system will consist of a Raspberry Pi 4 Model B, a selection of sensors to measure temperature, humidity, and other environmental conditions, and actuators to control the experiment's various systems.
The system will have the following features:
- Sensor Interface: The system will interface with various sensors such as temperature and humidity sensors using GPIO pins.
- Control System: The system will use actuators such as relays or motor drivers to control the experiment's various systems based on the sensor data.
- Data Logging and Analysis: The system will log the sensor data periodically to a CSV file stored on an SD card. The data will be analyzed using Python libraries such as Pandas, Matplotlib, and Seaborn to gain insights into the experiment's performance.
- Remote Access and Control: The system can be accessed remotely via a web interface to monitor and control the experiment. The Raspberry Pi can also be connected to a camera and microphone to allow researchers to remotely view the experiment and communicate with the lab personnel.
Items Required:
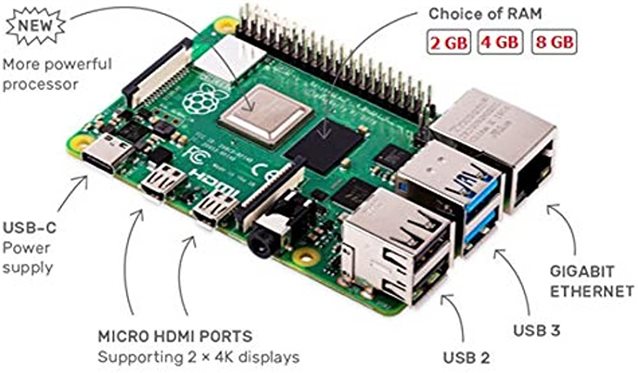
- Raspberry Pi 4 B - the main brain of the system
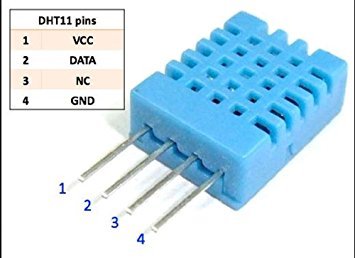
- DHT 11 - for temperature and humidity measurement
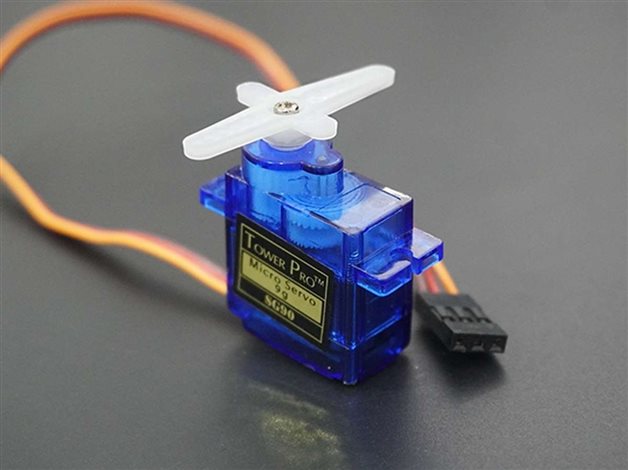
- Servo motor - to perform some action in the remote lab like control an apparatus
- Internet connection either through WIFI or LAN Cable
- Peripherals like keyboard, mouse, monitor etc to interface with the Raspberry Pi 4 B (optional)
Workflow:
Sensor Interface:
Several sensors can be connected to the Raspberry Pi 4 B for monitoring the remote Lab. For this project, I will use a DHT11 for measuring the humidity and temperature. Though we can add any number and type of sensors to the Raspberry Pi 4 B using its inbuilt GPIO pins.
I am also planning to use the Flusso FLS110 Mass Flow Sensor Evaluation Kit with the Pi to add a new sensor that I have to the sensor interface. It can be used to monitor the Air Flow in a controlled environment or equipment in a laboratory.
You can know more about this kit here.

Control System:
The control system can be used to control the environment through various things like motors, switches and other actuators.
For this project, I will use a servo motor to represent a device to move a telescope's location :)
Though we can use anything appropriate to your own lab and experiment requirements.
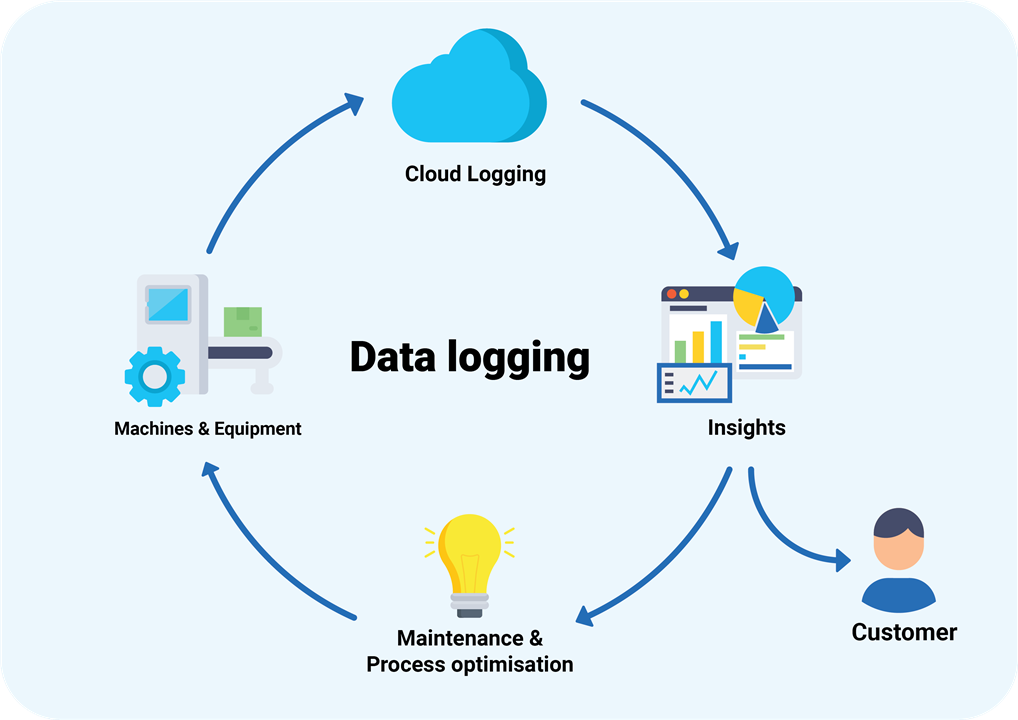
Data Logging and Analysis:
The Control System and Sensor Interface is also critical for automatic measurements reducing the need for monotonous readings. They can be programmed using the Raspberry Pi 4 B to take readings after some interval of time. This data can then be stored in a log for monitoring and analysis.
The system will log the sensor data periodically to a CSV file stored on an SD card. The data will be analyzed using Python libraries such as Pandas, Matplotlib, and Seaborn to gain insights into the experiment's performance
This makes the data collection and analysis phase much easier with automation and less human contact improving the accuracy and consistency of the readings. Also, the exact experiment setup is stored for easy reproducibility. Also, we can include some machine learning models like anomaly detection to improve the data accuracy and detect errors in the devices early on.
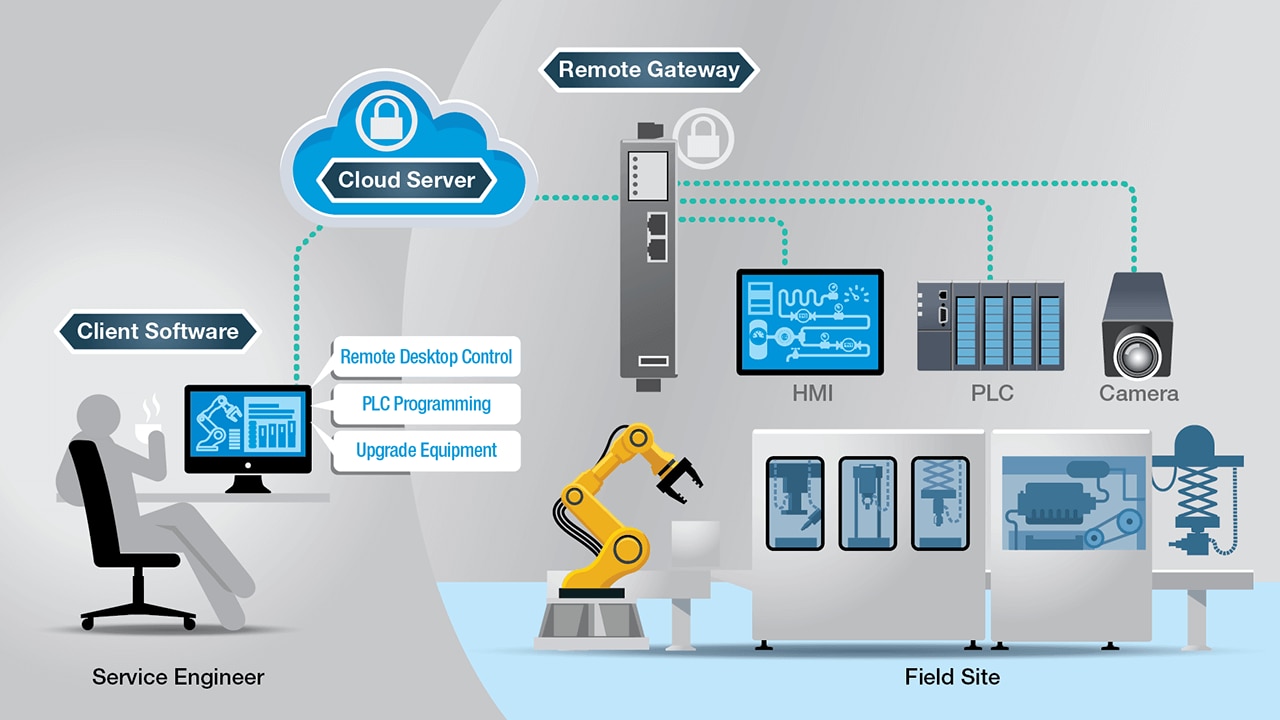
Remote Access and Control:
This is the most critical and also the most versatile part of this project. We can use multiple remote access and control methods depending on the application that we are looking for. The system can be accessed remotely via a web interface to monitor and control the experiment. The Raspberry Pi can also be connected to a camera and microphone to allow researchers to remotely view the experiment and communicate with the lab personnel.
For this project, I will be using a few remote access software that will allow to completely control the Raspberry Pi 4 B remotely using another PC. My first test would be using Chrome Remote Desktop as that is one of the most easy to use, free and with reasonable latency. Also as recommended by soldering.on , I will also try Putty and WinSCP or their equivalents.
Though this approach is suitable only with few trusted users. In case of school or rental remote labs, it would be better to have a web interface to expose the required controls and conduct the experiments. This can also be coupled with an interactive GUI for better understanding and interaction.
Conclusion:
In the next blog, we will see the project in action and control & monitor our remote lab over the internet using various methods and workflows as discussed in this blog and the previous ones.