Hello everyone.
I welcome you in my third blog as part of Summer of Sensors Design Challenge in the In the Air Tonight category. In my first blog post I described my plans as part of this competition and in second blog I shown contents of the board which I use as part of this experiments. In this blog post I will first time show practical usage of ZMOD4510 Outdoor Air Quality Sensor. Because we use sensor on EVKIT board we can use software provided by Renesas which can utilize communication board available as part of evaluation kit and can visualize data from the sensor on the PC.
Downloading the Software
The software is available at Renesas website. I had to go to ZMOD4510-EVK page, scrolled down to Design & Development section and downloaded evaluation software. At the time of writing this blog post version 7.9.0 released at 2022-06-15 is available. For download you need to login or register on Renesas website, but this was not an issue for me because I already had account on Renesas website.
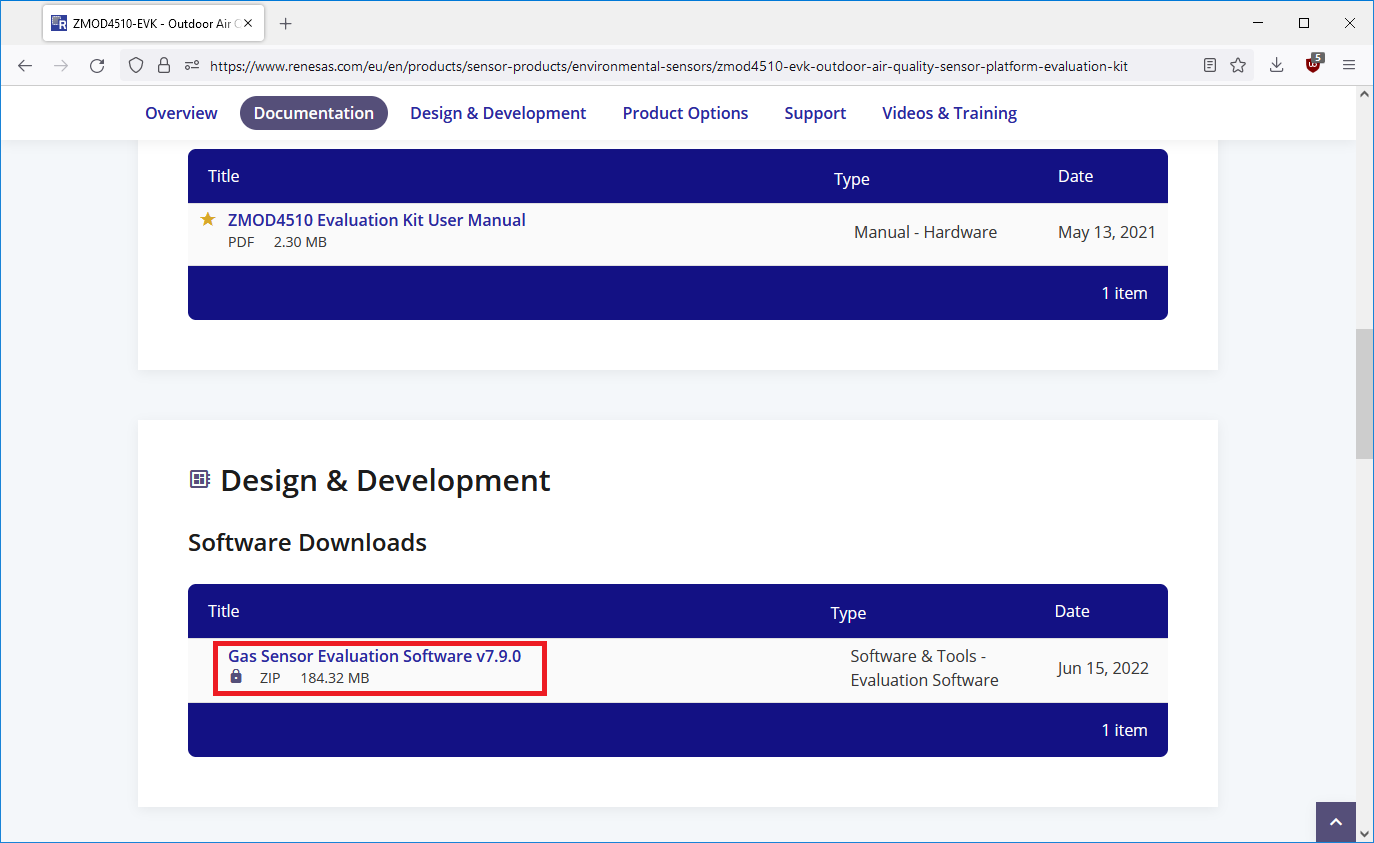
Last version of evaluation software is quite new. I am writing this blog post at 2022-09-07 so it is less than three months old, but I did not find changelog anywhere. I recommend checking for new versions regularly. When downloading you can also register for receiving email when new version gets released which is nice feature of Renesas website.
Installing the Software
The first step is installing the software. It is not bundled with any installer and in README it is mentioned that recommended way is to unzip the file and copy its content to the Program Files directory. After brief browsing of files which I had to copy I found many Python files, so utility is most probably developed in Python.
Starting the software
Starting the software is slow. I originally thought that it do not work, but after more than 30 seconds window appeared. The first step is selecting target sensor. This utility supports all three ZMOD4xxx sensors. I did not mention it anywhere yet, so it is good time to mention it now. Renesas has three sensors in this family. They technically looks very similar but differ in I2C address and I think also in some gas sensor specific thing like type of chemical element used for sensing or calibration procedure in factory. Exact differences between three offered sensor are not described anywhere but they look very similar at the first look. There are following three Renesas ZMOD sensors available:
- ZMOD4410 for Indoor Air Quality sensing
- ZMOD4510 for Outdoor Air Quality sensing (this sensor which I use)
- ZMOD4450 for Refrigerator Air Quality sensing
After starting the software, you need to select sensor used and also algorithm used for processing data from sensor. Following options are available:

The most available options targets Indoor variant ZMOD4410. ZMOD4510 which I use has two variants available. I selected newer second generation which is also optimized in the terms of power consumption. Optionally you can select older algorithm.
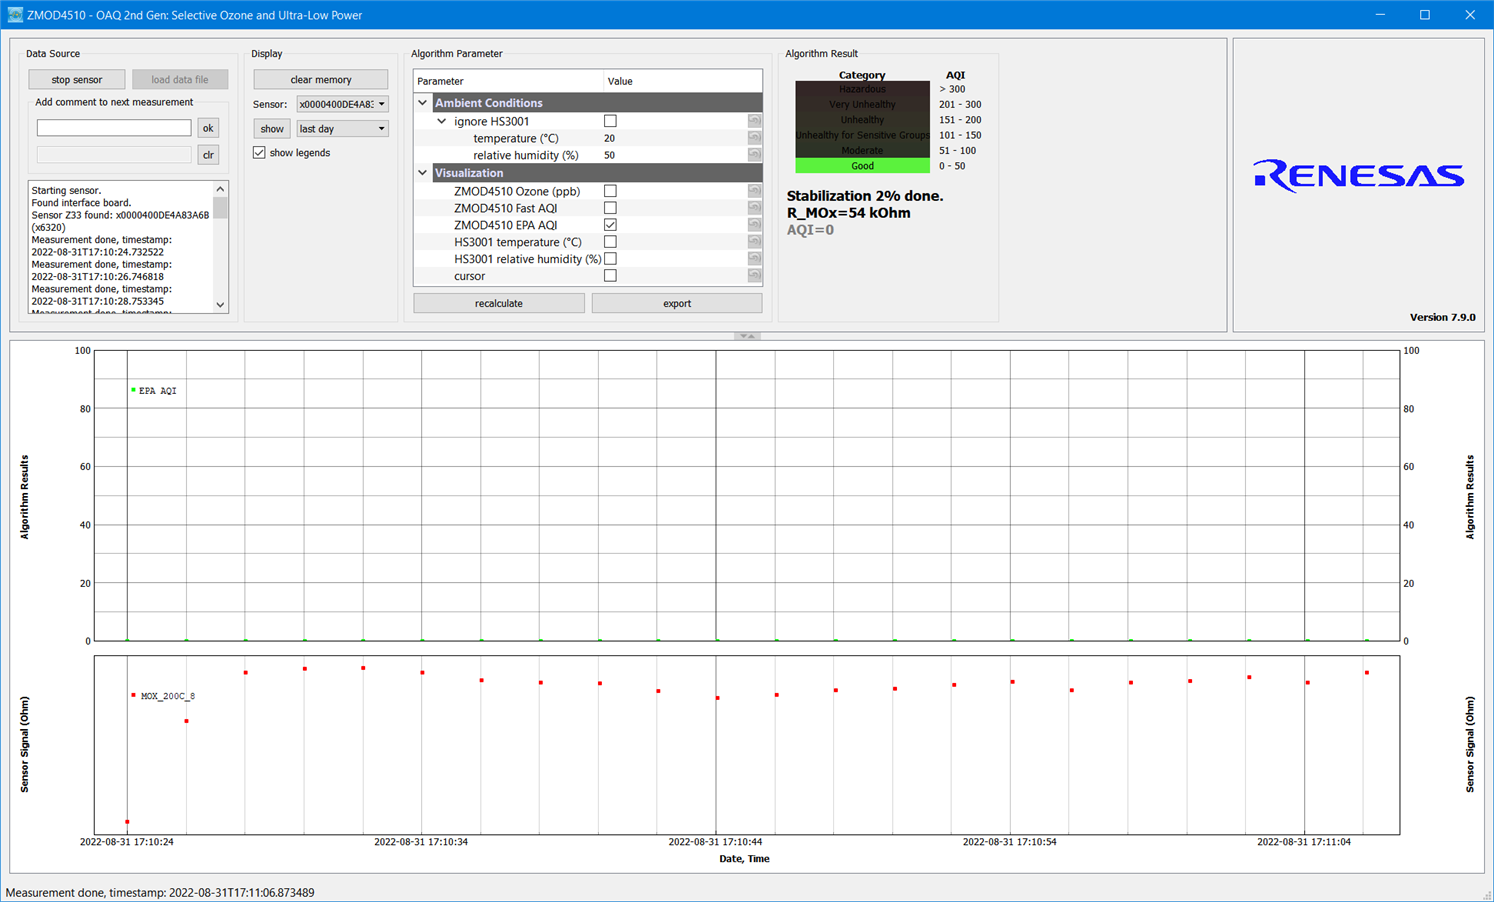
After selecting sensor and algorithm main window of the program appears. It took me a while to find how to start sensing because I was confused that sensor drop down shown nothing. I had to press start sensor button and then sensor appeared. Very soon after I started sensor window looked as follows.
Experiment environment
Before I will describe what happened with plot later, I want to spend some time with describing environment in which I run the sensor for a first time. For my first experiment I did not place sensor outside because I was in time pressure and instead, I placed sensor inside but near opened window. I plan to run sensor outside in next experimenting phase when I will log data from sensor to the cloud, but for now I chosen simpler setup. I started sensor about one hour before there were webinar on element14. After webinar started, I decided to close window for reducing acoustic noise from outside. This moment will be visible on future plots. At the end after webinar concluded I opened window again which will be also visible.
Stabilization phase
At previous screenshot above you can see that after powerup sensor do not report air quality value and instead status text in bold mention that sensor is currently in stabilization phase it do not report air quality but resistance of sensitive element is visible. In my case it grown after start-up. Stabilization took about two minutes.
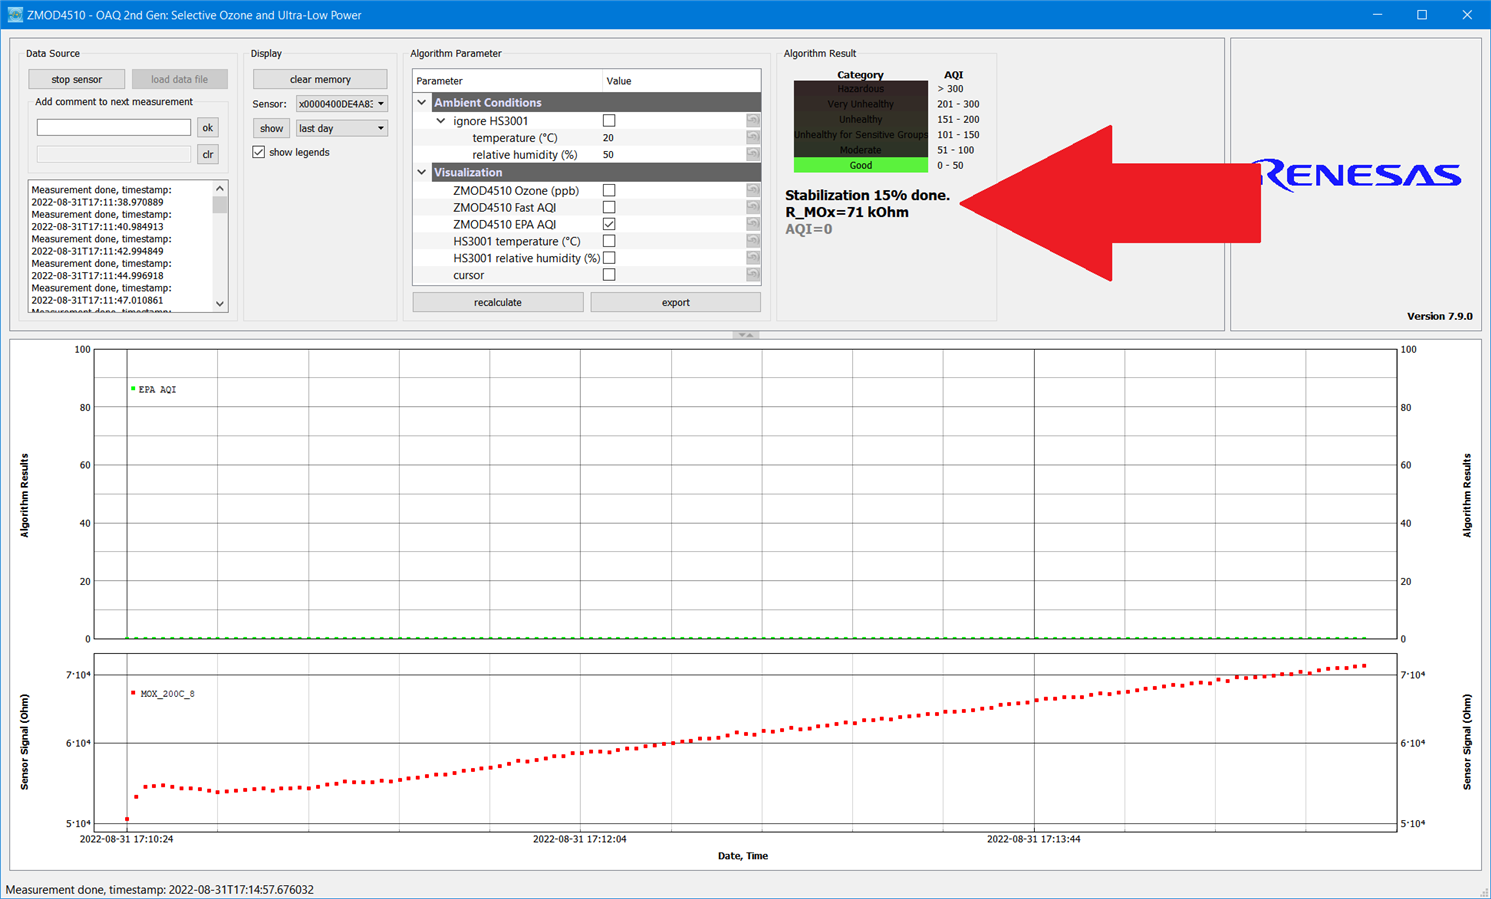
After a while at 70% of stabilization process plot was still growing:
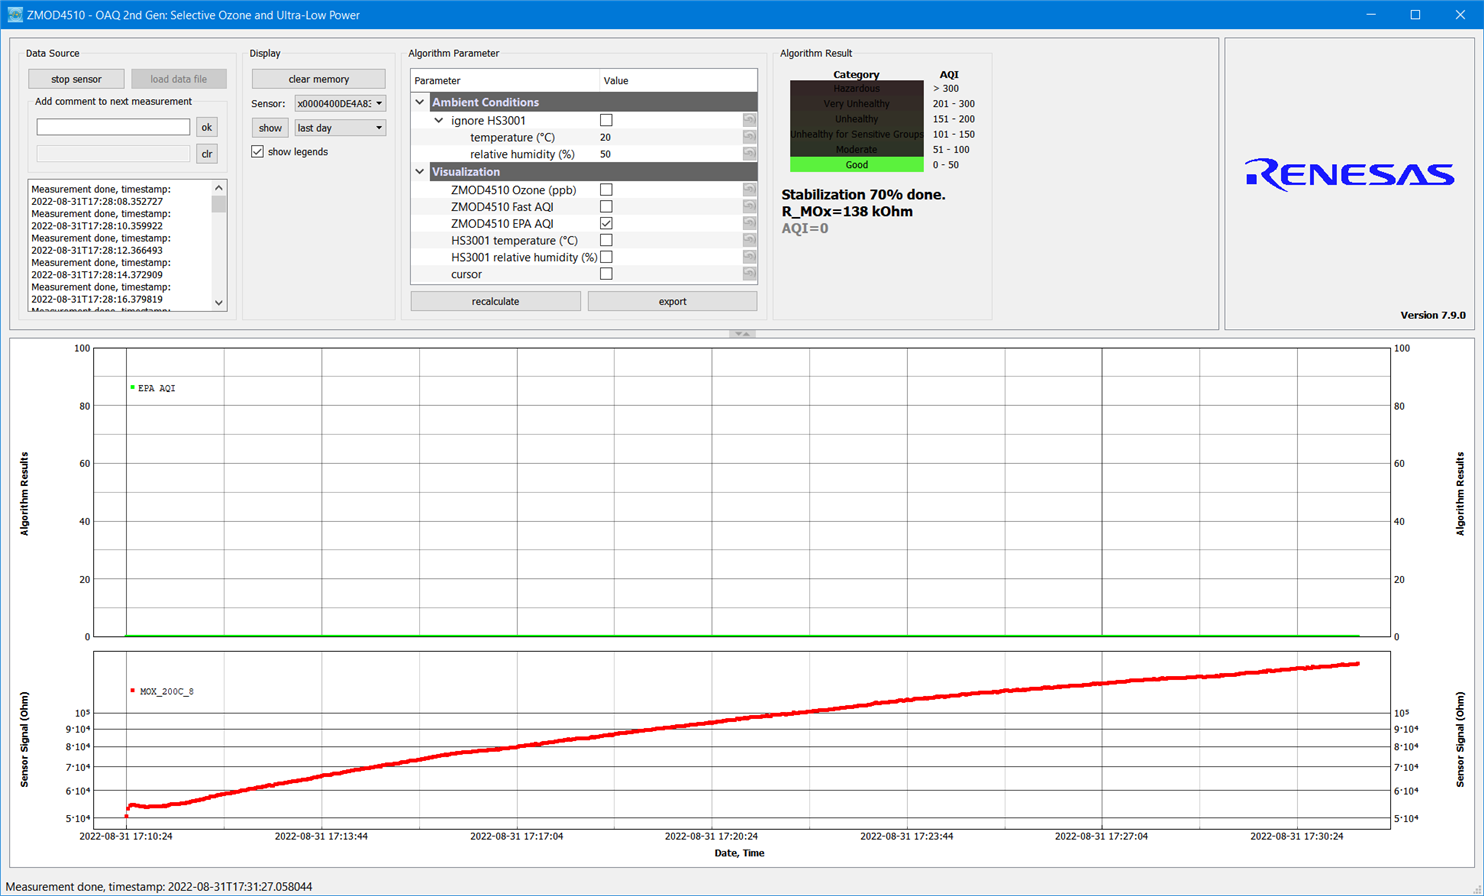
And it was still growing even after stabilization completed. After stabilization completed air quality stuck at 0 (best air quality) for a while:
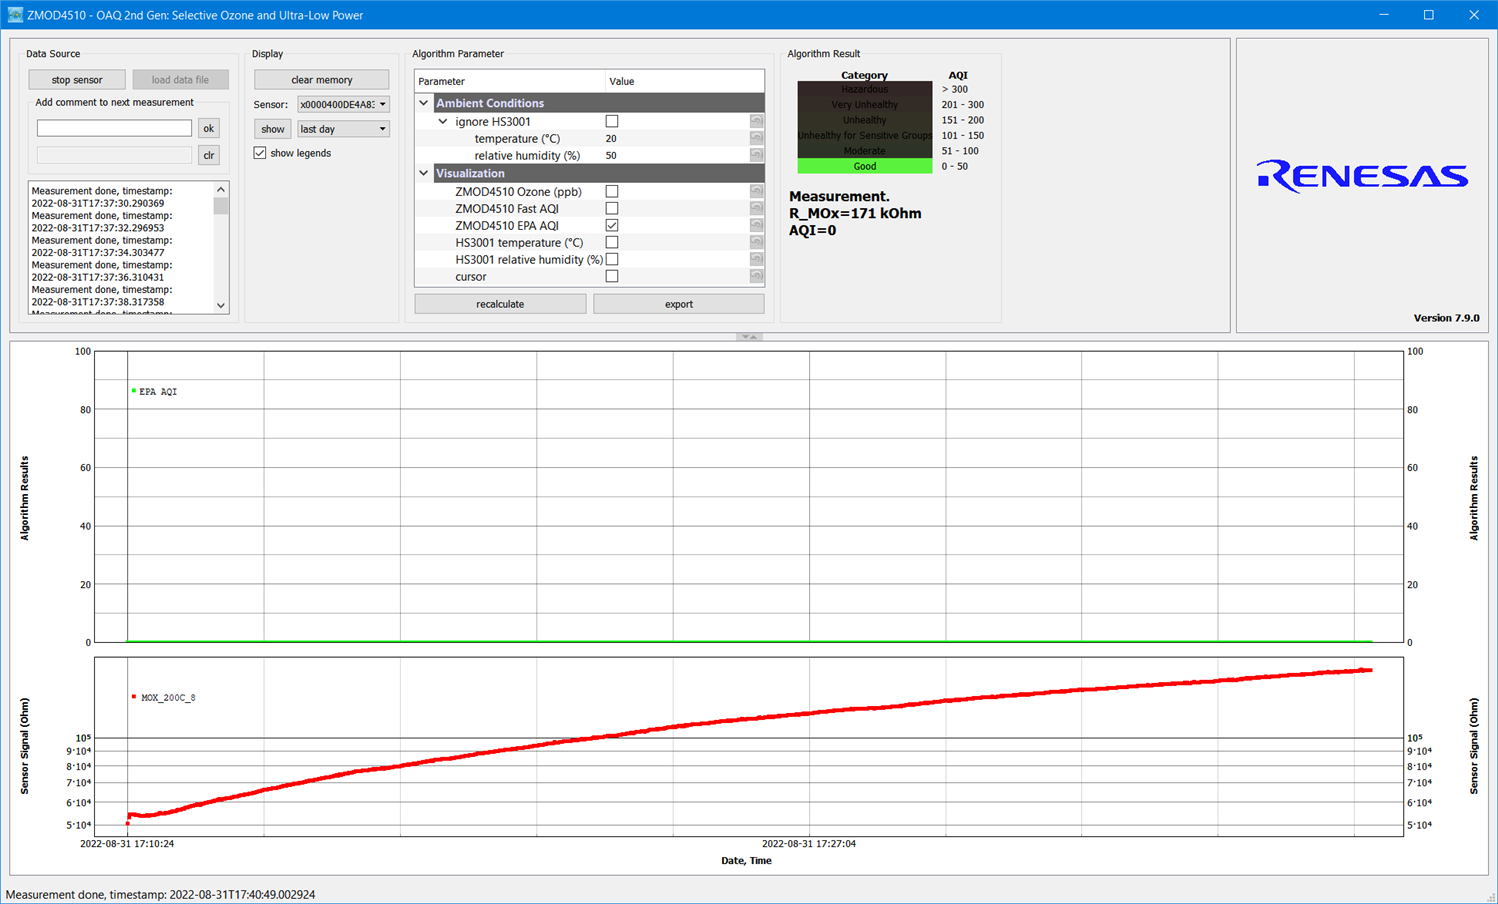
But later it grown a little (still indicating very good air quality):
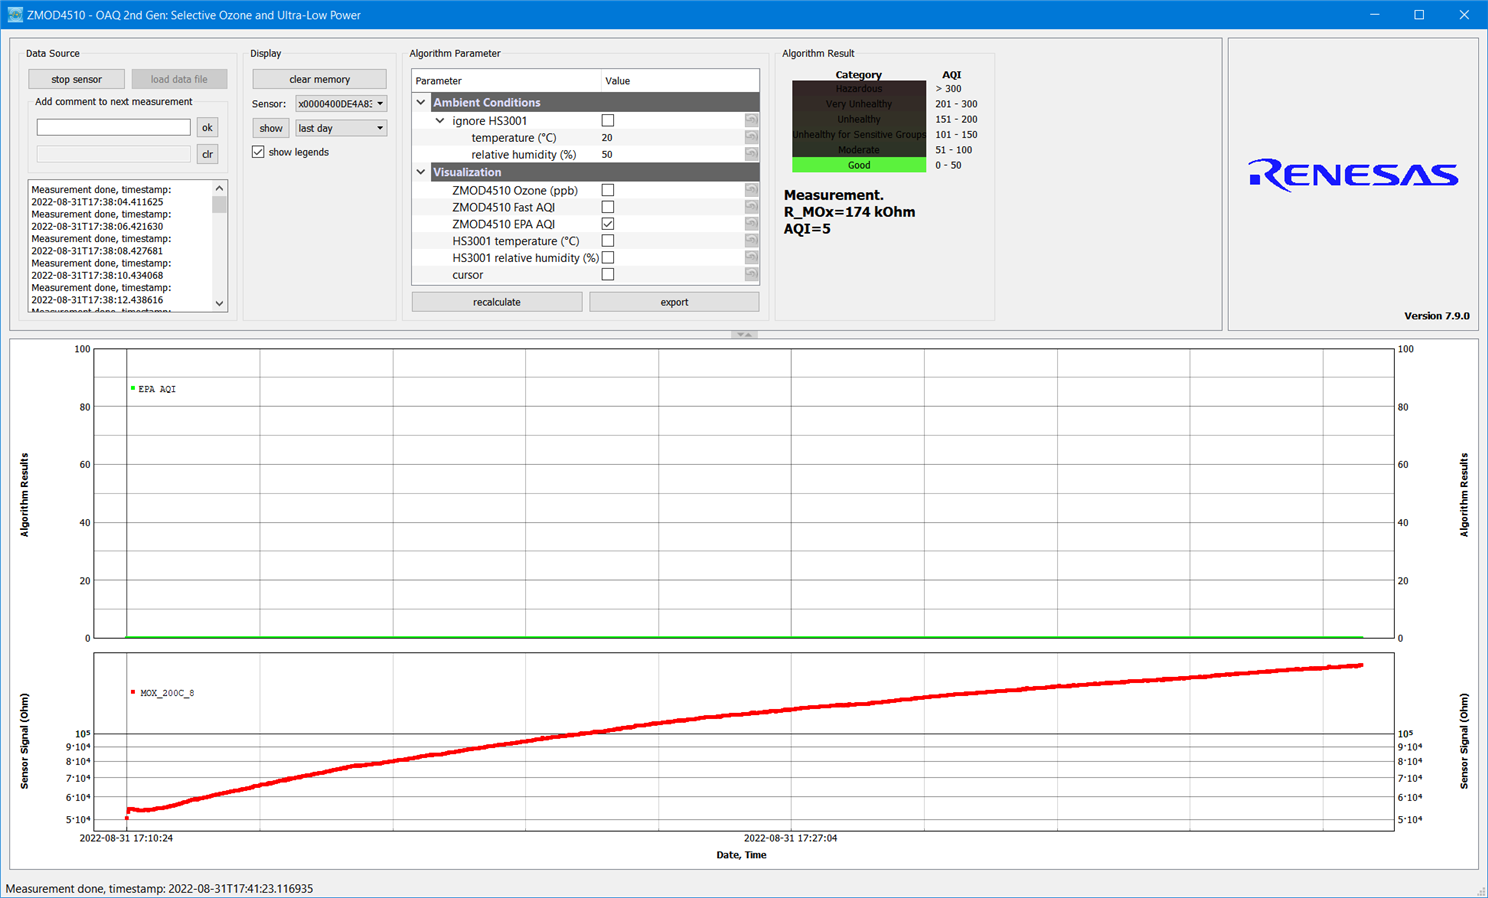
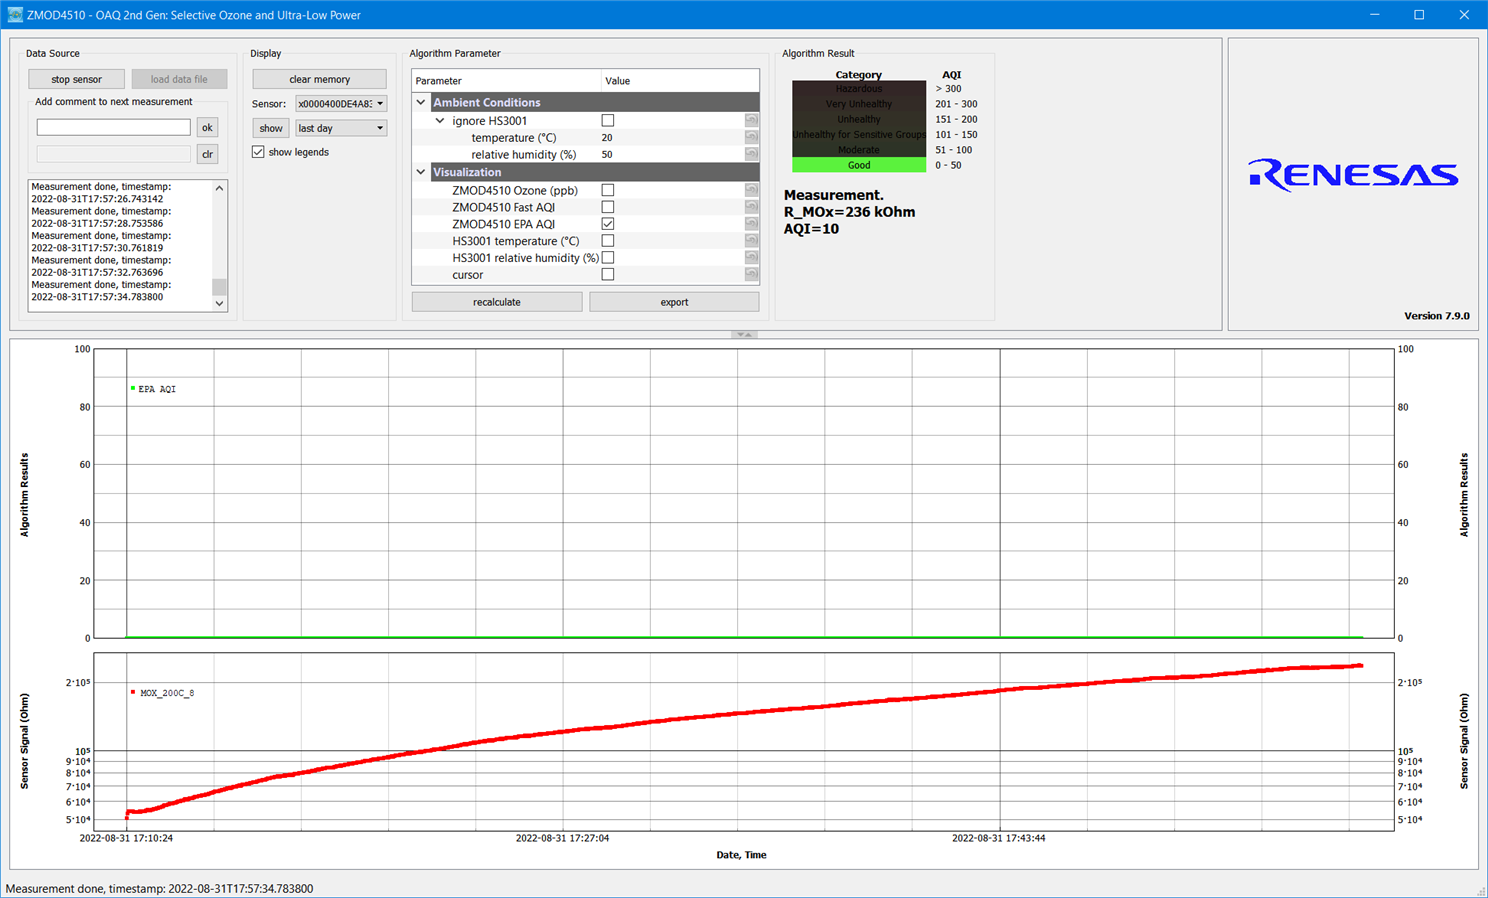
After a longer period of time plot was still growing slightly. Maybe it was because of my opened window. I guess it was because air in my room was changing with outside air continuously which resulted to this behaviour of sensor.
Then I closed window as I stated in Experiment environment section above. After I did it and air stopped circulating between my room and outside, sensitive element started to reduce its resistance. At the end of webinar, I opened window again and was able to see growing patter again. After end I realized that I can enable plotting other characteristics from the menu above, so except air quality and resistance of sensitive element you can on following final screenshot see another metrics: Fast Air Quality (which I guess is less sensitive to value inertia) and absolute amount of ozone in air.
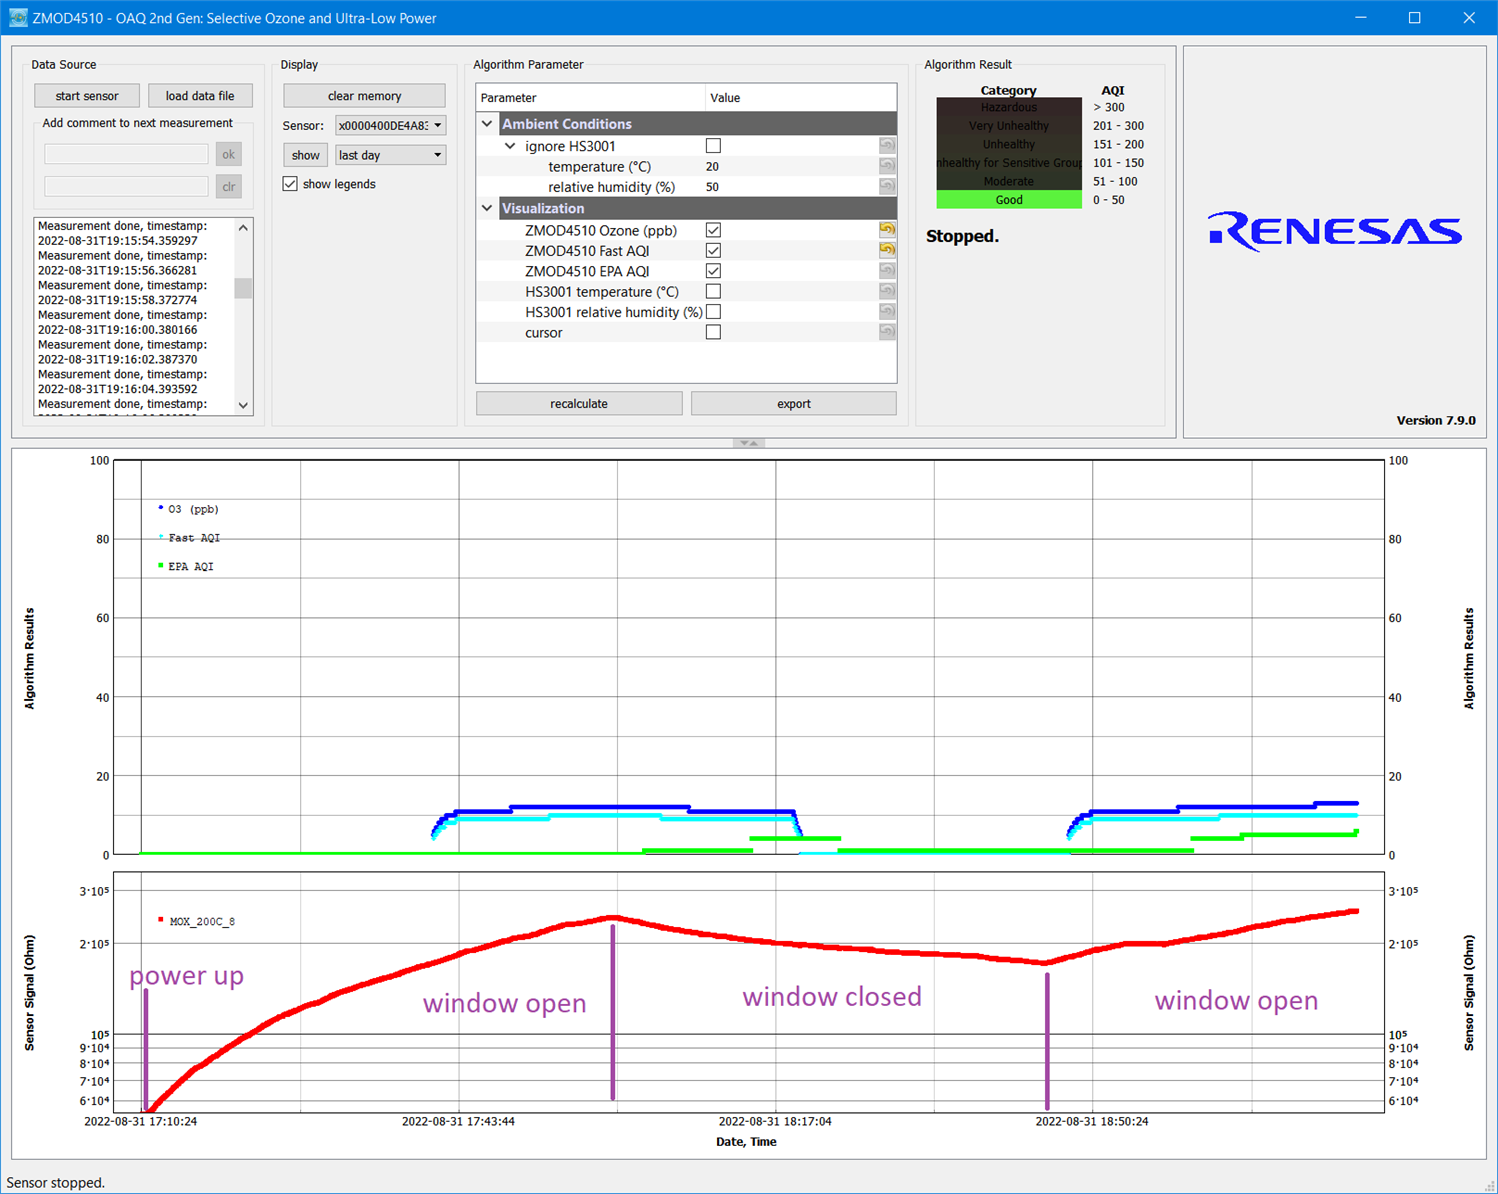
As you can see after I closed window air quality index grown a slightly which indicated slightly worse air, and this make sense. For some reason this happened also in case of reopening window after webinar concluded. I guess it is because I used sensor inside which affected measured values and confused AI algorithms which are used for computing this value.
Summary
This was my first experiment with ZMOD4510 Outdoor Air Quality sensor. I am posting this blog slightly late because I was busy by other projects and tasks. In this experiment I first time powered up my sensor and checked that it works and return values which make sense. Currently I started working on integrating sensor with Renesas microcontroller using Renesas quick connect ecosystem. I will post blog post about it within next two weeks. Then I will connect Wi-Fi module and start sending this data to the cloud.
Thank you for reading this blog post. Feel free to comment this blog post in comments below.
Next blog: Blog #4: Tutorial: Using ZMOD4510 with Renesas EK-RA2L1 and FSP


-

osjef
-
Cancel
-
Vote Up
0
Vote Down
-
-
Sign in to reply
-
More
-
Cancel
Comment-

osjef
-
Cancel
-
Vote Up
0
Vote Down
-
-
Sign in to reply
-
More
-
Cancel
Children