element14 Community
element14 Community
    Register Log In
  • Site
  • Search
  • Log In Register
  • Members
    Members
    • Benefits of Membership
    • Achievement Levels
    • Members Area
    • Personal Blogs
    • Feedback and Support
    • What's New on element14
  • Learn
    Learn
    • Learning Center
    • eBooks
    • STEM Academy
    • Webinars, Training and Events
    • More
  • Technologies
    Technologies
    • 3D Printing
    • FPGA
    • Industrial Automation
    • Internet of Things
    • Power & Energy
    • Sensors
    • More
  • Challenges & Projects
    Challenges & Projects
    • Design Challenges
    • element14 presents
    • Project14
    • Arduino Projects
    • Raspberry Pi Projects
    • More
  • Products
    Products
    • Arduino
    • Dev Tools
    • Manufacturers
    • Raspberry Pi
    • RoadTests & Reviews
    • Avnet Boards Community
    • More
  • Store
    Store
    • Visit Your Store
    • Choose Another Store
      • Europe
      •  Austria (German)
      •  Belgium (Dutch, French)
      •  Bulgaria (Bulgarian)
      •  Czech Republic (Czech)
      •  Denmark (Danish)
      •  Estonia (Estonian)
      •  Finland (Finnish)
      •  France (French)
      •  Germany (German)
      •  Hungary (Hungarian)
      •  Ireland
      •  Israel
      •  Italy (Italian)
      •  Latvia (Latvian)
      •  
      •  Lithuania (Lithuanian)
      •  Netherlands (Dutch)
      •  Norway (Norwegian)
      •  Poland (Polish)
      •  Portugal (Portuguese)
      •  Romania (Romanian)
      •  Russia (Russian)
      •  Slovakia (Slovak)
      •  Slovenia (Slovenian)
      •  Spain (Spanish)
      •  Sweden (Swedish)
      •  Switzerland(German, French)
      •  Turkey (Turkish)
      •  United Kingdom
      • Asia Pacific
      •  Australia
      •  China
      •  Hong Kong
      •  India
      •  Korea (Korean)
      •  Malaysia
      •  New Zealand
      •  Philippines
      •  Singapore
      •  Taiwan
      •  Thailand (Thai)
      • Americas
      •  Brazil (Portuguese)
      •  Canada
      •  Mexico (Spanish)
      •  United States
      Can't find the country/region you're looking for? Visit our export site or find a local distributor.
  • Translate
  • Profile
Upcycle It
  • Challenges & Projects
  • Design Challenges
  • Upcycle It
  • More
  • Cancel
Upcycle It
Blog Introduction to the Hermes 3000
  • Blog
  • Forum
  • Documents
  • Events
  • Mentions
  • Sub-Groups
  • Tags
  • More
  • Cancel
  • New
Blog Post Actions
  • Subscribe by email
  • More
  • Cancel
  • Share
  • Subscribe by email
  • More
  • Cancel
Group Actions
  • Group RSS
  • More
  • Cancel
Engagement
  • Author Author: jofas
  • Date Created: 28 Mar 2017 12:38 AM Date Created
  • Views 249 views
  • Likes 4 likes
  • Comments 12 comments
  • upcycled_hermes3000
  • hermes3000
Related
Recommended

Introduction to the Hermes 3000

jofas
jofas
28 Mar 2017

Hello Element14 Community!


For this project I will be upcycling a Hermes 3000 Typewriter. This specific typewriter was built around the early 1960's. Typewriters have become obsolete due to personal computers, however they are still collected because they are very interesting machines that reflect a different era of engineering.


I would like to bring this typewriter into the 21st century using the Intel Edison. It will be more of a novelty idea rather then solving a realistic problem, but in the end I will make this 1960's typewriter a fun 21st-century-compatible device.

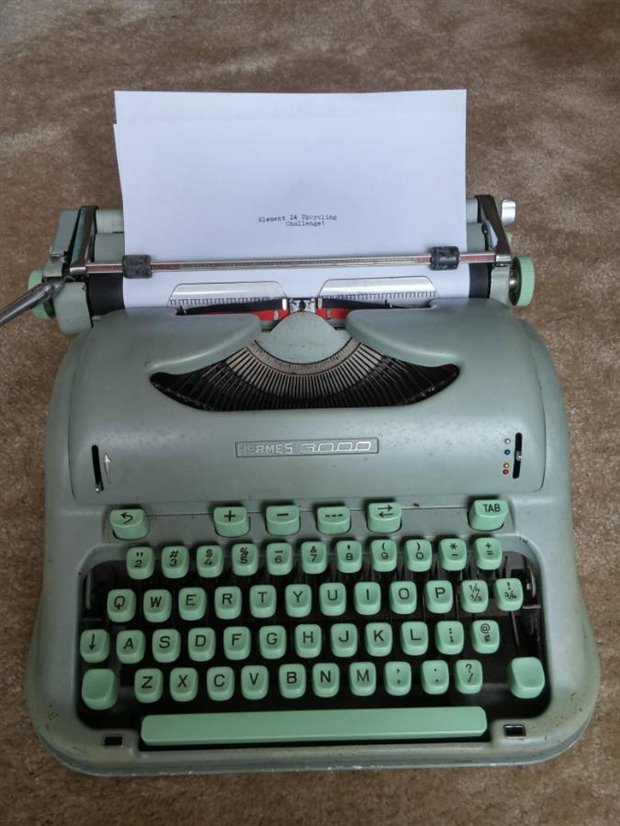
The Hermes 3000 Typewriter!


The idea is simple: send an email using a typewriter. To accomplish this, I will install the Intel Edison and some sensors to the inside of the typewriter. I will most likely have to build a base for the typewriter to add more space for the electronics. The sensors will allow the Edison to read which keys are being pressed on the typewriter. I had initially considered using photointerrupters to detect the key strokes however now I am exploring a simpler option which I will introduce in my next blog post (look for it next week!). The Edison will expect a specific format that looks something like this:
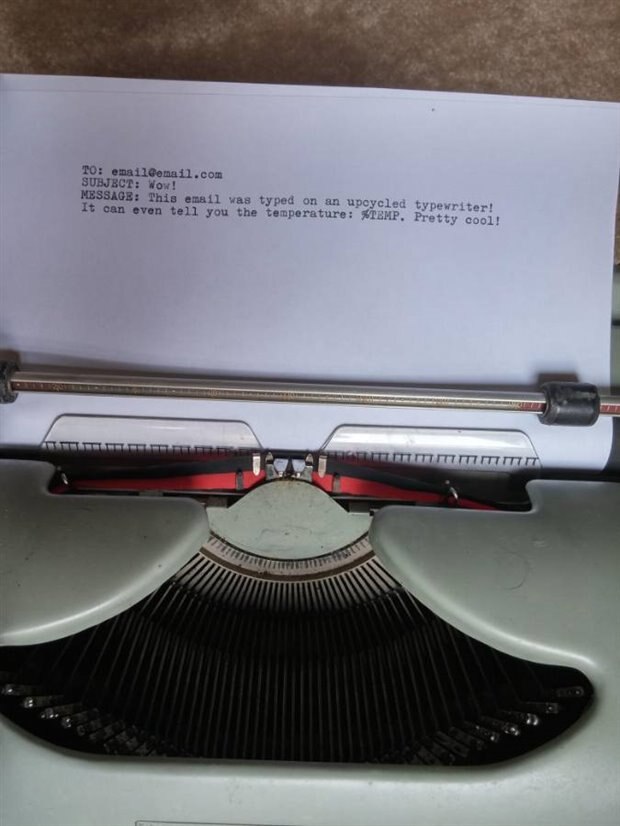
A sample "email"


Notice how I have added another feature - the temperature function. When the Edison reads the specific characters "%TEMP" it will replace those characters with the actual temperature that is being read from the challenge kit's temperature sensor. After typing the message as seen in the sample above, the user will press a specific key on the typewriter (one that is otherwise rarely used) which will tell the Edison to send the email. In the end, you will have sent an email using a typewriter!


I have two personal rules for this project:

1) I will not make any permanent modifications to the typewriter (for example, drilling holes into it). This typewriter is old, but it is not "junk". I do not want to damage it in any way.

2) I will try to avoid changing the style/look of the typewriter too much. I want it to still look and feel like I'm typing in the 1960's. I will try to keep any electronics hidden as best as possible.


Finally, here are some more features I would like to add to this project:

- More %codes: Like the %TEMP function mentioned earlier, I could include some like %DATE or %TIME.

- Status LED: Just to indicate that it is ready/not ready to use.

- LCD Screen: This would be normally hidden but could display error messages to make troubleshooting easier.

- SD Card: Log the emails to an SD card so they can be typed but not sent until later (thanks to mcb1 for this suggestion).


Stay tuned for my next update sometime next week (around April 4-6th)!

Anonymous

Top Comments

  • dougw
    dougw over 5 years ago in reply to balearicdynamics +2

    Sure I don't mind critique but would like to know why you think it is so much more complicated than other solutions. I am interested in exploring how to make it better or exploring simpler solutions.…

  • dougw
    dougw over 5 years ago +1

    Nice project.

    Here is an idea where the Edison might have just the right horsepower:

    • tape a white plastic rod below each key
    • generate a planar laser beam just below all the rods (like a laser level)
    • view from…
  • balearicdynamics
    balearicdynamics over 5 years ago in reply to dougw +1

    Can I criticise a bit your idea? Intel Edison has a lot of power to do this but it sounds me too complicated...

Parents
  • dougw
    dougw over 5 years ago

    Nice project.

    Here is an idea where the Edison might have just the right horsepower:

    • tape a white plastic rod below each key
    • generate a planar laser beam just below all the rods (like a laser level)
    • view from below with a camera
    • when a key is pushed, the laser will illuminate the corresponding rod
    • the Edison just needs to do simple pattern recognition on the camera image
    • Cancel
    • Up +1 Down
    • Reply
    • More
    • Cancel
  • balearicdynamics
    balearicdynamics over 5 years ago in reply to dougw

    Can I criticise a bit your idea? Intel Edison has a lot of power to do this but it sounds me too complicated...

    • Cancel
    • Up +1 Down
    • Reply
    • More
    • Cancel
Comment
  • balearicdynamics
    balearicdynamics over 5 years ago in reply to dougw

    Can I criticise a bit your idea? Intel Edison has a lot of power to do this but it sounds me too complicated...

    • Cancel
    • Up +1 Down
    • Reply
    • More
    • Cancel
Children
  • dougw
    dougw over 5 years ago in reply to balearicdynamics

    Sure I don't mind critique but would like to know why you think it is so much more complicated than other solutions. I am interested in exploring how to make it better or exploring simpler solutions.

    I think the main issue with this optical technique is it needs space under the keyboard.

    I am not suggesting this is the best solution, but as far as complexity and features go:

    • it only needs one sensor and one camera connection to the Edison to sense all 54 keys.
    • the actuators can be just cheap straws attached with tape
    • It is easy to remove
    • it is non-contact - won't wear out
    • both the typewriter and the Edison with camera can be re-used after the project
    • Cancel
    • Up +2 Down
    • Reply
    • More
    • Cancel
  • balearicdynamics
    balearicdynamics over 5 years ago in reply to dougw

    Maybe I have read your idea with a prejudice: where do you put the camera ?

    • Cancel
    • Up 0 Down
    • Reply
    • More
    • Cancel
  • dougw
    dougw over 5 years ago in reply to balearicdynamics

    The camera would be a few inches under the machine - anywhere it can unambiguously see any any straw that comes down.

    • Cancel
    • Up 0 Down
    • Reply
    • More
    • Cancel
  • balearicdynamics
    balearicdynamics over 5 years ago in reply to dougw

    That was my mistake ... I though how to put the camera on top, problems with hands, problems with camera support etc. etc. Under the machine instead maybe better, probably the only good place. A couple of questions, adopting this solution. A norma camera (e.g. the pi camera or similar range) may need a wide angle lens to cover the entire area of the keys (I suppose). But with a wide lens there is a non-planar image so some correction factor needs math involved.

    Another doubt is related to the keys position; they are not horizontal to the laser plane should be oriented with a slant according with the keys disposition. But not all the keys are at the same level to the bottom and also the camera should be positioned with a support keeping the focal plane parallel to the slanted laser plane ...

    • Cancel
    • Up +1 Down
    • Reply
    • More
    • Cancel
  • dougw
    dougw over 5 years ago in reply to balearicdynamics

    I didn't explain the concept very well. The rod or straw attached to each key is hanging straight down. All straws are trimmed to an appropriate length so they end up on the same plane, just at the bottom of the machine, so when any key is depressed, the corresponding straw would poke out below the plane by the amount the key was depressed. I had considered a matrix of lasers and photodetectors to determine the position of the protruding straw, but a camera is simpler.

    The camera just needs to be far enough away that all straws are in its field of view. If a fisheye lens is used to get closer, distortion doesn't really matter as long as each straw protrudes to a unique position in the mage.

    This is still not a complete description - ask more questions if it needs clarification.

    • Cancel
    • Up 0 Down
    • Reply
    • More
    • Cancel
Element14

element14 is the first online community specifically for engineers. Connect with your peers and get expert answers to your questions.

  • Members
  • Learn
  • Technologies
  • Challenges & Projects
  • Products
  • Store
  • About Us
  • Feedback & Support
  • FAQs
  • Terms of Use
  • Privacy Policy
  • Legal and Copyright Notices
  • Sitemap
  • Cookies

An Avnet Company © 2022 Premier Farnell Limited. All Rights Reserved.

Premier Farnell Ltd, registered in England and Wales (no 00876412), registered office: Farnell House, Forge Lane, Leeds LS12 2NE.

ICP 备案号 10220084.

Follow element14

  • Facebook
  • Twitter
  • linkedin
  • YouTube