element14 Community
element14 Community
    Register Log In
  • Site
  • Search
  • Log In Register
  • Community Hub
    Community Hub
    • What's New on element14
    • Feedback and Support
    • Benefits of Membership
    • Personal Blogs
    • Members Area
    • Achievement Levels
  • Learn
    Learn
    • Ask an Expert
    • eBooks
    • element14 presents
    • Learning Center
    • Tech Spotlight
    • STEM Academy
    • Webinars, Training and Events
    • Learning Groups
  • Technologies
    Technologies
    • 3D Printing
    • FPGA
    • Industrial Automation
    • Internet of Things
    • Power & Energy
    • Sensors
    • Technology Groups
  • Challenges & Projects
    Challenges & Projects
    • Design Challenges
    • element14 presents Projects
    • Project14
    • Arduino Projects
    • Raspberry Pi Projects
    • Project Groups
  • Products
    Products
    • Arduino
    • Avnet Boards Community
    • Dev Tools
    • Manufacturers
    • Multicomp Pro
    • Product Groups
    • Raspberry Pi
    • RoadTests & Reviews
  • About Us
  • Store
    Store
    • Visit Your Store
    • Choose another store...
      • Europe
      •  Austria (German)
      •  Belgium (Dutch, French)
      •  Bulgaria (Bulgarian)
      •  Czech Republic (Czech)
      •  Denmark (Danish)
      •  Estonia (Estonian)
      •  Finland (Finnish)
      •  France (French)
      •  Germany (German)
      •  Hungary (Hungarian)
      •  Ireland
      •  Israel
      •  Italy (Italian)
      •  Latvia (Latvian)
      •  
      •  Lithuania (Lithuanian)
      •  Netherlands (Dutch)
      •  Norway (Norwegian)
      •  Poland (Polish)
      •  Portugal (Portuguese)
      •  Romania (Romanian)
      •  Russia (Russian)
      •  Slovakia (Slovak)
      •  Slovenia (Slovenian)
      •  Spain (Spanish)
      •  Sweden (Swedish)
      •  Switzerland(German, French)
      •  Turkey (Turkish)
      •  United Kingdom
      • Asia Pacific
      •  Australia
      •  China
      •  Hong Kong
      •  India
      •  Korea (Korean)
      •  Malaysia
      •  New Zealand
      •  Philippines
      •  Singapore
      •  Taiwan
      •  Thailand (Thai)
      • Americas
      •  Brazil (Portuguese)
      •  Canada
      •  Mexico (Spanish)
      •  United States
      Can't find the country/region you're looking for? Visit our export site or find a local distributor.
  • Translate
  • Profile
  • Settings
Project Videos
  • Challenges & Projects
  • element14 presents
  • Project Videos
  • More
  • Cancel
Project Videos
Documents Edge-lit 7-Segment Display Clock Using Raspberry Pi Pico -- Episode-653
  • Documents
  • Members
  • Mentions
  • Sub-Groups
  • Tags
  • More
  • Cancel
  • New
Join Project Videos to participate - click to join for free!
Related
EMI-Reduction-Techniques
Recommended
Engagement
  • Author Author: tariq.ahmad
  • Date Created: 9 May 2024 3:31 PM Date Created
  • Last Updated Last Updated: 10 May 2024 3:21 PM
  • Views 2251 views
  • Likes 11 likes
  • Comments 12 comments

Edge-lit 7-Segment Display Clock Using Raspberry Pi Pico -- Episode-653

In this episode of Element14 Presents, Katie introduces us to her latest project: creating an acrylic edge-lit clock. The inspiration stemmed from discussions in the community about edge-lit dioramas, sparking Katie's interest in utilizing a laser cutter for this endeavor. Beginning with a simple etched acrylic design, she outlines her vision for illuminating each number on the clock face. 

Watch the Video:

You don't have permission to edit metadata of this video.
Edit media
x
image
Upload Preview
image

To achieve this, Katie decides to incorporate a PCB with neopixels, providing flexibility for future modifications. Initially designed as a clock, the PCB layout allows for the potential integration of various shapes or even diorama elements, as suggested by the community. She considers different configurations for displaying numbers, ultimately opting for a seven-segment display approach for its versatility and symmetry. 

image

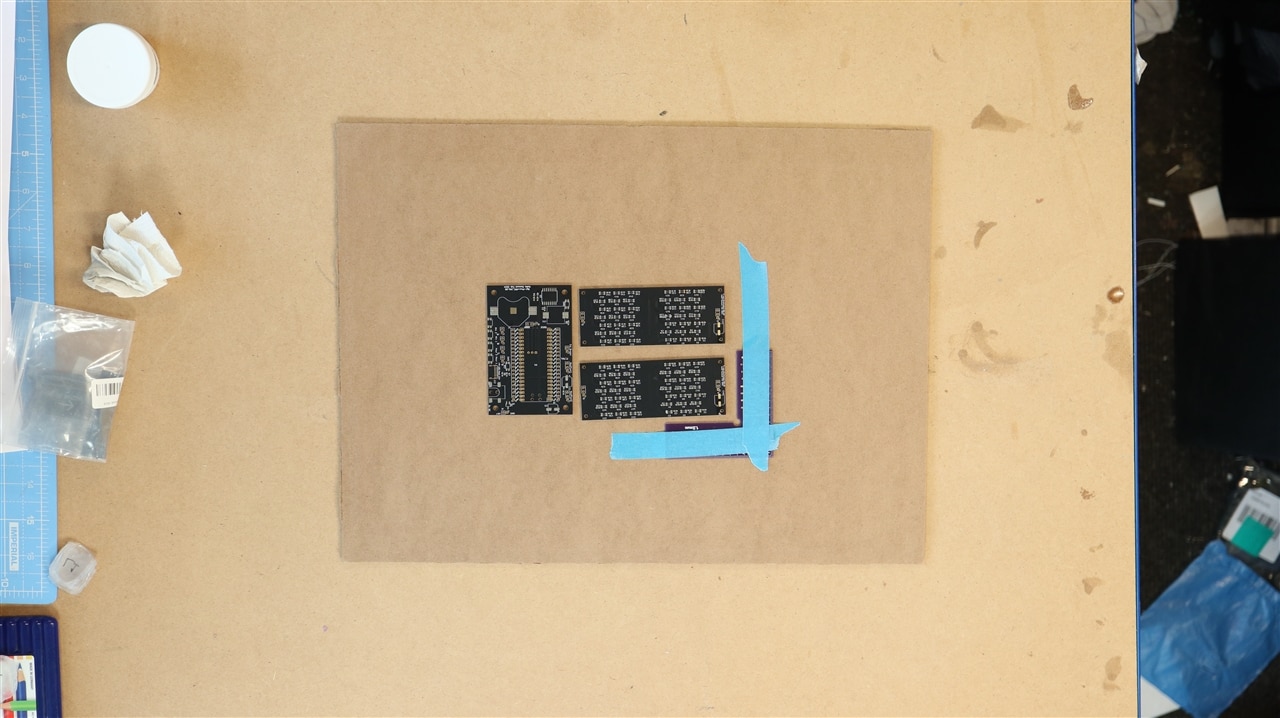
With the PCB design finalized, Katie shares insights into her modular approach, breaking down the components and functionalities of the Raspberry Pi Pico-based real-time clock PCB. Emphasizing flexibility, she discusses power options, buzzer integration, and near-pixel outputs for illuminating the acrylic segments. The meticulous planning extends to the PCB layout, optimizing space for future expansions. 

image

Moving on to the case design, Katie showcases a sleek, functional enclosure tailored for her project's needs. Despite encountering a setback with the size exceeding the printer bed limits, she devises a solution by splitting the case into two halves for printing. This resourceful approach highlights her adaptability in overcoming technical challenges. 

image

Transitioning to the laser cutting phase, Katie demonstrates her proficiency in engraving and cutting acrylic segments for the clock display. She recounts the refurbishment process of her laser cutter, underscoring the project's hands-on nature and cost-effectiveness. Despite the complexity of aligning and cutting multiple sheets, she remains focused on achieving precise results. 

image

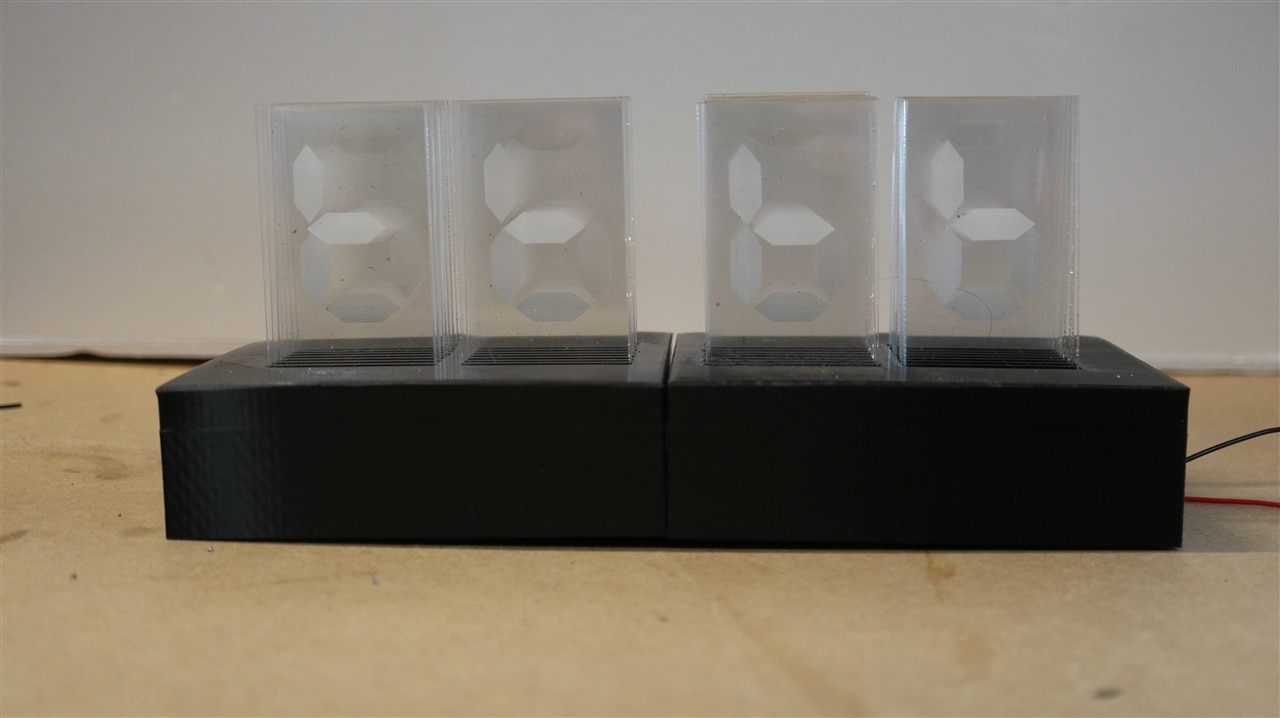
After receiving the PCBs and assembling them using a DIY soldering method, Katie proceeds to integrate them into the 3D-printed enclosure. Despite the challenge of assembling a split-case design, she ensures stability and functionality. Upon completion, she unveils the fully assembled clock, showcasing its functionality and aesthetic appeal. 

image

Reflecting on the project's journey, Katie is pretty happy with the result despite any issues and setbacks along the way. 

Downloads & Links:

  • Download Code and CAD Files!
  •  Building My Dream Digital Clock: DIY 7 Segment Display with a Cute Robot Twist! -- Episode 600  

Bonus Video:

You don't have permission to edit metadata of this video.
Edit media
x
image
Upload Preview
image

Bill of Material:

Product Name Manufacturer Quantity Buy Kit
MULTICOMP MC0025473D Printer Filament, 1.75mm Dia, Black, PLA, 1 kg Multicomp 1 Buy Now
RASPBERRY-PI SBC, Raspberry Pi Pico W, RP2040, ARM Cortex-M0+, 264kB RAM, 2MB Flash, Wifi, Micro-USB RASPBERRY-PI 1 Buy Now
USB4085-GF-A GCT (GLOBAL CONNECTOR TECHNOLOGY) USB Connector, Charging Connector, USB Type C, USB 2.0, Receptacle, 16 Ways, Through Hole Mount GCT (GLOBAL CONNECTOR TECHNOLOGY) 1 Buy Now
DS3231SN# ANALOG DEVICES RTC IC, Date Time Format (Date/Month/Year hh:mm:ss), I2C, 2.3 V to 5.5 V, WSOIC-16 ANALOG DEVICES 1 Buy Now
BC-2001 MULTICOMP PRO 1 Buy Now
PANASONIC Tactile Switch, SPST-NO, SMD, EVQPU, Side Actuated, Surface Mount, Rectangular Button, 160 gf PANASONIC 4 Buy Now
C&K COMPONENTS Tactile Switch, Microminiature, KMR 2 Series, Top Actuated, Surface Mount, Oval Button, 300 gf C&K COMPONENTS 2 Buy Now
MULTICOMP PRO Transducer, 1 V to 25 V, Single, 75 dB, Sounder, 1 mA, SMD MULTICOMP PRO 1 Buy Now
MULTICOMP PRO AC/DC Power Supply, Level VI, 1 Output, 15 W, 5 VDC, 3 A MULTICOMP PRO 1 Buy Now
CLIFF ELECTRONIC COMPONENTS DC Power Connector, Jack, 2 A, 2.5 mm, Surface Mount, Surface Mount CLIFF ELECTRONIC COMPONENTS 1 Buy Now
DMG2305UX-7 DIODES INC. Power MOSFET, P Channel, 20 V, 4.2 A, 0.04 ohm, SOT-23, Surface Mount DIODES INC. 1 Buy Now
 

Additional Parts:

3mm Acrylic sheet, to laser engrave with segments
CR2032 battery

element14 presents

element14 presents  |  About Katie Dumont |  Project Videos

  • 3D-printed enclosure design
  • PCB design for makers
  • Raspberry Pi Pico project
  • e14p_KD
  • Seven-segment display clock
  • Neopixel lighting solutions
  • DIY laser cutting
  • Acrylic segment engraving
  • Real-time clock integration
  • Acrylic edge-lit clock
  • Element14 Presents episode
  • Laser cutter refurbishment
  • Modular electronics projects
  • Maker community collaboration
  • Maker project inspiration
  • friday_release
  • Creative DIY clock design
  • Share
  • History
  • More
  • Cancel
Actions
  • Share
  • More
  • Cancel
  • Sign in to reply
Parents
  • DAB
    DAB over 1 year ago

    Great build Katie.

    I agree, any excuse to buy a laser cutter is enough to do the project.

    • Cancel
    • Vote Up 0 Vote Down
    • Sign in to reply
    • More
    • Cancel
  • hifromkatie
    hifromkatie over 1 year ago in reply to DAB

    Yes, it was a perfect excuse! I'd just started this project, and was about to ask someone to do the laser work for me, but then found someone local selling a broken laser.
    So £300 but for a good chassis and working controller. Basically replaced everything else, but have a 60W 500x300 laser, need to look at all the parts costs, but I think it'll have come to about £700 all in, so much cheaper than a new machine Slight smile.

    • Cancel
    • Vote Up 0 Vote Down
    • Sign in to reply
    • More
    • Cancel
Comment
  • hifromkatie
    hifromkatie over 1 year ago in reply to DAB

    Yes, it was a perfect excuse! I'd just started this project, and was about to ask someone to do the laser work for me, but then found someone local selling a broken laser.
    So £300 but for a good chassis and working controller. Basically replaced everything else, but have a 60W 500x300 laser, need to look at all the parts costs, but I think it'll have come to about £700 all in, so much cheaper than a new machine Slight smile.

    • Cancel
    • Vote Up 0 Vote Down
    • Sign in to reply
    • More
    • Cancel
Children
No Data
element14 Community

element14 is the first online community specifically for engineers. Connect with your peers and get expert answers to your questions.

  • Members
  • Learn
  • Technologies
  • Challenges & Projects
  • Products
  • Store
  • About Us
  • Feedback & Support
  • FAQs
  • Terms of Use
  • Privacy Policy
  • Legal and Copyright Notices
  • Sitemap
  • Cookies

An Avnet Company © 2025 Premier Farnell Limited. All Rights Reserved.

Premier Farnell Ltd, registered in England and Wales (no 00876412), registered office: Farnell House, Forge Lane, Leeds LS12 2NE.

ICP 备案号 10220084.

Follow element14

  • X
  • Facebook
  • linkedin
  • YouTube