element14 Community
element14 Community
    Register Log In
  • Site
  • Search
  • Log In Register
  • Community Hub
    Community Hub
    • What's New on element14
    • Feedback and Support
    • Benefits of Membership
    • Personal Blogs
    • Members Area
    • Achievement Levels
  • Learn
    Learn
    • Ask an Expert
    • eBooks
    • element14 presents
    • Learning Center
    • Tech Spotlight
    • STEM Academy
    • Webinars, Training and Events
    • Learning Groups
  • Technologies
    Technologies
    • 3D Printing
    • FPGA
    • Industrial Automation
    • Internet of Things
    • Power & Energy
    • Sensors
    • Technology Groups
  • Challenges & Projects
    Challenges & Projects
    • Design Challenges
    • element14 presents Projects
    • Project14
    • Arduino Projects
    • Raspberry Pi Projects
    • Project Groups
  • Products
    Products
    • Arduino
    • Avnet Boards Community
    • Dev Tools
    • Manufacturers
    • Multicomp Pro
    • Product Groups
    • Raspberry Pi
    • RoadTests & Reviews
  • Store
    Store
    • Visit Your Store
    • Choose another store...
      • Europe
      •  Austria (German)
      •  Belgium (Dutch, French)
      •  Bulgaria (Bulgarian)
      •  Czech Republic (Czech)
      •  Denmark (Danish)
      •  Estonia (Estonian)
      •  Finland (Finnish)
      •  France (French)
      •  Germany (German)
      •  Hungary (Hungarian)
      •  Ireland
      •  Israel
      •  Italy (Italian)
      •  Latvia (Latvian)
      •  
      •  Lithuania (Lithuanian)
      •  Netherlands (Dutch)
      •  Norway (Norwegian)
      •  Poland (Polish)
      •  Portugal (Portuguese)
      •  Romania (Romanian)
      •  Russia (Russian)
      •  Slovakia (Slovak)
      •  Slovenia (Slovenian)
      •  Spain (Spanish)
      •  Sweden (Swedish)
      •  Switzerland(German, French)
      •  Turkey (Turkish)
      •  United Kingdom
      • Asia Pacific
      •  Australia
      •  China
      •  Hong Kong
      •  India
      •  Korea (Korean)
      •  Malaysia
      •  New Zealand
      •  Philippines
      •  Singapore
      •  Taiwan
      •  Thailand (Thai)
      • Americas
      •  Brazil (Portuguese)
      •  Canada
      •  Mexico (Spanish)
      •  United States
      Can't find the country/region you're looking for? Visit our export site or find a local distributor.
  • Translate
  • Profile
  • Settings
Project Videos
  • Challenges & Projects
  • element14 presents
  • Project Videos
  • More
  • Cancel
Project Videos
Documents Making a Stronger Affordable DIY Robot Arm with 3D Printing with Raspberry Pi Pico -- Episode 662
  • Documents
  • Members
  • Mentions
  • Sub-Groups
  • Tags
  • More
  • Cancel
  • New
Project Videos requires membership for participation - click to join
Related
Recommended
Top Tech Voices
Engagement
  • Author Author: cstanton
  • Date Created: 9 Apr 2025 3:51 PM Date Created
  • Last Updated Last Updated: 11 Apr 2025 3:38 PM
  • Views 3076 views
  • Likes 8 likes
  • Comments 14 comments

Making a Stronger Affordable DIY Robot Arm with 3D Printing with Raspberry Pi Pico -- Episode 662

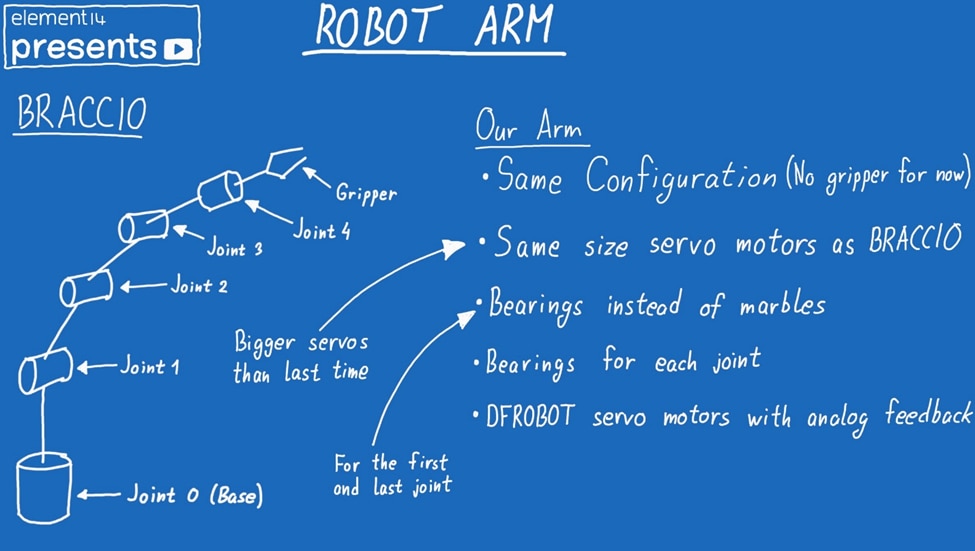
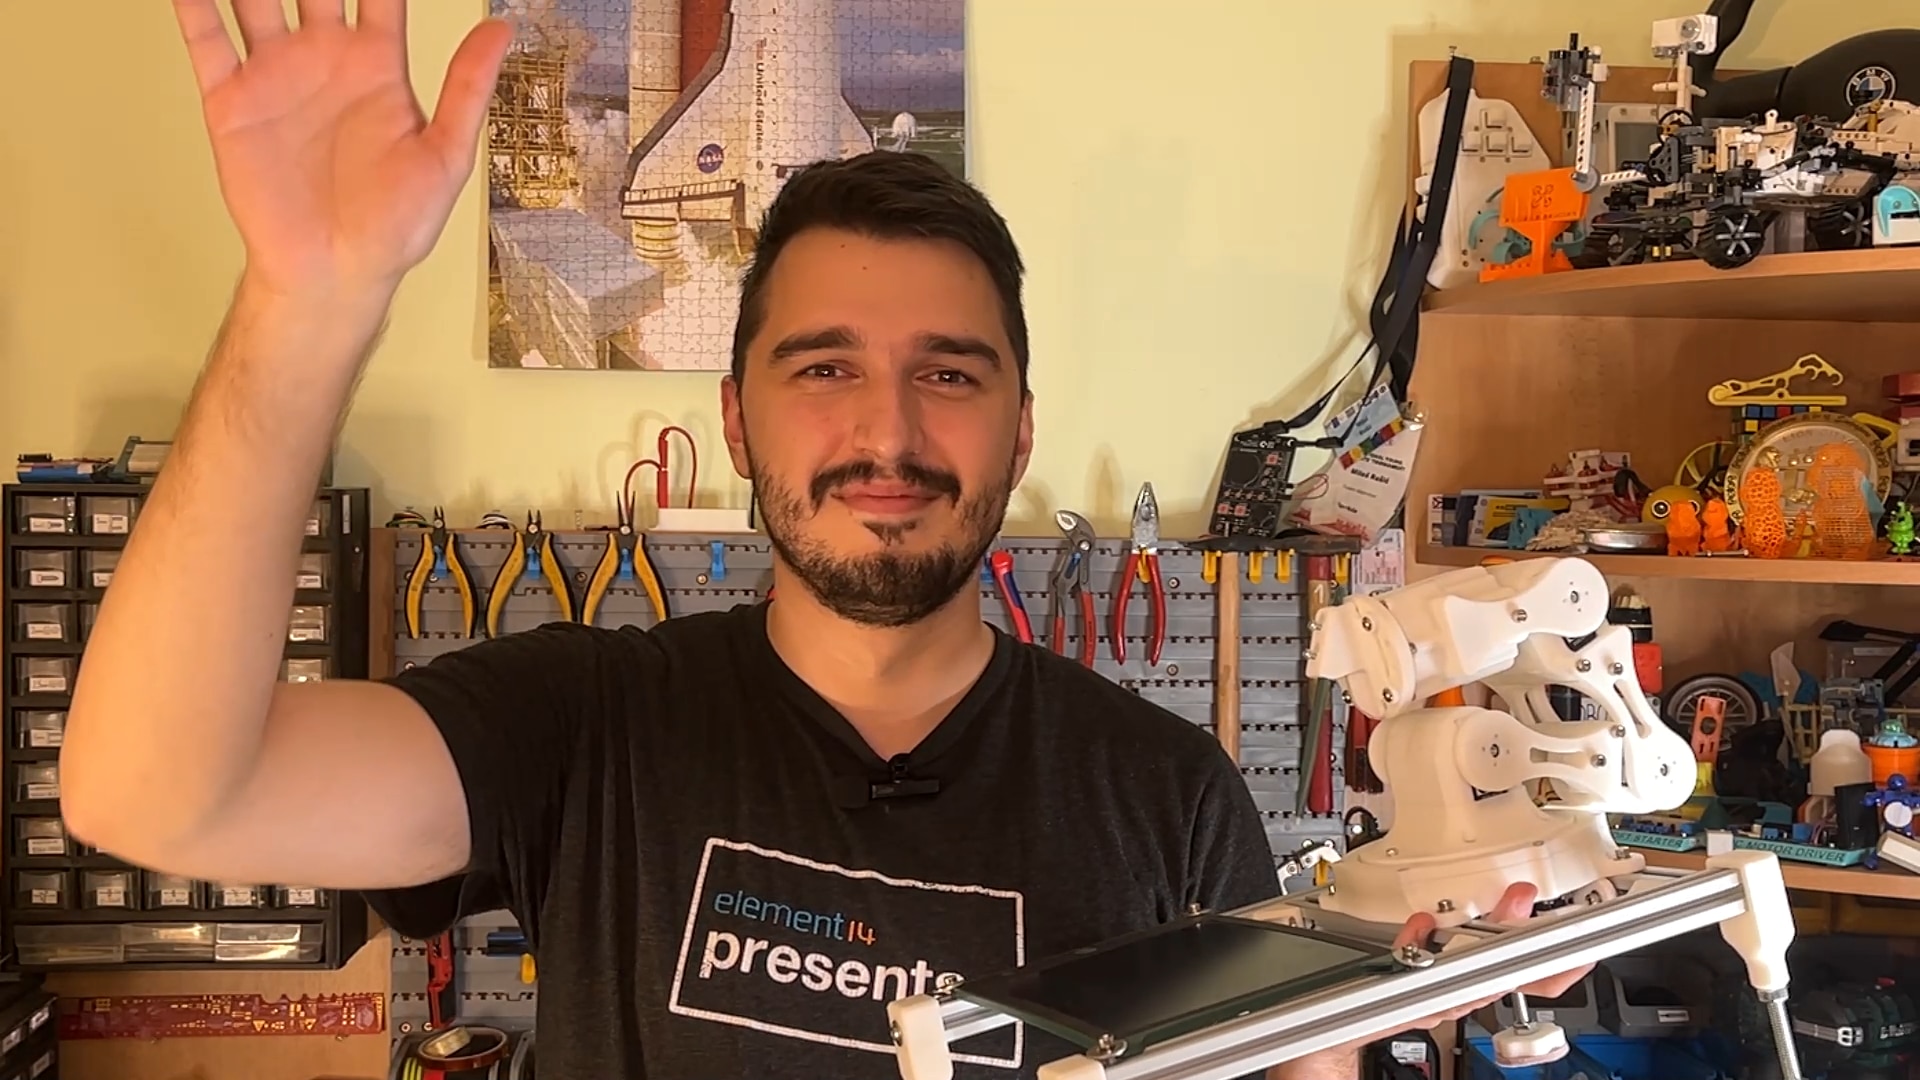
Milos is back with an upgraded version of his low-cost robot arm project! After building a popular 3D-printed arm in 2023, he's now redesigned it with more powerful servos, real bearings, and improved electronics—all while keeping costs down. In this video, he walks through the new build, tests out its movement, and shows how Python scripts can record and replay motion with position feedback. Milos made the robot arm as cheap as possible using 3D printing, servo motors, and marbles for the custom designed bearings. While the robot arm turned out good, he wasn’t satisfied with its performance since the motors were not strong enough. Now we have a bigger and stronger arm, one that is comparable in size to the BRACCIO robot arm from Arduino but with the same goal of making it as low cost as possible!

Watch the Video

You don't have permission to edit metadata of this video.
Edit media
x
image
Upload Preview
image

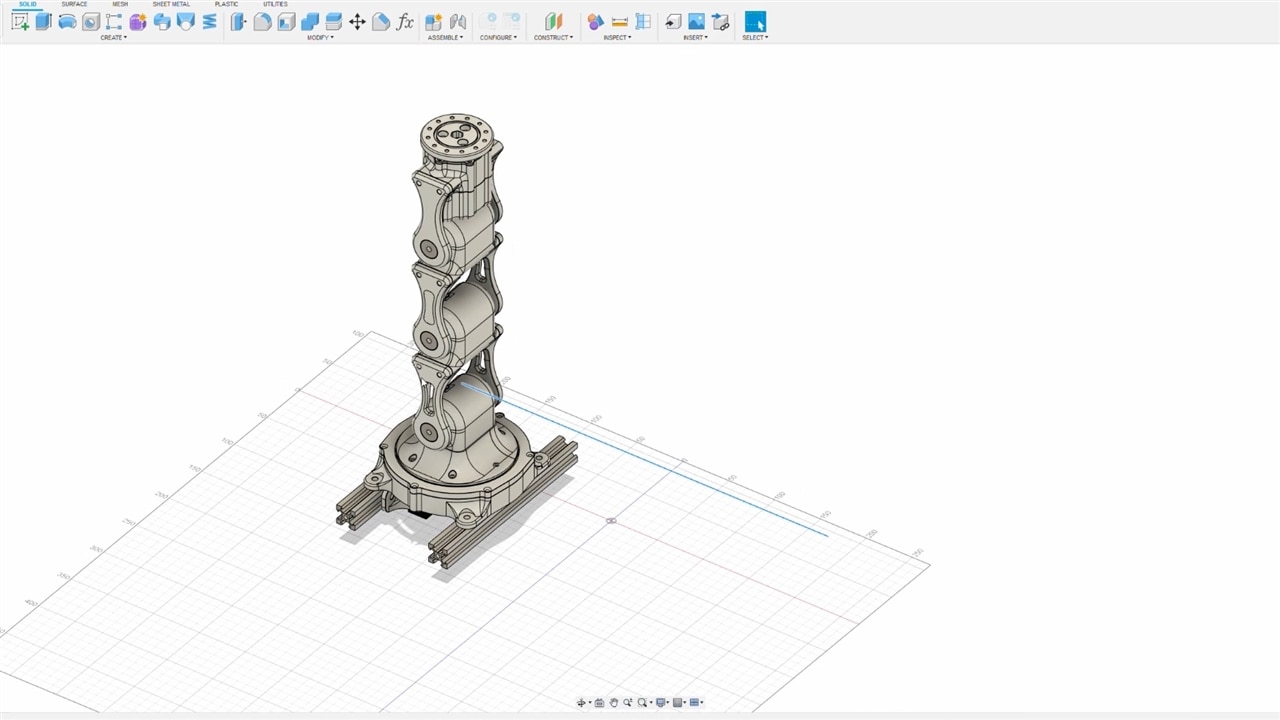
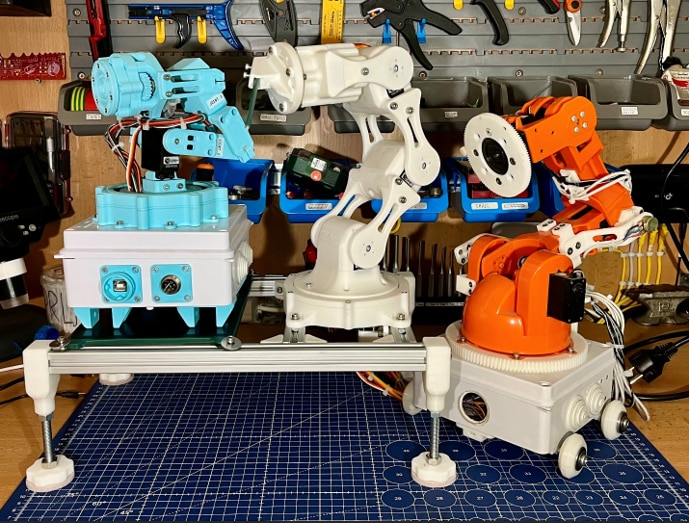
The new arm is trying to keep the same functionality like the last robot arm, but just bigger and stronger. This includes new DFROBOT servo motors with position feedback, actual bearings for each of the joints just to make the whole structure more stable. All of those changes bring it more onto the level of the BRACCIO robot arm since it will have the same size servos but with some benefits like the built in position feedback as well as a sturdier construction. The 3 arms put side by side, are in the picture below, with the new arm in the middle.

image

image

image

The Electronics

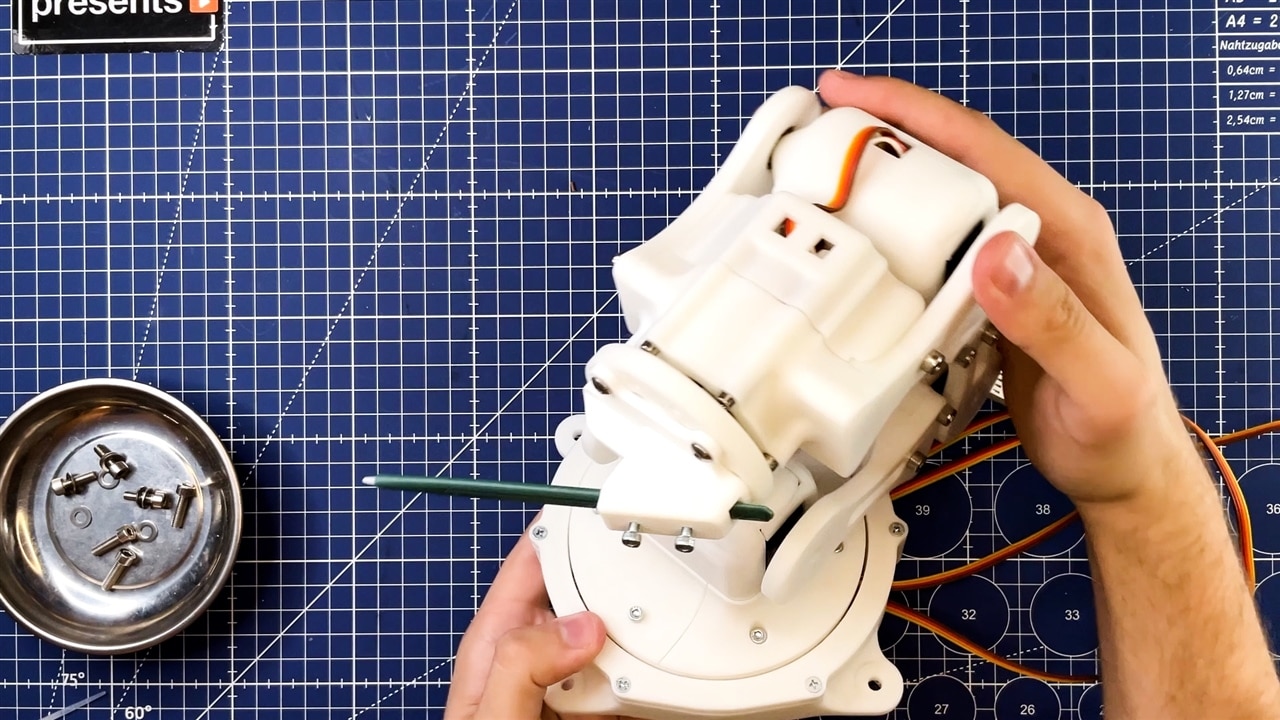
The electronics haven’t changed too much compared to the old, smaller robot arm. The MCU behind the robot arm is a Raspberry Pi Pico, and its main job is to record the data from the servo motors and send them position commands. This time however, Milos did more things on the programming side, he wrote a few Python scripts which can interact with the robot arm to send commands and also record the robot arm movements. This way, the robot arm can be guided by hand and after the recording is done, it can replay everything the user has shown it. Because of the higher current draw of the bigger motors, a bigger relay was used to make sure that the motors are getting sufficient power without anything overheating in the middle.

image

Testing the Arm

image

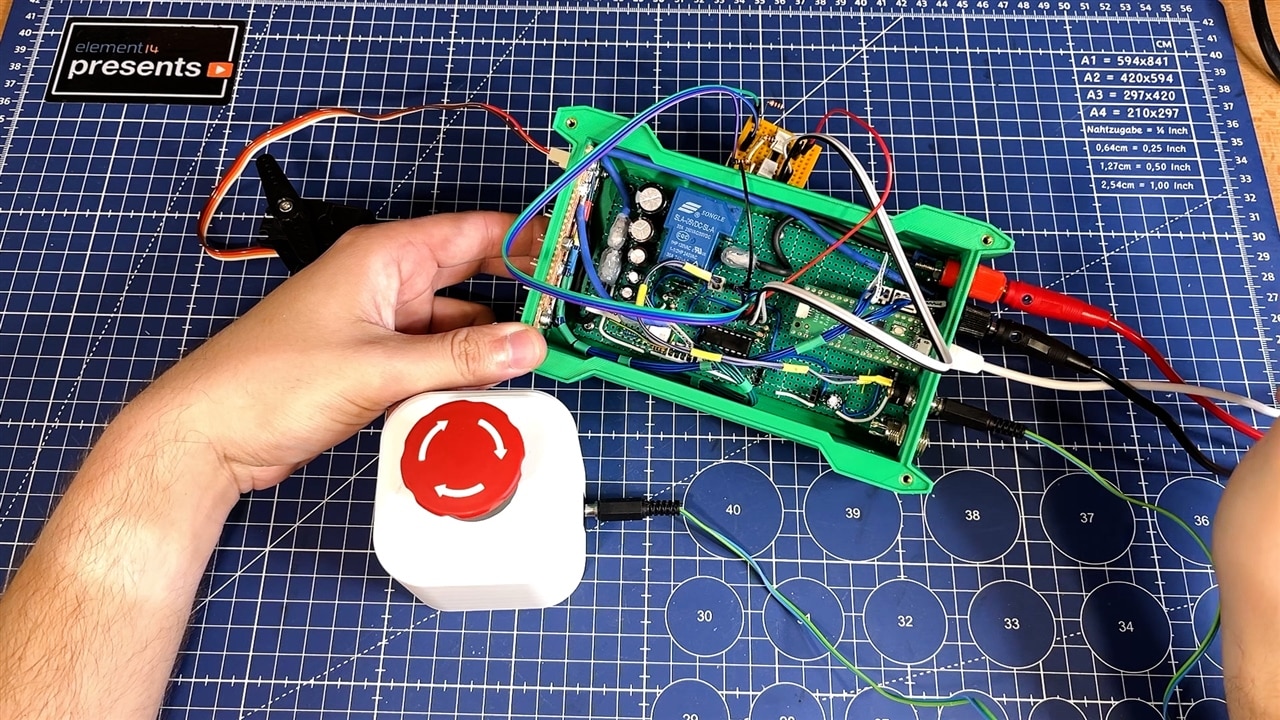
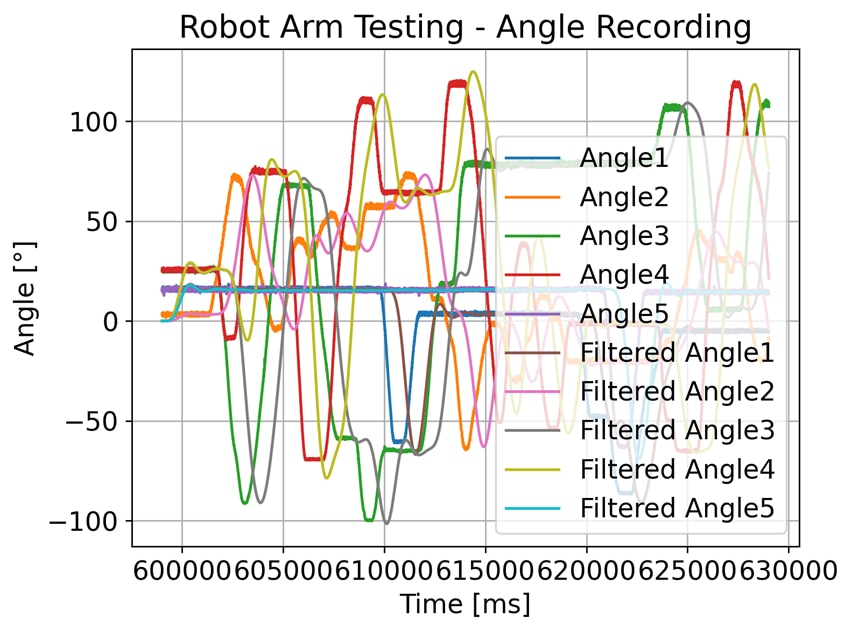
Of course, this was the favourite part for Milos to do, playing around with the finished robot arm. He runs through some basic tests like sending simple move commands to the robot arm, and also recording the data from moving the robot arm by hand. A picture of the collected data during one of those sessions is below.

image

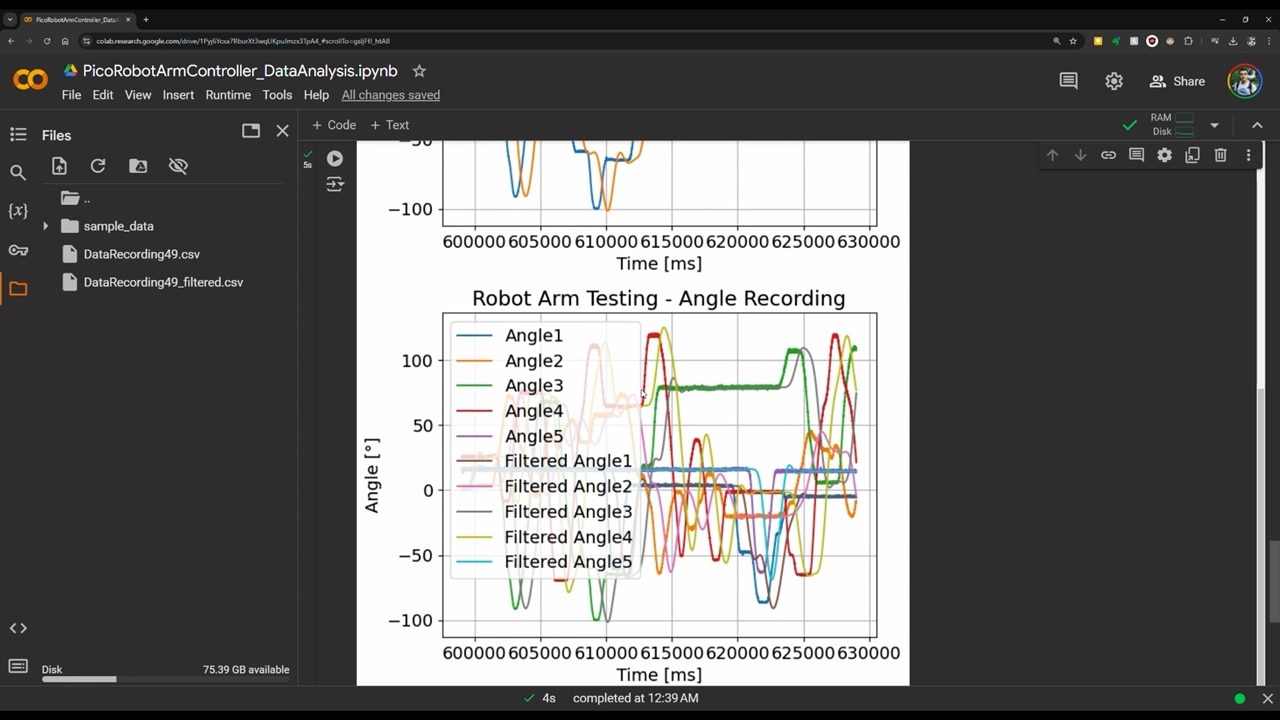
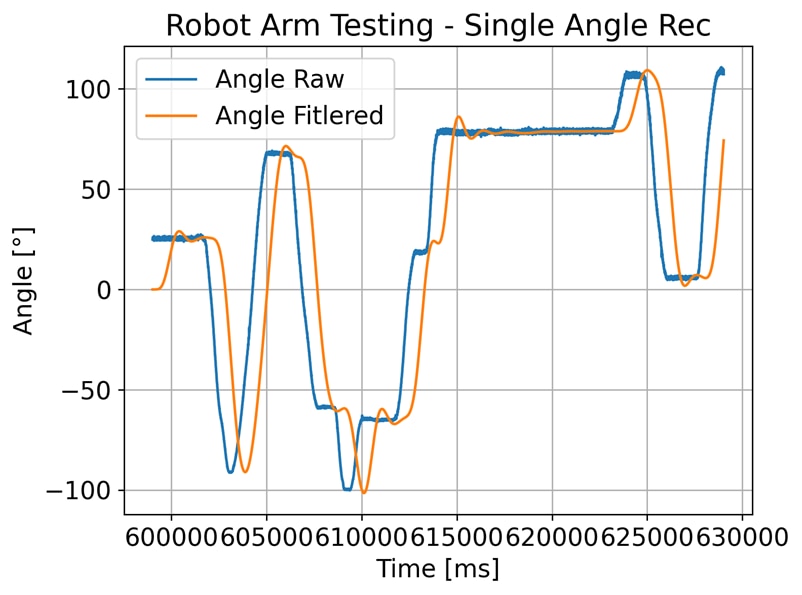
He noticed one thing during testing, and especially when looking at the plotted data, and that’s the amount of noise coming from the potentiometers. Zooming in on one of the signals, we can see this.

image

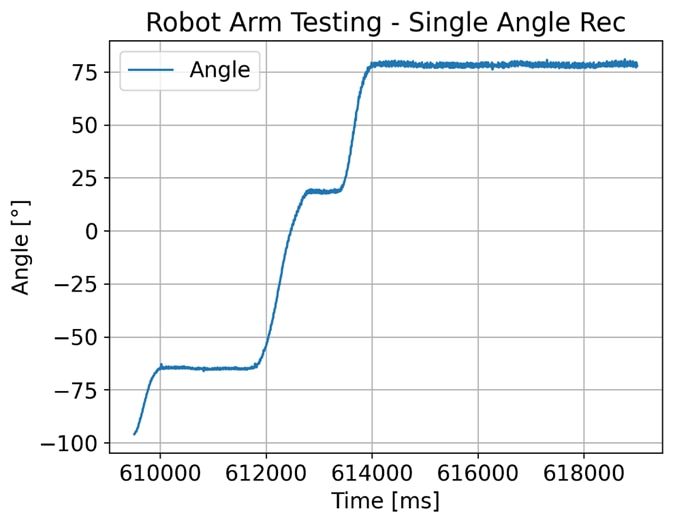
The signal is very noisy, especially when that joint is stationary. To battle that a bit, Milos did some filtering in Python, and from the recorded data, he generated a new CSV file with filtered signals. An example of how the filtering process worked for the signal shown above is shown here:

image

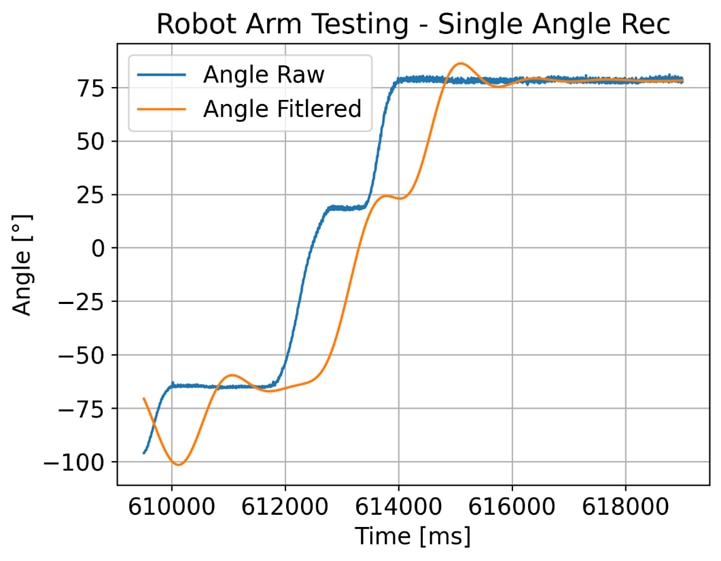
While the filtering for this case was a bit too strong, it doesn’t change the signal too much for a robot arm of this precision, so it’s a better fit than the unfiltered signal. He applied the same filtering algorithm to all of the axis, and this is the comparison of that for all of the joints at once.

image

image

The Finished Product (For Now?)

image

What should Milos consider for the robot arm design? Or are you building one for yourself?

Let us know below.

Downloads and Links

  • CAD and Code
  •  Affordable DIY Robot Arm: A Deep Dive into 3D Printing and Servo Motors -- Episode-628 - with more files and bill of materials. 

Bill of Materials

Product Name Manufacturer Quantity Buy Kit
RASPBERRY PI PICO H RASPBERRY PI 1 Buy Now
DFROBOT SERVO MOTOR DFROBOT 5 Buy Now
5V 18A POWER SUPPLY XP POWER 1 Buy Now
WHITE PLA 3D PRINTING FILAMENT MULTICOMP 1 Buy Now
M3 8 SO12CS Z100 TR FASTENINGS 1 Buy Now
 

Additional Parts

Product Name
Other M3 screws
Aluminum 20x20 profiles
LCD drawing tablet
M8 bolts and nuts
Small bearings

element14 presents

element14 presents  |  About Milos Rasic |  Project Videos

  • robot arm with position feedback
  • robot arm calibration
  • servo motor robot arm
  • dfrobot servo motor
  • homemade robotic arm
  • robotic arm filtering python
  • robot arm pythonc ontrol
  • low cost robot arm
  • diy robotics project
  • robot arm using bearings
  • raspberry pi pico robotics
  • DIY Robot Arm
  • friday_release
  • robot arm with analog feedback
  • robot arm data logging
  • 3d printed robot arm
  • Share
  • History
  • More
  • Cancel
Actions
  • Share
  • More
  • Cancel
  • Sign in to reply
Parents
  • dougw
    dougw 1 month ago

    Great project. I like the teach mode.

    It looks like the arm could be taught to draw something with a spring loaded pen.

    • Cancel
    • Vote Up 0 Vote Down
    • Sign in to reply
    • More
    • Cancel
Comment
  • dougw
    dougw 1 month ago

    Great project. I like the teach mode.

    It looks like the arm could be taught to draw something with a spring loaded pen.

    • Cancel
    • Vote Up 0 Vote Down
    • Sign in to reply
    • More
    • Cancel
Children
  • milosrasic98
    milosrasic98 1 month ago in reply to dougw

    Thanks!

    Spring loaded pen, and a lot of further calibration and tweaking is needed to get it to the actual positions. Gotta make one with absolute encoders, that should make for a really precise teach mode, especially with gravity compensation!

    • Cancel
    • Vote Up 0 Vote Down
    • Sign in to reply
    • More
    • Cancel
  • beacon_dave
    beacon_dave 30 days ago in reply to dougw

    Looked like it was lining up for an ice hockey slap shot there at one point. Perhaps give it a while before attempting a fountain pen Slight smile

    It still amazes me the precision of the linkages in the likes of the Jaquet-Droz 'The Writer' automata to create handwritten script.

    https://en.wikipedia.org/wiki/Jaquet-Droz_automata#The_writer

    • Cancel
    • Vote Up 0 Vote Down
    • Sign in to reply
    • More
    • Cancel
element14 Community

element14 is the first online community specifically for engineers. Connect with your peers and get expert answers to your questions.

  • Members
  • Learn
  • Technologies
  • Challenges & Projects
  • Products
  • Store
  • About Us
  • Feedback & Support
  • FAQs
  • Terms of Use
  • Privacy Policy
  • Legal and Copyright Notices
  • Sitemap
  • Cookies

An Avnet Company © 2025 Premier Farnell Limited. All Rights Reserved.

Premier Farnell Ltd, registered in England and Wales (no 00876412), registered office: Farnell House, Forge Lane, Leeds LS12 2NE.

ICP 备案号 10220084.

Follow element14

  • X
  • Facebook
  • linkedin
  • YouTube