element14 Community
element14 Community
    Register Log In
  • Site
  • Search
  • Log In Register
  • Community Hub
    Community Hub
    • What's New on element14
    • Feedback and Support
    • Benefits of Membership
    • Personal Blogs
    • Members Area
    • Achievement Levels
  • Learn
    Learn
    • Ask an Expert
    • eBooks
    • element14 presents
    • Learning Center
    • Tech Spotlight
    • STEM Academy
    • Webinars, Training and Events
    • Learning Groups
  • Technologies
    Technologies
    • 3D Printing
    • FPGA
    • Industrial Automation
    • Internet of Things
    • Power & Energy
    • Sensors
    • Technology Groups
  • Challenges & Projects
    Challenges & Projects
    • Design Challenges
    • element14 presents Projects
    • Project14
    • Arduino Projects
    • Raspberry Pi Projects
    • Project Groups
  • Products
    Products
    • Arduino
    • Avnet Boards Community
    • Dev Tools
    • Manufacturers
    • Multicomp Pro
    • Product Groups
    • Raspberry Pi
    • RoadTests & Reviews
  • Store
    Store
    • Visit Your Store
    • Choose another store...
      • Europe
      •  Austria (German)
      •  Belgium (Dutch, French)
      •  Bulgaria (Bulgarian)
      •  Czech Republic (Czech)
      •  Denmark (Danish)
      •  Estonia (Estonian)
      •  Finland (Finnish)
      •  France (French)
      •  Germany (German)
      •  Hungary (Hungarian)
      •  Ireland
      •  Israel
      •  Italy (Italian)
      •  Latvia (Latvian)
      •  
      •  Lithuania (Lithuanian)
      •  Netherlands (Dutch)
      •  Norway (Norwegian)
      •  Poland (Polish)
      •  Portugal (Portuguese)
      •  Romania (Romanian)
      •  Russia (Russian)
      •  Slovakia (Slovak)
      •  Slovenia (Slovenian)
      •  Spain (Spanish)
      •  Sweden (Swedish)
      •  Switzerland(German, French)
      •  Turkey (Turkish)
      •  United Kingdom
      • Asia Pacific
      •  Australia
      •  China
      •  Hong Kong
      •  India
      •  Korea (Korean)
      •  Malaysia
      •  New Zealand
      •  Philippines
      •  Singapore
      •  Taiwan
      •  Thailand (Thai)
      • Americas
      •  Brazil (Portuguese)
      •  Canada
      •  Mexico (Spanish)
      •  United States
      Can't find the country/region you're looking for? Visit our export site or find a local distributor.
  • Translate
  • Profile
  • Settings
Project Videos
  • Challenges & Projects
  • element14 presents
  • Project Videos
  • More
  • Cancel
Project Videos
Documents Raspberry Pi AI Tracking Eye of Sauron - AI AL Barad Dur - Episode 665
  • Documents
  • Members
  • Mentions
  • Sub-Groups
  • Tags
  • More
  • Cancel
  • New
Join Project Videos to participate - click to join for free!
Related
Recommended
EMI-Reduction-Techniques
Engagement
  • Author Author: e14phil
  • Date Created: 16 May 2025 8:51 AM Date Created
  • Last Updated Last Updated: 21 May 2025 10:12 PM
  • Views 1508 views
  • Likes 9 likes
  • Comments 12 comments

Raspberry Pi AI Tracking Eye of Sauron - AI AL Barad Dur - Episode 665

Welcome back to element14 presents! In this exciting episode, Lorraine takes on the challenge of making the Eye of Sauron move using LEGO, Raspberry Pi, and machine learning. If you're a fan of intricate builds and innovative tech projects, this is one episode you won't want to miss.

You don't have permission to edit metadata of this video.
Edit media
x
image
Upload Preview
image

The Inspiration Behind the Project

Lorraine has been away for a while, focusing on completing her PhD thesis. To celebrate her achievement, her supervisors, colleagues, friends, and husband gifted her a massive LEGO kit with 10,000 pieces. Over the Christmas holidays, Lorraine built the Eye of Sauron, a project that combines her love for LEGO and her passion for technology.

Congratulations to Dr. Lorraine Underwood from our team and the whole community. 

The Plan: Making the Eye Move

image

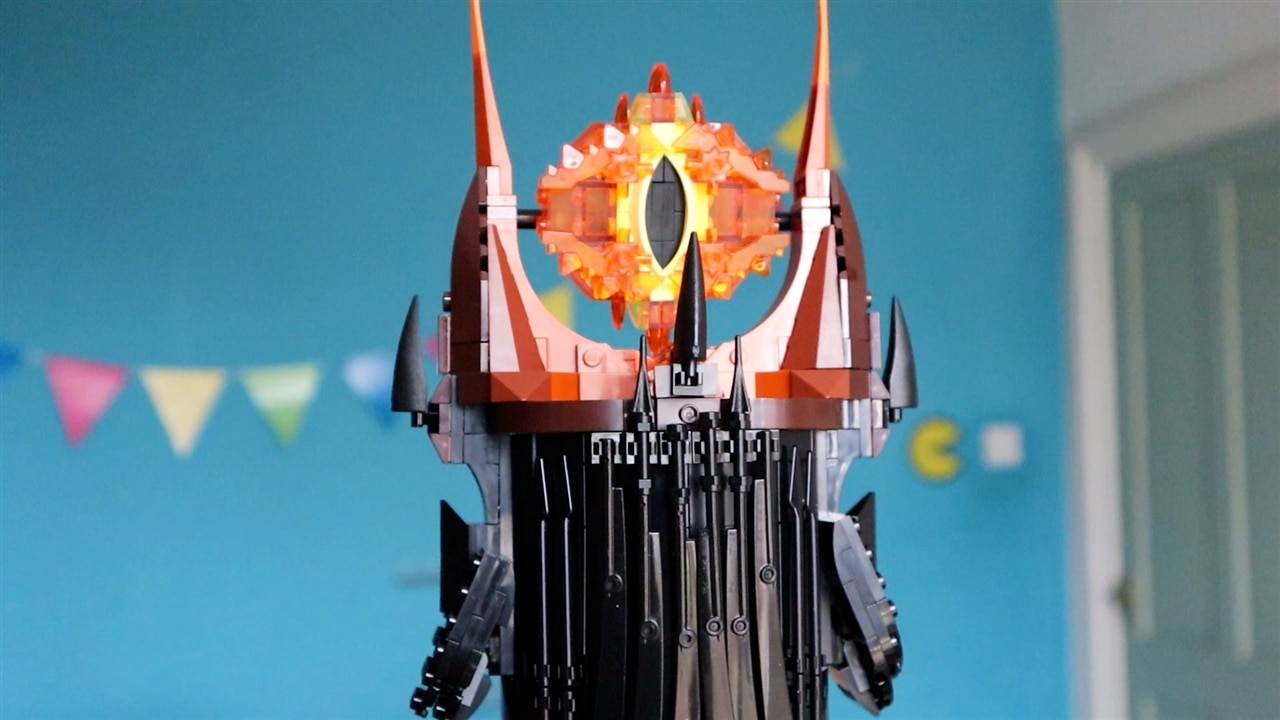
The Eye of Sauron is known for its fiery appearance in the movies, and Lorraine's LEGO version includes a red light block to give it a glowing effect.
But Lorraine wanted to take it a step further by making the eye move. The goal is to add more LEGO bricks to enable the eye to tilt left and right, and up and down, creating the illusion that it's following people across the room.

Adding Machine Learning to the Mix

To achieve this, Lorraine plans to integrate a camera into the structure that can detect faces using machine learning. The camera will lock onto a face and move the eye to follow that person around the room. This adds a layer of interactivity and realism to the project, making it even more impressive.

image

Challenges and Solutions

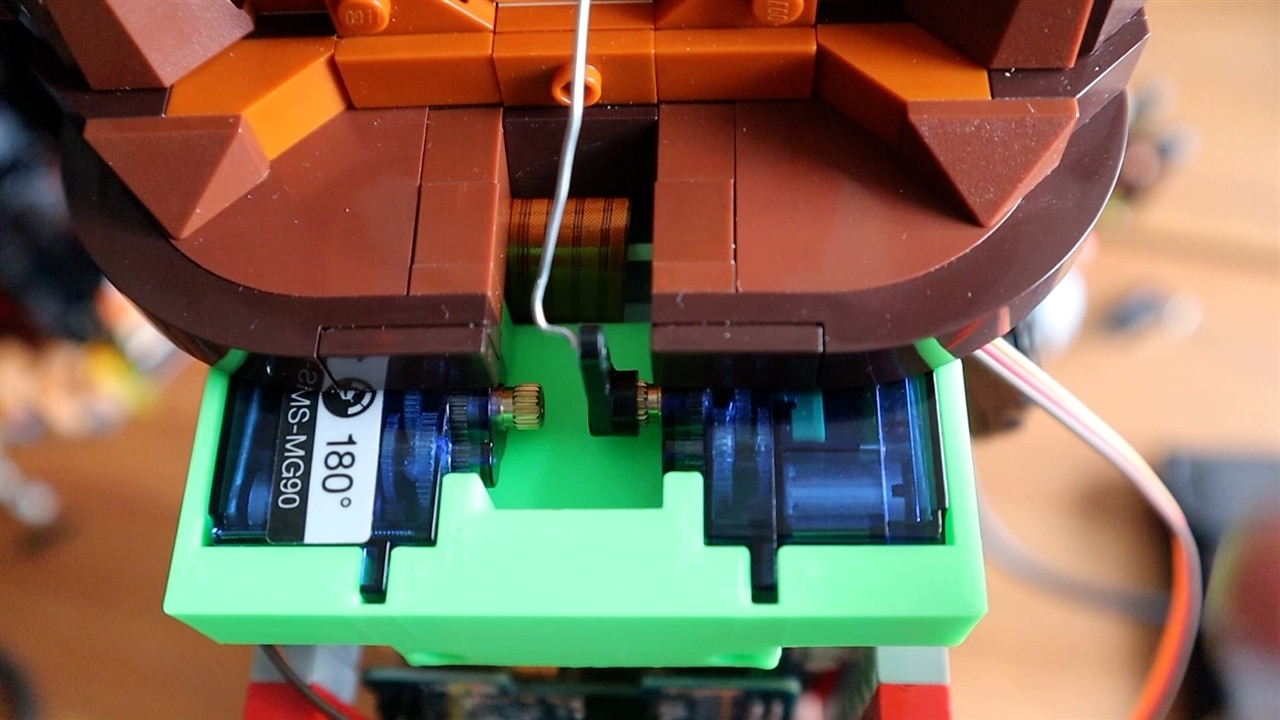
One of the challenges Lorraine faces is hiding the camera within the LEGO structure without drilling or gluing the pieces, which are considered sins in the LEGO community. She explores different options for mounting the servos and ensuring the eye can move freely without hitting any obstacles.

Building the Structure

Lorraine starts by soldering the servo board and configuring the Raspberry Pi to control the servos. She tests different libraries for pose detection and object detection to find the best one for her project. After some trial and error, she settles on a solution that works well for detecting body coordinates.

image

Integrating the Camera and Servos

With the top of the tower modified to allow better movement, Lorraine carefully feeds the camera through the structure, ensuring it remains hidden. She uses double-sided tape and a custom 3D-printed holder to secure the servos and Raspberry Pi in place. The servos are programmed to move the eye based on the coordinates detected by the camera.

Final Adjustments and Testing

Lorraine makes final adjustments to the structure, ensuring everything is securely in place. She calibrates the servos through code, setting the default positions and testing the movement in different directions. The eye successfully follows a person around the room, creating a subtle yet impressive effect.

image

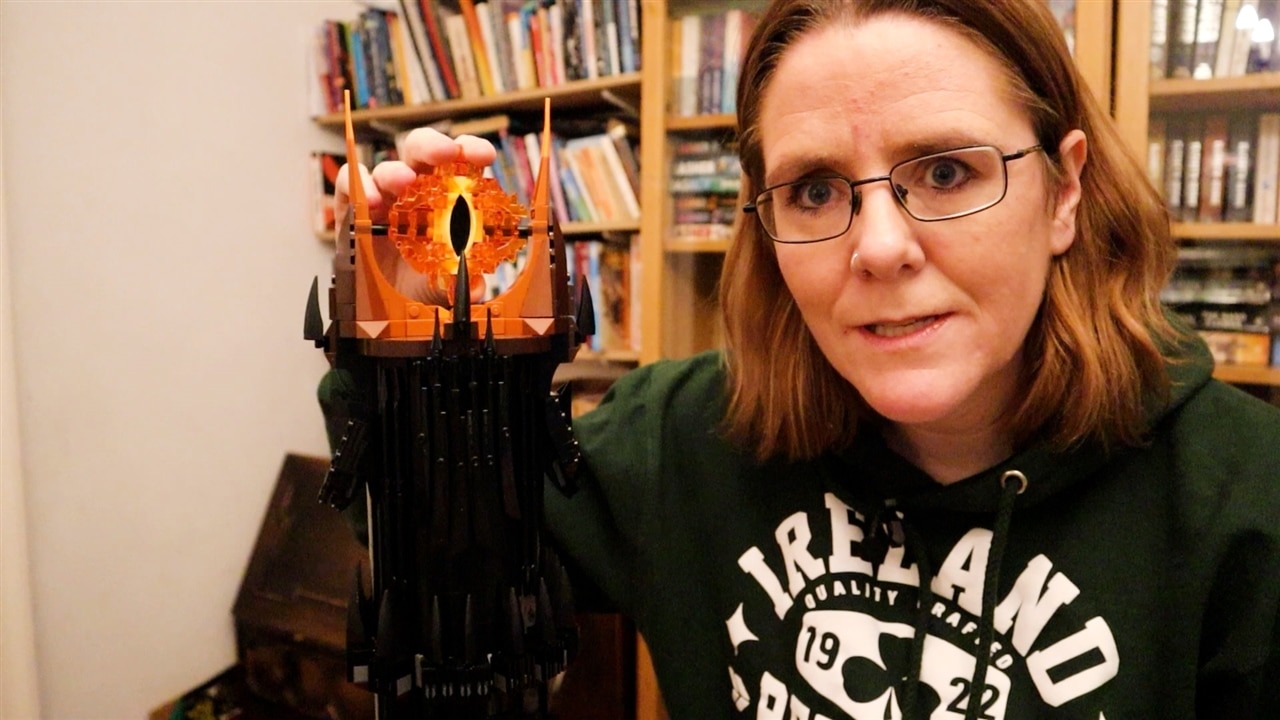
This project showcases Lorraine's skills in 3D printing, Python programming, and camera integration, all while maintaining the integrity of the LEGO build. The Eye of Sauron now not only glows but also follows people around the room, thanks to the clever use of machine learning and servos.

Supporting Files and Links

  • Supporting Code

Join the Conversation

What do you think of this project? How would you have approached it differently? 

Bill of Materials


Part Manufacturer Quantity Buy KitBuy Kit

MULTICOMP PRO Raspberry Pi 5 Starter Kit, 8GB, micro SD 16GB, Case with Fan, HDMI Cable, PSU 5.1V/5.0A UK Plug

Multicomp Pro 1 Buy Now

DFROBOT Servo Motor, Micro, 6 V, 0.17 N-m

DFROBOT 2 Buy Now
RASPBERRY-PI Raspberry Pi AI Camera, 12MP, IMX500 Intelligent Vision Sensor, Raspberry Pi Neural Network Model RASPBERRY-PI 1 Buy Now
ADAFRUIT Raspberry Pi PWM Servo Hat Development Board ADAFRUIT 1 Buy Now


Additional Parts:


Product Name Quantity

LEGO Barad Dur

1

Paper clips

1
  • servo motor
  • LEGO
  • python
  • raspberry pi project
  • Face Detection
  • Raspberry Pi AI Tracking Eye of Sauron
  • 3D Printing
  • element14 presents
  • machine learning
  • rpi
  • ai camera
  • Eye of Sauron
  • friday_release
  • AI AL Barad Dur
  • Share
  • History
  • More
  • Cancel
Actions
  • Share
  • More
  • Cancel
  • Sign in to reply
Parents
  • beacon_dave
    beacon_dave 1 month ago

    Could you perhaps redo the eye and use a round display in the centre of a translucent resin 3D print with additional embedded RGB LEDs around the outside to create an animated flaming eye with reactive pupil ?
    image

    • Cancel
    • Vote Up 0 Vote Down
    • Sign in to reply
    • More
    • Cancel
  • beacon_dave
    beacon_dave 1 month ago in reply to beacon_dave

    There are possibly enough separate translucent bricks to add small LEDs per brick to get them to illuminate separately

    rear view (rotated 90°):
    image

    front view:
    image

    The Lord of the Rings: Barad-dûrTm (3/3) 79.58MB (PDF)

    Might take a bit of experimentation to light a brick optimally e.g. surface mount to the rear or drill and insert into the centre of the brick. Edges could be blacked out before assembly so as to reduce brick-to-brick light spill or left as is to allow bleed for a smoother blend.

    A small LCD display could really animate the shape of the vertical pupil in the centre (and colour) and allow for more realistic fire effects but need to have a smooth transition from LCD back to LEGO. Perhaps have it mounted behind a thin layer of clear material to soften the effect and keep the front flush with the four genuine LEGO parts (highlighted in green) bonded to the front of it to bring it back to the world of Lego.

    Looks like you can get spares so no need to modify the original parts if you want to revert.

    • Cancel
    • Vote Up 0 Vote Down
    • Sign in to reply
    • More
    • Cancel
Comment
  • beacon_dave
    beacon_dave 1 month ago in reply to beacon_dave

    There are possibly enough separate translucent bricks to add small LEDs per brick to get them to illuminate separately

    rear view (rotated 90°):
    image

    front view:
    image

    The Lord of the Rings: Barad-dûrTm (3/3) 79.58MB (PDF)

    Might take a bit of experimentation to light a brick optimally e.g. surface mount to the rear or drill and insert into the centre of the brick. Edges could be blacked out before assembly so as to reduce brick-to-brick light spill or left as is to allow bleed for a smoother blend.

    A small LCD display could really animate the shape of the vertical pupil in the centre (and colour) and allow for more realistic fire effects but need to have a smooth transition from LCD back to LEGO. Perhaps have it mounted behind a thin layer of clear material to soften the effect and keep the front flush with the four genuine LEGO parts (highlighted in green) bonded to the front of it to bring it back to the world of Lego.

    Looks like you can get spares so no need to modify the original parts if you want to revert.

    • Cancel
    • Vote Up 0 Vote Down
    • Sign in to reply
    • More
    • Cancel
Children
  • beacon_dave
    beacon_dave 1 month ago in reply to beacon_dave

    Typo (can't edit) - the front view is rotated by 90° and not the rear as indicated.

    • Cancel
    • Vote Up 0 Vote Down
    • Sign in to reply
    • More
    • Cancel
element14 Community

element14 is the first online community specifically for engineers. Connect with your peers and get expert answers to your questions.

  • Members
  • Learn
  • Technologies
  • Challenges & Projects
  • Products
  • Store
  • About Us
  • Feedback & Support
  • FAQs
  • Terms of Use
  • Privacy Policy
  • Legal and Copyright Notices
  • Sitemap
  • Cookies

An Avnet Company © 2025 Premier Farnell Limited. All Rights Reserved.

Premier Farnell Ltd, registered in England and Wales (no 00876412), registered office: Farnell House, Forge Lane, Leeds LS12 2NE.

ICP 备案号 10220084.

Follow element14

  • X
  • Facebook
  • linkedin
  • YouTube