element14 Community
element14 Community
    Register Log In
  • Site
  • Search
  • Log In Register
  • About Us
  • Community Hub
    Community Hub
    • What's New on element14
    • Feedback and Support
    • Benefits of Membership
    • Personal Blogs
    • Members Area
    • Achievement Levels
  • Learn
    Learn
    • Ask an Expert
    • eBooks
    • element14 presents
    • Learning Center
    • Tech Spotlight
    • STEM Academy
    • Webinars, Training and Events
    • Learning Groups
  • Technologies
    Technologies
    • 3D Printing
    • FPGA
    • Industrial Automation
    • Internet of Things
    • Power & Energy
    • Sensors
    • Technology Groups
  • Challenges & Projects
    Challenges & Projects
    • Design Challenges
    • element14 presents Projects
    • Project14
    • Arduino Projects
    • Raspberry Pi Projects
    • Project Groups
  • Products
    Products
    • Arduino
    • Avnet Boards Community
    • Dev Tools
    • Manufacturers
    • Multicomp Pro
    • Product Groups
    • Raspberry Pi
    • RoadTests & Reviews
  • Store
    Store
    • Visit Your Store
    • Choose another store...
      • Europe
      •  Austria (German)
      •  Belgium (Dutch, French)
      •  Bulgaria (Bulgarian)
      •  Czech Republic (Czech)
      •  Denmark (Danish)
      •  Estonia (Estonian)
      •  Finland (Finnish)
      •  France (French)
      •  Germany (German)
      •  Hungary (Hungarian)
      •  Ireland
      •  Israel
      •  Italy (Italian)
      •  Latvia (Latvian)
      •  
      •  Lithuania (Lithuanian)
      •  Netherlands (Dutch)
      •  Norway (Norwegian)
      •  Poland (Polish)
      •  Portugal (Portuguese)
      •  Romania (Romanian)
      •  Russia (Russian)
      •  Slovakia (Slovak)
      •  Slovenia (Slovenian)
      •  Spain (Spanish)
      •  Sweden (Swedish)
      •  Switzerland(German, French)
      •  Turkey (Turkish)
      •  United Kingdom
      • Asia Pacific
      •  Australia
      •  China
      •  Hong Kong
      •  India
      •  Korea (Korean)
      •  Malaysia
      •  New Zealand
      •  Philippines
      •  Singapore
      •  Taiwan
      •  Thailand (Thai)
      • Americas
      •  Brazil (Portuguese)
      •  Canada
      •  Mexico (Spanish)
      •  United States
      Can't find the country/region you're looking for? Visit our export site or find a local distributor.
  • Translate
  • Profile
  • Settings
Clustered MCUs
  • Challenges & Projects
  • Project14
  • Clustered MCUs
  • More
  • Cancel
Clustered MCUs
Blog tinyMonster AIO Robot (part-2)
  • Blog
  • Forum
  • Documents
  • Events
  • Polls
  • Files
  • Members
  • Mentions
  • Sub-Groups
  • Tags
  • More
  • Cancel
  • New
Join Clustered MCUs to participate - click to join for free!
  • Share
  • More
  • Cancel
Group Actions
  • Group RSS
  • More
  • Cancel
Engagement
  • Author Author: mahmood.hassan
  • Date Created: 13 Oct 2018 5:18 PM Date Created
  • Views 886 views
  • Likes 4 likes
  • Comments 0 comments
  • clusteredmcuch
  • irda
  • arduino project
  • arm mbed
  • arduino ide
  • esp-8266
  • stm32 nucleo
  • l298hn
  • nrf24l01
  • 16x2 lcd
Related
Recommended

tinyMonster AIO Robot (part-2)

mahmood.hassan
mahmood.hassan
13 Oct 2018

Previous Post: tinyMonster AIO Robot (part-1)

In the previous post I have mentioned all the important hardware and software required for this robot. In this post I am sharing System Block Diagram, required libraries and how to setup them. How to program ESP and Nucleo Board in Arduino IDE. Also I will share how to store and use files in SPIFFS of ESP-12E (part of ESP8266 family).

System Block Diagram

It is showing the programming function implemented inside nucleo and esp module. Also it is also indicating how different hardware modules will work together in FIG:1. Similarly main hardware modules of RF remote are shown in FIG:2.

.

image

FIG 1: tinyMonster Robot Block Diagram

image

FIG:2 RF Remote Block Diagram
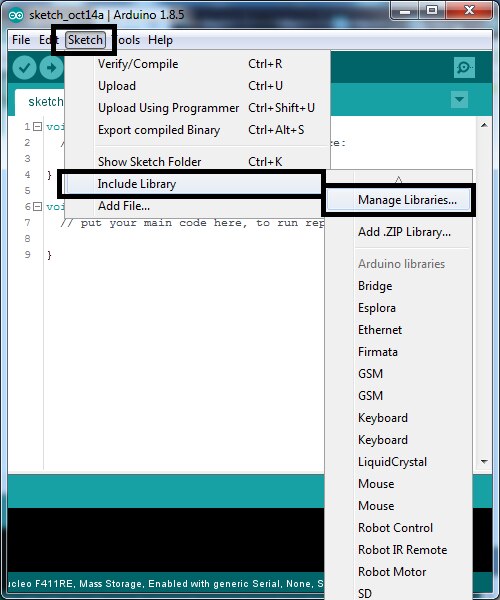
Board Manager

To program ESP and NUCLEO board using arduino IDE please follow the following guides:

  • ESP8266
  • STM32


Required Libraries

  • ESP-12E
    • ESP8266WiFi
    • ESPUI
    • Adafruit_MQTT
    • Adafruit_MQTT_Client
    • Ticker
    • ESP8266mDNS
    • ArduinoOTA
    • FS
    • Hash
    • ESPAsyncTCP
    • ESPAsyncWebServer
    • SPIFFSEditor
    • Arduino
    • ArduinoJson
    • stdlib_noniso
  • NUCLEO
    • LiquidCrystal
    • IRremote
    • Ultrasonic
    • SPI
    • nRF24L01
    • RF24
    • printf

* IMPORTANT: use only stable version of ArduinoJson 5.13.3. Do not use beta version it will not work with ESP code.

  • ESP8266 libraries


{gallery} Arduino Libraries

image

IMAGE TITLE: Arduino Libraries Manager

image

IMAGE TITLE: ArduinoJson (only use stable version not the latest beta version)

image

IMAGE TITLE: AdafruitMQTT

image

IMAGE TITLE: ESPAsyncTCP and ESPAsyncWebserver (important for ESPUI)

image

IMAGE TITLE: ESPUI (for more detail: https://github.com/s00500/ESPUI  )

image

IMAGE TITLE:IRremote

image

IMAGE TITLE: RF24

image

IMAGE TITLE: Ultrasonic


Board Setting

I am using generic ESP-12E module. To program it using Arduino IDE first of install its core using Arduino board manager. After that you can select ESP board. Other setting to program generic ESP module are shown in FIG.3. Here COM-13 is port at which my USB to Serial is connected to program ESP-12E. You need to select COM port at which your ESP module is connected. Similarly after installing STM32 core using board manager you will be able to select NUCLEO board and other required settings are shown in FIG.4.

image

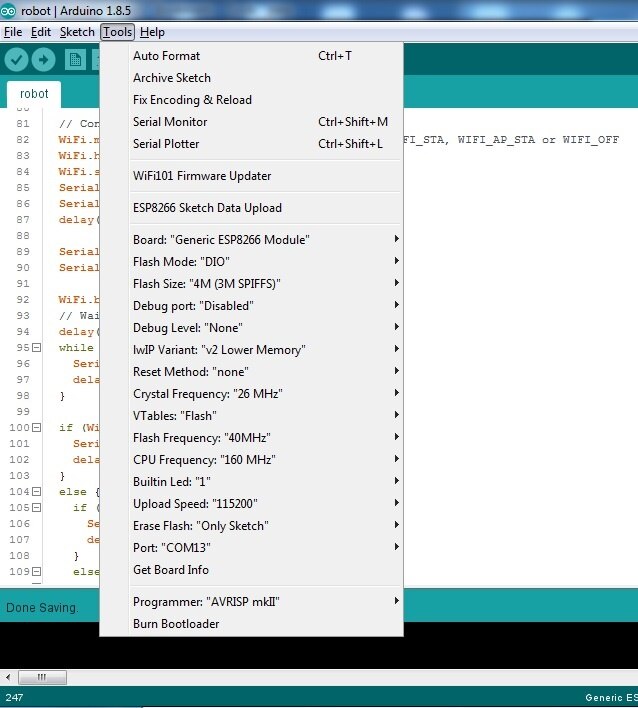
FIG.3: ESP-12E module setting

image

FIG.4: NUCLEO STM32F411RE setting

ESP8266 SPIFFS

When we use ESP module as a web server there are two ways of saving webpages:

1) Program Memory (1M)

2) SPIFFS (3M)

To host small data we can use program memory but to host few HTML pages with CSS style and JavaScript it is better to use SPIFFS memory to store website data. Data store in SPIFFS remain there even if u program it. You can access and edit SPIFFS file through code. Usually this part of memory is used to store static data (No or Very rare changing). Web pages are static data only so its better to store it in SPIFFS memory.

There is a Arduino tool to directly store data in SPIFFS memory of ESP without any programming. Complete guide how to install it in Arduino IDE is given in link below OR you can directly download it from Download page and after extraction the jar file should be placed at following path <sketchbook directory>/tools/ESP8266FS/tool/esp8266fs.jar>.

GUIDE

  • https://github.com/esp8266/arduino-esp8266fs-plugin

DOWNLOAD

  • https://github.com/esp8266/arduino-esp8266fs-plugin/releases

After successfully installing ESP data uploader you will be able to see this option in Arduino menubar >> Tools >> ESP8266 Sketch Data Upload as shown in FIG.5.

image


.

.

.

............

  • Sign in to reply
element14 Community

element14 is the first online community specifically for engineers. Connect with your peers and get expert answers to your questions.

  • Members
  • Learn
  • Technologies
  • Challenges & Projects
  • Products
  • Store
  • About Us
  • Feedback & Support
  • FAQs
  • Terms of Use
  • Privacy Policy
  • Legal and Copyright Notices
  • Sitemap
  • Cookies

An Avnet Company © 2025 Premier Farnell Limited. All Rights Reserved.

Premier Farnell Ltd, registered in England and Wales (no 00876412), registered office: Farnell House, Forge Lane, Leeds LS12 2NE.

ICP 备案号 10220084.

Follow element14

  • X
  • Facebook
  • linkedin
  • YouTube