


VidorBitstream
Part of the intent of the VidorScout project is to take advantage of the FPGA code that Arduino has provided and modify it for a particular purpose. It is unknown at this time whether this is possible since not all of the released FPGA code has been provided by Arduino for the MKR Vidor 4000, so it will be a matter of working with what is available.
However, Arduino recently posted the VidorBitstrem code which has the majority of the FPGA code used in the VidorPeripherials and VidoGraphics examples. To compile the VidorBitstream code, a few steps are required.
Related Posts:
VidorScout - MKR Vidor 4000 Mobile Robot: Intro
VidorScout - MKR Vidor 4000 Mobile Robot: Camera QR Code Recognition
VidorScout - MKR Vidor 4000 Mobile Robot: Assembly and Test
CAUTION: Perform these steps at your own risk. The MKR Vidor 4000 is still consider in Beta and the VidorBitstream is not complete and loading a Vidor 4000 with the VidorBitstream could case the VidorGraphics examples to no longer function. There is a known issue concerning a licensing issue with a UART on the Vidor 4000 when using Quartus II Lite to build the code, so if this code is loaded on the board, the communication with the FPGA will be slowed way down causing the graphics to not behave properly.
Intel Quartus Prime (includes Nios II EDS)
To edit and synthesis the Intel Cyclone 10 LP code for the Vidor 4000, the Intel Quartus Prime (includes Nios II EDS) software needs to be downloaded an installed. Intel provides a Lite 18.1 version that is free to download and use but is a couple of steps behind the latest release. This includes the Intel Quartus Prime development environment, Nios II Embedded Design Suite, ModelSim Starter Edition and much more.
To download the Quartus II software, a login is require for the Intel site. After registering and the email confirmation is sent, the software can be downloaded from the following link:
http://fpgasoftware.intel.com/?edition=lite
The MKR Vidor 4000 has a Intel Cyclone 10 LP FPGA so this is the only one required to select for the download.
Go Programming Language Install
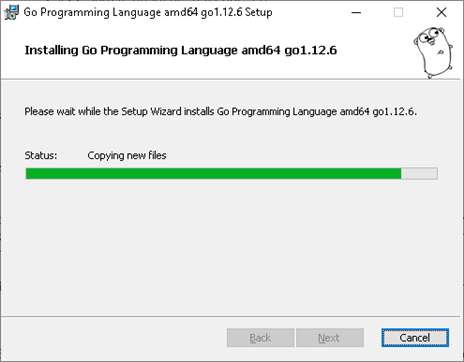
The VidorBitstream as a requirement to use the Go Programming Language to build a particular package. If Go is not already installed, then it will need to be downloaded and installed prior to building the VidorBitstream code.
Go can be downloaded from the following:
Once downloaded, run the installer to install the Go Language files.
Download VidorBitstrem
Once the Quartus II and related software as well as Go are installed, the VidorBitstrem can be downloaded from the Arduino vidor-libraries GitHub page:
https://github.com/vidor-libraries/VidorBitstream/tree/release/projects
This can be done either via a downloaded .zip file or using git in Git Bash on Windows 10.
Using git, this can be performed by using "git clone"
$ git clone https://github.com/vidor-libraries/VidorBitstream.git
Cloning into 'VidorBitstream'...
remote: Enumerating objects: 5626, done.
remote: Total 5626 (delta 0), reused 0 (delta 0), pack-reused 5626
Receiving objects: 100% (5626/5626), 11.38 MiB | 5.24 MiB/s, done.
Resolving deltas: 100% (2842/2842), done.
Nios II Command Shell
Once the VidorBitstream bits have been downloaded, open the Nios II Command Shell which will be used to compile the code
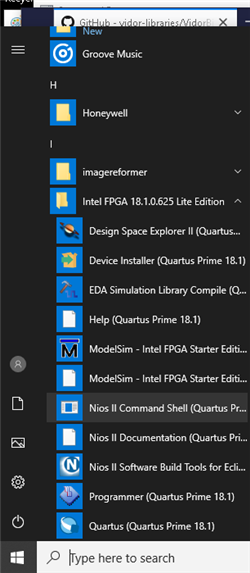
In windows, go to the Window Icon and select Nios II Command Shell ( Quartus Prime 18.1)
This will open a Command Shell which acts like a Linux Console.
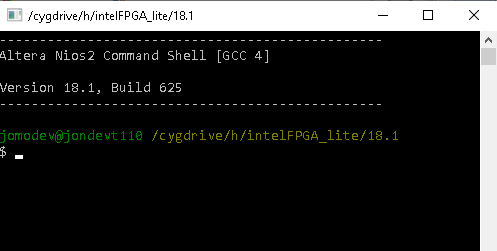
NOTE: The path in the Nios II Command Shell starts with "cygdrive" and then the driver letter and the rest of the directory structure, "h" in this case.
Set the PATH environment variable
To run the build on the VidorBistream code, the PATH variable must be set to include the VidorBitstream/TOOLS/scripts folder using the Nois II Command Shell.
$ PATH=$PATH:/cygdrive/h/Development/Arduino_config/MKR_Vidor_4000/fpga/VidorBitstream/TOOLS/scripts
Set file permissions (Windows 10)
In Windows 10, the file permissions are set correctly for the VidorBitstream files in the Nios II Command Shell, so these will need to be change as follows:
1. Change directories to either the VidorBistream folder or one previous to it.
$ cd /cygdrive/h/Development/Arduino_config/MKR_Vidor_4000/fpga/VidorBistream
2. Run the 'chmod' tool to recursively change the VidorBitstream file permissions.
$ chmod -R a+rw *
Quartus Patches.
Prior to building the VidorBitstream code, a set of patches need to be installed via a provided patch script.
Navigate to the VidorBitstream/TOOLS/scripts directory and run the apply_quartus_patches.sh script
   $ cd /cygdrive/h/Development/Arduino_config/MKR_Vidor_4000/fpga/VidorBitstream/TOOLS/scripts

   $ apply_quartus_patches.sh
$ cd ../makeCompositeBinary
$  go build -o makeCompositeBinary make_composite_binary.go
Build makeCompositeBinary using Go
The last step to complete before building the VidorBitstream code is to compile the makeCompositeBinary code using the Go Language.
This is located under TOOLS/makeCompositeBinary, so from the previous step, just 'cd' back one directory to get to the makeCompositeBinary and then Go.
   $ cd ../makeCompositeBinary

   $  go build -o makeCompositeBinary make_composite_binary.go
VidorBitstream projects
Under the VidorBitstream/projects directory, there are a number of projects, however only the MKRVIDOR4000_graphics and MKRVIDOR4000_peripherals will be used in this project.
me@computer/cygdrive/h/Development/Arduino_config/MKR_Vidor_4000/fpga/VidorBitstream/projects
$ dir
MKRVIDOR4000_graphics     MKRVIDOR4000_template_bare
MKRVIDOR4000_pacman       MKRVIDOR4000_template_mbox
MKRVIDOR4000_peripherals
Change directories to a folder to run the build_all.sh script to build the code.
MKRVIDOR4000_graphic is used in this example.
cd /cygdrive/h/Development/Arduino_config/MKR_Vidor_4000/fpga/VidorBitstream/projects/MKRVIDOR4000_graphics
Run the build_all.sh script to build the code.
$ build_all.sh
This will take a bit of time to complete, but id successful the output should look like the following.
This resulted in the following for me:
[code]Info: Quartus Prime Shell was successful. 0 errors, 352 warnings
    Info: Peak virtual memory: 4626 megabytes
    Info: Processing ended: Sat Jun 22 02:28:30 2019
    Info: Elapsed time: 00:06:33
    Info: Total CPU time (on all processors): 00:00:05
create ram + flash app.ttf
Jun 22, 2019 2:28:30 AM - (INFO) elf2flash: args = --input=build/software/MKRVIDOR4000_graphics/MKRVIDOR4000_graphics_lite.elf --output=build/output_files/MKRVIDOR4000_graphics_lite.flash --base=0x008E0000 --end=0x008FFFFF --verbose --save
Jun 22, 2019 2:28:30 AM - (FINE) elf2flash: Starting
Jun 22, 2019 2:28:30 AM - (FINE) elf2flash: Done
projects
ip
cp: omitting directory './ip/GFX/arduino/Vidor_GFX/examples'
cp: omitting directory './ip/QUAD_ENCODER/arduino/VidorEncoder/examples'
cp: omitting directory './ip/NEOPIXEL/arduino/VidorNeopixel/examples'
cp: omitting directory './ip/MIPI_RX_ST/arduino/VidorCamera/examples'[/code]
NOTE: I am not certain what the "omitting directory" message mean and have posted this on the GitHub page.
If the build is successful, a number of files will be populated in the 'build/output_files' directory.
NOTE: The app.ttf and MKRVIDOR4000_graphics_lite.flash can be used to flash the MKR Vidor 4000
me@computer cygdrive/h/Development/Arduino_config/MKR_Vidor_4000/fpga/VidorBitstream/projects/MKRVIDOR4000_graphics
$ ls build/output_files/
MKRVIDOR4000_graphics_lite.asm.rpt
MKRVIDOR4000_graphics_lite.bin
MKRVIDOR4000_graphics_lite.done
MKRVIDOR4000_graphics_lite.fit.rpt
MKRVIDOR4000_graphics_lite.fit.smsg
MKRVIDOR4000_graphics_lite.fit.summary
MKRVIDOR4000_graphics_lite.flash
MKRVIDOR4000_graphics_lite.flow.rpt
MKRVIDOR4000_graphics_lite.jam
MKRVIDOR4000_graphics_lite.jbc
MKRVIDOR4000_graphics_lite.jdi
MKRVIDOR4000_graphics_lite.map.rpt
MKRVIDOR4000_graphics_lite.map.smsg
MKRVIDOR4000_graphics_lite.map.summary
MKRVIDOR4000_graphics_lite.pin
MKRVIDOR4000_graphics_lite.pof
MKRVIDOR4000_graphics_lite.rbf
MKRVIDOR4000_graphics_lite.sld
MKRVIDOR4000_graphics_lite.sof
MKRVIDOR4000_graphics_lite.sta.rpt
MKRVIDOR4000_graphics_lite.sta.summary
MKRVIDOR4000_graphics_lite.ttf
app.ttf
signature.h
Run an Example
To test the code, the 'app.ttf' file can be copied to the Arduino Library VidorGraphics/src directory and then compile and load an example.
NOTE: Ensure to backup the existing code prior to copying the file over.
me@computer /cygdrive/h/Development/Arduino_config/MKR_Vidor_4000/fpga/VidorBitstream/projects/MKRVIDOR4000_graphics

$ cp build/output_files/app.ttf /cygdrive/c/Users/jomodev/Documents/Arduino/libraries/VidorGraphics/src/app.ttf
I made an edit to the VidorDrawLogo example recompiled it using the app.ttf from the VidorBitstream exercise and I did not see an issue with the output of the example on the HDMI port. I added a Red Circle that goes from Left to Right to show the code has changed since the last post.
This is a quick video showing the result.
This example shown how to take the VidorBitstream code and build it using the Intel Quartus II and Nios II tools.
NOTE: At the end of the VidorBitstream build process, there will be a distrib directory under the project directory:
Ex: VidorBitstream\distrib\MKRVIDOR4000_graphics
This can be used to replace the existing VidorGraphics code under the Arduino IDE libraries file, however after doing so has rendered my board's graphics as non functional. Neither the Camera, the Log nor NeoPixel examples are working now and I am still trying to recover my board to it's previous state.
Updated 7/5/2019
There is a fork of the Arduino provided VidorBitstream code that bypasses the limitation of the Arduino code and uses the Vidor FPGA to resolve the issue. With this code, the VidorGraphics examples work fine as does the camera.
Use this code instead of the Arduino provided VidorBitstream if there are issues.
https://github.com/MinatsuT/VidorBitstream_GFX_HW
Restore FPGA Bootloader
If the MKR Vidor 4000 Graphics are no longer working, there is a RestoreFPGABootloader example that can be downloaded from the vidor-libraries Github repo.
https://github.com/vidor-libraries/VidorBoot
Just download the VidorBoot zipped repo, load it into the Arduino IDE libraries and then run the VidorBoot->RestoreFPGABootloader example to restore the board back to the original, or at least a functional, state. All of the VidorGraphics examples worked again after performing this.
Next step, show the QR code recognition capability of the MKR Vidor 4000.
Top Comments