element14 Community
element14 Community
    Register Log In
  • Site
  • Search
  • Log In Register
  • Members
    Members
    • Benefits of Membership
    • Achievement Levels
    • Members Area
    • Personal Blogs
    • Feedback and Support
    • What's New on element14
  • Learn
    Learn
    • Learning Center
    • eBooks
    • STEM Academy
    • Webinars, Training and Events
    • More
  • Technologies
    Technologies
    • 3D Printing
    • FPGA
    • Industrial Automation
    • Internet of Things
    • Power & Energy
    • Sensors
    • More
  • Challenges & Projects
    Challenges & Projects
    • Design Challenges
    • element14 presents
    • Project14
    • Arduino Projects
    • Raspberry Pi Projects
    • More
  • Products
    Products
    • Arduino
    • Dev Tools
    • Manufacturers
    • Raspberry Pi
    • RoadTests & Reviews
    • Avnet Boards Community
    • More
  • Store
    Store
    • Visit Your Store
    • Choose Another Store
      • Europe
      •  Austria (German)
      •  Belgium (Dutch, French)
      •  Bulgaria (Bulgarian)
      •  Czech Republic (Czech)
      •  Denmark (Danish)
      •  Estonia (Estonian)
      •  Finland (Finnish)
      •  France (French)
      •  Germany (German)
      •  Hungary (Hungarian)
      •  Ireland
      •  Israel
      •  Italy (Italian)
      •  Latvia (Latvian)
      •  
      •  Lithuania (Lithuanian)
      •  Netherlands (Dutch)
      •  Norway (Norwegian)
      •  Poland (Polish)
      •  Portugal (Portuguese)
      •  Romania (Romanian)
      •  Russia (Russian)
      •  Slovakia (Slovak)
      •  Slovenia (Slovenian)
      •  Spain (Spanish)
      •  Sweden (Swedish)
      •  Switzerland(German, French)
      •  Turkey (Turkish)
      •  United Kingdom
      • Asia Pacific
      •  Australia
      •  China
      •  Hong Kong
      •  India
      •  Korea (Korean)
      •  Malaysia
      •  New Zealand
      •  Philippines
      •  Singapore
      •  Taiwan
      •  Thailand (Thai)
      • Americas
      •  Brazil (Portuguese)
      •  Canada
      •  Mexico (Spanish)
      •  United States
      Can't find the country/region you're looking for? Visit our export site or find a local distributor.
  • Translate
  • Profile
Proving Science
  • Challenges & Projects
  • Project14
  • Proving Science
  • More
  • Cancel
Proving Science
Blog Laser Microscope Experiment
  • Blog
  • Forum
  • Documents
  • Events
  • Members
  • Mentions
  • Sub-Groups
  • Tags
  • More
  • Cancel
  • New
Proving Science requires membership for participation - click to join
Blog Post Actions
  • Subscribe by email
  • More
  • Cancel
  • Share
  • Subscribe by email
  • More
  • Cancel
Group Actions
  • Group RSS
  • More
  • Cancel
Engagement
  • Author Author: vishwasn
  • Date Created: 14 Sep 2020 7:49 AM Date Created
  • Views 338 views
  • Likes 7 likes
  • Comments 6 comments
  • provingsciencech
Related
Recommended

Laser Microscope Experiment

vishwasn
vishwasn
14 Sep 2020

Proving Science

Enter Your Electronics & Design Project for a chance to win a $200 shopping cart!

Submit an EntrySubmit an Entry  Back to homepage
Project14 Home
Monthly Themes
Monthly Theme Poll


LASER stands for Light Amplification by Stimulated Emission of Radiation. As the name itself says it's a powerful beam of light which is coherent and monochromatic. Let's see how we can make a microscope with this key-chain LASER.


PLEASE DON'T FORGET TO VOTE ME IN CONTESTS. THANKS FOR YOUR PRECIOUS TIME.


Step 1: Parts Required


Parts Required


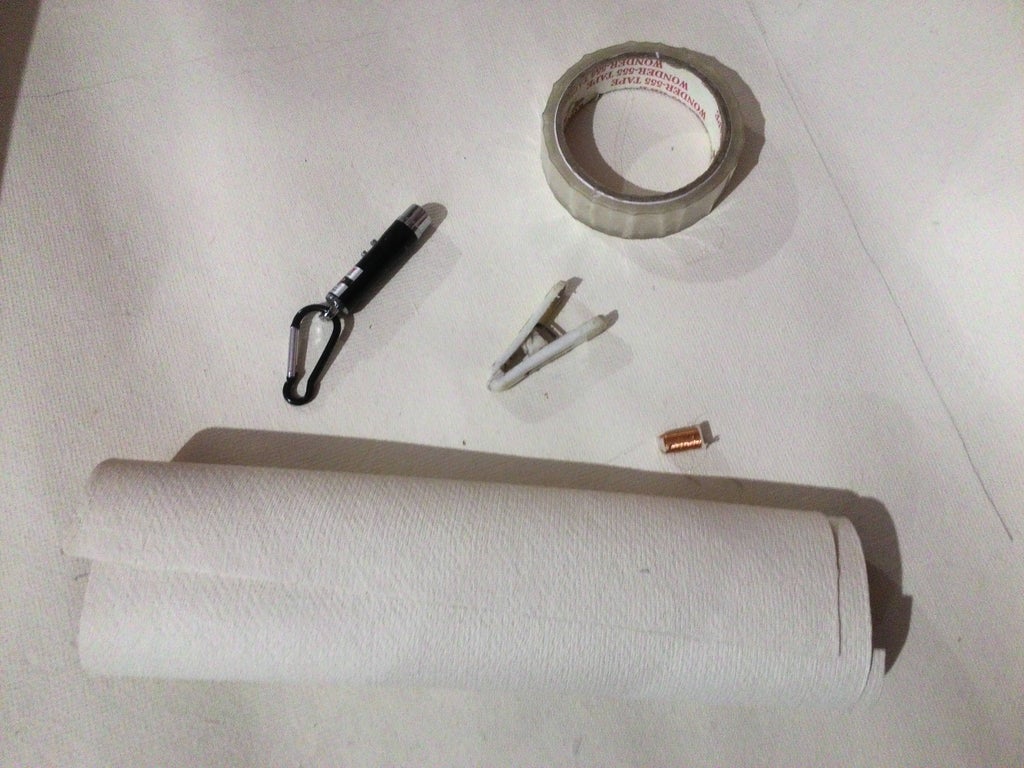
1. Key-chain LASER (You can use any LASER source such as laser diode .etc)

2. Injection Syringe(Be careful with the needle).

3.Cellophane Tape

4.Thin Copper Wire(Extracted from old electronic clock)

5.Stands for holding the things

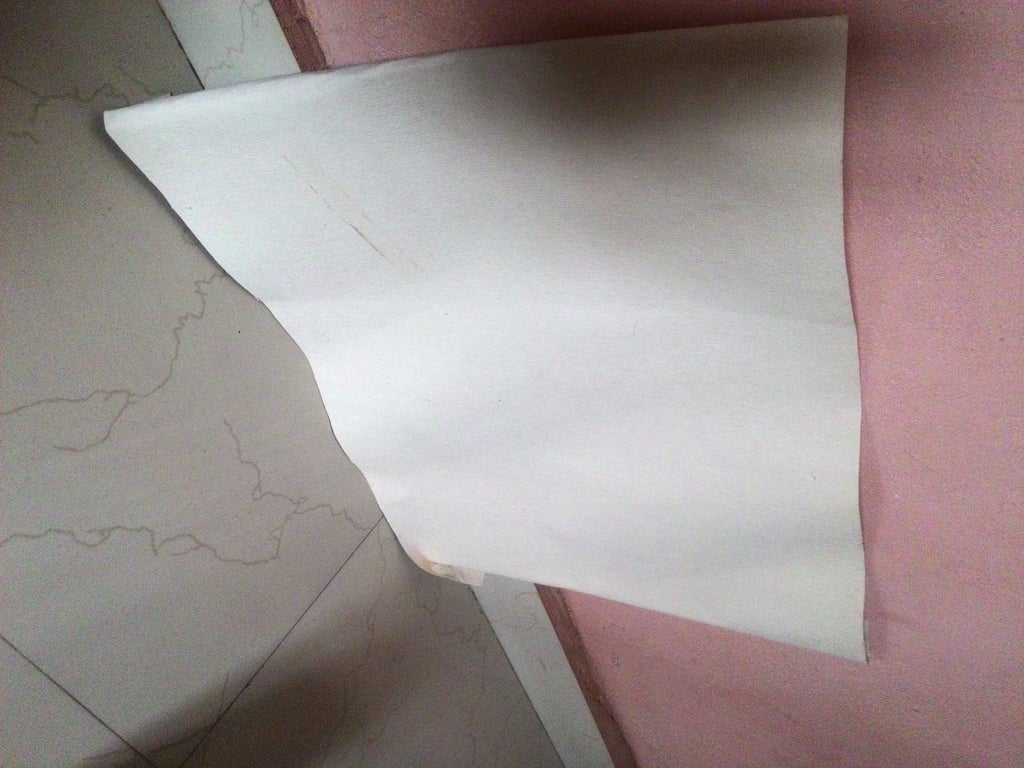
6.White Chart paper for Screen

7.Clip for holding the button of key-chain laser


Step 2: 1. Laser Microscope


1. Laser Microscope


1. Laser Microscope


1. Laser Microscope


Take the syringe and fill it with pond water (To see aquatic creatures in micro-level) then place it on a stand or on top of a box.

Wrap the chart paper around a cardboard to make a screen.

Place the screen about 1 meter from the syringe arrangement.

With the help of clip hold the button of key-chain laser in ON position.

Secure the laser setup with the help of a stand or a box.

Place this setup 2 feet away from the syringe arrangement.


Step 3: Setting Up...!


Setting Up...!


Now we have arranged everything let's put the things into action.

Gently press the syringe piston such a way that water droplet should come at the end of the needle. This is the main part of our microscope i.e Convex lens. Yes, water droplet acts as a convex lens.

Focus the laser beam such that it should point the water droplet. Due to refraction from the water lens, it projects the laser light directly on the screen. This will form a red patch on the screen.


Step 4: The Final Show: Microbes.

You don't have permission to edit metadata of this video.
Edit media
x
Upload Preview


The Final Show: Microbes.


Turn off the light and see the nice view of the microbes. You can use this experimental setup to check the purity of drinking water, boiled water etc.

Now you can observe microbes, bacteria etc. roaming around the tiny droplet of water.

You need the patience to watch this, of course in order to see wonders of science you need patience.

Anonymous

Top Comments

  • balearicdynamics
    balearicdynamics over 1 year ago +2

    Maybe a video may help. Anyway, the proof of concept is interesting, but I think it is more probable you see the diffraction of the microbes instead of the cells themselves. The reason that probably you…

  • dubbie
    dubbie over 1 year ago +2

    Looks a fun experiment. I might have to try this out.


    Dubbie

  • jw0752
    jw0752 over 1 year ago +1

    Fascinating simple experiment. I've got to try this. Even if the images aren't perfect it will be neat just to confirm the presence of the little beaties in the water.


    John

Parents
  • jw0752
    jw0752 over 1 year ago

    Fascinating simple experiment. I've got to try this. Even if the images aren't perfect it will be neat just to confirm the presence of the little beaties in the water.


    John

    • Cancel
    • Vote Up +1 Vote Down
    • Reply
    • More
    • Cancel
  • vishwasn
    vishwasn over 1 year ago in reply to jw0752

    Thanks. I have added the video please checkout.

    Regards,

    Vishwas Navada B,

    VU3TEY,

    https://vishwasnavada.github.io

    • Cancel
    • Vote Up 0 Vote Down
    • Reply
    • More
    • Cancel
Comment
  • vishwasn
    vishwasn over 1 year ago in reply to jw0752

    Thanks. I have added the video please checkout.

    Regards,

    Vishwas Navada B,

    VU3TEY,

    https://vishwasnavada.github.io

    • Cancel
    • Vote Up 0 Vote Down
    • Reply
    • More
    • Cancel
Children
No Data
element14 Community

element14 is the first online community specifically for engineers. Connect with your peers and get expert answers to your questions.

  • Members
  • Learn
  • Technologies
  • Challenges & Projects
  • Products
  • Store
  • About Us
  • Feedback & Support
  • FAQs
  • Terms of Use
  • Privacy Policy
  • Legal and Copyright Notices
  • Sitemap
  • Cookies

An Avnet Company © 2022 Premier Farnell Limited. All Rights Reserved.

Premier Farnell Ltd, registered in England and Wales (no 00876412), registered office: Farnell House, Forge Lane, Leeds LS12 2NE.

ICP 备案号 10220084.

Follow element14

  • Facebook
  • Twitter
  • linkedin
  • YouTube