Intro
How far can a passive RFID tag be detected?
RFID and NFC are pretty big topics, but this blog simply explores the RFID read range of various RFID technologies. RFID read range is intentionally short, but my application interests lie in slightly longer ranges.
I have collected a few RFID reader modules and tags to explore potential applications. To do this I will assemble and program or test four reader modules. I do not have a specific application I am developing yet - that may happen once I understand the features of the various technologies better. I have a vague idea that an RFID technology could be used by my cats to do something such as open a door or dispense some food or turn on a light or turn on a fountain, but my cats lead a pretty pampered life and aren't too interested in learning tricks.
The RFID technologies I have on hand are based on 3 different frequencies: 125 KHz, 134.2 KHz and 13.56 MHz.
The main section of this blog will present the RFID reader designs I am using in my exploration. I will include another section that looks at RFID signals on an oscilloscope. The final wrap up will discuss potential applications. The project will include several PCB designs, a couple of 3-D printed case designs and some basic firmware to read RFID data.
125 KHz RFID
I have 2 RFID readers that can read 125 KHz tags:
This USB reader simply acts like a USB keyboard to send tag ID numbers that it reads to a computer:

Any text application can display the data. I am using Notepad just to show the text in a large font.
RDM6300
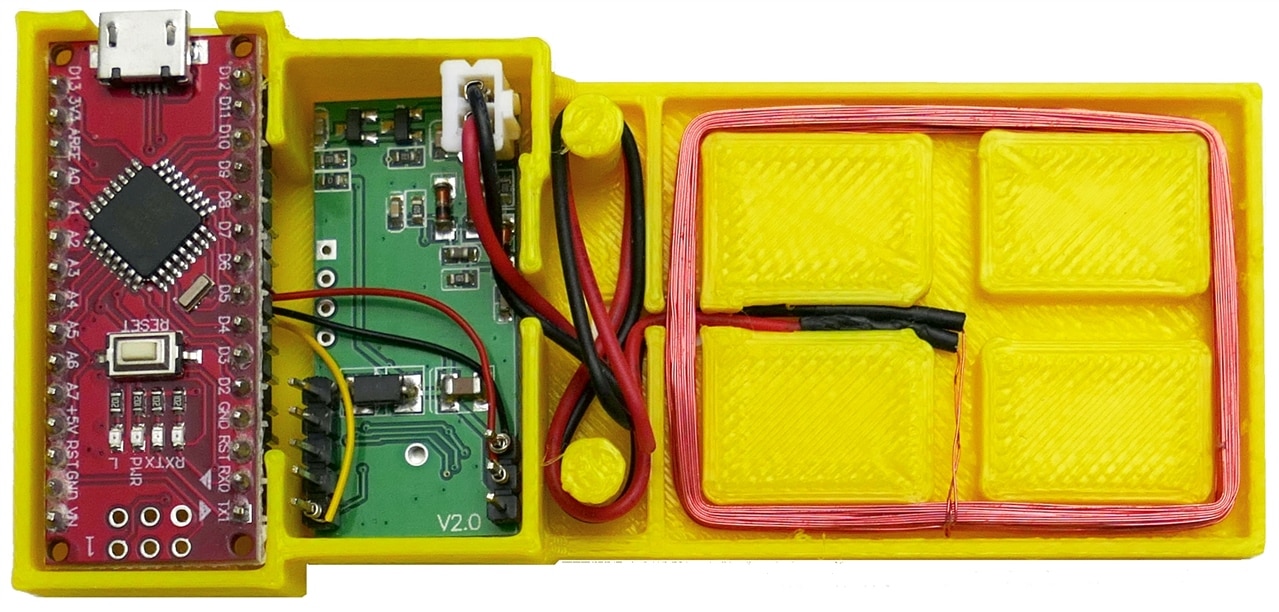
The second 125 KHz reader I have is an RD6300 module. This Module simply outputs serial ASCII data using a 5 volt UART. I have connected it to an Arduino Nano compatible MCU, which in turn is connected via USB to a PC running PuTTY.

This very simple connection is made using wire-wrap in the following 3-D printed module:
Here is the Nano code:
/*======================================================
// Author : Doug Wong
// Project : Arduino Nano connected to an RDM6300
// Description : RDM6300 125KHz RFID Card Reader Module
//======================================================
*/
#include <SoftwareSerial.h>
const int BUFFER_SIZE = 14; // RFID DATA FRAME FORMAT: 1byte head (value: 2), 10byte data (2byte version + 8byte tag), 2byte checksum, 1byte tail (value: 3)
const int DATA_SIZE = 10; // 10byte data (2byte version + 8byte tag)
const int DATA_VERSION_SIZE = 2;
const int DATA_TAG_SIZE = 8; // 8byte tag
const int CHECKSUM_SIZE = 2; // 2byte checksum
SoftwareSerial ssrfid = SoftwareSerial(2,8); //RDM6300 TX pin to D2 Arduino Board.
uint8_t buffer[BUFFER_SIZE]; // used to store an incoming data frame
int buffer_index = 0;
void setup() {
Serial.begin(9600);
ssrfid.begin(9600);
ssrfid.listen();
Serial.println("INIT DONE");
}
void loop() {
 if (ssrfid.available() > 0){
 bool call_extract_tag = false;

 int ssvalue = ssrfid.read(); // read
 if (ssvalue == -1) {         // no data was read
 return;
 }
 if (ssvalue == 2) {          // RDM630/RDM6300 found a tag => tag incoming
 buffer_index = 0;
 } else if (ssvalue == 3) {   // tag has been fully transmitted
 call_extract_tag = true;     // extract tag at the end of the function call
 }
 if (buffer_index >= BUFFER_SIZE) { // checking for a buffer overflow (It's very unlikely that an buffer overflow comes up!)
 Serial.println("Error: Buffer overflow detected!");
 return;
 }

 buffer[buffer_index++] = ssvalue; // everything is alright => copy current value to buffer
 if (call_extract_tag == true) {
 if (buffer_index == BUFFER_SIZE) {
 unsigned tag = extract_tag();
 } else {                         // something is wrong... start again looking for preamble (value: 2) buffer_index = 0;
 return;
 }
 }
 }
}
unsigned extract_tag() {
 uint8_t msg_head = buffer[0];
 uint8_t *msg_data = buffer + 1; // 10 byte => data contains 2byte version + 8byte tag
 uint8_t *msg_data_version = msg_data;
 uint8_t *msg_data_tag = msg_data + 2;
 uint8_t *msg_checksum = buffer + 11; // 2 byte
 uint8_t msg_tail = buffer[13];
 // print message that was sent from RDM630/RDM6300
 Serial.println("--------");
 Serial.print("Message-Head: ");
 Serial.println(msg_head);
 Serial.println("Message-Data (HEX): ");
 for (int i = 0; i < DATA_VERSION_SIZE; ++i) {
 Serial.print(char(msg_data_version[i]));
 }
 Serial.println(" (version)");
 for (int i = 0; i < DATA_TAG_SIZE; ++i) {
 Serial.print(char(msg_data_tag[i]));
 }
 Serial.println(" (tag)");
 Serial.print("Message-Checksum (HEX): ");
 for (int i = 0; i < CHECKSUM_SIZE; ++i) {
 Serial.print(char(msg_checksum[i]));
 }
 Serial.println("");
 Serial.print("Message-Tail: ");
 Serial.println(msg_tail);
 Serial.println("--");
 long tag = hexstr_to_value(msg_data_tag, DATA_TAG_SIZE);
 Serial.print("Extracted Tag: ");
 Serial.println(tag);
 long checksum = 0;
 for (int i = 0; i < DATA_SIZE; i+= CHECKSUM_SIZE) {
 long val = hexstr_to_value(msg_data + i, CHECKSUM_SIZE);
 checksum ^= val;
 }
 Serial.print("Extracted Checksum (HEX): ");
 Serial.print(checksum, HEX);
 if (checksum == hexstr_to_value(msg_checksum, CHECKSUM_SIZE)) { // compare calculated checksum to retrieved checksum
 Serial.print(" (OK)"); // calculated checksum corresponds to transmitted checksum!
 } else {
 Serial.print(" (NOT OK)");                 // checksums do not match
 }
 Serial.println("");
 Serial.println("--------");
 return tag;
}
long hexstr_to_value(char *str, unsigned int length) { // converts a hexadecimal value (encoded as ASCII string) to a numeric value
 char* copy = malloc((sizeof(char) * length) + 1);
 memcpy(copy, str, sizeof(char) * length);
 copy[length] = '\0';
 // the variable "copy" is a copy of the parameter "str". "copy" has an additional '\0' element to make sure that "str" is null-terminated.
 long value = strtol(copy, NULL, 16);                 // strtol converts a null-terminated string to a long value
 free(copy); // clean up
 return value;
}
I actually printed a case and built this with an Arduino Pro Micro, but that MCU would not even enumerate, so I redesigned around a Nano I had in stock.
134.2 KHz RFID using a Texas Instruments Series 2000 Micro Reader (RI-STU-MRD1)
This is the RI-STU-MRD1 from Texas Instruments:
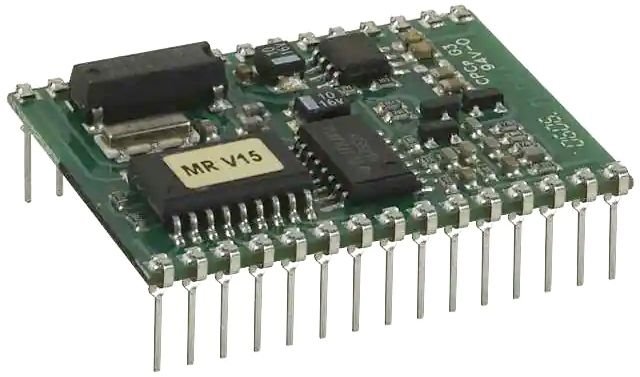
I designed a PCB which adds a voltage regulator and an RS232 interface to this module:

This PCB was packaged in a commercial plastic case:
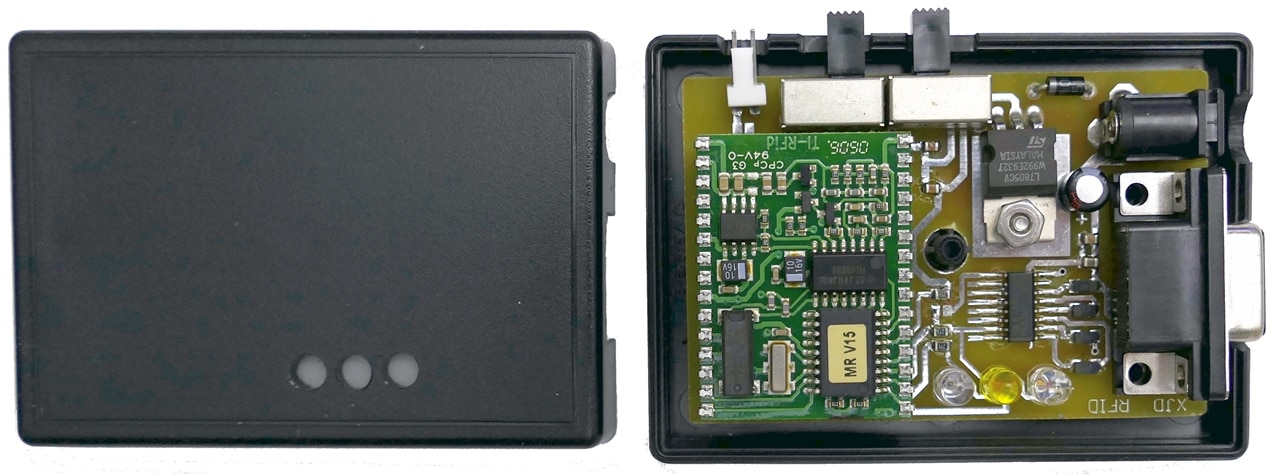
This unit did not need any software development, I simply used HTERM to display what it was outputting.
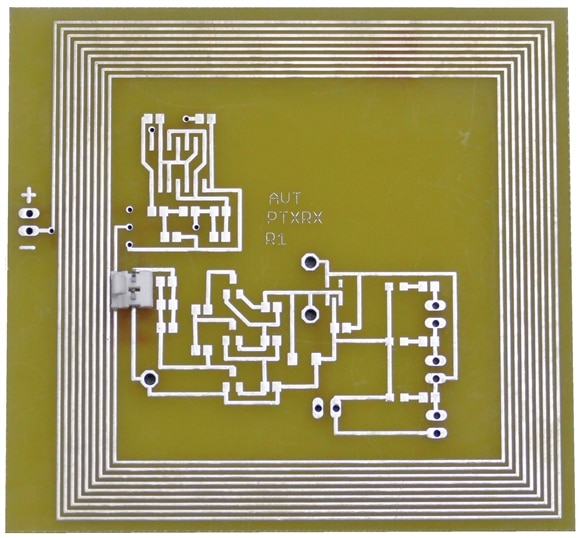
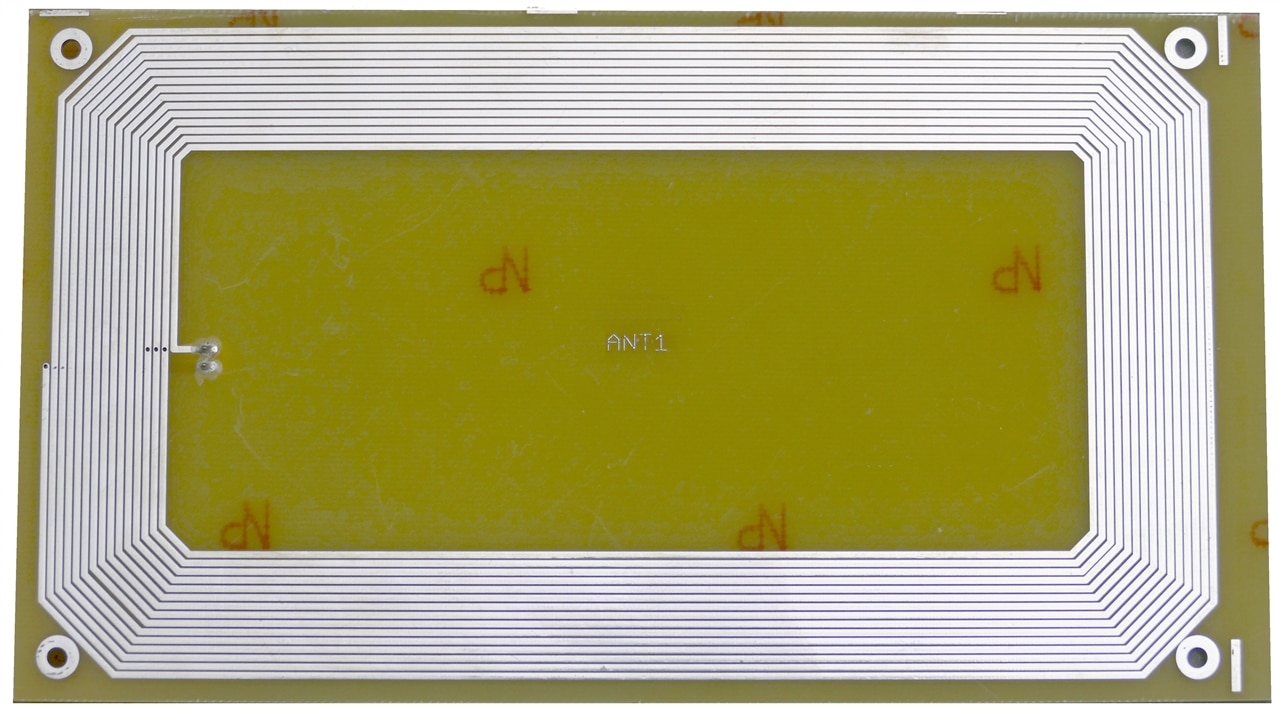
This design allowed easy experimentation with different antennas.
Here are 2 PCB antennas I printed to experiment with:
13.56 MHz RFID using an RC522 Reader Module
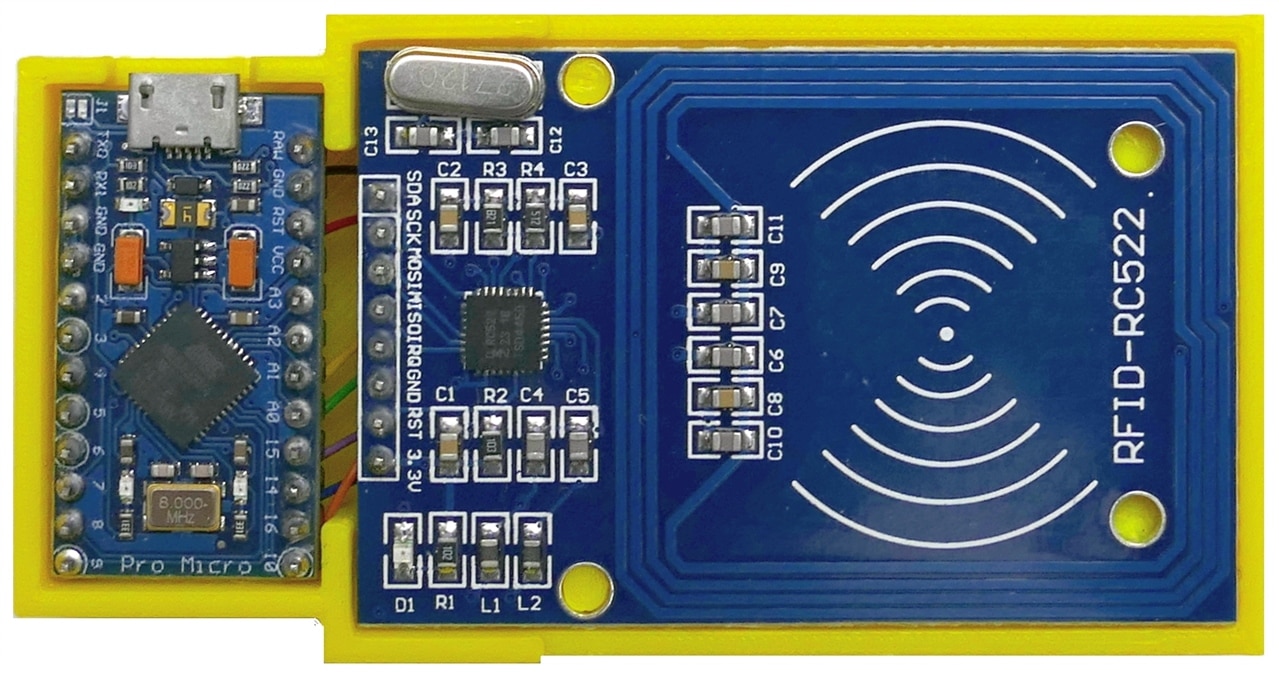
This 13.56 MHz RFID system connected an RC522 module to an Arduino Pro Micro using this wiring diagram:

Again, the connections were made using wire-wrap. Here is what they looks like in their 3-D printed case:
Here is the very simple Arduino program used to read tags:
/*
 * -----------------------------------------------------
 * RC522 Reader Based on an Arduino Pro Micro
 * -----------------------------------------------------
 * Doug Wong 2022
 *
 * Pin layout used:
 * ------------------------------------
 *             MFRC522      Arduino
 *             Reader/PCD   Pro Micro
 * Signal      Pin          Pin
 * ------------------------------------
 * RST/Reset   RST          18
 * SPI SS      SDA(SS)      10
 * SPI MOSI    MOSI         16
 * SPI MISO    MISO         14
 * SPI SCK     SCK          15
 */

#include <SPI.h>
#include <MFRC522.h>

#define RST_PIN         18          // Configurable, see typical pin layout above
#define SS_PIN          10          // Configurable, see typical pin layout above

MFRC522 mfrc522(SS_PIN, RST_PIN);   // Create MFRC522 instance

void setup() {
	Serial.begin(9600);		// Initialize serial communications with the PC
	while (!Serial);		  // Do nothing if no serial port is opened (added for Arduinos based on ATMEGA32U4)
	SPI.begin();			    // Init SPI bus
	mfrc522.PCD_Init();		// Init MFRC522
	delay(4);				      // Optional delay. Some board do need more time after init to be ready, see Readme
	mfrc522.PCD_DumpVersionToSerial();	// Show details of PCD - MFRC522 Card Reader details
	Serial.println(F("Scan PICC to see UID, SAK, type, and data blocks..."));
}

void loop() {
	// Reset the loop if no new card present on the sensor/reader. This saves the entire process when idle.
	if ( ! mfrc522.PICC_IsNewCardPresent()) {
		return;
	}

	// Select one of the cards
	if ( ! mfrc522.PICC_ReadCardSerial()) {
		return;
	}

	// Dump debug info about the card; PICC_HaltA() is automatically called
	mfrc522.PICC_DumpToSerial(&(mfrc522.uid));
}
RFID Read Range Demonstration
Here is a video showing these readers in action. I included use of an android phone to read tags as well:
Here are a few measurements just to explore a bit what the hardware is doing:
Discussion
I have been collecting RFID bits and pieces for quite a while, so it is very satisfying to finally start putting them together into working systems that I can use to get a better feel for the whole topic of RFID and NFC.
Things generally worked close to expectations, although I was a bit surprised that all these different frequencies interfered so much with performance of other devices at different frequencies.
Sooner or later I will find a good application that will make use of what I am learning in this project.
Here are the .stl files for the reader cases:
Relevant Links:
Project14 | RFID or NFC: Win a Ready to Use NFC RFID Set!
https://www.handsontec.com/dataspecs/module/RDM6300.pdf
http://www.handsontec.com/dataspecs/RC522.pdf
https://www.ti.com/lit/ug/scbu027/scbu027.pdf?ts=1668181124959
http://www.circuits.dk/calculator_planar_coil_inductor.htm
https://www.translatorscafe.com/unit-converter/pt-PT/calculator/planar-coil-inductance/

Top Comments
-

dang74
-
Cancel
-
Vote Up
+1
Vote Down
-
-
Sign in to reply
-
More
-
Cancel
-

dougw
in reply to dang74
-
Cancel
-
Vote Up
0
Vote Down
-
-
Sign in to reply
-
More
-
Cancel
-

dang74
in reply to dougw
-
Cancel
-
Vote Up
+1
Vote Down
-
-
Sign in to reply
-
More
-
Cancel
Comment-

dang74
in reply to dougw
-
Cancel
-
Vote Up
+1
Vote Down
-
-
Sign in to reply
-
More
-
Cancel
Children