


 | Enter Your Electronics & Design Project for Your Chance to Win a $100 Shopping Cart! | Project14 Home |
| Monthly Themes | ||
| Monthly Theme Poll |

This robot was a collaboration between my daughter and I.
The idea was she could use flowchart software to program it, however that never really happened.
The design was based on an earlier and slightly larger model I built.
I had assisted the local school in a challenge and felt the 'feelers' that were used for sensing a wall were too delicate and bent if they hit too hard or got caught, so I worked on a bumper system.
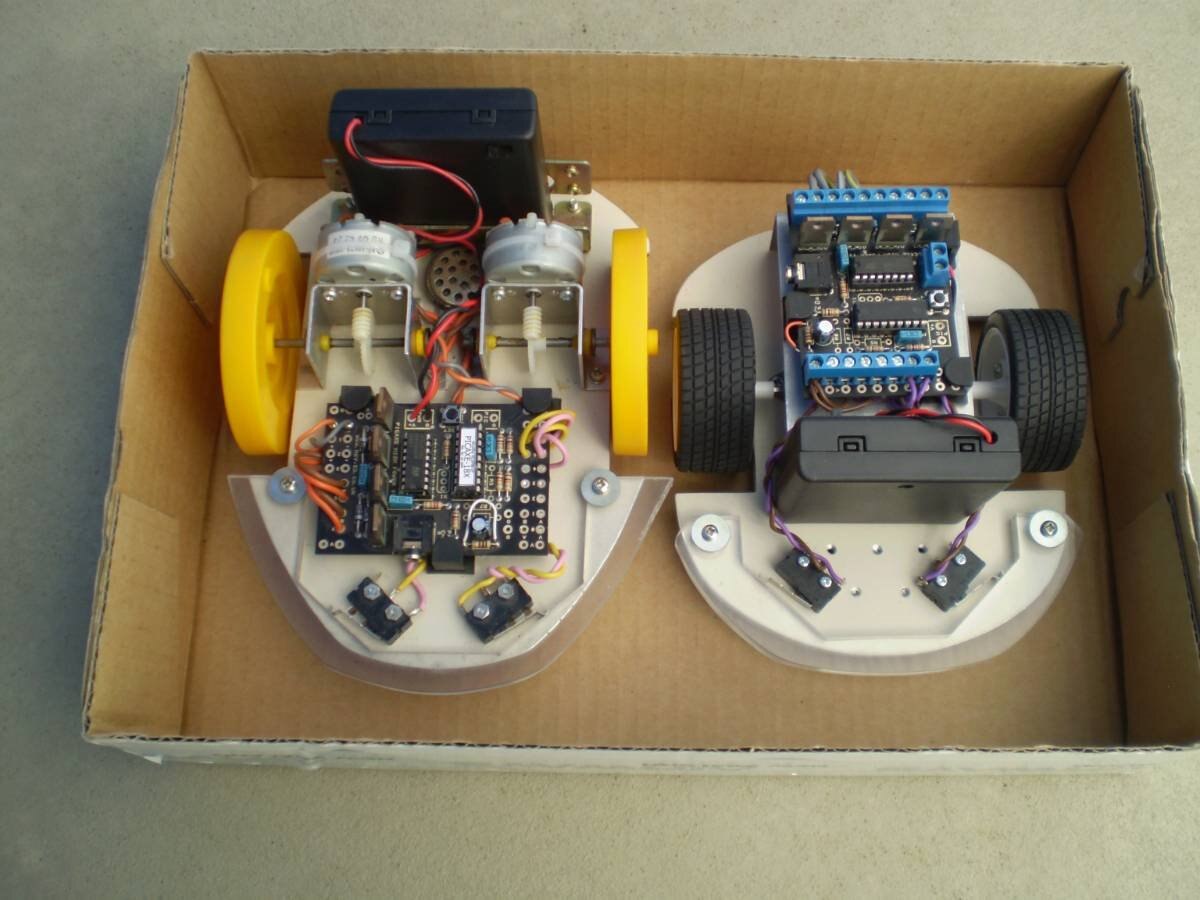
Version 1.0 on the left and ver 0.9 HaloBOT on the right.
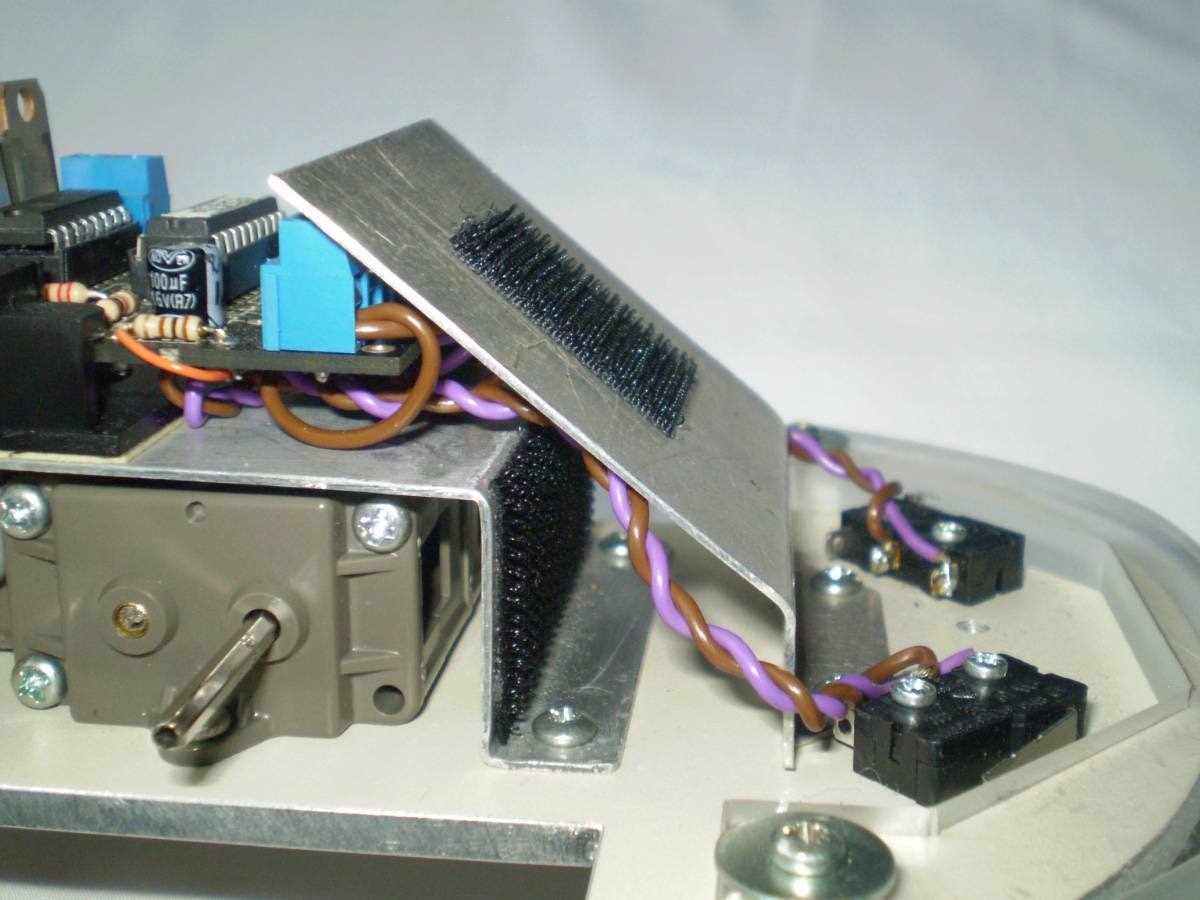
A second angled plate was fitted and the battery pack velcros to this.
As the drawing shows the shape of the bumper was made to help prevent it getting stuck.
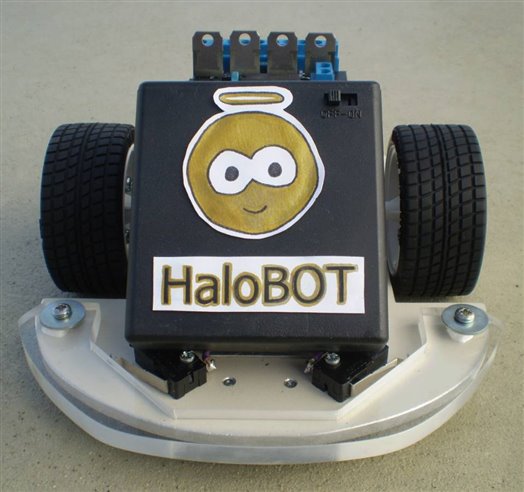
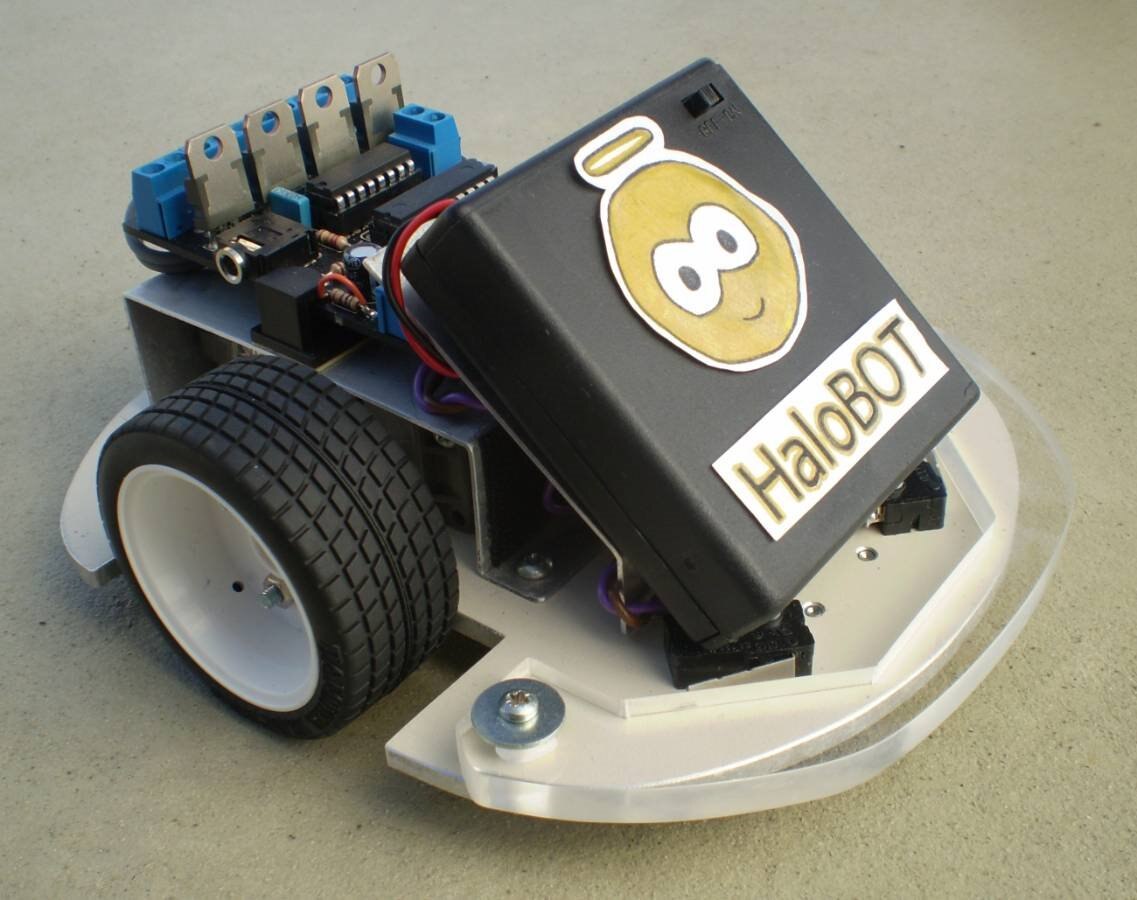
HaloBOT was essentially Ver 2.0 using commonly available parts (board), motors and wheels.
It uses a castor underneath that glides on the surface to act as a nose wheel.
The design was refined by Hayley and once built she added the graphical touch to it.
HaloBOT was the name she gave it.
Bumper
The design of the front bumper is such that it can detect three different touches, using two switches.
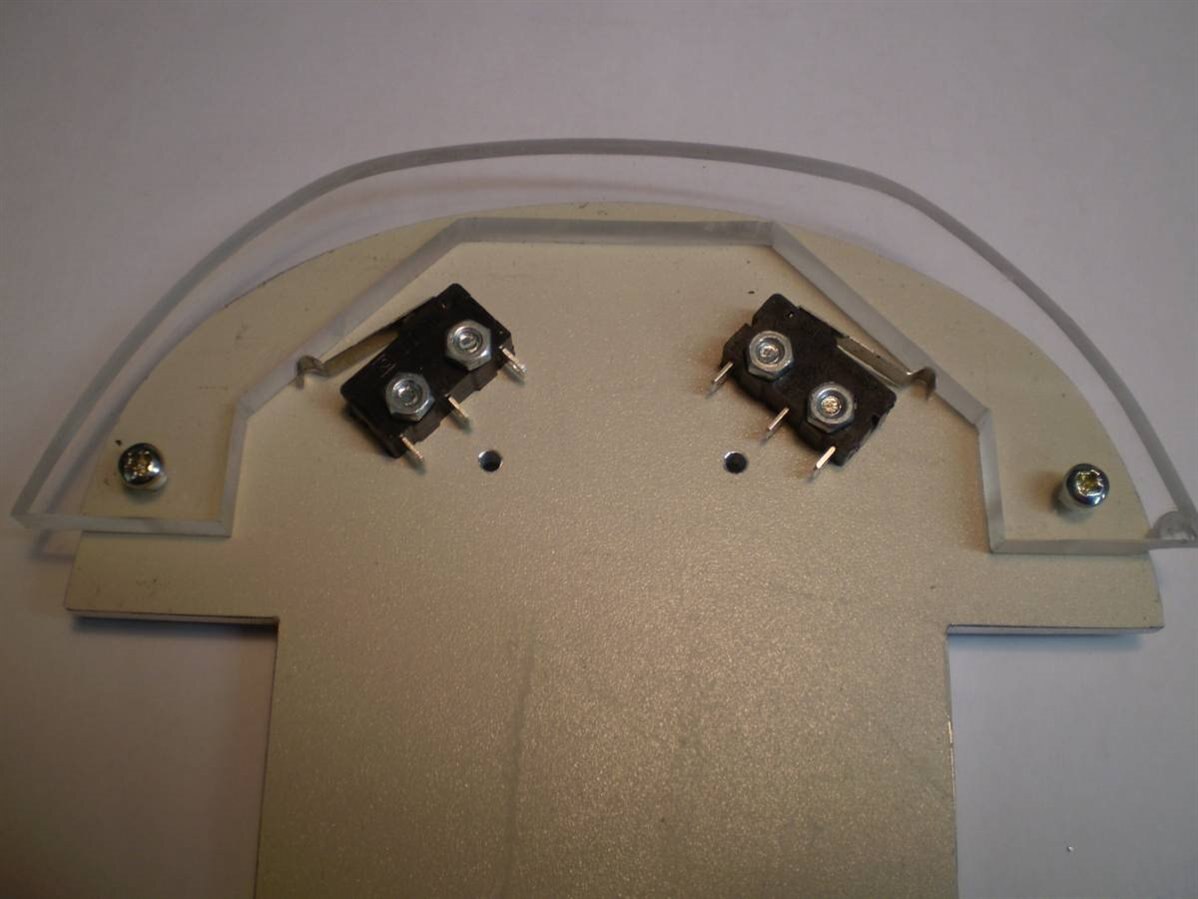
This shows the bumper before the triangle shaped clearance holes were filled.
It also shows a chip in the corner which was 'removed' by some rounding.
Pressure on the left side operates the left bumper switch. Pressure on the right side operates the right bumper switch.
However pressure directly onto the front of the bumper will operate both switches.
This is achieved by making the mounting mount float (the screws are have a lock nut on the bottom), and the 45 deg angle surface the micro-switches connect with.
The spring action inside the micro-switch provides the necessary centering action without any additional springs.
The use of acrylic also means it is non marking (or hard to isolate what caused those marks), and the shape means it can push it's way past if you get the programming wrong.
Plan
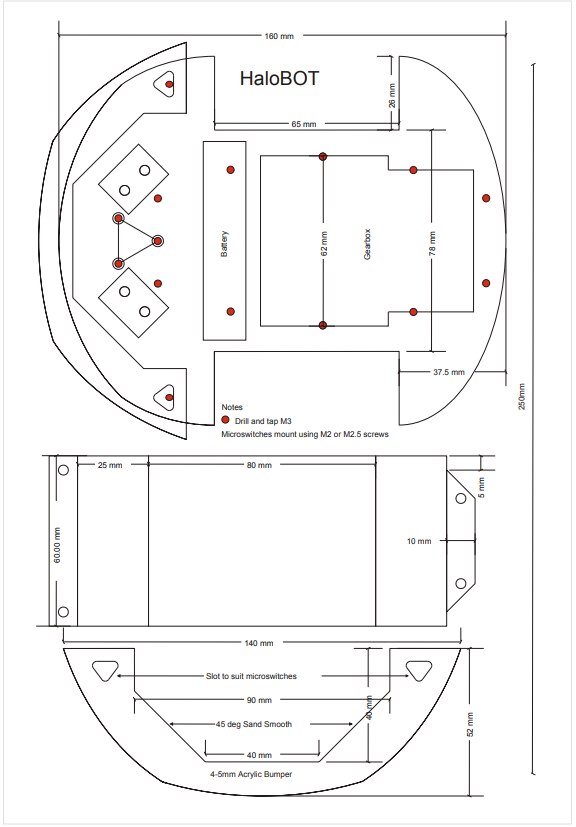
You should be able to enlarge this using the measurments as a guide, and print full size to use as a template.
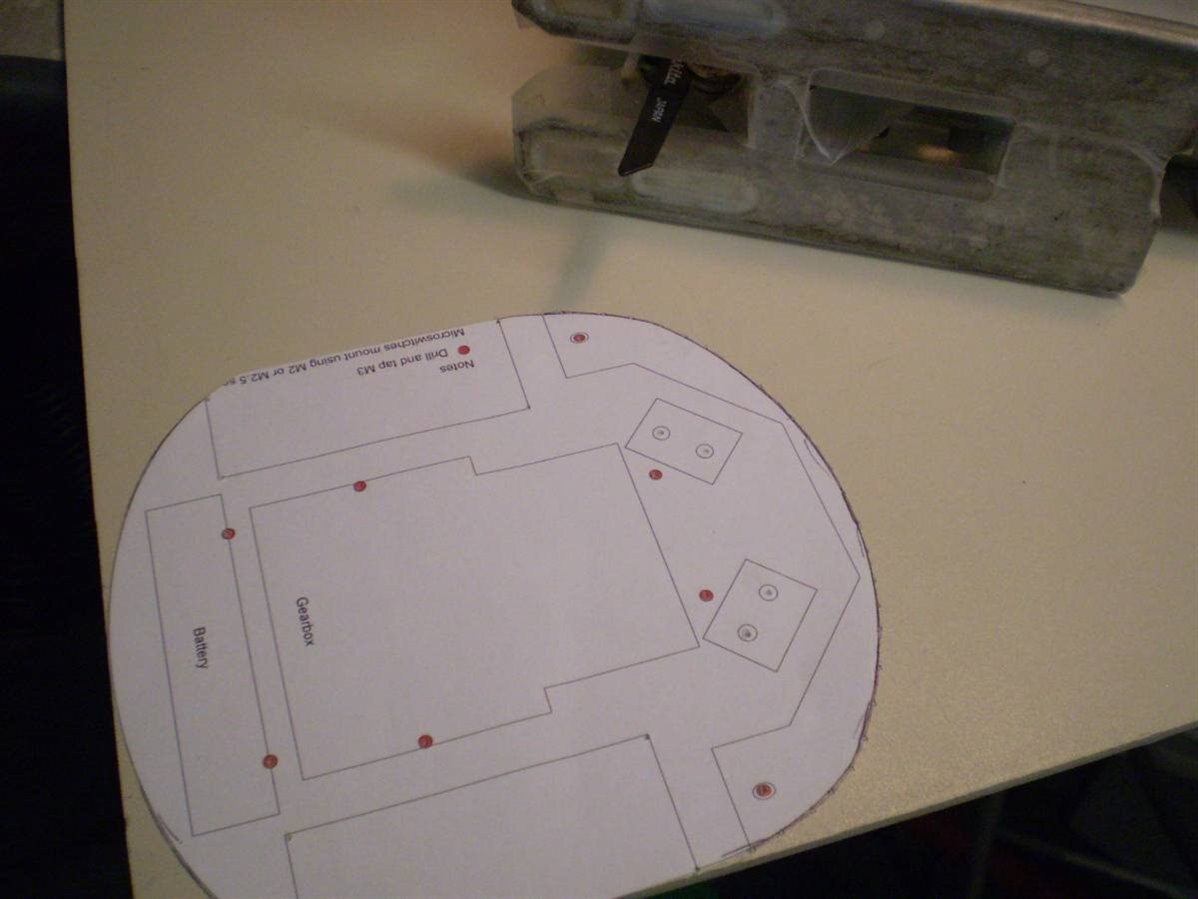
Stick it down onto ypur material of choice, and cut out.
Wheels
Tamiya provided the wheels, and I discovered that these are one of the 'stickiest' off the shelf, meaning it has the best traction if your motors are up to it.
The Tamiya gearbox allows for multiple ratios and is cheap and robust, although not very good in dirty situations due to it's open construction.
Updated My software code included this note ...... Tamiya Dual Gearbox at 114.7:1 ratio (Type C) and 56mm wheels

The gearbox configuration changes depending on which ratio you choose, so multiple mounting holes were provided, however we've never changed it.
The gearboxes are easy to mount and together with the wheels make a very simple construction.
The power consumption is very light, and therefore the battery voltage remains constant which makes programming easier.
Some other bots have high speed and high discharge, so 0.25 secs motor at the start makes the bot travel much further than 0.25 secs after some time in use.
These have no encoders so there is no correlation with time v distance travelled.
Chassis
The chassis of any robot is the backbone.
Because these tend to be a WIP (Work In Progress) you need to allow room for extras to be added, and mounting can be a problem.
The chassis was constructed using 5mm aluminium that was recycled (previous life was a blank panel in a rack) and most holes are drilled and tapped for M3. (use meths as the lubricant for the tap)
The intention was to enable it to be made using basic hand tools.
I've seen the odd robot using a very lightweight chassis which can flex and bend, or becomes too hard to add extras, so while this could be considered as over engineered, in this case it wasn't going to be the fastest or lightest bot.
Software
The board is based on Picaxe 18 and was programmed in Basic.
The Picaxe software can be programmed using a flowchart, which removes the need to understand Basic.
It does provide an early and easier learning curve, which was the reason it was chosen (at the time).
HaloBOT is programmed to wait after it is turned on, wait for a bumper switch to operate, then move forward until it detects a wall.
It will respond until it detects a wall and respond accordingly with the aim of keeping it moving forward.
Since there is no vision and both motors were travelling forward, the angle of collision is not known, hence there are two options when it touches a wall :-
- stop the motor on that side and reverse the other motor, then move both motors forward.
- Stop both motors and reverse both, then make the motor on the side that touched go forward first, followed by the other motor.
As you can see there is a difference in the amount the bot clears the wall by, and how quickly forward progress is made.
Any time you reverse, you will lose time and distance travelled.
The next problem was being stuck in a corner.
The worst is striking the corner at 45 degs where you react to one side touching followed by the same reaction on the other side, and it repeats.
In this case we counted the contacts and then made the next touch add more time to the sequence to break the deadlock.
This shows in the video as a 'pause' to show it is thinking about the next move, and it carries on.
Enhancements
We added an IR sensor to the front in order to warn of impending wall and slow it down.
It was never programmed to be used, but means there is some protection from collision with objects.
You can detect the bumper switches at turn on, and jump to a sub routine in the software to do one of three operations.
One of these routines was to provide a method of equalizing the motors so it drove straight.
DC brushed motors can be run forward or backwards, and are never the same speed.
Manufacturing tolerances also means one will run slightly faster than another, so it's impossible to make these run straight.
Because the motor can be PWM (Pulse Width Modulated) it does mean you can adjust the speed of the fastest motor to something less than 1.
This gets set in software or is best stored in the EEPROM so it can be set and used.
It was tagged as a future enhancement.
Video
The video show Halobot trying to escape the lid of an A4 Paper box.
It keeps on going and never really understands that it can't escape, but does provide entertainment.
Hopefully someone else will enjoy making something similar.
If you do use my bumper design, it would be nice if you could acknowledge this blog.
Cheers
Mark
Edit 04/04/18 Code added, and Motor details.
This was designed to run on a Picaxe 18 board with the L293D motor controller http://www.picaxe.com/docs/chi035a.pdf
'Robot Test Program For PICAXE18 microcontroller
'using www.rev-ed.co.uk CHI007
'Opposite motor is off during turns


'MCB May 2011
'Suited to HaloBOT

'output pin allocation (%76543210)
'76 = Right Motor (viewed from the rear)
'54 = Left Motor    (viewed from the rear)
'3  = not used
'2  = LED B            'future
'1  = LED A            'future
'0  = piezo sounder    'future


'input pin allocation
'7  = Right Switch looking from the rear
'6  = Left Switch looking from the rear

'counter allocation
symbol RightCount = b0
symbol LeftCount = b1
symbol ForwardCount = b2
symbol CornerCount =b3
symbol BackCount =b4
symbol LastTurn = b5
symbol RightBump =pin7
symbol LeftBump = pin6


'start going forwards
'testing switches as you go

Waiting:

'In order to put the robot down, the motors should be off
'Press a bumper switch to start


    if RightBump = 1 or LeftBump = 1 then check

goto waiting

check:
    pause 100

main:
    let pins = %10100000        'both motors forward
    ForwardCount = ForwardCount + 1

    if RightBump =1 or LeftBump =1 then
        pause 50        'time to settle and check if both touch
    endif

    'if RightBump = 1 and LeftBump =1 then backturn
    'if RightBump =1 and CornerCount >3 or LeftBump =1 and CornerCount >3 then Corner
    if LeftBump = 1 then left
    if RightBump = 1 then right

    if ForwardCount = 200 then ResetCount
goto main

ResetCount:
    'sound 0,(255,25)
    ForwardCount = 0
    RightCount = 0
    LeftCount =0
    CornerCount =0
    LastTurn=0

Goto Main

left:

'left switch hit
'so stop, both reverse, turn right
'LastTurn =1

    If LastTurn =1 then
        CornerCount = 0
        else
        CornerCount = CornerCount +1
    endif

    LeftCount = LeftCount +1
    let pins =%00000000    'Stop
    let pins =%01010000    'Reverse
    'sound 0,(110,25)
    pause 100
    let pins =%00100000    'Left forward, Right off
    pause 50
    LastTurn =1
    ForwardCount =0

    'If LeftCount = RightCount +3 or RightCount = LeftCount +3 CornerExit

goto main

right:

'right switch hit
'so stop, both reverse, turn left
'LastTurn =2

    If LastTurn =2 then
        CornerCount = 0
        else
        CornerCount = CornerCount +1
    endif

    RightCount = RightCount +1
    let pins =%00000000    'Stop
    let pins =%01010000    'Reverse
    'sound 0,(50,25)
    pause 100
    let pins =%10000000    'Right forward, Left off
    pause 50
    LastTurn =2
    ForwardCount =0

goto main

backturn:

'both switch hit
'so stop, reverse, turn to one side
'LastTurn =0
    'BackTurn = backTurn +1
    If RightCount > LeftCount then

        let pins =%00000000    'Stop
        let pins =%01010000    'Reverse
        sound 0,(100,10,110,10,110,10,110,10)
        pause 150
        'larger reverse movement
        let pins =%10000000    'Right forward, Right off
        pause 100

    else
        let pins =%00000000    'Stop
        let pins =%01010000    'Reverse
        sound 0,(100,10,110,10,110,10,110,10)
        pause 150
        'larger reverse movement
        let pins =%00100000    'Left forward, Left off
        pause 100
    endif

    LastTurn =0
    ForwardCount =0
    'CornerCount =0

goto main

Corner:
'we think we've stuck in a corner therefore we need to add something to exit the sequence
' this would show as a high left right backups without much forward.
' the solution is to decide which side has a greater hit rate, and move opposite.
' In this case I have tried to move back a larger amount, along with more turn.

    sound 0,(255,10,255,10,255,10)
    pause 100
    'pause 500
If RightCount > LeftCount then

        let pins =%00000000    'Stop
        let pins =%01010000    'Reverse
        sound 0,(75,50)
        pause 200
        'larger reverse movement
        let pins =%10000000    'Right forward, Right off
        pause 150

    else
        let pins =%00000000    'Stop
        let pins =%01010000    'Reverse
        sound 0,(75,50)
        pause 200
        'larger reverse movement
        let pins =%00100000    'Left forward, Left off
        pause 150
    endif

    'If CornerCount >1 then
    '    CornerCount =CornerCount -1
    'endif
    Cornercount=0
goto main
Top Comments
-

balearicdynamics
-
Cancel
-
Vote Up
+2
Vote Down
-
-
Sign in to reply
-
More
-
Cancel
Comment-

balearicdynamics
-
Cancel
-
Vote Up
+2
Vote Down
-
-
Sign in to reply
-
More
-
Cancel
Children