


The Flower
In each game there must be at least 1 Flower micro:bit/player.
This player will hide, and the Bee must find them (after collecting Pollen) to pollinate the Flower.
You will need:
1 Micro:bit
1 Battery box and batteries
1 USB programming cable
You will also need a computer connected to the Internet that has a USB input in order to program each micro:bit.
Instructions:
On the computer, point your browser to https://makecode.microbit.org/ and select New Project.

Name this project Flower.

on Start Block
We'll use the "on start" block,
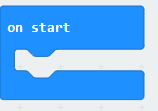
to set up the game.
Under "Radio" then "... more" we can find the "radio set transmit power" block.

Click on that block and drag it into the "on start" block. Then change the value in the white box to 0.
The value to 0 means we will be limiting the radio transmission to the lowest possible setting, which means the micro:bits will need to be within around a meter of each other to be able to "talk" to each other.

Create a Variable
The next step is to create a variable called "game" using the "Make a Variable..." button inside the "Variables" menu.
To do this, go to

Then

Then name the variable and click OK.

Your Variables should look like this:

Set the Values of the Variables
Now we are going to use the "set" block to set the variable to 0 to start the game.
In the Variables menu, click the "set" block and drag it on to the "on start" block beneath "radio set transmit power." The variable will default to "count".
Now drag another "set" block to "on start" and, using the drop down, change the variable name to "game."
We are then going to use the "set" block to set both of these to 0 at the start of the game.
Note: the block is the same for all, once you drag it into the code, you select the down arrow in the block to change which variable it refers to.
Then we are going to use "show leds" block to display an "F", showing that this is running the Flower code.

Starting the Game
To start the game, we want to change the variable "game" to 1 to indicate the game has started and we want to display a Flower icon to show that this micro:bit is a Flower. We will do this by pressing the A button on the micro:bit.
To do this, go to the "Input" menu, click on the "on button 'A' pressed" block and drag it to the workspace.

Inside this block we will place the "set" block from the Variables menu.
Go to Variables, click on the "set" block and drag it in to the "on button A pressed" block. Click on the white circle and change the value to 1.
To add the Flower icon to the micro:bit display, go to Basic and click and drag the "show icon" block into the "on button A pressed" block. In the drop down for the icons, select the Flower.

Your "on button A pressed" block should look like this:

Receiving Radio Signals
When the A button is pressed on the micro:bit, the game is underway. Remember, we set the radio transmit area to 0 in the "on start" block. That means the radio works to a distance of about 1 meter so the Bee will have to find the other players and see what messages those micro:bits are sending.
To see if there are any micro:bits transmitting in the area, we will go to the Radio menu, click on the "on radio received receivedString", and drag it to the workspace.

Since the Flower's micro:bit will be receiving strings from the other players' micro:bits, we need to define what we're looking for ("Bee" and "Pollen") and then tell the micro:bit what to do based on the value received. To do this we'll be using "If" blocks. The first thing we'll check for is whether or not the game has started.
If you'd like more information on how this block works, see the MakeCode help section on the "If" block.
Checking if the Game Has Started
In the Logic menu, click on the "if" block and drag it into the "on radio received receivedString" block.

We want to replace the "true" drop down with a comparison - so that we can compare the value to what we want the value to be. In this case, we want the game to have started, so we're looking for the "game" variable to be set to "1" (we set this in the final step of the "on button A pressed" block above).
Go to Logic and then select the comparison block that looks like this

and drag it on top of the if block:

What we are looking for is the "game" variable to be set to 1. To look for this comparison, we'll drag the "game" variable from the Variables menu

and drag it on top of the left value of the "If" block to the left of the equal sign:

and then change the value from 0 to 1. This tells the micro:bit that if the "game" variable is set to 1, run the rest of the if blocks nested within. But if the "game" variable is not 1, then it will do nothing.
Waiting for a Bee
Once the game is live (the variable is set to 1), the next signal we're waiting for is one from the Bee. Once we receive the Bee signal, we will:
- take the Flower out of the current game,
- play a happy tone,
- tell the Bee "thank you" for the pollen,
- and display a heart icon.
To do this we will first check for a text string received that equals "Bee."
To do this, go to Logic and click on an "If" block and drag it in to the existing "on radio received" block, inside the existing "If" block for game.

In this "If" block we are looking for the the received string to be "Bee."
We will change the "true" statement to a comparison - this time we're looking for a text string (words/letters), not a number, so drag this comparison on to the "If" block

The block should look like this:

We want to compare the value received by radio signal from another micro:bit to the value "Bee."
Click on the "receivedString" variable name in the "on radio received" block and drag it on the "If" block to the left of the equal sign.

Then click in the box to the right of the equal sign and type in "Bee". If the value is "Bee" then the rest of the actions in this "If" block will run.
Take the Flower out of the Current Game
A Flower can only be pollinated once, so we remove the Flower from the game by setting the "game" variable back to 0.
To do this, go to Variables and click on a "set" block and drag it in to to "If" block, then change the variable to "game" using the drop-down.

Play a Happy Tone
Next, we will play a melody from the micro:bit library to indicate our Flower is happily pollinated.
In Music, find the "play melody" block

and drag it into the "If" block under the game variable block. Use the drop down to select a melody (I chose entertainer).

Tell the Bee Thank You
We're going to send a radio message to the Bee's micro:bit. We do this not just because it's polite to say "thank you", but also to ensure the Bee gets credit for finding and pollinating this Flower. Every time a Bee gets a "thank you" from a Flower, its score increases by 1.
To do this, go to Radio and click on the "radio send string" block

and drag it in in to the "If" block beneath the melody player block.
Click in the white text box and enter "thanks"
Display a Heart
This happy Flower is now out of the current game. To indicate that I have put in a "show icon" block displaying a heart.
Go to Basic, click the "show icon" block and drag it in to the "If" block under the "radio send string"
The final "on radio receive" block should look like this

This is the code for the Flower Micro:bit complete, you also need a pollinator and a bee, and then you can go and play!

Be sure to save your work! At the bottom of the screen you'll see the save interface, click the save icon to save your work.

The final step is adding the code to a micro:bit. See the micro:bit guide for programming here: https://microbit.org/get-started/user-guide/transfer-code-to-the-microbit/ if you require assistance with this step.
Now on to Pollen and Bee.

