element14 Community
element14 Community
    Register Log In
  • Site
  • Search
  • Log In Register
  • About Us
  • Community Hub
    Community Hub
    • What's New on element14
    • Feedback and Support
    • Benefits of Membership
    • Personal Blogs
    • Members Area
    • Achievement Levels
  • Learn
    Learn
    • Ask an Expert
    • eBooks
    • element14 presents
    • Learning Center
    • Tech Spotlight
    • STEM Academy
    • Webinars, Training and Events
    • Learning Groups
  • Technologies
    Technologies
    • 3D Printing
    • FPGA
    • Industrial Automation
    • Internet of Things
    • Power & Energy
    • Sensors
    • Technology Groups
  • Challenges & Projects
    Challenges & Projects
    • Design Challenges
    • element14 presents Projects
    • Project14
    • Arduino Projects
    • Raspberry Pi Projects
    • Project Groups
  • Products
    Products
    • Arduino
    • Avnet Boards Community
    • Dev Tools
    • Manufacturers
    • Multicomp Pro
    • Product Groups
    • Raspberry Pi
    • RoadTests & Reviews
  • Store
    Store
    • Visit Your Store
    • Choose another store...
      • Europe
      •  Austria (German)
      •  Belgium (Dutch, French)
      •  Bulgaria (Bulgarian)
      •  Czech Republic (Czech)
      •  Denmark (Danish)
      •  Estonia (Estonian)
      •  Finland (Finnish)
      •  France (French)
      •  Germany (German)
      •  Hungary (Hungarian)
      •  Ireland
      •  Israel
      •  Italy (Italian)
      •  Latvia (Latvian)
      •  
      •  Lithuania (Lithuanian)
      •  Netherlands (Dutch)
      •  Norway (Norwegian)
      •  Poland (Polish)
      •  Portugal (Portuguese)
      •  Romania (Romanian)
      •  Russia (Russian)
      •  Slovakia (Slovak)
      •  Slovenia (Slovenian)
      •  Spain (Spanish)
      •  Sweden (Swedish)
      •  Switzerland(German, French)
      •  Turkey (Turkish)
      •  United Kingdom
      • Asia Pacific
      •  Australia
      •  China
      •  Hong Kong
      •  India
      •  Korea (Korean)
      •  Malaysia
      •  New Zealand
      •  Philippines
      •  Singapore
      •  Taiwan
      •  Thailand (Thai)
      • Americas
      •  Brazil (Portuguese)
      •  Canada
      •  Mexico (Spanish)
      •  United States
      Can't find the country/region you're looking for? Visit our export site or find a local distributor.
  • Translate
  • Profile
  • Settings
microbit
  • Learn
  • Learning Center
  • STEM Academy
  • microbit
  • More
  • Cancel
microbit
micro:bit Blog Save the Bees - A micro:bit Project - The Pollen
  • Blog
  • Forum
  • Documents
  • Events
  • Polls
  • Files
  • Members
  • Mentions
  • Sub-Groups
  • Tags
  • More
  • Cancel
  • New
Join microbit to participate - click to join for free!
  • Share
  • More
  • Cancel
Group Actions
  • Group RSS
  • More
  • Cancel
Engagement
  • Author Author: hifromkatie
  • Date Created: 2 Nov 2023 2:57 PM Date Created
  • Views 652 views
  • Likes 7 likes
  • Comments 0 comments
  • micro:bit
  • bees
  • education
  • micro:bit project
  • microbit
  • programming
  • learning
  • code
Related
Recommended

Save the Bees - A micro:bit Project - The Pollen

hifromkatie
hifromkatie
2 Nov 2023

The Pollen

There must be at least one Pollen micro:bit/player. The Pollen player(s) hide while the Bee player(s) search for them to collect pollen, which they bring to the Flowers.

See game instructions

To create a Pollen micro:bit, you will need:

  • 1 micro:bit
  • 1 battery box (and batteries)
  • 1 USB programming cable

To program the micro:bit, you will also need a computer that is connected to the Internet and has a USB input.

Instructions:

On the computer, point your browser to https://makecode.microbit.org/  and select "New Project".

image 

Name this project "Pollen".
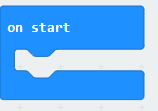
image

on start Block

To set up the game, we'll use the "on start" block, which should be already on the screen.

image

Click "Radio" and then "more". In this menu, look for the "radio set transmit power" block.

image

Drag this block onto the "on start" block.   

Change the number in the white text field to "0" by typing in the text field or by moving the slider. Setting the value to 0 limits the radio transmission to the lowest possible setting, which means the micro:bits will need to be within around a meter of each other to be able to communicate wirelessly.

image

Add an indicator that this is the Pollen player. To do this, click "Basic" in the menu and drag the "show leds" block into the "onstart" block underneath radio transmit power.  Click on the appropriate grey boxes in the grid to form the letter "P".

, imageimage

Starting the Game

Now it's time to add the code that starts the game (pressing the 'A' button). Click on "Input" in the menu, and drag the "on button 'A' pressed" onto the workspace.

image

On the Pollen player's micro:bit, there should be a flower icon. The Pollen player's micro:bit will also send out a message of "Pollen" to the other micro:bits in the area.

To create these tasks, go to the "Loops" menu and click the "while false" block. This runs the code inside this loop continuously for the rest of the game. For more information on While loops, visit MakeCode support at https://makecode.microbit.org/blocks/loops/while

imageimage

Display Flower Icon

Next, set up the Flower icon on the micro:bit's display. Click "Basic" and drag the "show icon" block into the "while false" block.  Then click on the dropdown menu and select the Flower icon.

image

Send Pollen Message Wirelessly

The final task is to build the functionality that sends the message "Pollen" to the other micro:bits in the area.  

Click the "Radio" menu and drag the "radio send string" block into the "while false" block.  Click in the text field and type in "Pollen".   

The completed "on button A pressed" block should look like this:

image

The code for Pollen is now complete. The entire program should look like this:

image

Don't forget to save your work!  The save interface is located at the bottom of the screen.

image

Click the Save icon (the floppy disk) to save your work.

The coding is now complete and the final step is adding the code to a micro:bit. More details on how to do this can be found at the micro:bit Guide for Programming.

If you haven't already programmed Flower and Bee, follow the links below: 

Flower program instructions

Bee program instructions

  • Sign in to reply
element14 Community

element14 is the first online community specifically for engineers. Connect with your peers and get expert answers to your questions.

  • Members
  • Learn
  • Technologies
  • Challenges & Projects
  • Products
  • Store
  • About Us
  • Feedback & Support
  • FAQs
  • Terms of Use
  • Privacy Policy
  • Legal and Copyright Notices
  • Sitemap
  • Cookies

An Avnet Company © 2025 Premier Farnell Limited. All Rights Reserved.

Premier Farnell Ltd, registered in England and Wales (no 00876412), registered office: Farnell House, Forge Lane, Leeds LS12 2NE.

ICP 备案号 10220084.

Follow element14

  • X
  • Facebook
  • linkedin
  • YouTube