element14 Community
element14 Community
    Register Log In
  • Site
  • Search
  • Log In Register
  • Members
    Members
    • Benefits of Membership
    • Achievement Levels
    • Members Area
    • Personal Blogs
    • Feedback and Support
    • What's New on element14
  • Learn
    Learn
    • Learning Center
    • eBooks
    • STEM Academy
    • Webinars, Training and Events
    • Learning Groups
  • Technologies
    Technologies
    • 3D Printing
    • FPGA
    • Industrial Automation
    • Internet of Things
    • Power & Energy
    • Sensors
    • Technology Groups
  • Challenges & Projects
    Challenges & Projects
    • Design Challenges
    • element14 presents
    • Project14
    • Arduino Projects
    • Raspberry Pi Projects
    • Project Groups
  • Products
    Products
    • Arduino
    • Dev Tools
    • Manufacturers
    • Raspberry Pi
    • RoadTests & Reviews
    • Avnet Boards Community
    • Product Groups
  • Store
    Store
    • Visit Your Store
    • Choose Another Store
      • Europe
      •  Austria (German)
      •  Belgium (Dutch, French)
      •  Bulgaria (Bulgarian)
      •  Czech Republic (Czech)
      •  Denmark (Danish)
      •  Estonia (Estonian)
      •  Finland (Finnish)
      •  France (French)
      •  Germany (German)
      •  Hungary (Hungarian)
      •  Ireland
      •  Israel
      •  Italy (Italian)
      •  Latvia (Latvian)
      •  
      •  Lithuania (Lithuanian)
      •  Netherlands (Dutch)
      •  Norway (Norwegian)
      •  Poland (Polish)
      •  Portugal (Portuguese)
      •  Romania (Romanian)
      •  Russia (Russian)
      •  Slovakia (Slovak)
      •  Slovenia (Slovenian)
      •  Spain (Spanish)
      •  Sweden (Swedish)
      •  Switzerland(German, French)
      •  Turkey (Turkish)
      •  United Kingdom
      • Asia Pacific
      •  Australia
      •  China
      •  Hong Kong
      •  India
      •  Korea (Korean)
      •  Malaysia
      •  New Zealand
      •  Philippines
      •  Singapore
      •  Taiwan
      •  Thailand (Thai)
      • Americas
      •  Brazil (Portuguese)
      •  Canada
      •  Mexico (Spanish)
      •  United States
      Can't find the country/region you're looking for? Visit our export site or find a local distributor.
  • Translate
  • Profile
Members
Members
Blog JustEncaseBLOG#5TestingPart2
  • Blog
  • Forum
  • Documents
  • Events
  • Leaderboard
  • Members
  • Mentions
  • Sub-Groups
  • Tags
  • More
  • Cancel
  • New
Members requires membership for participation - click to join
Blog Post Actions
  • Subscribe by email
  • More
  • Cancel
  • Share
  • Subscribe by email
  • More
  • Cancel
Group Actions
  • Group RSS
  • More
  • Cancel
Engagement
  • Author Author: skruglewicz
  • Date Created: 19 Feb 2022 10:13 PM Date Created
  • Views 642 views
  • Likes 0 likes
  • Comments 2 comments
Related
Recommended

JustEncaseBLOG#5TestingPart2

skruglewicz
skruglewicz
19 Feb 2022


TEST# 2 - Measure the Environment within the Waterproof Enclosure 1554H2GYCL 

  • imageimage
  • Description

    • For this Test, I purchased two Grove Sensors from Seeed and used two of sensors from the supplied Grove starter Kit.
    • I also purchased the Arduino MKR Connector Carrier from the Arduino Store. This is used to attach the sender MKR1 from the previous test and attach the groove sensor connectors.
    • The List of components used in this test:
      • Arduino MKR Connector Carrierimage
        • The Arduino MKR CONNECTOR CARRIER provides Seeed Studio's Grove connectors to your MKR board.
        • This shield can allow you to build applications with different IoT connectivity's by simply changing the MKR board and with almost no changes to the code.
        • BUY it from the Arduino Store
      • Grove - Dust Sensor(PPD42NS)SKU 101020012image
        • This Dust Sensor gives a good indication of the air quality in an environment by measuring the dust concentration.
        • The Particulate Matter level (PM level) in the air is measured by counting the Low Pulse Occupancy time (LPO time) in a given time unit. LPO time is proportional to PM concentration. This sensor can provide reliable data for air purifier systems; it is responsive to PM of diameter 1μm.
        • Buy it from Seeed
      • Grove - Water Sensor   SKU 101020018 image
        • Grove - Water Sensor detects the presence of water using exposed PCB traces.
        • The sensor is made up of interlaced traces of Ground and Sensor signals.
        • The sensor traces are weakly pulled up using 1 MΩ resistor.
        • The resistor will pull the sensor trace value high until a drop of water shorts the sensor trace to the ground trace. 
      • USB Ruggedized Charger for Power image
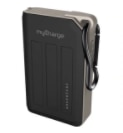
        • The AdventureMax 10000mAh by MyCharge
        • splash resistant
        • drop resistant
        • dirt-proof
        • II had this charger lying around the house. I decided to use it to power the MKR WAN 1300.
      • Grove - Starter Kit Sensors
        • Grove - LCD RGB Backlight image
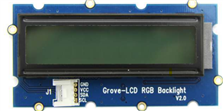
          • The Grove - LCD RGB Backlight supports text display, using user-defined characters. It enables you to set the backlight color, using the simple and concise Grove interface. It uses I2C as the communication method with your Arduino.
          • This is a 16x2 LCD screen.
          • It is capable of displaying two rows of sixteen-character texts, supporting languages such as English and Japanese.
        • Grove – Temperature Sensor  
          • imagethe Grove - Temperature Sensor uses a thermistor which returns the ambient temperature
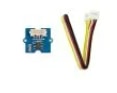
image.
          • The board then converts this voltage value measured by an analog input pin to a temperature.
          • The operating range is -40 to 125 degrees Celsius.
          • Wiki] Grove - Temperature Sensor
  • Wiring Diagram

    • All the sensors mentioned in the previous section are connected to the Arduino Connector Carrier with a Groove Cable connected to the designated connectors.
    • One end of the cable is attached to the Grove sensor and the other to the Grove connector on the Carrier.
      • The LCD Display is attached to the TWI ()I2C) connector
      • The TEMPRATURE sensor is attached to the analog A0 connector.
      • The DUST sensor is attached to the digital D4 connector
      • The WATER sensor is attached to the digital D2 connector
    • The Arduino MKRWAN 1300 Is attached to the Connector Carrier in the relation shown below
      • For POWER, the AdventureMax 10000mAh is attached to the USB connector on the MKRWAN 1300
      • The LoRa Antenna is attached to the antenna connector on the MKRWAN 1300
    • BLOCK DIGARAM
      • Here is a diagram of components: 
        • image
           
      • THE BUILD
        • Carrier Connector and the Attached components

          image

SOFTWARE DESIGN

Libraries

  • rgb_lcd.h
    • used for the LCD
    •  README.md
  • MKRWAN.h
    • used for Lora communications . 
    • Installed by the Arduino IDE Library Manger
  • LoRa.h
    • the library used for sending and receiving data using LoRa radios. 
    • GitHub - sandeepmistry/arduino-LoRa: An Arduino library for sending and receiving data using LoRa radios.
  • Wire.h
    • This library allows you to communicate with I2C / TWI devices.
    • It is needed by the Grove LCD Display

Arduino Sketches 

  • Three MCU"s, Three Sketches to get the the data through.
  • The next Three section will describe the 3 sketches used to get the data thru and onto the Arduino IoT cloud.

LoRa SENDER  - MKR_LoRa_Sender_E2.ino on MKR1

  • This sketch is Uploaded to the MKR1 board in my design.
  • This Sketch, will be used to transmit LoRaWAN packets  to the MKR2 LoRa Receiver board.
  • As described in the Design section above it will have 3 Grove sensors and 1 Grove LCD display connected to the Arduino MKR Connector Carrier.
  •  a MKR WN 1300 (MKR1) is attached to the Carrier.
  • one by one, each sensor is read.
    • after each sensor is read, a LoRa a packet with the sensor value is sent 
    • In the packet send function the value is displayed on the LCD display.

CODE- MKR_LoRa_Sender_E2.ino


LoRa Receiver - MKR_LoRa_Reeiver_UnitTest.ino on MKR2

  • This Sketch, will be used to receive LoRaWAN packets.
  • It is the same code that I used in Test#1, but I have included here for brevity
  • The packets will contain telemetry data that will be sent over a serial line to the Nano 33 IoT.

CODE - MKR_LoRa_Reeiver_UnitTest.ino

Sending Data to the Arduino IoT Cloud 

  • This sketch sends data to the IoT Cloud Dashboard
  • It runs on the Nano 33 IoT board and connects via a WiFi connection.
  • The sketch, is Auto Generated when you initially create a thing connected to a device on the Arduino IoT cloud
  • NOTE: the Nano board script is generated automatically when creating a new Thing on the Arduino IoT cloud as described in the online tutorial
    • Getting started with the Arduino IoT Cloud
  • Here is my Thing on the Arduino Cloud with the variables defined.
    • image
  • The sketch is generated on the sketch Tab as described below.
  • Here is a screenshot of the sketch generated to send data to the thing that I created on the IoT cloud.
    • image
  • I then added my code to this sketch to receive serial data, parse the packet to extract the value and set the value to the proper variable
  • The variable is then sent to the Thing and onto the Dashboard.
  • Here is the entire sketch that will run on the Nano 33 IoT:
  • Here is a screenshot of the Serial Monitor tab on the Arduino CLoud showing the Serial.print() calls in the program running on the Nano 33 IoT.
    • image
  • And Finally, here is the dashboard showing the Variables.
    • On the Phoneimage

<<< PREVIOUS BLOG NEXT BLOG  >>>

Blog#4 Testing Part 1 (Case Enclosure Reliability Monitor)

Addendum BLOG A Testing


  • Sign in to reply
  • skruglewicz
    skruglewicz over 1 year ago

    CODE- MKR_LoRa_Sender_E2.ino

    CODE WAS MOVED HERE FROM THIS BLOG

    • /* 
        Sketch generated by the Arduino IoT Cloud Thing "1554H2GYCL "
        https://create.arduino.cc/cloud/things/f6a8d66c-2702-45e7-b93a-a2d41f9bedb8 
      
        Arduino IoT Cloud Variables description
      
        The following variables are automatically generated and updated when changes are made to the Thing
      
        String water;
        float dust;
        float temp;
        int waterInt;
      
        Variables which are marked as READ/WRITE in the Cloud Thing will also have functions
        which are called when their values are changed from the Dashboard.
        These functions are generated with the Thing and added at the end of this sketch.
      */
      
      #include "thingProperties.h"
      String inputString = "";         // a String to hold incoming data
      bool stringComplete = false;  // whether the string is complete
      
      float retFloat(String stringOne) {
        // Given a tuple pair in the form varname:value ex. inTemp:1.1
        // return a float value to the right of the colon character
      //Serial.println(stringOne);
      int firstClosingBracket = stringOne.indexOf(':');
      String value = String(stringOne.substring(firstClosingBracket+1));
      //Serial.println(value);
      float val  = value.toFloat();
         return val;
      }
      
      String retString(String stringOne) {
        // Given a tuple pair in the form varname:value ex. inTemp:1.1
        // return a int  value to the right of the colon character
      //Serial.println(stringOne);
      int firstClosingBracket = stringOne.indexOf(':');
      String value = stringOne.substring(firstClosingBracket+1);
      //Serial.println(value);
      //float val  = value.toInt();
         return value;
      }
      
      String getType(String stringOne){
        int colon = stringOne.indexOf(':');
        String value = stringOne.substring(0,colon);
        //Serial.println(value);
           return value;  
      }
      
      void setup() {
        // Initialize serial and wait for port to open:
        Serial.begin(9600);
        Serial1.begin(9600);
        
        // This delay gives the chance to wait for a Serial Monitor without blocking if none is found
        delay(1500); 
      
        // Defined in thingProperties.h
        initProperties();
      
        // Connect to Arduino IoT Cloud
        ArduinoCloud.begin(ArduinoIoTPreferredConnection);
        //delay(3000);
        
        /*
           The following function allows you to obtain more information
           related to the state of network and IoT Cloud connection and errors
           the higher number the more granular information you’ll get.
           The default is 0 (only errors).
           Maximum is 4
       */
        setDebugMessageLevel(2);
        ArduinoCloud.printDebugInfo();
      }
      
      
      void loop() {
        ArduinoCloud.update();
        // Your code here 
        
        // use the string when a newline arrives:
        if (stringComplete) {
          Serial.print("received on RX PIN:");
          Serial.print(inputString);
      
          
          //USE THE InputString HERE
          // get the type of var
          String type = getType(inputString);
          
          if(type == "Temp"){
            temp = retFloat(inputString); 
            Serial.print("Sending value = ");
            Serial.println(temp);
          }
          
          if(type == "Dust"){
            dust = retFloat(inputString); 
            Serial.print("Sending value = ");
            Serial.println(dust);
          }
          
          if(type == "Water"){
            water = retString(inputString); 
            if (water == "WET\n"){
              waterInt = 0;
            }
            if (water == "DRY\n"){
              waterInt = 1;
            }
            Serial.print("Sending value = ");
            Serial.print(water);
            Serial.println(waterInt);
          }  
          
          inputString = "";
          stringComplete = false;
        }
        
        //At the very end of the loop check for serial data
        serialEvent();
        
      }
      
      /*
        SerialEvent occurs whenever a new data comes in the hardware serial RX. This
        routine is run between each time loop() runs, so using delay inside loop can
        delay response. Multiple bytes of data may be available.
      */
      void serialEvent() {
        while (Serial1.available()) {
          // get the new byte:
          char inChar = (char)Serial1.read();
          // add it to the inputString:
          
          inputString += inChar;
          // if the incoming character is a newline, set a flag so the main loop can
          // do something about it:
          if (inChar == '\n') {
            stringComplete = true;
          }
        }
      }
      /*
        Since Temp is READ_WRITE variable, onTempChange() is
        executed every time a new value is received from IoT Cloud.
      */
      void onTempChange()  {
        // Add your code here to act upon Temp change
      }
      
      /*
        Since Water is READ_WRITE variable, onWaterChange() is
        executed every time a new value is received from IoT Cloud.
      */
      void onWaterChange()  {
        // Add your code here to act upon Water change
      }
      
      /*
        Since WaterInt is READ_WRITE variable, onWaterIntChange() is
        executed every time a new value is received from IoT Cloud.
      */
      void onWaterIntChange()  {
        // Add your code here to act upon WaterInt change
      }
      
      /*
        Since Dust is READ_WRITE variable, onDustChange() is
        executed every time a new value is received from IoT Cloud.
      */
      void onDustChange()  {
        // Add your code here to act upon Dust change
      }
      • Cancel
      • Vote Up 0 Vote Down
      • Sign in to reply
      • More
      • Cancel
    • skruglewicz
      skruglewicz over 1 year ago

      CODE- MKR_LoRa_Sender_E2.ino

      CODE HAS MOVED TO COMMENTS BELOW

      /*
      MKR_LoRa_SENDER_InTemp
      This sketch will get the temprture from a DS18B20 Temperature Sensor attached to the MKR WAN 1300 
      Each time the loop runs, we will send a "packet" containing the message "InTemp:<temp>
      the value of <temp> will contain the current tempreture from the sensor
      The packet will be sent 
      
      1-20-2020 Added OLED Adafruit_SSD1306 support.
      
      */
      
      // MKRWAN - Version: 1.0.15
      #include <MKRWAN.h>
      
      #include <SPI.h>
      #include <LoRa.h>
      #include <Wire.h>
      #include "rgb_lcd.h"
      
      // Grove LCD DISPLAY
      rgb_lcd lcd;      //instantiate lcd Object
      
      // Grove TEMPERATURE Sensor
      const int pinTemp = A0;      // pin of temperature sensor
      float temperature;
      float TempF;                 // tempreture in ferienheight
      int B=3975;                  // B value of the thermistor
      float resistance;
      
      //Grove WATER Sensor
      #define WATER_SENSOR 2
      String WaterStatus;
      
      // Grove Dust Sensor 
      int pin = 4;
      unsigned long duration;
      unsigned long starttime;
      unsigned long sampletime_ms = 30000;//sampe 30s ;
      unsigned long lowpulseoccupancy = 0;
      float ratio = 0;
      float concentration = 0;
      float DustStatus;
      
      //DISPLAY STRING
      void Display(String title,String message){
      // display title and message on the LCD display
      // Put title on the 1st line 
      // put message on the 2nd line
        
        //DISPLAY TITLE
        // set the cursor to (0,0):
        lcd.setCursor(0, 0);
        lcd.print(title);
        lcd.print(" . . . . . . . .");
        delay(2000);
       
        //DISPLAY MESSAGE - on a scrolling message on the 2nd line
        // set the cursor to (16,1):
        lcd.setCursor(16,1);
        // set the display to automatically scroll:
        lcd.autoscroll();
        lcd.print(message);
        delay(2000);
      
        //CLEAN UP
        // turn off automatic scrolling
        lcd.noAutoscroll();
        // clear screen for the next Message
        lcd.clear();
      }
      
      void setup() {
        
        // Grove LCD DISPLAY SECTION
        // set up the LCD's number of columns and rows:
        lcd.begin(16, 2);
      
        // LoRa INIT SECTION
        //SHUT OFF SERIAL
        //  Serial.begin(9600);
        //  Serial.println("LoRa Sender");
        Display("LoRa Sender","Started...");
        if (!LoRa.begin(915E6)) {
          while(1){
            //SHUT OFF SERIAL
            Serial.println("Starting LoRa failed!");
            Display("Starting LoRa ","failed!");
          }  
        }
        
        //Grove TEMPERATURE 
          pinMode(A0,INPUT);      //Setting the A0 pin as input pin to take data from the temperature sensor 
      
        //Grove WATER Sensor
        pinMode(WATER_SENSOR, INPUT); 
      
        // Grove Dust Sensor 
        pinMode(pin,INPUT);
        starttime = millis();//get the current time;
      
      }


      // SEND LORA PACKET
      void SendPacket(String type, String value){
        String tuple;
        tuple = String(type) + String(value);
        
        //display the packet contents
        Display("Sending packet: ", tuple );
        //Display(type);
        //Display(value);
        
        // send packet
        LoRa.beginPacket();
        LoRa.print(type);
        LoRa.print(value);
        LoRa.endPacket();
      }
      
      //GET THE WATER DETECT VALUE  WET/DRY 0/1
      String GetWaterStatus(){
        String stat;
        int val;
        val = digitalRead(WATER_SENSOR);
        
        if (val == 0){
          stat = "WET";
        }
        if (val == 1){
          stat = "DRY";
        }
      //  if ((val != 0) || (val != 1) ){
      //    stat = "Water Sensor ERROR";
      //  }  
        return stat;
      }
      
      //GET DUST PARTICLE CONCENTRATION
      float GetDustParticle(){
        bool finished = false;
        
        do{
          
            duration = pulseIn(pin, LOW);
            lowpulseoccupancy = lowpulseoccupancy+duration;
         
            if ((millis()-starttime) > sampletime_ms)//if the sampel time == 30s
            {
                ratio = lowpulseoccupancy/(sampletime_ms*10.0);  // Integer percentage 0=>100
                concentration = 1.1*pow(ratio,3)-3.8*pow(ratio,2)+520*ratio+0.62; // using spec sheet curve
                
                if (lowpulseoccupancy > 0)
                {
                  Serial.print(lowpulseoccupancy);
                  Serial.print(",");
                  Serial.print(ratio);
                  Serial.print(",");
                  Serial.println(concentration);
                }
                
                lowpulseoccupancy = 0;
                starttime = millis();
                finished = true;
            }
        } while (!finished);
      
        return concentration;
          
      }
      
      //GET THE CURRENT Grove Sensor TEMPERATURE
      float GetTemp(){
        
        int val = analogRead(pinTemp);                               // get analog value
        resistance=(float)(1023-val)*10000/val;                      // get resistance
        temperature=1/(log(resistance/10000)/B+1/298.15)-273.15;     // calc temperature in celsius
        TempF = (temperature * 9/5) + 32;                            // calc temp in ferenheight  
                                      
        return TempF;
      }
      
      void loop() {
      
        //get the current Temperature
        TempF = GetTemp();
        //SEND THE PACKET
        
        SendPacket("Temp:",String(TempF));
      
        //get the water status
        WaterStatus = GetWaterStatus();
        SendPacket("Water:",WaterStatus);
      
        // get the dust particle status - Concentration
        DustStatus = GetDustParticle();
        SendPacket("Dust:",String(DustStatus)); 
       
        //delay(5000);
      }
       

      Generated Sketch to run on the Nano 33 IoT
      CODE HAS MOVED TO COMMENTS BELOW :

      • Cancel
      • Vote Up 0 Vote Down
      • Sign in to reply
      • More
      • Cancel
    element14 Community

    element14 is the first online community specifically for engineers. Connect with your peers and get expert answers to your questions.

    • Members
    • Learn
    • Technologies
    • Challenges & Projects
    • Products
    • Store
    • About Us
    • Feedback & Support
    • FAQs
    • Terms of Use
    • Privacy Policy
    • Legal and Copyright Notices
    • Sitemap
    • Cookies

    An Avnet Company © 2023 Premier Farnell Limited. All Rights Reserved.

    Premier Farnell Ltd, registered in England and Wales (no 00876412), registered office: Farnell House, Forge Lane, Leeds LS12 2NE.

    ICP 备案号 10220084.

    Follow element14

    • Facebook
    • Twitter
    • linkedin
    • YouTube