


Hello everyone,
I am going to write a brief review about PSoC 4 BLE kit which I received from element14 on thursday's giveaway. I am grateful for the opportunity to get to know the world of PSoC and BLE that element14 and Cypress has provided.
Since this is my first post in element14 community, I would also like to introduce myself. I am 4th year (the last one) bachelor student of applied physics from Lithuania. Currently working in a laser lab as an assistant and also writing my bachelor thesis there. My experience with electronics is quite limitted, mostly due to a lack of space in student dorms and also finance limit. However, I had some experience with STM32 microcontrollers and have built some small projects. I found element14 community when googling something about IoT and these design challenges got my attention. I hope to take part in one as soon as I have some more spare time (finish my bachelors degree). From now on about the kit.
First impressions
The packaging is very well made - electronics are protected and it is suitable for continuous usage. The kit contains:
1 CY5671CY5671 PRoC BLE module
2 CY8CKIT-142CY8CKIT-142 PSOC 4 BLE module
3. BLE dongle for PC
4. Baseboard with a holder for PSoC 4 BLE or PRoC BLE modules
5. Jumper wires
6. Proximity wires - for CapSense technology demonstration
7. Coin cell
8. USB mini cable.
One of the things that I really like about the baseboard are the rubber 'legs' on the bottom side. It proved really useful to me because not only it protects the bottom pins from accidentally touching something on the table, it also sort of sticks to the table so it's more difficult to drag it.
I really liked the fact that USB mini cable, coin cell, the wires and PC BLE dongle are included. It proved useful to me, but maybe because I have a shortage of this stuff 
The kit is preloaded with project example: by plugging the BLE dongle to the PC and putting the coin cell in the baseboard you can control the LED intensity on BLE dongle by sliding the finger on the slider.


About the PSoC BLE kit:
The main component of it is of course CY8CKIT-142CY8CKIT-142 PSoC 4 BLE module. It has a Cortex M0 based chip with programable analog and digital peripherals, CapSense module for touch sensing and BLE radio. There is also an antenna on the module itself.
PRoC BLE module is similar to PSoC 4 BLE module while lacking some functions like CapSense. I have not yet looked into it deeply.
The baseboard has programmer/debugger, arduino compatible headers, coin cell battery holder, Capsense slider, user and reset buttons and etc..
PC ble dongle gives BLE compatibility for the PC. There is also a software package to check bluetooth received/sent packets.
CapSense
Slider is powered by CapSense technology which is something Cypress is famous about or atleast where they put a lot of advertising. And I have to say I was really amazed by this technology. PSoC 4 BLE module has built in CapSense block, which basically handles capacitive sensing technology. It is possible to build touch buttons, sliders or proximity sensors with it. It also has things like water resistance, liquid flow compensation and etc if you add external shieldings.
I explored this technology a little and I was mostly astonished by proximity - the distance it can sense is pretty large. At first I was getting really low distances but then I doubled the length of the wire an viola! It has like 10cm distance. I am looking forward to making my custom touchless slider or gesture control
Cypress has mobile app for iOS and Android to test BLE projects. Thats what I used for CapSense proximity testing. There was a problem with a newest version of app (it crashed) on my Meizu M2 note, but I found an earlier version and it works fine.


PSoC Creator
PSoC 4 is programmed using the programmer and debugger on the baseboard. IDE is called PSoC Creator and it is very nice. Since my experience was limitted to STM32 microcontrollers and programming with IAR workbench, which is very different and much more difficult, I could not believe how easy is to work with PSoC creator.
There is a section called TopDesign where you simply put all the peripherals that you need. There is another section, where you assign peripherals to physical pins. Then you simply click 'generate application' and you have all the libraries built for your peripherals (in the pictures I2C and PWM). Then you can work on your code with generated high level functions while low level functions are still available.


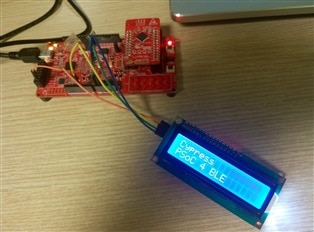
It is possible to set up I2C in just a few minutes. However, I wouldnt be me, if I hadn't struggled for a few days with it  I was trying to make my libraries for I2C hitachi LCD display work, however, I was struggling to launch I2C correctly. It turned out I was using the wrong function. Once I figured it out, I launched it in 10mins
My original idea was to make a bluetooth vibration measurement device. However, due to lack of time (busy with my courses/bachelors degree/work) I did not start that doing that yet. I hope to do that soon.
Summary
The kit is mainly aimed to BLE applications. It can work with voltages as low as 1.7V. Coin cell battery makers say it is dead when it reaches 2V but this kit can still work with it. It is incredibly easy to make projects with PSoC creator, probably on the same level as arduino (However, psoc community is not as large).
I did not test 95% functions of this little thing, but I am positive that I will and probably will move my next projects to PSoC since it is so easy to do everything on it I will update this review with my further adventures with PSoC.
p.s. I attached a PSoC project for hitachi LCD with pcf8574 and also the library itself. The code is not my creation, I just ported the C++ library for arduino to C code and adapted it for PSoC. I do not remember the original source though. The code is a bit messy, so if something is unclear, PM me.


