element14 Community
element14 Community
    Register Log In
  • Site
  • Search
  • Log In Register
  • Community Hub
    Community Hub
    • What's New on element14
    • Feedback and Support
    • Benefits of Membership
    • Personal Blogs
    • Members Area
    • Achievement Levels
  • Learn
    Learn
    • Ask an Expert
    • eBooks
    • element14 presents
    • Learning Center
    • Tech Spotlight
    • STEM Academy
    • Webinars, Training and Events
    • Learning Groups
  • Technologies
    Technologies
    • 3D Printing
    • FPGA
    • Industrial Automation
    • Internet of Things
    • Power & Energy
    • Sensors
    • Technology Groups
  • Challenges & Projects
    Challenges & Projects
    • Design Challenges
    • element14 presents Projects
    • Project14
    • Arduino Projects
    • Raspberry Pi Projects
    • Project Groups
  • Products
    Products
    • Arduino
    • Avnet Boards Community
    • Dev Tools
    • Manufacturers
    • Multicomp Pro
    • Product Groups
    • Raspberry Pi
    • RoadTests & Reviews
  • Store
    Store
    • Visit Your Store
    • Choose another store...
      • Europe
      •  Austria (German)
      •  Belgium (Dutch, French)
      •  Bulgaria (Bulgarian)
      •  Czech Republic (Czech)
      •  Denmark (Danish)
      •  Estonia (Estonian)
      •  Finland (Finnish)
      •  France (French)
      •  Germany (German)
      •  Hungary (Hungarian)
      •  Ireland
      •  Israel
      •  Italy (Italian)
      •  Latvia (Latvian)
      •  
      •  Lithuania (Lithuanian)
      •  Netherlands (Dutch)
      •  Norway (Norwegian)
      •  Poland (Polish)
      •  Portugal (Portuguese)
      •  Romania (Romanian)
      •  Russia (Russian)
      •  Slovakia (Slovak)
      •  Slovenia (Slovenian)
      •  Spain (Spanish)
      •  Sweden (Swedish)
      •  Switzerland(German, French)
      •  Turkey (Turkish)
      •  United Kingdom
      • Asia Pacific
      •  Australia
      •  China
      •  Hong Kong
      •  India
      •  Korea (Korean)
      •  Malaysia
      •  New Zealand
      •  Philippines
      •  Singapore
      •  Taiwan
      •  Thailand (Thai)
      • Americas
      •  Brazil (Portuguese)
      •  Canada
      •  Mexico (Spanish)
      •  United States
      Can't find the country/region you're looking for? Visit our export site or find a local distributor.
  • Translate
  • Profile
  • Settings
Personal Blogs
  • Community Hub
  • More
Personal Blogs
Nico teWinkel's Blog FRM-KL25z, installing headers
  • Blog
  • Documents
  • Mentions
  • Sub-Groups
  • Tags
  • More
  • Cancel
  • New
  • Share
  • More
  • Cancel
Group Actions
  • Group RSS
  • More
  • Cancel
Engagement
  • Author Author: ntewinkel
  • Date Created: 12 May 2013 6:29 PM Date Created
  • Views 1095 views
  • Likes 2 likes
  • Comments 9 comments
  • tutorial
  • freescale
  • frdm
  • frdm-kl25z
  • soldering
  • codeexchange
Related
Recommended

FRM-KL25z, installing headers

ntewinkel
ntewinkel
12 May 2013

Unfortunately, the Freescale Freedom FRDM-KL25z does not come with headers installed, or even included.

This set me back a few weeks having to wait for some headers to arrive in the mail - although I admit that as a good electronics nerd I should have already had some of these on hand image


Last week I finally received some double headers for my Freescale Freedom board. Hooray!


I purchased some 2x40pin headers for the job. The FRDM board uses 1 of 2x6, 2 of 2x8, and 1 of 2x10 headers, so it would be easier to just buy sets of those instead. I probably should have done that, but I think at the time I just couldn't find the ones I needed. The 2x40 are very inexpensive, so it does save a few dollars and since I don't foresee doing this regularly it also keeps me from hoarding more parts image


In any case, one 2x40 piece is enough for the FRDM board. The trick is to score across a connector on both sides and then snap it off there, losing one connector in the process. For example, to cut the 2x10 piece, I used a hobby knife to score across the 11th connection.

image


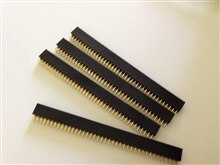
A little bit of cleanup at the snapped ends, and viola! I have the pieces I need:

image


So I soldered them on.

That takes a little bit of fiddling soldering effort, but it's good practice and it's not difficult to do. I would even consider it a great learning opportunity for beginner students.

For those who haven't done any soldering before, Lady Ada has come up with a nice list of tutorials: http://www.ladyada.net/learn/soldering/thm.html

I'm by no means an expert, so I should probably have a look at them to see if I can pick up on any new techniques image


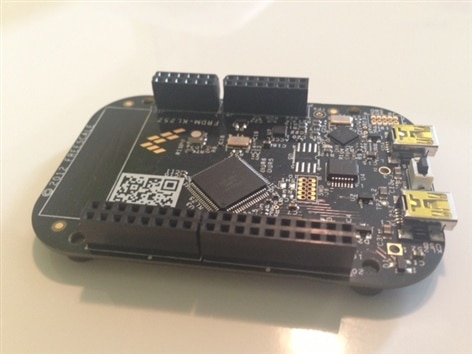
One little trick I did use is that I plugged in a shield to help keep the headers all aligned squarely.


This is what the board looks like now, ready to connect external bits:

image


And this is the soldered side:

image

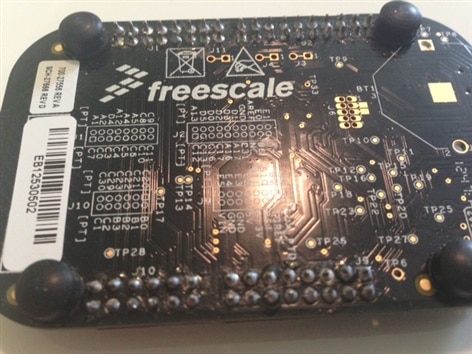
Like I said, I'm no expert. But I think I got some nice connections - the little pyramids are not looking too bad. I double checked with a magnifying lens to make sure I didn't short anything out. On a side note, that magnifying lens is part of the soldering "helping hands" I bought recently - highly recommended! I don't know how I ever soldered little bits without them. Probably because I used to have better eyes, steadier hands, and much more patience image


However, my soldered bits never look as nice and shiny as the ones you see on commercially produced boards, and I always end up with the flux sorta coating the area. I usually wipe around as best as possible using a kleenex and q-tips.


Can any soldering experts give me some advice on what I can do to change that?

Is it the solder I'm using?

Can I wash off the flux without harming the board? I've heard of maybe using a toothbrush to do that, but I would hate to get water staying under the chips, for example.


Cheers,

-Nico

  • Sign in to reply

Top Comments

  • shabaz
    shabaz over 12 years ago +1
    Hi Nico, I think it may rather be the type of solder. Some traditional solders have rosin flux, which works very well but does leave a mess (which can be cleaned with isopropanol - and a firm brush as…
  • mcb1
    mcb1 over 12 years ago in reply to shabaz +1
    Nico Your headers look strangely like the ones I had ..too long. The magnifying glass is almost a given now ...the smd are the hard part, so plenty of light. Luckily at work we have a multitude of flux…
  • mcb1
    mcb1 over 12 years ago in reply to ntewinkel +1
    I think they just set up alias'es. I have given Hanno (12blocks) one to play with while he travels around the states. He nearly fell over when I told him the price. It shouldn't be hard for him to add…
  • mcb1
    mcb1 over 11 years ago in reply to ntewinkel

    Headers

    Good news ... my latest KL25z board (AUS/NZ) came with the headers in the smae package for the same price.

    It appears they have removed the CooCox miniCD nad supplied headers.


    You still need to solder them in, so Nico's blog is still relevant.


    Mark

    • Cancel
    • Vote Up +1 Vote Down
    • Sign in to reply
    • More
    • Cancel
  • ntewinkel
    ntewinkel over 11 years ago in reply to Former Member

    Hi Bargavi,


    If it's a tiny servo, you probably don't need an external power supply - pin 10 supplies 5v (from usb connection).

    Here is an Arduino example, but the circuit will be the same for the KL25Z: http://www.oomlout.com/oom.php/products/ardx/circ-04


    Are you using mbed.org? They have this nice example (https://mbed.org/cookbook/Servo), which includes the circuit of how to hook it up with an external 6volt (4xAA) battery pack.


    Cheers,

    -Nico

    • Cancel
    • Vote Up 0 Vote Down
    • Sign in to reply
    • More
    • Cancel
  • Former Member
    Former Member over 11 years ago in reply to ntewinkel

    Hi Nico-


    Thanks for the reply!


    I need to do a simple project to control a servo motor(4.8-6v) using FRDM-KL25Z. For that I have to connect an external power supply to the board (right?). If possible, can you please tell me what kind of external supply can I give in order to connect my servo motor directly to the board?


    Thanks a lot!

    Regards

    Bargavi.

    • Cancel
    • Vote Up 0 Vote Down
    • Sign in to reply
    • More
    • Cancel
  • ntewinkel
    ntewinkel over 11 years ago in reply to Former Member

    Hi Bargavi,


    I just bought some off EBay direct from China. It takes a month to get here, but it's super cheap ($1.50 for 5 of 2x40). I find it a nice solution for little parts that otherwise tend to cost more to ship than the parts are worth image


    For a few more dollars you can actually buy the proper 2x6, 2x8, and 2x10 pieces there too.


    The spacing is standard (0.1" / 2.54 mm I think) - same as breadboards. It's identical to the layout of the Arduino Uno, except using double headers rather than singles.


    Cheers,

    -Nico

    • Cancel
    • Vote Up 0 Vote Down
    • Sign in to reply
    • More
    • Cancel
  • Former Member
    Former Member over 11 years ago in reply to ntewinkel

    Hi Nico-


    Can you please tell me from where you got these female header for FRDM-KL25Z ? if possible can you please tell me the spacing(pitch) for this headers?


    Thanks a lot!

    Regards

    Bargavi

    • Cancel
    • Vote Up 0 Vote Down
    • Sign in to reply
    • More
    • Cancel
>
element14 Community

element14 is the first online community specifically for engineers. Connect with your peers and get expert answers to your questions.

  • Members
  • Learn
  • Technologies
  • Challenges & Projects
  • Products
  • Store
  • About Us
  • Feedback & Support
  • FAQs
  • Terms of Use
  • Privacy Policy
  • Legal and Copyright Notices
  • Sitemap
  • Cookies

An Avnet Company © 2025 Premier Farnell Limited. All Rights Reserved.

Premier Farnell Ltd, registered in England and Wales (no 00876412), registered office: Farnell House, Forge Lane, Leeds LS12 2NE.

ICP 备案号 10220084.

Follow element14

  • X
  • Facebook
  • linkedin
  • YouTube