

If you've been on the internets lately, you might have noticed that our Raspberry Pi 3-powered retro gaming table has become... quite popular.
And that got me to thinking about all the other PIK3A table builds that you guys have put together, many of which are actually improvements on the first model (which, I admit, I built in something of a rush).
So I thought it'd be fun to bring them all together in one blog post, so we can marvel at the delights of advanced technology being put to such frivolous use, and the entertaining brutalisation of IKEA furniture.
If I've missed your table or you've only just put your project together, let me know and I'll add it to the virtual arcade below.
Game on!
badvs3vil | |
Kenneth Ulrich put together a great two player table, in much the same style as our PIK3A build, only with a full six buttons per player and a widescreen monito in place of the 4:3 display we used.
Also of note is how Kenny included an HDMI splitter so his table can provide a video output to a TV as well as using its built-in monitor, much like the PIK3A Retro Gaming Table Mk II. |  |
timtlm | |
Tim Yonker went super classy with his PIK3A table, going for a striking black and white minimalist design while bumping the number of buttons up to a Street-Fighter-II-friendly six.
The black electrical tape around the cut-out's edges to frame the monitor finish it off beautifully, which is something we didn't do with the original build, and I now regret. Tim's inspired quite a few other members to add this to their own tables, at least, so good work Tim. |  |
highli | |
Erik Bartmann kept it classic with a red table, but he went with a mega eight buttons (good for Neo Geo games)!
He also moved the coin and player start buttons to the side (a wise move for kids, who have leaned on the buttons of our table while playing) and he also added a bezel to the monitor and some bigger speakers underneath the table. |  |
mconners | |
Top Member Mike Conners went green with his build, which looks awesome; I didn't even see a green Lack table in IKEA, so kudos on that alone!
He also swapped out the Arduino Leonardo interface board for the significantly smaller OSOYOO Micro ATmega, which still identifies itself as a keyboard to the Raspberry Pi 3, but comes in a little cheaper and is great when you're trying to save as much space as possible. |  |
izzieil | |
Edward Izard went with a classic black table (good for a less conspicuous living room installation) and with colour-matched joystick and buttons in blue, which looks very stylish.
He beefed up the number of control buttons on the edge of the table too, adding individual player one start, player two start, coin and exit.
Why have a player two start? Well, it's worth remembering that a lot of old arcade games, not least of them being Pac-Man and Space Invaders, support two player games by alternating between the two players. This was especially prevalent on cocktail cabs.
So one set of controls still serves two gamers, so long as you can start in two player mode, of course. Which Eddie's table can. |  |
bombo | |
Bombo here was following the PIK3A thread from the start, and it was great to see him jump in and go for it.
The result is a beautiful white Lack PIK3A, with uniform blue buttons for an understated, highly stylish finish.
The monitor insert is nicely finished off with a black bezel, and he kept things simple by dispensing with the acrylic overlay. In my opinion, the acrylic sheet is more for protection than looks, so if the table is for personal use and you can be sure it's safe from coffee cups, it's certainly not essential. |  |
jameswest | |
Here's an interesting twist from James West. Instead of going with the IKEA Lack table, he's upcycled an old wooden unit he found in a charity shop.
The smaller screen has been mounted in portrait mode (perfect for games like Pac-Man and Karate Champ) and he's dropped a pre-built arcade control panel into the table top rather than using discreet buttons and joysticks. A great labour saving option.
The Pac-Man decals are a delicious topping on this tasty arcade cake too! |  |
rattlehead78 | |
An excellent two player addition to the roster here, where Scott has gone with a larger LACK table and a widescreen monitor (which are actually a little easier to get hold of these days than the 4:3 display used in the original build).
The designs around the buttons add some real flair to the table top, and breaks up the expanse of clinical IKEA white beautifully.
Note that he's got the Amiga emulator up on the screen, and a bigger table like this leaves plenty of room for a keyboard and mouse should you feel inclined to play some old home computer games, as well as the arcade and console stuff. | 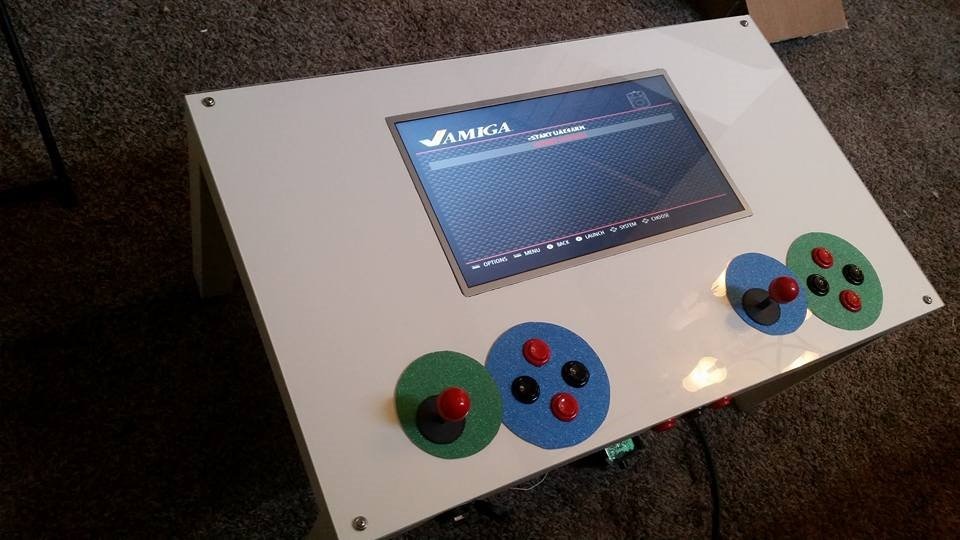 |
jtanner | |
In classic red, James has put together a supercharged version of the original PIK3A, with a good number of extra buttons included, and some very cool decal stickers on the acrylic sheet. Stylish!
Of note is his joystick mounting. Using the mounting holes in the joystick's plate is great in terms of strength, but they can irritate when they're under your hand. So he's astutely countersunk the screw holes so they're underneath the acrylic and don't get in the way when using the joystick, as such mountings often do. I think this is the first time we've seen a bat top joystick on a PIK3A, too.
Also, in case you're wondering, Moonwalker might come from rather dubious origins, but it's actually a really good -- and often overlooked -- game. So tip o' the hat to James for his great taste in pixels, too
Update: James has since added some red screw caps underneath the acrylic sheet, hiding the screw heads nicely! |  |
paulcull | |
Another excellent two player table here from Paul Cullender, who's opted for the larger LACK table, but stuck with the "SNES" four button layout.
Even though a larger monitor could be added here, what I like about this table is how it retains lots of space by still going with a 17" screen. This is still very much a useful living room table, while remaining an awesome retro gaming project!
Oh, and he's also provided some alternative code for interfacing the controls, as a few other members have, so thanks for the Paul! | 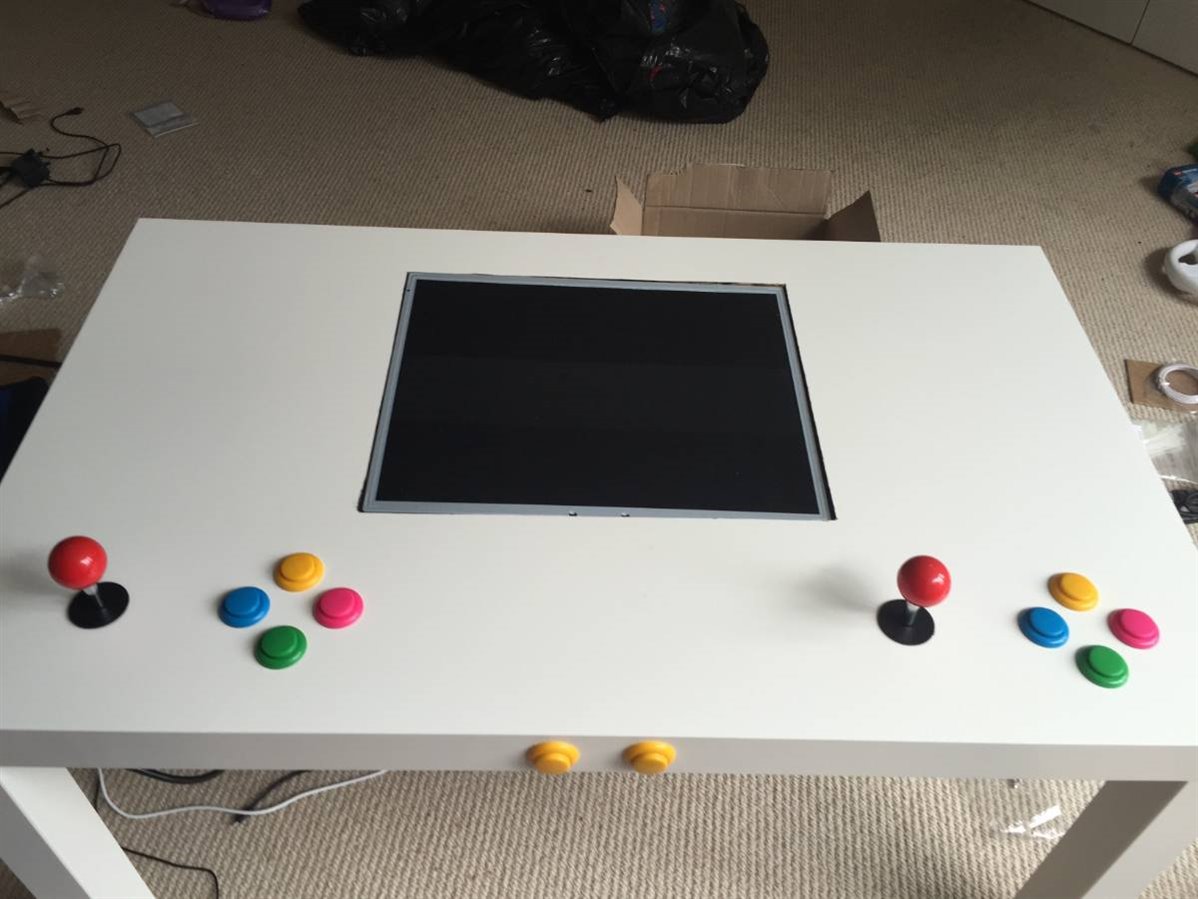 |
stainy | |
Brand new element14 member Darren Gurney has shown off both his electronics and woodworking chops, with some excellent images of the whole process while building his black PIK3A table.
Of note is his hybrid-acrylic table top! It introduces some difficulty, drilling the joystick and button holes through both the table and the acrylic, so what Darren's done is only cover the monitor area with the clear sheeting, but stopping short of the buttons.
Works well, and takes quite a bit of effort out of the hardware side of the build. He's also gone external with the RPi, mounting it under the table in a case (which is what we also did with the PIK3A MkII, at the bottom of the page). |  |
rokster | |
Here's what happens when someone with a few woodworking chops has a go!
Cliff has put together a beautiful table, and managed to squeeze two players with six buttons each onto a standard red LACK table!
Take note of the very neat finish around the monitor cut-out, and underneath he's broken out two USB ports, mounted on a single gang plate -- superb idea! And he's inverted the monitor to improve the viewing angle.
He's also added separate pause and exit buttons on the side of the table, making this a seriously high quality example of PIK3A excellence. | 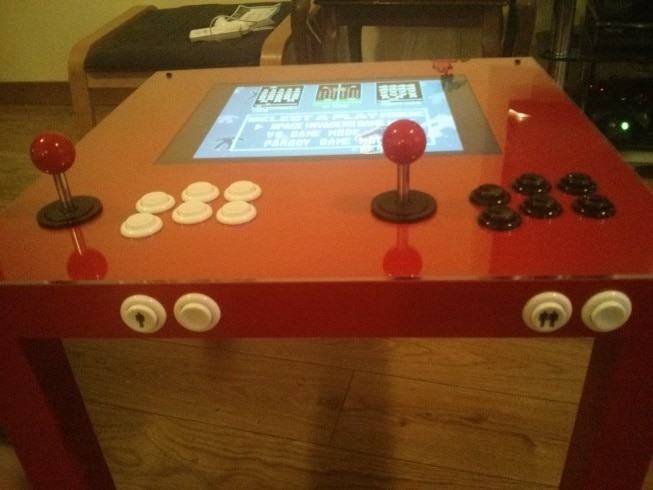 |
clefty | |
CD's red and black table has a great industrial motif to it, not least because of the "DANGER: High Voltage" sticker in the top corner!
A nice bezel around the monitor hides the table cutout nicely, and as you can see from the image she's experimenting with turning it into a two player cab with the addition of a USB SNES-style controller. Great work!
Speaking of the controller, those make an excellent encoder if you don't mind butchering them... |  |
kravex | |
Alan's stark white table with beautifully contrasting all-black controls is a classic PIK3A example, with some very unique features.
First and foremost is the removable acrylic sheet on the table top. As with stainy's above, Alan's protective sheet stops short of the controls, so as just to protect the vulnerable screen. But he's holding it in place with strong magnets, making it secure, but easily removable!
Also check out the one and two player start buttons on the front edge, the external portable speaker underneath, and the additional controls on the side.
A very fine table, which will look even more amazing alongside the black table with white controls that he's working on next! | 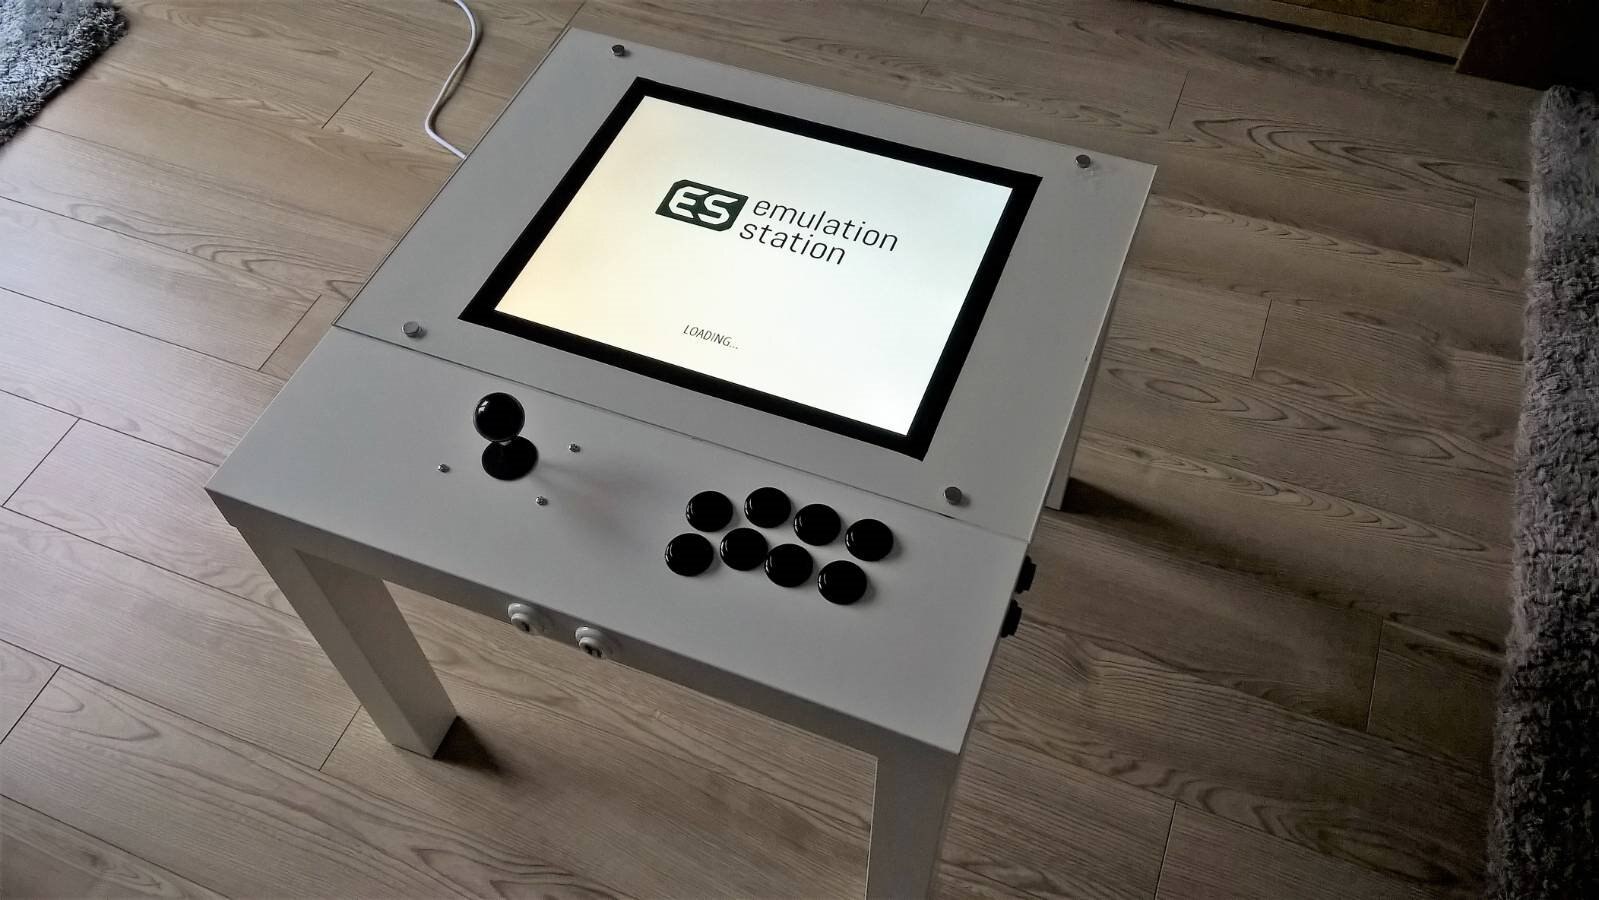 |
padselis | |
Pantelis has built a very fine example of the classic red, single player PIK3A table, with a couple of noticeable improvements.
Firstly, you can see there's no acrylic sheet on the table, which simplifies the construction and really boosts the table's minimalist design. But this is (I'm assuming) an important part of the construction process.
Having previously raised concerns about the integrity of the joystick mountings (quite understandably) he's glued a piece of 10mm plywood underneath the joystick location. The joystick is then screwed to this plywood from underneath, giving it a much stronger mount.
There's also a shutdown function built into the Raspberry Pi, and he's rotated the monitor for an improved viewing angle. Excellent work! | 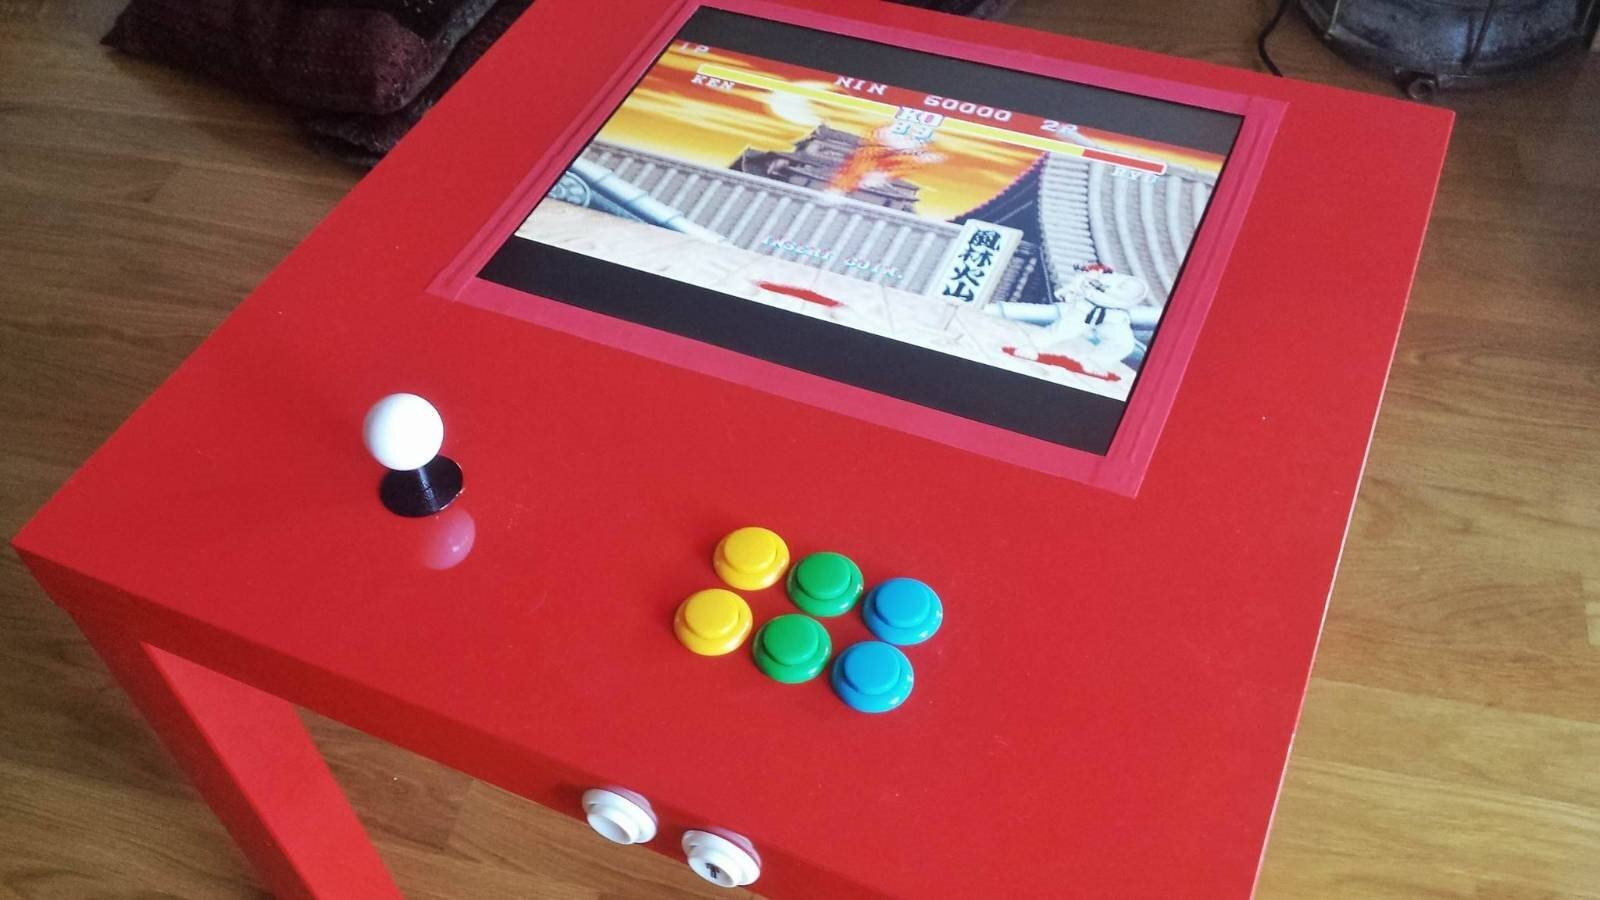 |
gazzac72 | |
Now here's a table that captures the chaotic styling of the retro games world!
Gary's just finished a PIK3A table that makes use of a 21" widescreen monitor, rather than the usual 4:3 screens that most tables have included. He says that it took a bit of work to get it stable within the hollowed out tabletop, and in the end he made use of expanding builders foam to hold it in place. Top tip!
And, of course, he gave it a dazzling lick of retro paint by covering the tabletop in a loud, awesome, retro-styled self-adhesive vinyl! Oh, and the buttons are illuminated, too, so this beauty will look just as good in the dark! | 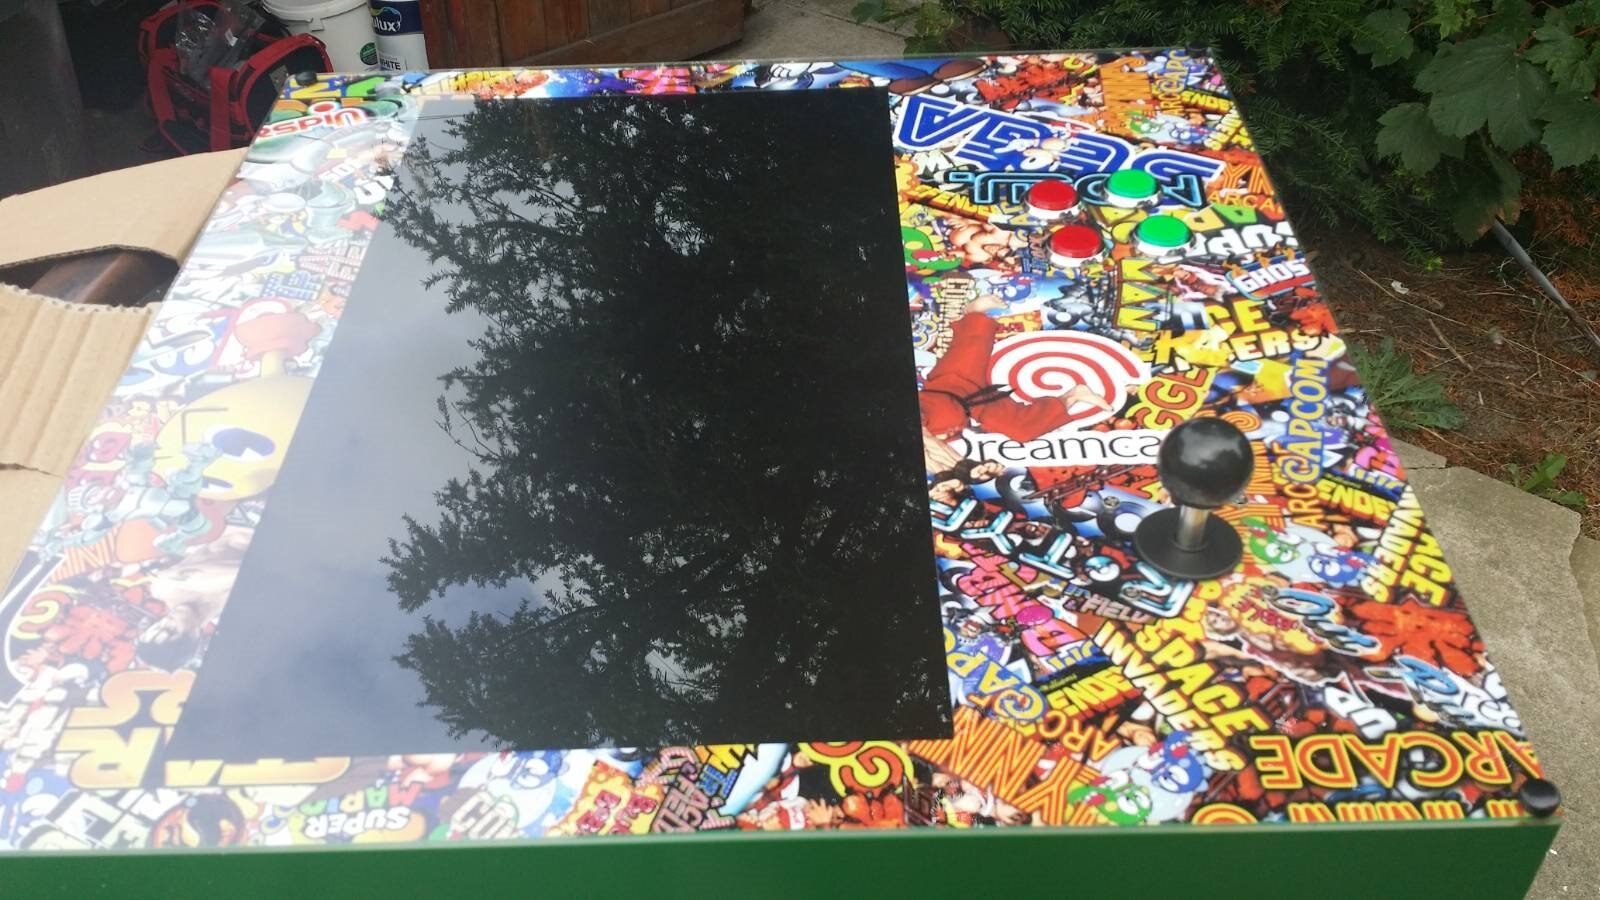 |
spannerspencer | |
| And just for the sake of completion -- not just to blow my own trumpet (not with my back) -- let's include the PIK3A Retro Gaming Table Mk II in the list, in the hope that it inspires you guys to keep on strapping joysticks and buttons to the Raspberry Pi 3! |  |

Top Comments