element14 Community
element14 Community
    Register Log In
  • Site
  • Search
  • Log In Register
  • About Us
  • Community Hub
    Community Hub
    • What's New on element14
    • Feedback and Support
    • Benefits of Membership
    • Personal Blogs
    • Members Area
    • Achievement Levels
  • Learn
    Learn
    • Ask an Expert
    • eBooks
    • element14 presents
    • Learning Center
    • Tech Spotlight
    • STEM Academy
    • Webinars, Training and Events
    • Learning Groups
  • Technologies
    Technologies
    • 3D Printing
    • FPGA
    • Industrial Automation
    • Internet of Things
    • Power & Energy
    • Sensors
    • Technology Groups
  • Challenges & Projects
    Challenges & Projects
    • Design Challenges
    • element14 presents Projects
    • Project14
    • Arduino Projects
    • Raspberry Pi Projects
    • Project Groups
  • Products
    Products
    • Arduino
    • Avnet Boards Community
    • Dev Tools
    • Manufacturers
    • Multicomp Pro
    • Product Groups
    • Raspberry Pi
    • RoadTests & Reviews
  • Store
    Store
    • Visit Your Store
    • Choose another store...
      • Europe
      •  Austria (German)
      •  Belgium (Dutch, French)
      •  Bulgaria (Bulgarian)
      •  Czech Republic (Czech)
      •  Denmark (Danish)
      •  Estonia (Estonian)
      •  Finland (Finnish)
      •  France (French)
      •  Germany (German)
      •  Hungary (Hungarian)
      •  Ireland
      •  Israel
      •  Italy (Italian)
      •  Latvia (Latvian)
      •  
      •  Lithuania (Lithuanian)
      •  Netherlands (Dutch)
      •  Norway (Norwegian)
      •  Poland (Polish)
      •  Portugal (Portuguese)
      •  Romania (Romanian)
      •  Russia (Russian)
      •  Slovakia (Slovak)
      •  Slovenia (Slovenian)
      •  Spain (Spanish)
      •  Sweden (Swedish)
      •  Switzerland(German, French)
      •  Turkey (Turkish)
      •  United Kingdom
      • Asia Pacific
      •  Australia
      •  China
      •  Hong Kong
      •  India
      •  Korea (Korean)
      •  Malaysia
      •  New Zealand
      •  Philippines
      •  Singapore
      •  Taiwan
      •  Thailand (Thai)
      • Americas
      •  Brazil (Portuguese)
      •  Canada
      •  Mexico (Spanish)
      •  United States
      Can't find the country/region you're looking for? Visit our export site or find a local distributor.
  • Translate
  • Profile
  • Settings
Freedom development platform
  • Products
  • Dev Tools
  • Freedom development platform
  • More
  • Cancel
Freedom development platform
Blog [FRDM-KL46Z + KDS + PE] Tutorial: UART communication with a console on the host through OpenSDA
  • Blog
  • Forum
  • Documents
  • Files
  • Members
  • Mentions
  • Sub-Groups
  • Tags
  • More
  • Cancel
  • New
Join Freedom development platform to participate - click to join for free!
  • Share
  • More
  • Cancel
Group Actions
  • Group RSS
  • More
  • Cancel
Engagement
  • Author Author: bheemarao
  • Date Created: 22 May 2015 11:16 AM Date Created
  • Views 1988 views
  • Likes 1 like
  • Comments 2 comments
  • kds
  • uart
  • kl46z
Related
Recommended

[FRDM-KL46Z + KDS + PE] Tutorial: UART communication with a console on the host through OpenSDA

bheemarao
bheemarao
22 May 2015

This project demonstrates UART through OpenSDA (character is printed back on console through the CDC port of the board) with the FRDM-KL46Z Board and Kinetis Design Studio.


I have created a demo project which communicates with a console on the host.

Before we start this project below are the pre-requisites:


  • KDS 2.0.0 software tool from Freescale

         (http://www.freescale.com/webapp/sps/site/prod_summary.jsp?code=KDS_IDE)

  • FRDM-KL46Z Freedom development board


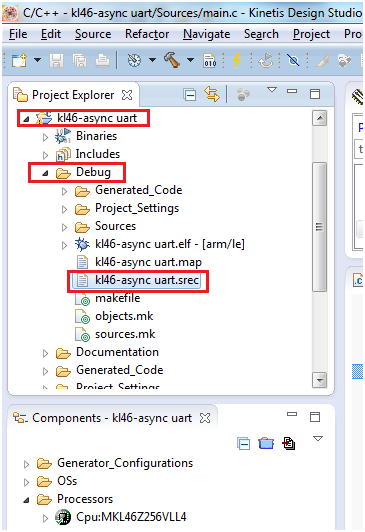
I have created a project by name “kl46-async uart” as shown below:


image


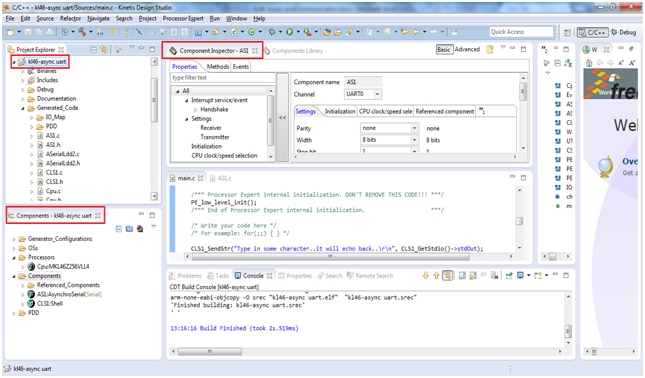
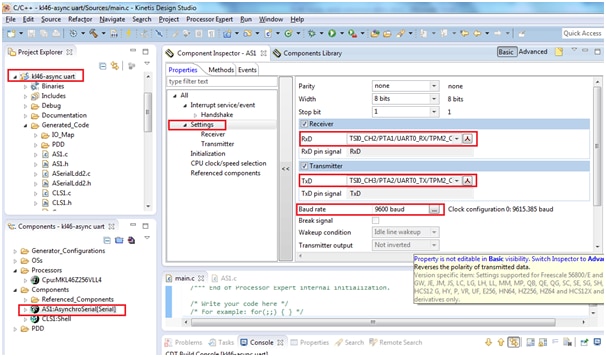
I am adding the component “AsynchroSerial” to our project which is the low-level driver used for this in Processor Expert is the ‘AsynchroSerial‘ component as shown


image


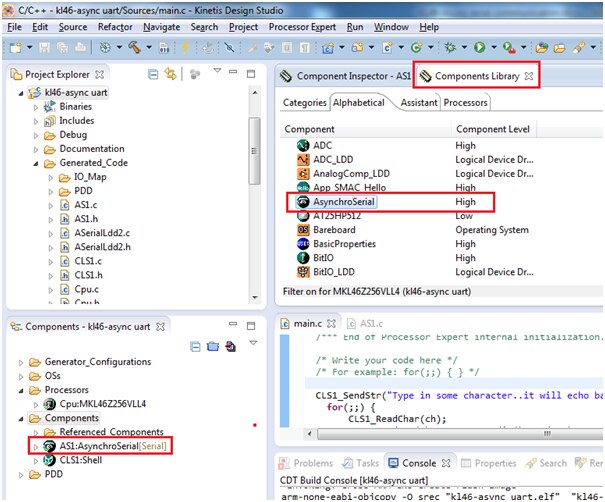
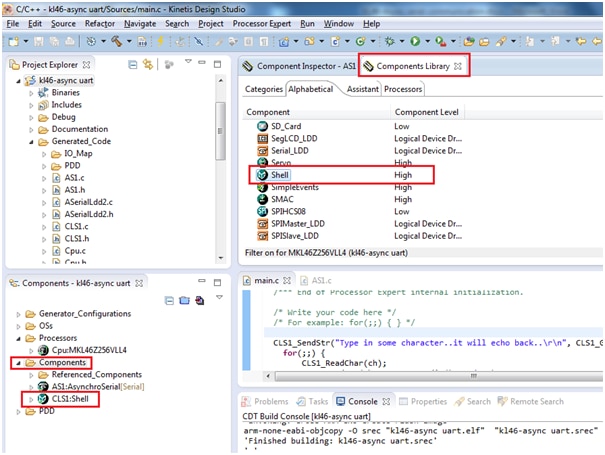
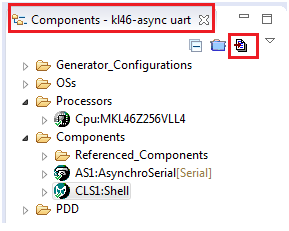
And i am adding the component “ Shell” as the Shell component offers a SendStr() method and other useful functionality.

  So add the Shell component for the project, and use the AsynchroSerial with the ‘Serial’ template.


image


The AsynchroSerial settings are been done as shown below:

The interrupt is enabled as shown below:


image


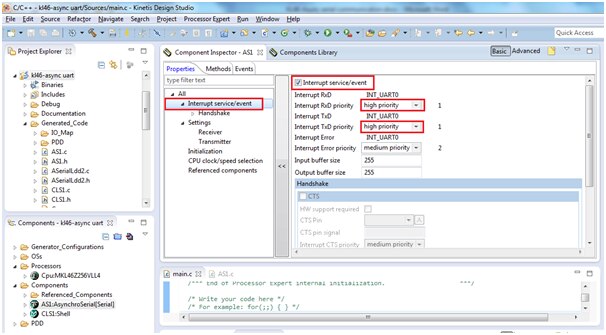
As the CDC port of KL46 is connected to UART0 port i.e


RX port is connected to PTA1 :UART0_RX

TX port is connected to PTA2 :UART0_TX


And the baud rate is set to standard 9600


image


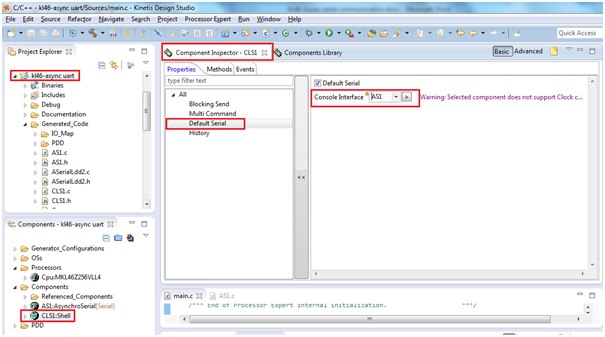
Next select CLS1 shell and make the settings as shown below:

The default serial is connected to AsynchroSerial component AS1


image


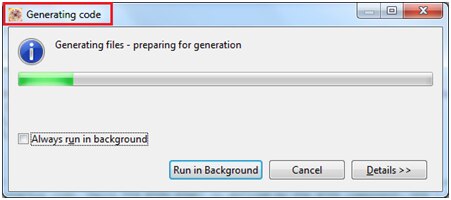
Generate the processor expert code by clicking the button shown below:


image

image


Now its time to add our code:

We are just reading the character from console through RX pin of UART port and same character is printing back to the console from TX pin of UART port.


I have declared a variable ch[10] as a char and storing the typed character from console into it.

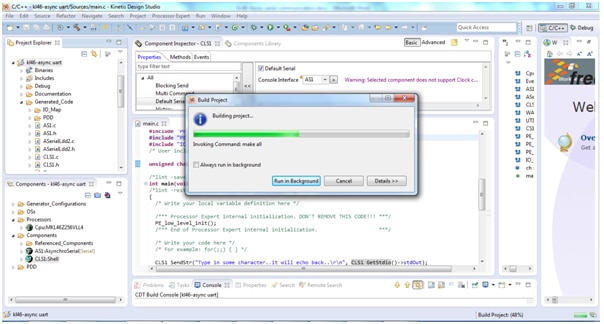
  Now build the project either by clicking on the small hammer button

image

or as shown below


image


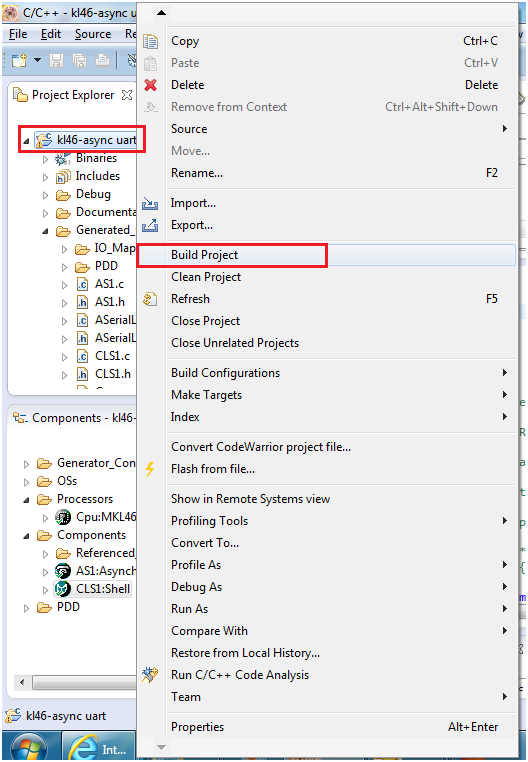
You can see the compilation building the project


image


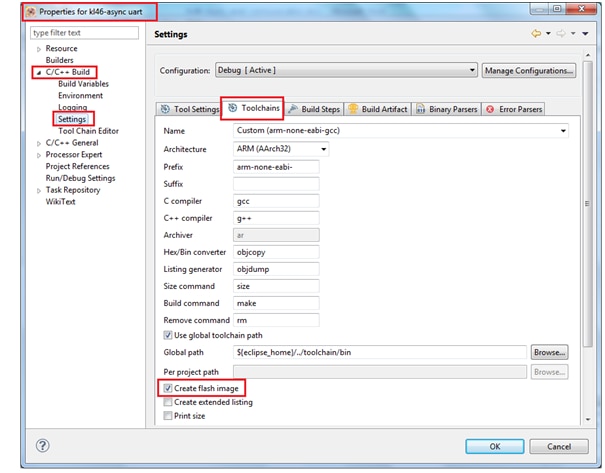
You can run this project either by going to Debug configuration and run by single step or by going to project properties > C/C++ Build > settings > Toolchains at the time of building the project opt for “create flash image”  click apply and ok


image


Next select Tool settings and select Motorola S-record to generate SREC format as shown below:


image


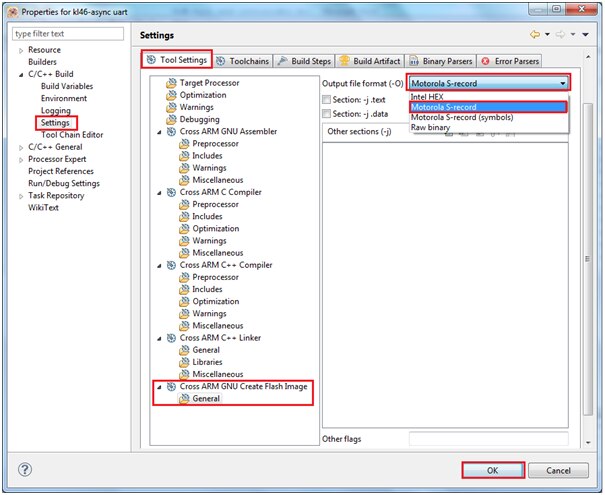
Click on ‘Apply’ and ‘ok’

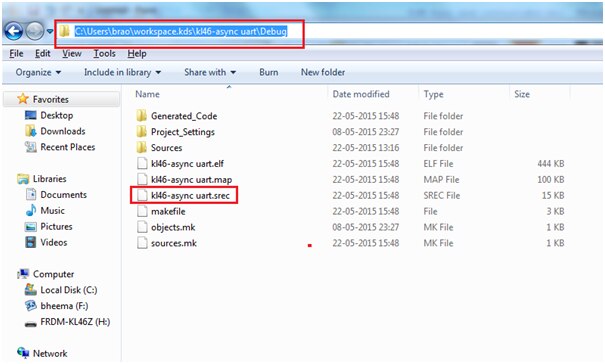
Now build the project, after successfully build you can find the “kl46-async uart.srec” file inside the Debug folder as shown


image


You can check it at below location


image


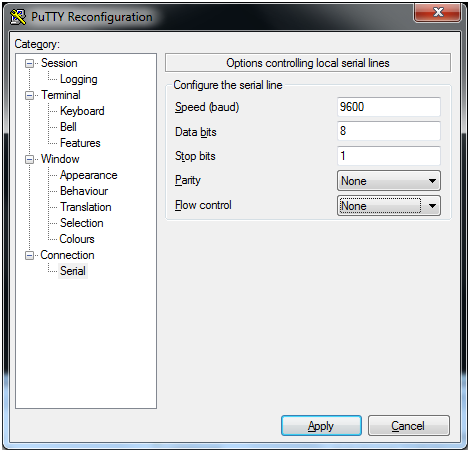
To run your program plug on KL46 board to your computer and open the corresponding COM port (com port number can be noted from device manager after plugging the board) and settings as shown below.


image


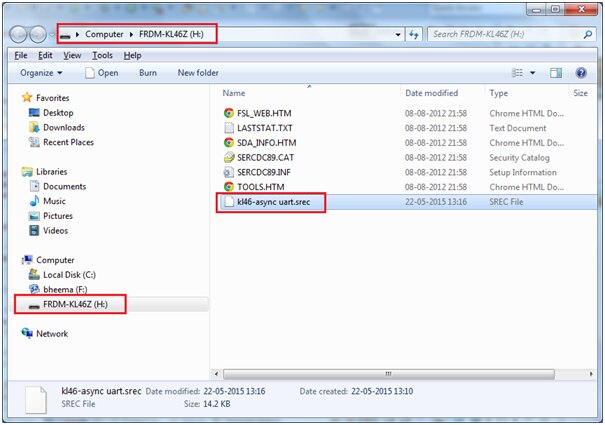
Now just drag and drop the srec file to the KL46 folder detected


image


You can see the output as shown below: type a character it is printed back on console through the CDC port of the board.


image


I have enclosed the project folder and SREC file for quick reference and testing.


Happy Async uart testing image image

Attachments:
kl46-async uart.rar
kl46-async uart.srec.zip
  • Sign in to reply

Top Comments

  • clem57
    clem57 over 10 years ago +1
    Nice demo/tutorial. Keep up the informative work you do here. Clem
Parents
  • balearicdynamics
    balearicdynamics over 10 years ago

    Another good idea with full documentation to bookmark image

    • Cancel
    • Vote Up 0 Vote Down
    • Sign in to reply
    • More
    • Cancel
Comment
  • balearicdynamics
    balearicdynamics over 10 years ago

    Another good idea with full documentation to bookmark image

    • Cancel
    • Vote Up 0 Vote Down
    • Sign in to reply
    • More
    • Cancel
Children
No Data
element14 Community

element14 is the first online community specifically for engineers. Connect with your peers and get expert answers to your questions.

  • Members
  • Learn
  • Technologies
  • Challenges & Projects
  • Products
  • Store
  • About Us
  • Feedback & Support
  • FAQs
  • Terms of Use
  • Privacy Policy
  • Legal and Copyright Notices
  • Sitemap
  • Cookies

An Avnet Company © 2025 Premier Farnell Limited. All Rights Reserved.

Premier Farnell Ltd, registered in England and Wales (no 00876412), registered office: Farnell House, Forge Lane, Leeds LS12 2NE.

ICP 备案号 10220084.

Follow element14

  • X
  • Facebook
  • linkedin
  • YouTube