element14 Community
element14 Community
    Register Log In
  • Site
  • Search
  • Log In Register
  • Community Hub
    Community Hub
    • What's New on element14
    • Feedback and Support
    • Benefits of Membership
    • Personal Blogs
    • Members Area
    • Achievement Levels
  • Learn
    Learn
    • Ask an Expert
    • eBooks
    • element14 presents
    • Learning Center
    • Tech Spotlight
    • STEM Academy
    • Webinars, Training and Events
    • Learning Groups
  • Technologies
    Technologies
    • 3D Printing
    • FPGA
    • Industrial Automation
    • Internet of Things
    • Power & Energy
    • Sensors
    • Technology Groups
  • Challenges & Projects
    Challenges & Projects
    • Design Challenges
    • element14 presents Projects
    • Project14
    • Arduino Projects
    • Raspberry Pi Projects
    • Project Groups
  • Products
    Products
    • Arduino
    • Avnet & Tria Boards Community
    • Dev Tools
    • Manufacturers
    • Multicomp Pro
    • Product Groups
    • Raspberry Pi
    • RoadTests & Reviews
  • About Us
  • Store
    Store
    • Visit Your Store
    • Choose another store...
      • Europe
      •  Austria (German)
      •  Belgium (Dutch, French)
      •  Bulgaria (Bulgarian)
      •  Czech Republic (Czech)
      •  Denmark (Danish)
      •  Estonia (Estonian)
      •  Finland (Finnish)
      •  France (French)
      •  Germany (German)
      •  Hungary (Hungarian)
      •  Ireland
      •  Israel
      •  Italy (Italian)
      •  Latvia (Latvian)
      •  
      •  Lithuania (Lithuanian)
      •  Netherlands (Dutch)
      •  Norway (Norwegian)
      •  Poland (Polish)
      •  Portugal (Portuguese)
      •  Romania (Romanian)
      •  Russia (Russian)
      •  Slovakia (Slovak)
      •  Slovenia (Slovenian)
      •  Spain (Spanish)
      •  Sweden (Swedish)
      •  Switzerland(German, French)
      •  Turkey (Turkish)
      •  United Kingdom
      • Asia Pacific
      •  Australia
      •  China
      •  Hong Kong
      •  India
      • Japan
      •  Korea (Korean)
      •  Malaysia
      •  New Zealand
      •  Philippines
      •  Singapore
      •  Taiwan
      •  Thailand (Thai)
      • Vietnam
      • Americas
      •  Brazil (Portuguese)
      •  Canada
      •  Mexico (Spanish)
      •  United States
      Can't find the country/region you're looking for? Visit our export site or find a local distributor.
  • Translate
  • Profile
  • Settings
RIoTboard
  • Products
  • Dev Tools
  • Single-Board Computers
  • RIoTboard
  • More
  • Cancel
RIoTboard
Blog Part 2: Build an Android App on RIoTBoard
  • Blog
  • Forum
  • Documents
  • Files
  • Members
  • Mentions
  • Sub-Groups
  • Tags
  • More
  • Cancel
  • New
Join RIoTboard to participate - click to join for free!
  • Share
  • More
  • Cancel
Group Actions
  • Group RSS
  • More
  • Cancel
Engagement
  • Author Author: bluescreen
  • Date Created: 8 Feb 2014 4:10 AM Date Created
  • Views 2523 views
  • Likes 2 likes
  • Comments 15 comments
Related
Recommended

Part 2: Build an Android App on RIoTBoard

bluescreen
bluescreen
8 Feb 2014

In my last blog, we look at the features of the RIoTBoard and started setting up our devbox so we could get ready to write Android apps. In this post, we're going to finish setting up Eclipse. We'll install Android version 4.3 from the SDK Manager and add the Devices panel to our environment. In the next installment, we will finish getting our devbox ready for writing Android apps, add the Devices panel to Eclipse, and connect our RIoTBoard to devbox. In the final installment, we'll write our Hello, world app and transfer it over to the RIoTBoard for testing.


I. A Quick Look at Eclipse


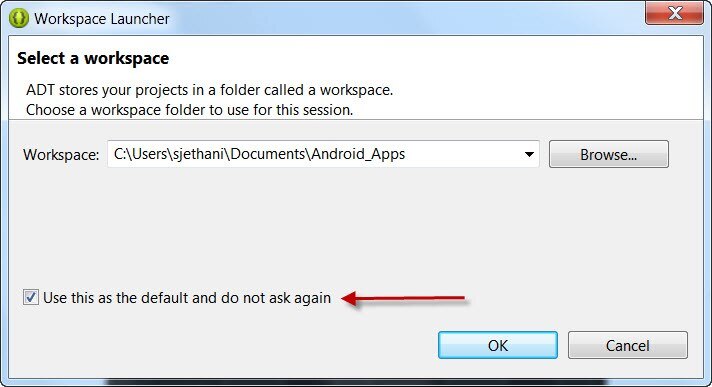
Hopefully, you were able to start Eclipse by the end of the last blog. After you get past the splash screen, it will ask you where you want to save your app files. I chose to create a new directory in my "Documents" folder, but you can place it anywhere you prefer on your computer. Check the box so it won't ask you to do this again.


image


After it finishes loading, Eclipse will ask you if you would like help building your app. We're going to build our app a different way, so x-out of this window:


image


You should now be looking at the Eclipse workspace:


image


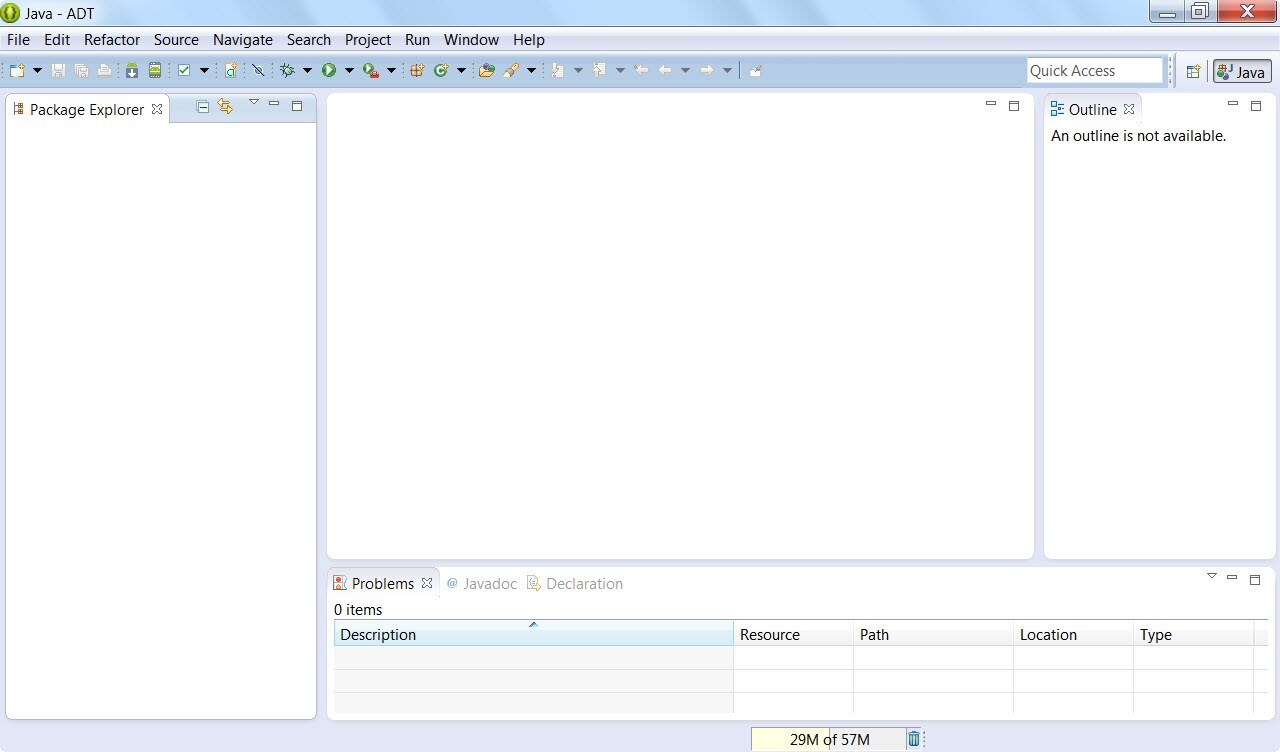
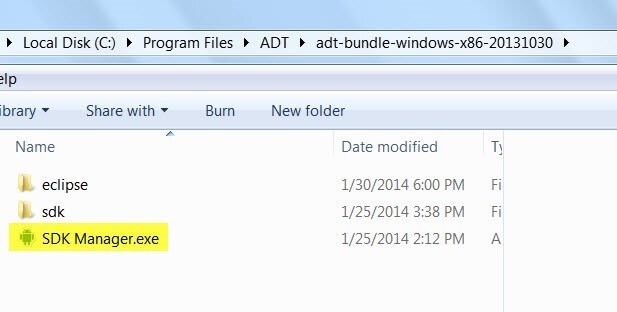
Lots of white space. Don't worry-- we're going to start filling this up with code just as soon as we tell Eclipse what version of Android we want to use. To do this, we need to run a program called the SDK Manager. It was installed to your computer as part of the Android Developer Tools (ADT), and, if you're curious, you can find it in the main ADT directory:


image


Getting to the SDK Manager is so important when building Android apps, that the version of Eclipse you downloaded as part of the ADT includes a nifty button which will launch it so you don't have to go hunting through directories to find it:


image


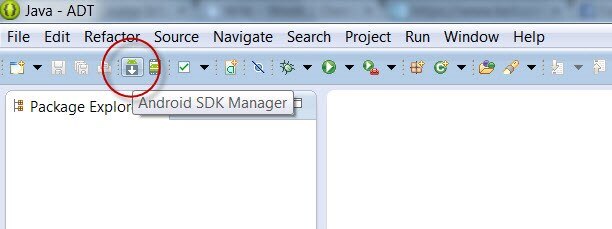
Let's click it and launch the SDK Manager.


II. Using the SDK Manager


The RIoTBoard comes equipped with Android 4.3, also known as Jelly Bean. This means we will need to tell Eclipse that this is the version of Android we're going to use to build our apps. You do that in the SDK Manager. (And don't worry-- just because we're developing our app for version 4.3 doesn't mean it won't run on earlier versions of Android. I'll show you how we address the issue of backwards compatibility a bit later.)


When you start the SDK Manager up, it will automatically connect to Google's servers to locate all the latest updates to Android versions and tools.


image


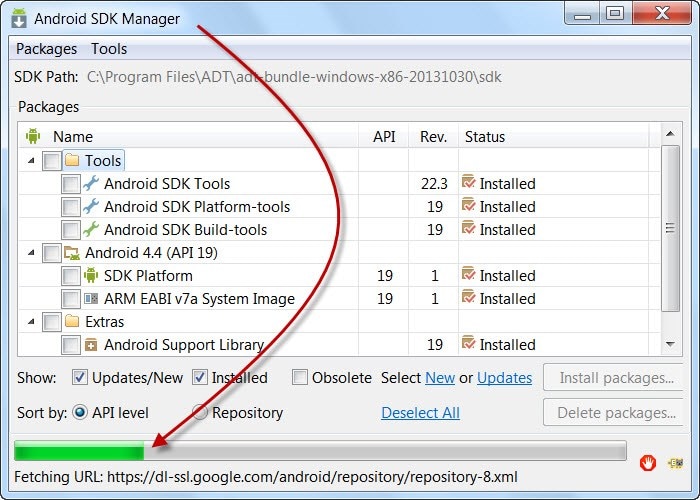
Give it a few minutes to find all the updates out there.


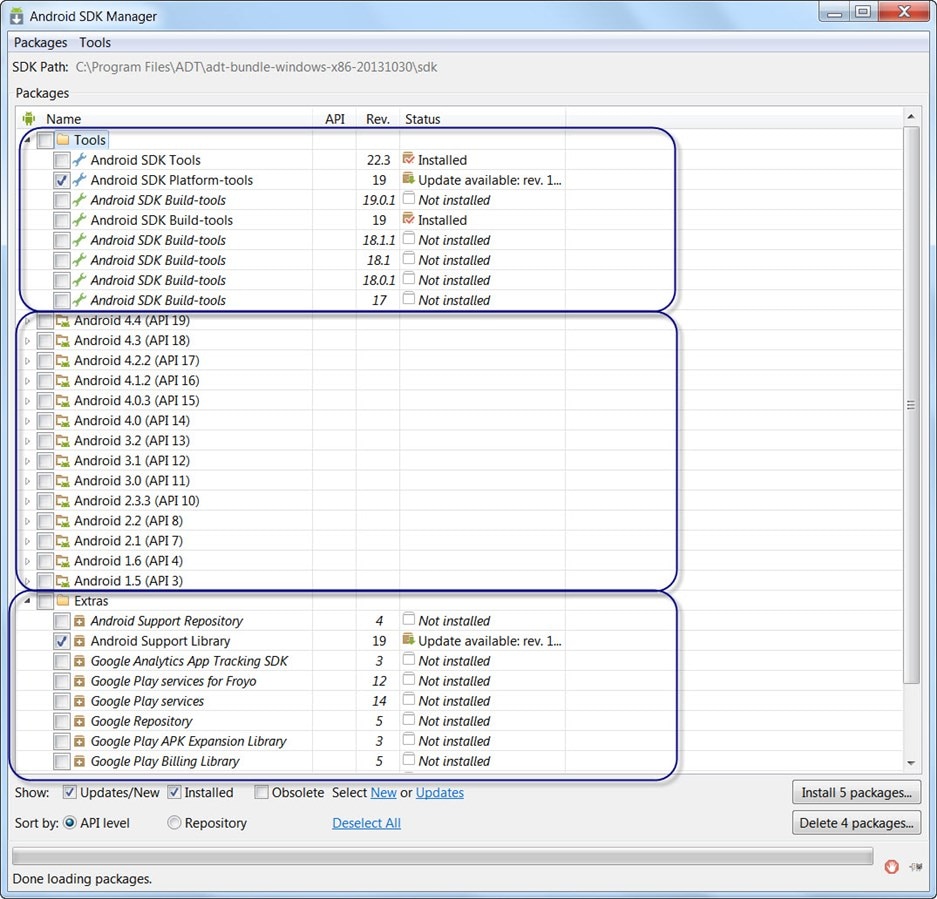
Available files in the SDK update window fall into three categories: Tools, Android versions (APIs), and Extras:


image


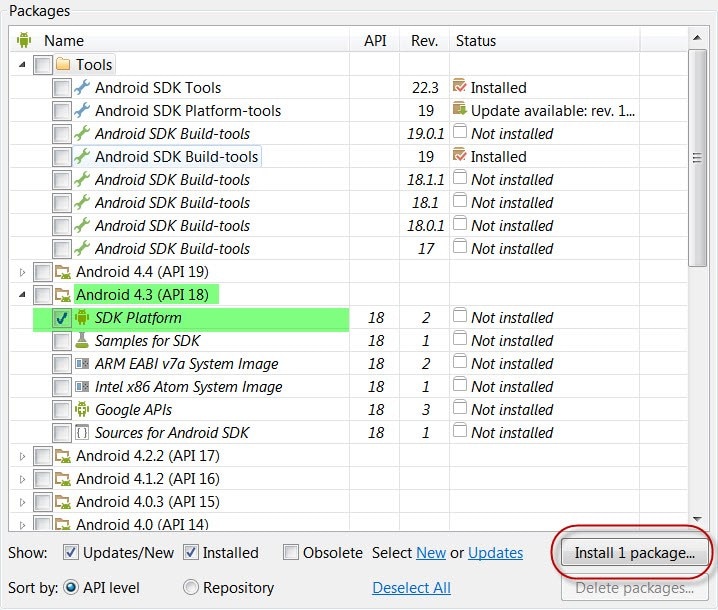
Even though API 19 (KitKat) is the latest version, we're going to stick to API 18, since that corresponds to the Android version on the RIoTBoard. The only thing we need to select is SDK Platform for API 18. Select that and click Install 1 package:


image


(By the way, here's what we aren't going to download: emulators. And this is a beautiful thing. Why do I inveigh so often against Android emulators? Because they are memory-hogs. They tend to reduce your machine to a standstill if you can get them working at all. In my Android class, most of the complaints centered around slow-running emulators for Intel and ARM. Here's a taste. Now, back to the installation.)


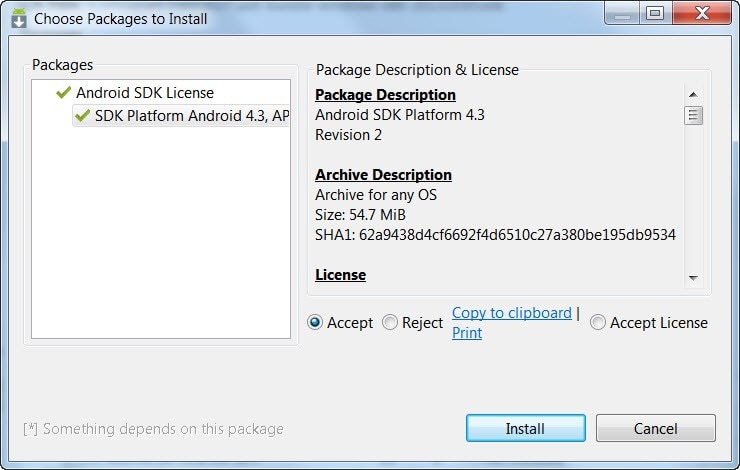
You may need to consent to a legal agreement when it pops up:


image


After it finishes, re-start Eclipse.


III. Finish Configuring Eclipse


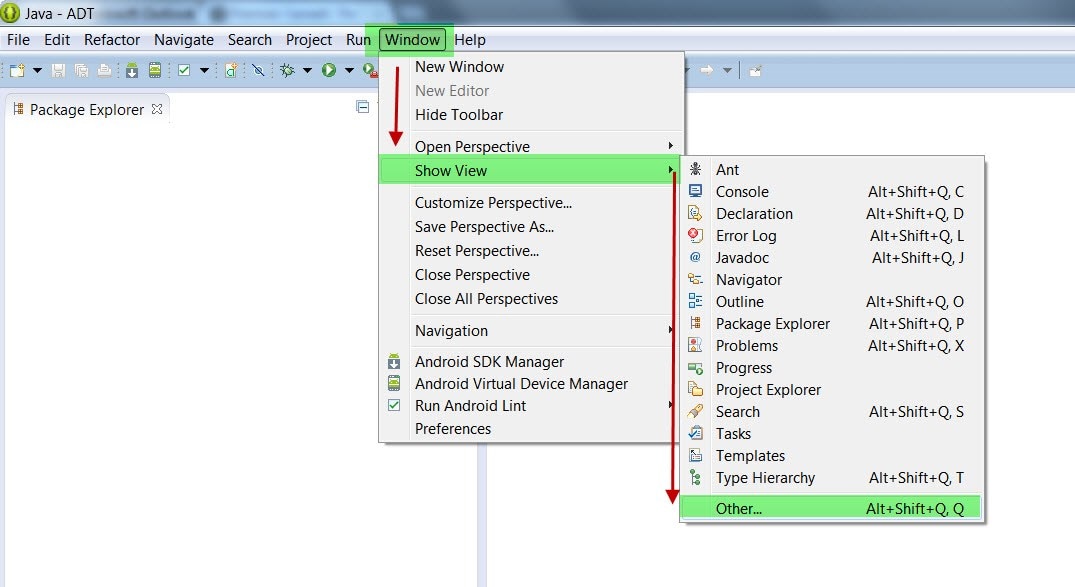
Once Eclipse opens up, we need to add a panel to see any Android devices which might be connected to devbox (hint: it's going to be the RIoTBoard. image) To add the Devices panel, click on the top Windows toolbar, then select Show View, and Other...:


image


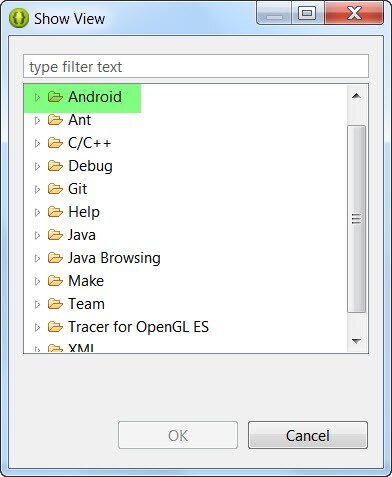
Next, select Android from the pop-up box:
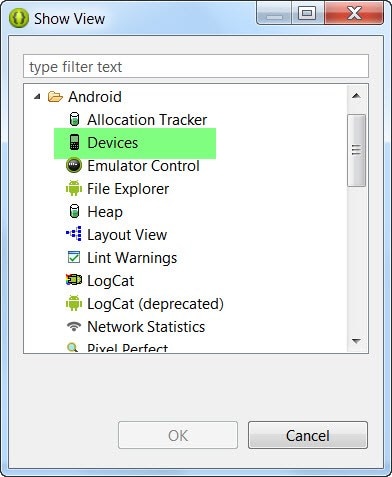
image


And select Devices:


image


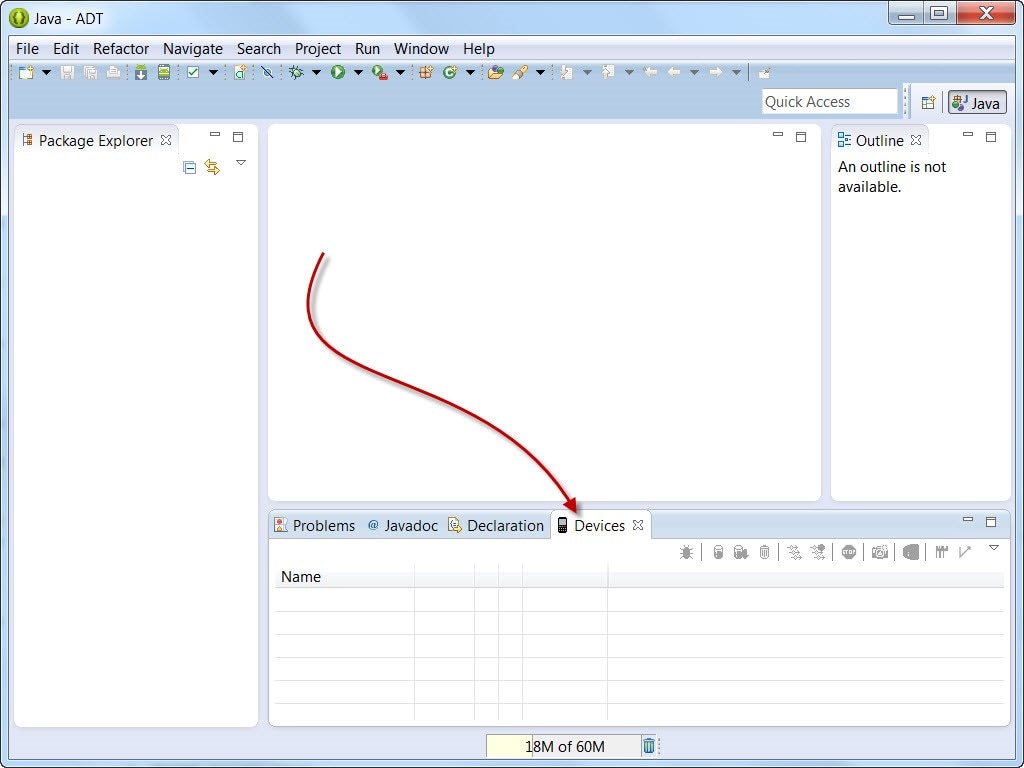
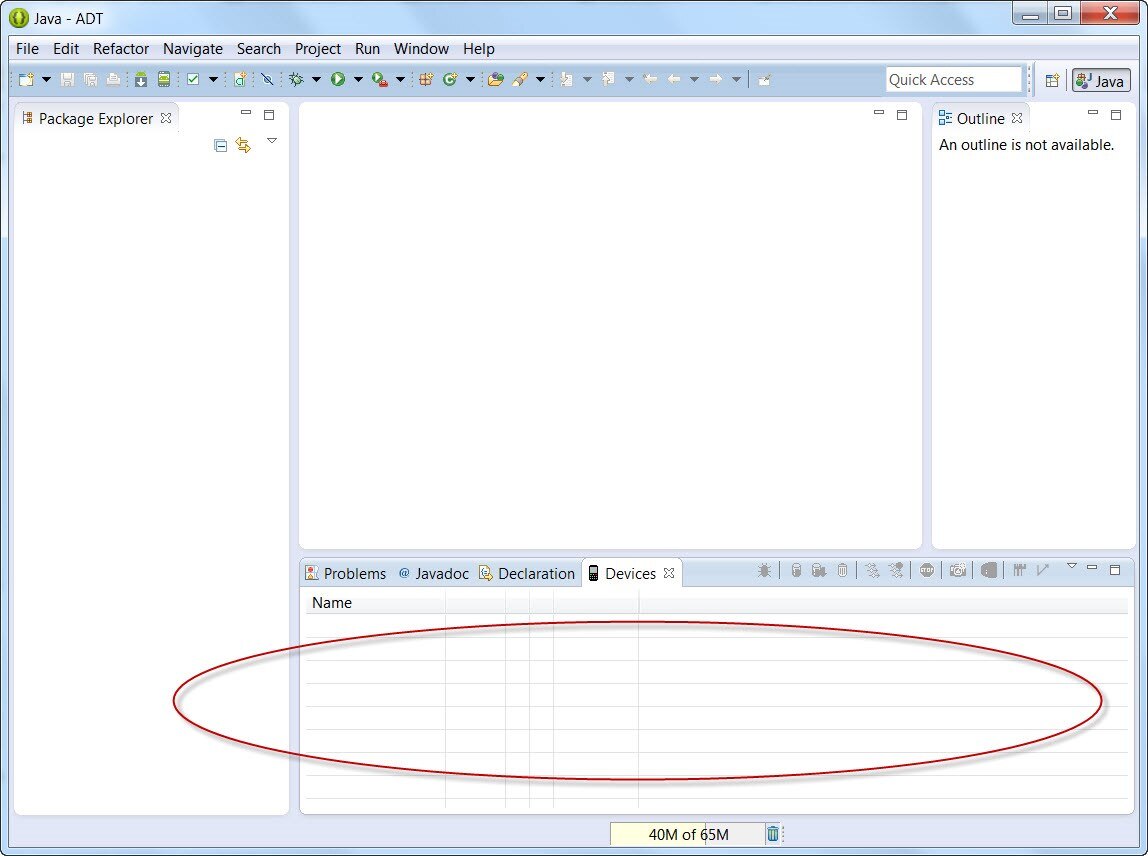
Voila! You should now see a new panel for Android devices in the main Eclipse window:


image


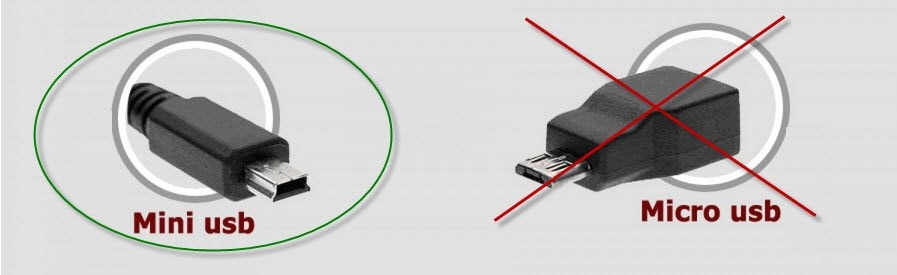
Time to connect our RIoTBoard. You'll need a mini-USB to USB-A cable. It's easy to confuse mini-USB with the now-dominant micro-USB. Make sure you get the right one:


image


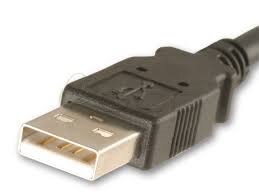
The other end of the cable is a regular USB-A connector:


image


(You can get one here if you're in North America. If you're outside North America, select your country link here.)


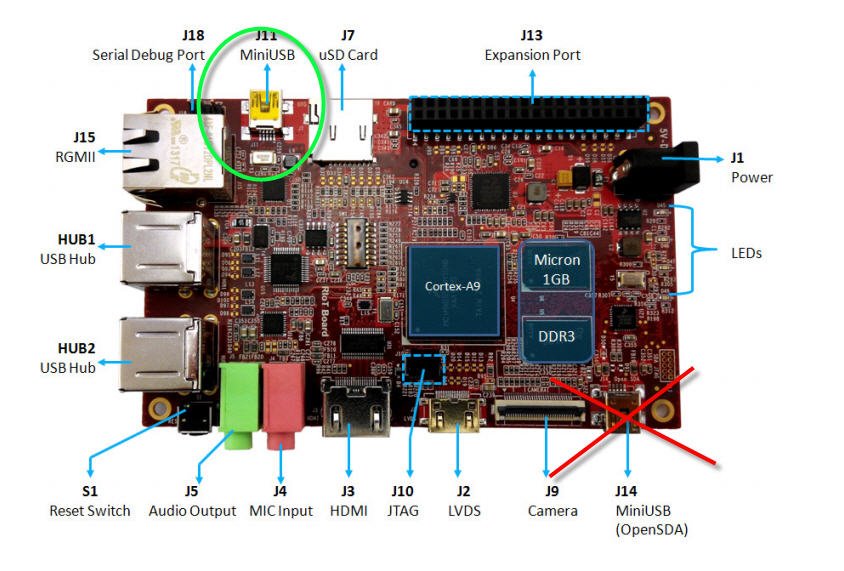
On the RIoTBoard, there are two different mini-USB ports. One of these is not yet activated. Plug your USB cable into port J11-- the one right next to the Ethernet port:


image

Now connect the other end to devbox. It should automatically install the RIoTBoard driver. Once you get the message that the driver has finished installing, you may be surprised to see that it still doesn't appear in the Devices panel in Eclipse:


image


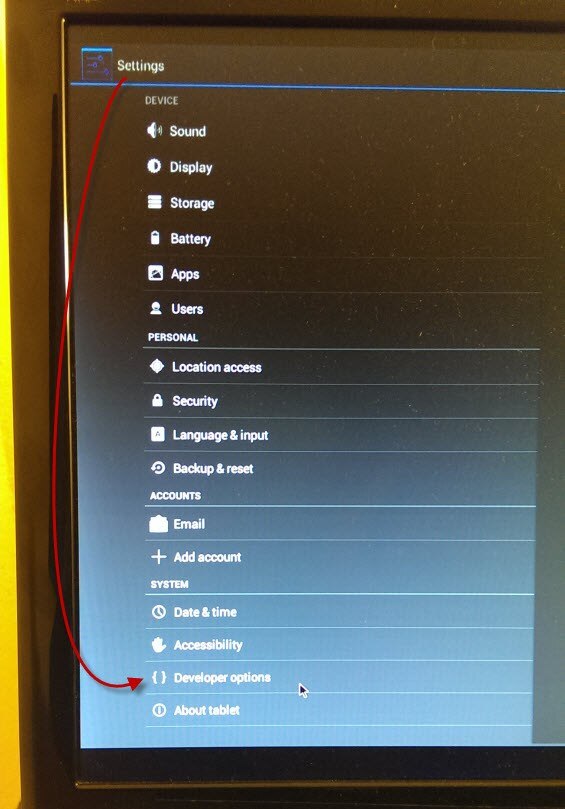
The reason is that we need to enable Debugging mode on our RIoTBoard-- just like you would on any other Android device connected to devbox. Go into the RIoTBoard's Settings and click on Developer options:


image


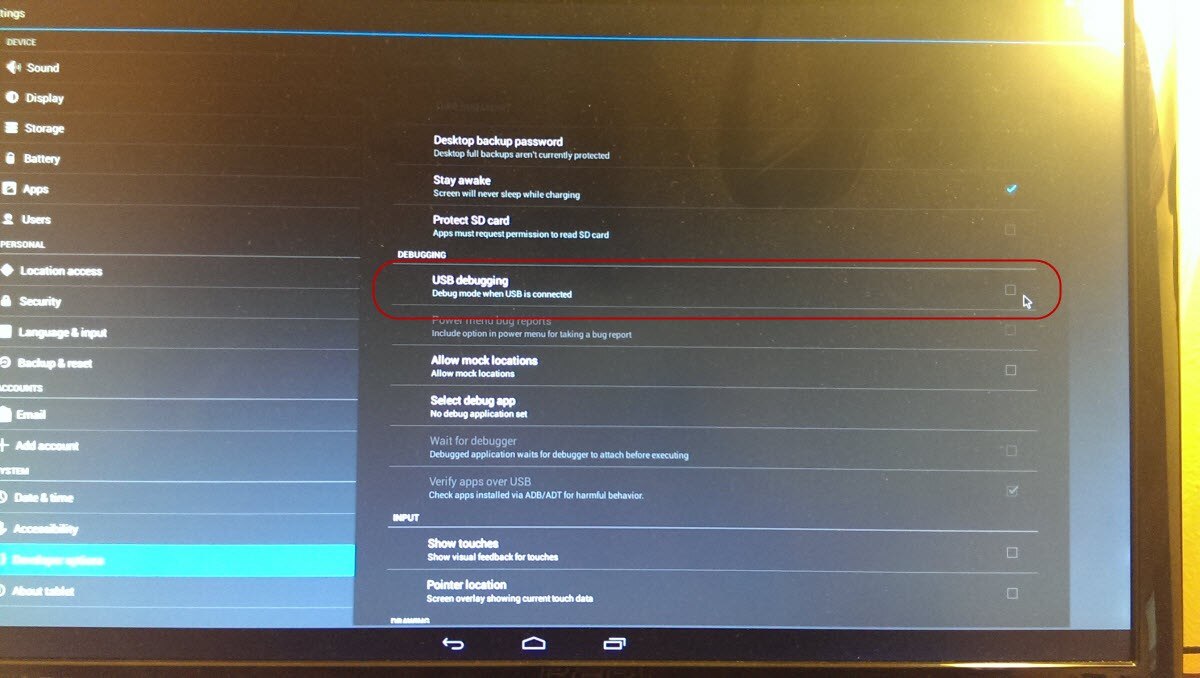
Check the box for USB Debugging:


image


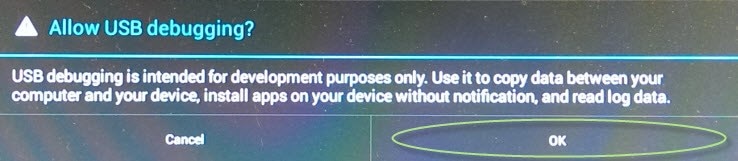
You'll get a pop-up warning; click OK (We know what we're doing, right..?)


image


Now restart Eclipse and check in the Devices panel:


image


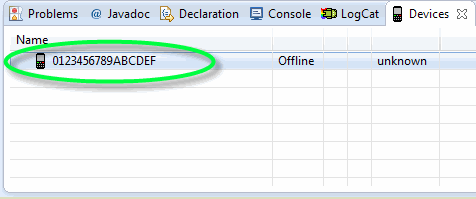
Now, "0123456789ABCDEF" may not be the most intuitive default name, but rest assured-- this is the RIoTBoard!


If you've made it this far, you're doing a great job. You've finished setting up ADT and Eclipse, downloaded all the software you needed from the Android SDK Manager, and got devbox to recognize your RIoTBoard.


Next time, we'll write our app and transfer it over to the RIoTBoard for testing.


image

  • Sign in to reply

Top Comments

  • Former Member
    Former Member over 11 years ago +2
    After re-flashing my board, I noticed I didn't have a "Developer Options" option. Turns out you may have to enable it: From How to enable developer settings on Android 4.2 | Android Central Go to the settings…
  • johnbeetem
    johnbeetem over 11 years ago +1
    This has done nothing to change my impression that using Eclipse is "like flying a jet airliner with 100,000 switches", as an old prof of mine used to say
  • johnbeetem
    johnbeetem over 11 years ago in reply to bluescreen +1
    Sagar Jethani wrote: I never heard that before! I wouldn't shed any tears if Eclipse went away, but it's what they are teaching our class since it's bundled with the Android Tools. Do you have…
  • bluescreen
    bluescreen over 11 years ago in reply to Former Member

    Hi Java.


    At long last, my third and final installment on writing Android Apps on the RIoTBoard has been published. I'm sorry for the delay in posting it, and hope you're able to get your first app up and running! Let me know how it goes. image


    Cheers,

    Sagar

    • Cancel
    • Vote Up 0 Vote Down
    • Sign in to reply
    • More
    • Cancel
  • bluescreen
    bluescreen over 11 years ago in reply to Former Member

    Hi Java.


    Thanks for the kind words, and sorry about the delay. I had to steal my keyboard and monitor for another devkit and your post is the impetus I needed to hook my RIoTBoard back up.


    Third and final blog post, coming soon!

    • Cancel
    • Vote Up 0 Vote Down
    • Sign in to reply
    • More
    • Cancel
  • Former Member
    Former Member over 11 years ago

    Hi Sagar - this is great, and I am anxiously awaiting the next installment which will tell us how to actually write our first app! Any idea when this will be?

    • Cancel
    • Vote Up +1 Vote Down
    • Sign in to reply
    • More
    • Cancel
  • Former Member
    Former Member over 11 years ago in reply to Former Member

    In the Android SDK program, try installing the "Google USB Driver". That might help. See my post here for more details that should help get it up and running: How to Install Netflix Streaming on the RIoTBoard

    • Cancel
    • Vote Up +1 Vote Down
    • Sign in to reply
    • More
    • Cancel
  • bluescreen
    bluescreen over 11 years ago in reply to Former Member

    Hi pallutr.


    When you connected your RIoTBoard to your devbox initially, did you see a pop-up indicating it was installing the device drivers?


    I have a new RIoTBoard here which I will use to go through the steps today + see if I can figure out what's happening. Will also look under my system devices + see how it appears there.

    • Cancel
    • Vote Up 0 Vote Down
    • Sign in to reply
    • More
    • Cancel
>
element14 Community

element14 is the first online community specifically for engineers. Connect with your peers and get expert answers to your questions.

  • Members
  • Learn
  • Technologies
  • Challenges & Projects
  • Products
  • Store
  • About Us
  • Feedback & Support
  • FAQs
  • Terms of Use
  • Privacy Policy
  • Legal and Copyright Notices
  • Sitemap
  • Cookies

An Avnet Company © 2025 Premier Farnell Limited. All Rights Reserved.

Premier Farnell Ltd, registered in England and Wales (no 00876412), registered office: Farnell House, Forge Lane, Leeds LS12 2NE.

ICP 备案号 10220084.

Follow element14

  • X
  • Facebook
  • linkedin
  • YouTube