element14 Community
element14 Community
    Register Log In
  • Site
  • Search
  • Log In Register
  • About Us
  • Community Hub
    Community Hub
    • What's New on element14
    • Feedback and Support
    • Benefits of Membership
    • Personal Blogs
    • Members Area
    • Achievement Levels
  • Learn
    Learn
    • Ask an Expert
    • eBooks
    • element14 presents
    • Learning Center
    • Tech Spotlight
    • STEM Academy
    • Webinars, Training and Events
    • Learning Groups
  • Technologies
    Technologies
    • 3D Printing
    • FPGA
    • Industrial Automation
    • Internet of Things
    • Power & Energy
    • Sensors
    • Technology Groups
  • Challenges & Projects
    Challenges & Projects
    • Design Challenges
    • element14 presents Projects
    • Project14
    • Arduino Projects
    • Raspberry Pi Projects
    • Project Groups
  • Products
    Products
    • Arduino
    • Avnet Boards Community
    • Dev Tools
    • Manufacturers
    • Multicomp Pro
    • Product Groups
    • Raspberry Pi
    • RoadTests & Reviews
  • Store
    Store
    • Visit Your Store
    • Choose another store...
      • Europe
      •  Austria (German)
      •  Belgium (Dutch, French)
      •  Bulgaria (Bulgarian)
      •  Czech Republic (Czech)
      •  Denmark (Danish)
      •  Estonia (Estonian)
      •  Finland (Finnish)
      •  France (French)
      •  Germany (German)
      •  Hungary (Hungarian)
      •  Ireland
      •  Israel
      •  Italy (Italian)
      •  Latvia (Latvian)
      •  
      •  Lithuania (Lithuanian)
      •  Netherlands (Dutch)
      •  Norway (Norwegian)
      •  Poland (Polish)
      •  Portugal (Portuguese)
      •  Romania (Romanian)
      •  Russia (Russian)
      •  Slovakia (Slovak)
      •  Slovenia (Slovenian)
      •  Spain (Spanish)
      •  Sweden (Swedish)
      •  Switzerland(German, French)
      •  Turkey (Turkish)
      •  United Kingdom
      • Asia Pacific
      •  Australia
      •  China
      •  Hong Kong
      •  India
      •  Korea (Korean)
      •  Malaysia
      •  New Zealand
      •  Philippines
      •  Singapore
      •  Taiwan
      •  Thailand (Thai)
      • Americas
      •  Brazil (Portuguese)
      •  Canada
      •  Mexico (Spanish)
      •  United States
      Can't find the country/region you're looking for? Visit our export site or find a local distributor.
  • Translate
  • Profile
  • Settings
Autodesk EAGLE
  • Products
  • More
Autodesk EAGLE
EAGLE User Support (English) Finding/attaching components (trying to recreate a schematic)
  • Blog
  • Forum
  • Documents
  • Events
  • Polls
  • Files
  • Members
  • Mentions
  • Sub-Groups
  • Tags
  • More
  • Cancel
  • New
Join Autodesk EAGLE to participate - click to join for free!
Actions
  • Share
  • More
  • Cancel
Forum Thread Details
  • Replies 7 replies
  • Subscribers 176 subscribers
  • Views 1729 views
  • Users 0 members are here
  • search
  • recreate
  • components
  • library
  • polarity
  • finding
  • schematic
  • connecting
Related

Finding/attaching components (trying to recreate a schematic)

Former Member
Former Member over 11 years ago

I'm trying to recreate a PCB layout from an electronics magazine (I don't have the etching/photo-sensitive gear for the magazine's PCB layout, so ordering an Eagle generated file online seems easier) but am having trouble locating some of the components in the Eagle library and connecting them. I'm sure there's a logic to how components are organized there which I just haven't understood yet.

Here's a copy of the original schematic followed by what I've done so far in Eagle.

imageimage


1) Regarding the two ICs (1458 and 741) I'm a little confused. First, will any "1458" do, such as the LM1458N? Likewise, will any 741 do? Those were the only ones I could find in Eagle (DIL package).

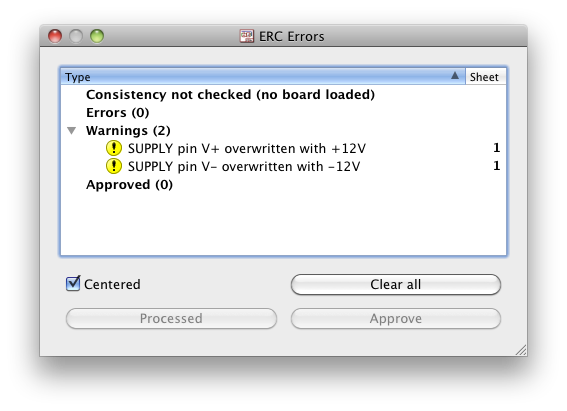
Second, it seems I should disregard the literal connection from the schematic when checking with the datasheets (the + and - are opposite), but what about the power pins for them? I assume with the 741 I should attach pin 4 to GND and pin 7 to +Vcc but there aren't any power pins on the LM1458N. What gives?


2) Since there's no electrical connection in my Eagle schematic for now, how do I do that according the original schematic?


3) I'm having trouble finding the 1/4" mono output jack (PCB mount), the potmeters (not sure if the ones I found are correct) and how about those attachement pins (channels 1,2,4 etc/bypass/+12V/-12V etc.)?

  • Sign in to reply
  • Cancel
  • shabaz
    shabaz over 11 years ago

    Hi silica10,


    1458 and 741 are a couple of very early (and historically they were popular) devices, so a few different manufacturers have compatible designs (this is not usually the case), and the manufacturers have a different prefix/suffix convention. So yes you could use the LM... one that you mention.

    There are power pins of course (as with any op amp) just in this case that the schematic symbol does not display it. You can display it by clicking on the 'Invoke' icon in EAGLE (the icon looks like four little AND gates - you'll know it from the tooltips when you hover over it - also in the EAGLE user manual).

    The circuit above looks old (maybe 20 or more years older?) so you likely won't find the exact model number potentiometer and jack that may be mentioned in the text, but any pot and jack with the same relevant specs will be fine. For the potentiometer the only likely relevant spec for the circuit shown is the resistance, and possibly log/linear requirement you may have. For the jack, the relevant spec is the size (e.g. 1/4" and whether it is stereo or mono).


    By the way, it looks like the circuit is audio related, in which case the 741 and 1458 are quite poor to average performance since times change. You may wish to find a more modern circuit, or alternatively at a minimum have sockets and replace out with NE5532 instead of 1458 (I think the pinout is the same, the datasheet will help you). Also replace out the 741 with NE5532 too (the pinout will change of course, since the 741 is a single op-amp and the NE5532 is dual). If you have any unused op-amps left over, connect the unused output to the unused inverting input, and then for the non-inverting input connect to 0V in that circuit.


    but am having trouble locating some of the components in the Eagle library and connecting them. I'm sure there's a logic to how components are organized there which I just haven't understood yet.

    That's easy - no need to inspect the organization too much - you can use the search facility if you like. So, when you wish to add a component and you're at the dialog, just type something like *1458* and it will find all of them.

    • Cancel
    • Vote Up 0 Vote Down
    • Sign in to reply
    • Cancel
  • johnbeetem
    johnbeetem over 11 years ago

    I've never used Eagle, but here are some possible answers to question 1:


    I think the LM1458 and LM741 are pretty standard.


    The OP amp + and - inputs are not interchangeable.  Hook them up exactly as shown in the the original schematic.  Eagle should have a mirror command to flip the component so it's oriented like the original schematic.


    The LM1458 and LM741 have V+ and V- pins that connect to the +12/-12 power inputs.  The connections are not shown on the original schematic.  I don't know what you need to do in Eagle to make sure they're connected in your circuit.


    If your article has PCB artwork, check it to see how the power connections are made.


    If your ICs are DIPs, I suggest wiring up the design using a solderless breadboard so that you're sure it works before you make a PC board.  You could also build it on a perfboard instead of making a PC board.


    JMO/YMMV

    • Cancel
    • Vote Up 0 Vote Down
    • Sign in to reply
    • Cancel
  • shabaz
    shabaz over 11 years ago in reply to johnbeetem

    Hi John,


    I didn't spot that, the redrawn schematic is wrong as you say, i.e. the '+' and '-' matter.

    In EAGLE the symbol can be fixed if desired, by flipping [aka mirror in EAGLE speak) and then rotating (there are miror and rotate icons in EAGLE to achieve this).

    • Cancel
    • Vote Up 0 Vote Down
    • Sign in to reply
    • Cancel
  • Former Member
    Former Member over 11 years ago in reply to shabaz

    Shabaz and John, thank you both for your suggestions. I'll look into replacing those ICs with something better. The circuit is actually 34 years old so no wonder there's been some improvement in components since then!


    I've now attached power to the ICs, rotated/mirrored the ICs in order to flip the gates and have found what looks like standard pots. I had trouble finding a normal 1/4" jack socket though and had to download a separate "Eagle audio library" from somewhere. Still too many pins for what I need but it'll do for now.

    What I haven't found a solution for are all the connection pins (+12V, -12V, 0V, inputs etc.) which are simple solderings pins or just wires soldered directly to PCB traces/holes. If I'm not going to use an actual multi-pin connector, which part do I select for this?


    Finally, I got some ERC errors which I don't understand:

    image

    These are the power pins of the two ICs. I've chosen +12V, -12V and 0V from "Supply2", then attached them to the different parts of the schematic needing power. So why am I getting those errors?

    • Cancel
    • Vote Up 0 Vote Down
    • Sign in to reply
    • Cancel
  • shabaz
    shabaz over 11 years ago in reply to Former Member

    All the +12V connections will automatically connect to each other assumimg that the wires have the same name (ie. you can assign a name to a net, and then that means they are connected, even if the schematic doesn't have a wire drawn from one place to another).


    So, just to confirm all is ok, click on the 'info' button in EAGLE, or the 'name' icon, and then go around and click on a few wires where you expect to see +12V or -12V or 0V. You should see a net name, it doesn't matter what the name is, but it should be the same for all points that you want at the same voltage. When you look at the PCB view, you'll see yellow airwaves connecting those points too. If this is fine then you can safely ignore the warnings (or 'accept' them).


    You will need a connector or pads to solder the supplies to, there is a component library 'con-lstb' which has SIL connectors on 2.54mm pitch which is a generic way of making connectivity to a board if you don't have any other connector in mind.

    • Cancel
    • Vote Up 0 Vote Down
    • Sign in to reply
    • Cancel
  • autodeskguest
    autodeskguest over 11 years ago in reply to Former Member

    On 17/03/14 10:08, silica10 wrote:

    What I haven't found a solution for are all the connection pins (+12V,

    -12V, 0V, inputs etc.) which are simple solderings pins or just wires

    soldered directly to PCB traces/holes. If I'm not going to use an actual

    multi-pin connector, which part do I select for this?


    For these sort of connections, made with simple wires or veropins, you

    could use "PINHD-1X1" from the pinhead library, or something from the

    solpad library, or even the testpad library.


    • Cancel
    • Vote Up 0 Vote Down
    • Sign in to reply
    • Cancel
  • Former Member
    Former Member over 11 years ago in reply to autodeskguest

    Thanks for those suggestions regarding the connection pins. Now I have several options

    I can't figure out the power supply issue because "invoke" really doesn't help.The two PSU pins are shown, but I can't check their values with either "Name" or "Info" unless I add a small wire first. Still I only get names like N$9.

    Is there a way to add a "label" to pins like that, just for the sake of the schematic (i.e. no actual component, but just a symbol which attaches like a component)?


    Shabaz: from your understanding the names of the power supply outputs should match the names of the power pins of the ICs, so I changed the + and - supply from one of the "supply" libraries (so instead of "+12V" and "-12V" I now have "V+" and "V-" which removed some of the error messages.

    However I do have these error messages:

    image

    I believe it's asking if I should join together the +V with the lines I renamed +12V (it was previously named something like N$12 or similar IIRC) and -V from the PSU to the lines I renamed -12V. How do I solve this issue? By selecting one of the two lines with the yellow "!" symbol and pressing "Processed" or "Approve"?


    Regarding the 1.4" (6.3mm) jack socket (PCB mount): I've tried using one which I got from a downloaded "Audio jacks" library, but they had too many pins and the GND pin didn't even allow connecting. There doesn't seem to be any good options in the existing Eagle component library (I tried searching for: search: *jack*). Is there any chance of getting a similar jack socket to the one in my schematic (see first posting) hidden somewhere in the Eagle library or downloaded from somewhere?

    • Cancel
    • Vote Up 0 Vote Down
    • Sign in to reply
    • Cancel
element14 Community

element14 is the first online community specifically for engineers. Connect with your peers and get expert answers to your questions.

  • Members
  • Learn
  • Technologies
  • Challenges & Projects
  • Products
  • Store
  • About Us
  • Feedback & Support
  • FAQs
  • Terms of Use
  • Privacy Policy
  • Legal and Copyright Notices
  • Sitemap
  • Cookies

An Avnet Company © 2025 Premier Farnell Limited. All Rights Reserved.

Premier Farnell Ltd, registered in England and Wales (no 00876412), registered office: Farnell House, Forge Lane, Leeds LS12 2NE.

ICP 备案号 10220084.

Follow element14

  • X
  • Facebook
  • linkedin
  • YouTube