element14 Community
element14 Community
    Register Log In
  • Site
  • Search
  • Log In Register
  • Community Hub
    Community Hub
    • What's New on element14
    • Feedback and Support
    • Benefits of Membership
    • Personal Blogs
    • Members Area
    • Achievement Levels
  • Learn
    Learn
    • Ask an Expert
    • eBooks
    • element14 presents
    • Learning Center
    • Tech Spotlight
    • STEM Academy
    • Webinars, Training and Events
    • Learning Groups
  • Technologies
    Technologies
    • 3D Printing
    • FPGA
    • Industrial Automation
    • Internet of Things
    • Power & Energy
    • Sensors
    • Technology Groups
  • Challenges & Projects
    Challenges & Projects
    • Design Challenges
    • element14 presents Projects
    • Project14
    • Arduino Projects
    • Raspberry Pi Projects
    • Project Groups
  • Products
    Products
    • Arduino
    • Avnet & Tria Boards Community
    • Dev Tools
    • Manufacturers
    • Multicomp Pro
    • Product Groups
    • Raspberry Pi
    • RoadTests & Reviews
  • About Us
    About the element14 Community
  • Store
    Store
    • Visit Your Store
    • Choose another store...
      • Europe
      •  Austria (German)
      •  Belgium (Dutch, French)
      •  Bulgaria (Bulgarian)
      •  Czech Republic (Czech)
      •  Denmark (Danish)
      •  Estonia (Estonian)
      •  Finland (Finnish)
      •  France (French)
      •  Germany (German)
      •  Hungary (Hungarian)
      •  Ireland
      •  Israel
      •  Italy (Italian)
      •  Latvia (Latvian)
      •  
      •  Lithuania (Lithuanian)
      •  Netherlands (Dutch)
      •  Norway (Norwegian)
      •  Poland (Polish)
      •  Portugal (Portuguese)
      •  Romania (Romanian)
      •  Russia (Russian)
      •  Slovakia (Slovak)
      •  Slovenia (Slovenian)
      •  Spain (Spanish)
      •  Sweden (Swedish)
      •  Switzerland(German, French)
      •  Turkey (Turkish)
      •  United Kingdom
      • Asia Pacific
      •  Australia
      •  China
      •  Hong Kong
      •  India
      •  Japan
      •  Korea (Korean)
      •  Malaysia
      •  New Zealand
      •  Philippines
      •  Singapore
      •  Taiwan
      •  Thailand (Thai)
      •  Vietnam
      • Americas
      •  Brazil (Portuguese)
      •  Canada
      •  Mexico (Spanish)
      •  United States
      Can't find the country/region you're looking for? Visit our export site or find a local distributor.
  • Translate
  • Profile
  • Settings
Autodesk EAGLE
  • Products
  • More
Autodesk EAGLE
EAGLE User Support (English) Trying to add PLCC68 socket from the smd-special.lbr
  • Blog
  • Forum
  • Documents
  • Events
  • Polls
  • Files
  • Members
  • Mentions
  • Sub-Groups
  • Tags
  • More
  • Cancel
  • New
Join Autodesk EAGLE to participate - click to join for free!
Actions
  • Share
  • More
  • Cancel
Forum Thread Details
  • State Verified Answer
  • Replies 13 replies
  • Answers 1 answer
  • Subscribers 180 subscribers
  • Views 1282 views
  • Users 0 members are here
  • eagle
  • socket
  • plcc
Related

Trying to add PLCC68 socket from the smd-special.lbr

konsolkongen
konsolkongen over 9 years ago

Hi. I'm new to Eagle. I know the very basics of how to use it, but I have some problems adding a part to my board. I wan't to add a PLCC68 socket, which is included in the smd-special library. I just want the empty socked and I can wire up all the connections manually.


However, the socket cannot be found when in schematics mode, where I would normally add it. I can only find it when in board design, and there I'm not allowed to add it. I get the error "Can't backannotate this operation. Please do this in the schematic!", which as I said is not possible because the part does not show up there.


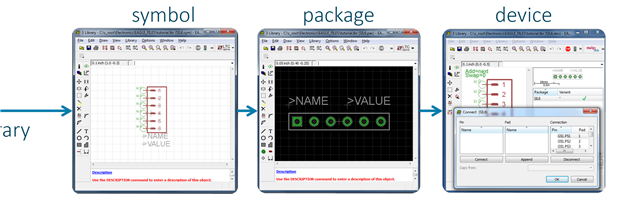
Can I seriously not just add an unnamed socket to my board and have me wire up the connections manually? Do I really have to create a whole new part with every pin predefined? That would be insane, and incredibly frustrating for a newcomer like myself. I could see myself end up using hours figuring that out image


The specific part I'm trying to add is PLCC-68 SMTL-TT. It's for a Motorola 68000 on a Neo Geo MV-1C.

  • Sign in to reply
  • Cancel

Top Replies

  • konsolkongen
    konsolkongen over 9 years ago in reply to shabaz +1
    Thanks again. I'll take a look at a guide, and hopefully I'll be able to figure it out in no time
Parents
  • shabaz
    0 shabaz over 9 years ago

    Hi Martin,


    You do need to create a part (if one doesn't exist) to reflect what you want in the schematic, and then it will place the footprint in the board layout view. While your requirement is valid for very small circuits, it wouldn't scale to larger circuits without a high risk of error and is therefore a workflow that isn't supported in many CAD packages.

    Some early low-cost CAD packages allowed you to place and wire package footprints manually, and there are still some software packages which do this. I think Sprint-Layout supports the type of workflow you want to do.

    • Cancel
    • Vote Up 0 Vote Down
    • Sign in to reply
    • Reject Answer
    • Cancel
Reply
  • shabaz
    0 shabaz over 9 years ago

    Hi Martin,


    You do need to create a part (if one doesn't exist) to reflect what you want in the schematic, and then it will place the footprint in the board layout view. While your requirement is valid for very small circuits, it wouldn't scale to larger circuits without a high risk of error and is therefore a workflow that isn't supported in many CAD packages.

    Some early low-cost CAD packages allowed you to place and wire package footprints manually, and there are still some software packages which do this. I think Sprint-Layout supports the type of workflow you want to do.

    • Cancel
    • Vote Up 0 Vote Down
    • Sign in to reply
    • Reject Answer
    • Cancel
Children
  • konsolkongen
    0 konsolkongen over 9 years ago in reply to shabaz

    Hi shabaz. Thank you for your reply. I do see the benefit in having the part properly defined for large runs, or parts you use regularly. For this one though it's a bit annoying as I don't ever plan on using it again image


    But at least I now know that this is the correct way, so there's no getting around it, as I would like to stick with Eagle. I have to figure out how to add a new part, and it will probably be handy down the line too.


    I have added the package? (the drawing from the smd-special library) to a new library, so I guess I need to figure out how to add the stuff that goes into the schematic view image

    • Cancel
    • Vote Up 0 Vote Down
    • Sign in to reply
    • Verify Answer
    • Cancel
  • shabaz
    0 shabaz over 9 years ago in reply to konsolkongen

    Hi Martin,


    You'll need to create a symbol too, and then marry them together in a device.

    This is described better in the EAGLE PDF user guide (and various user youtube videos), but the diagram below shows approximately where you need to get to.

    Once this is done, you can add the device in a schematic, and then generate your PCB from that.

    image

    • Cancel
    • Vote Up 0 Vote Down
    • Sign in to reply
    • Verify Answer
    • Cancel
  • konsolkongen
    0 konsolkongen over 9 years ago in reply to shabaz

    Thanks again. I was just messing around with that, without much clue what I needed to do.


    I have made a shape and all the pins in the symbol editor now. For the pins, is the green circle (like in your picture) supposed connect to, or face away from the part. Or does it not matter?


    I seem to have the drawing of the socket (the package) correctly copied from the other library, so I guess that will save a lot of time, as it should already have all the correct dimensions for the board view, right?


    I haven't been able to figure out how to connect the symbol and package yet, but it's getting late, so unfortunately it will have to wait for another day.


    Sigh... this was supposed to be just a few hours work and done. It's literally just the socket and some solder pads, nothing else... image

    • Cancel
    • Vote Up 0 Vote Down
    • Sign in to reply
    • Verify Answer
    • Cancel
  • shabaz
    0 shabaz over 9 years ago in reply to konsolkongen

    Hi Martin,

    The center of the green circle signifies where the signal connection will be made to other components, so faces away from the part.

    It is often an assumption that the package correctly matches the part so for this reason I always create my own symbols, packages and devices for anything more complicated than a resistor/capacitor. I'm not saying it won't work out for you if you use it, but it may be good to check the positions of some of the pins to confirm they are in the positions you expect, same pitch, etc.

    • Cancel
    • Vote Up 0 Vote Down
    • Sign in to reply
    • Verify Answer
    • Cancel
  • konsolkongen
    0 konsolkongen over 9 years ago in reply to shabaz

    Thanks again. I'll take a look at a guide, and hopefully I'll be able to figure it out in no time image

    • Cancel
    • Vote Up +1 Vote Down
    • Sign in to reply
    • Verify Answer
    • Cancel
element14 Community

element14 is the first online community specifically for engineers. Connect with your peers and get expert answers to your questions.

  • Members
  • Learn
  • Technologies
  • Challenges & Projects
  • Products
  • Store
  • About Us
  • Feedback & Support
  • FAQs
  • Terms of Use
  • Privacy Policy
  • Legal and Copyright Notices
  • Sitemap
  • Cookies

An Avnet Company © 2026 Premier Farnell Limited. All Rights Reserved.

Premier Farnell Ltd, registered in England and Wales (no 00876412), registered office: Farnell House, Forge Lane, Leeds LS12 2NE.

ICP 备案号 10220084.

Follow element14

  • X
  • Facebook
  • linkedin
  • YouTube