I've picked up Valve Software's Steam Deck. This (Arch) Linux based, hand-held personal computer is set at a reasonable price, can act as though it's a portable games console (often compared with the Nintendo Switch) and yet also behave like a desktop computer (especially when peripherals are plugged into it).
An upside to the Steam Deck is that Valve are quite happy for you to open it up, investigate it, and you do so at your own risk. In fact, they showed everyone how to take it apart while saying not to do it.
And then, because they partner with iFixIt to provide spare parts, so you can fix or replace components yourslef, iFixit tears down the Steam Deck doing everything Valve said not to do.
But aside from replacing the noisy 'Delta' fan, there's not a lot I've done with it, so far, but there's certainly more that I want to do with it, but it would be easier if we had schematics.
User 'CalcProgrammer1' from the SteamDeck discord hasn't quite gotten there yet, but they've been scouring the board for traces that they can use, and they found an i2c interface on the Deck that they could hack.

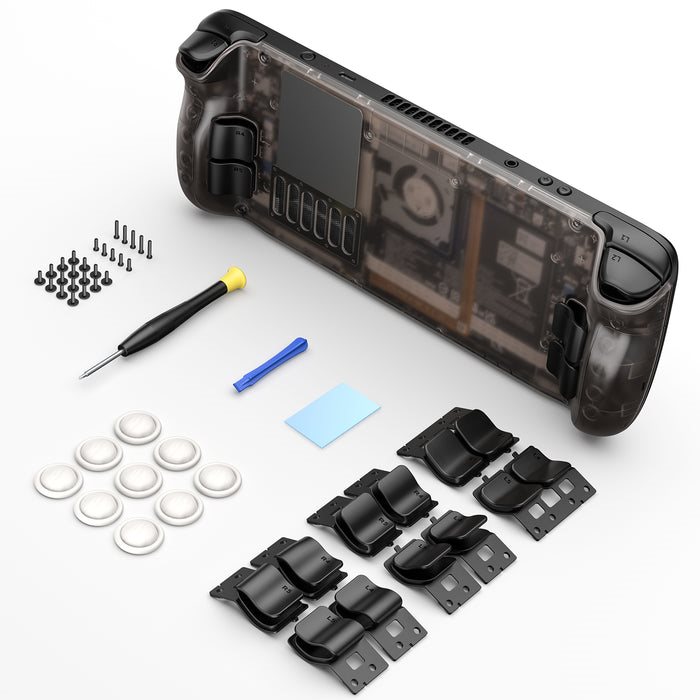
You see, JSAUX released a transparent back for the Steam Deck, (we'll not argue about the strange metal backplate and its thermal properties) and the first thing people thought of? Putting LEDs in it. Heck, people mod their PC with RGB LEDs, why not the Steam Deck? Well, CalcProgrammer1 thought they may as well do it, and go all the way with it.
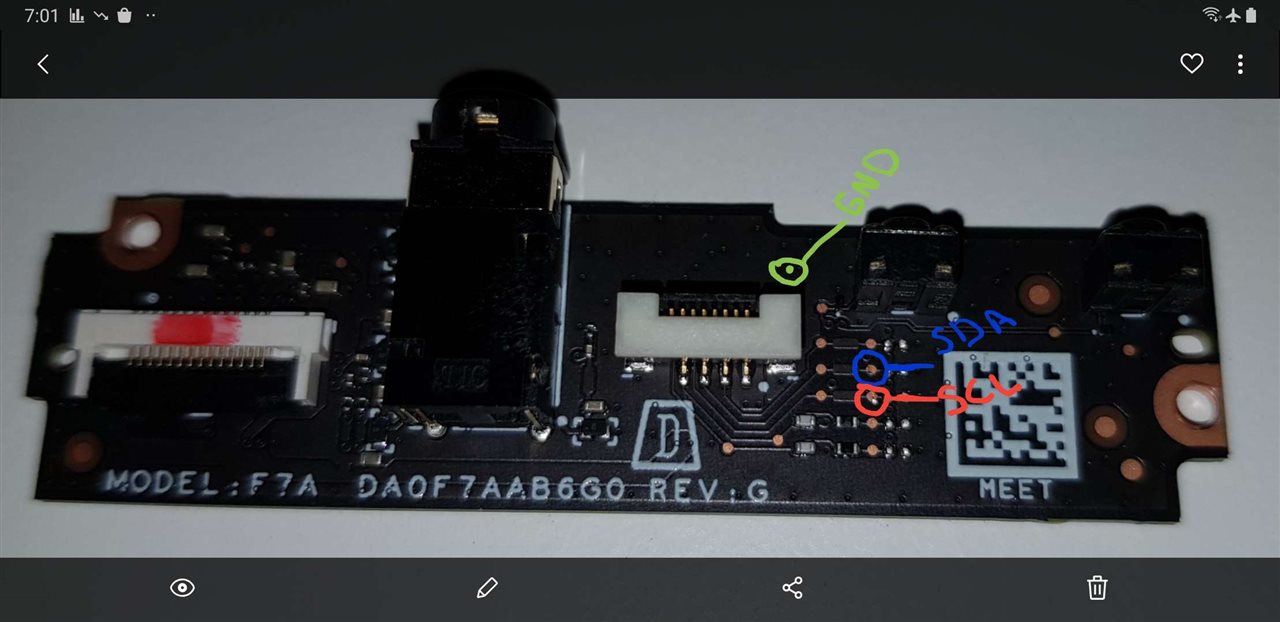
CalcProgrammer1 found the I2C interface on the sound interface board, the majority of boards in the Steam Deck are purposefully 'modular' and connected via ribbon cables, it was only a matter of time before it was discovered:
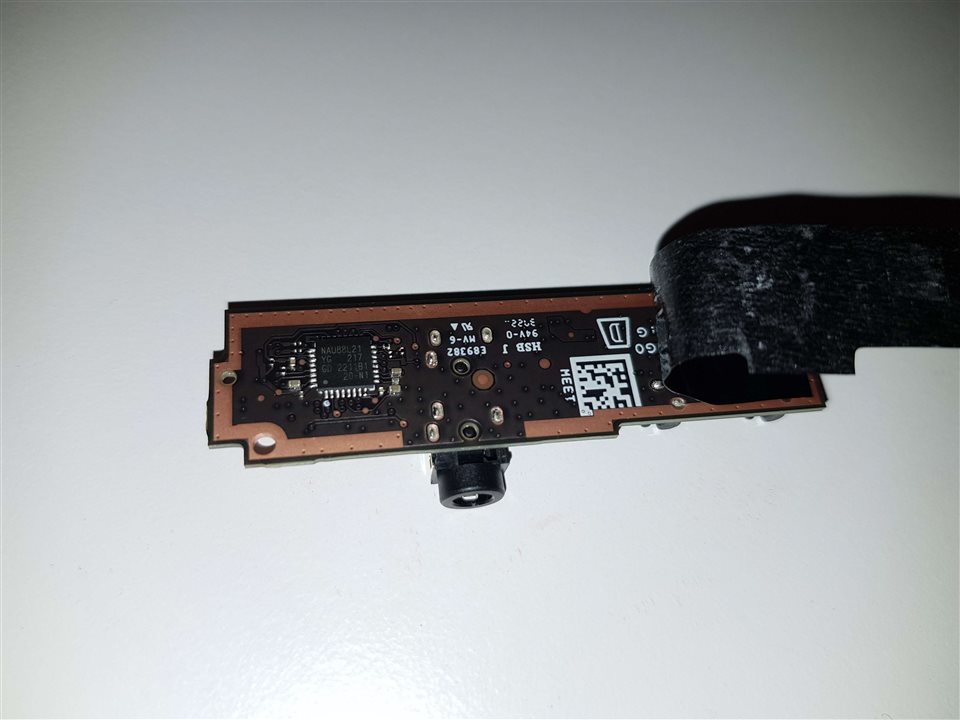
And as CalcProgrammer1 says "The bottom of this PCB has the audio codec"
It's not the only mod they'd like to make, though:
"I want to add stick LEDs and it would be pretty easy if there were aftermarket clear sticks available, but I don't want to lose functionality by getting rid of the capacitive caps, hopefully someone (JSAUX?) will make replacement sticks that have the capacitive pad, would be pretty easy to take a small WS2812B 2020 or 4020 package LED and glue it under the stick on the PCB"
You see, on the Steam Deck, the joysticks have capacitive touch pads on top of them, allowing to act as further interactions for games or to sense when you're 'touching' them to act, like a shift key on a keyboard to use with other buttons to activate other features, like say, the gyro that's built in. Allowing for better aim.
CalcProgrammer1's i2c hacking didn't end there, after trying to use an Arduino, they discovered that it wouldn't talk to the i2c bus on the Steam Deck at all, and they had to switch to a trusty Raspberry Pi Pico instead, running "sudo i2cdetect -r 0" got results:

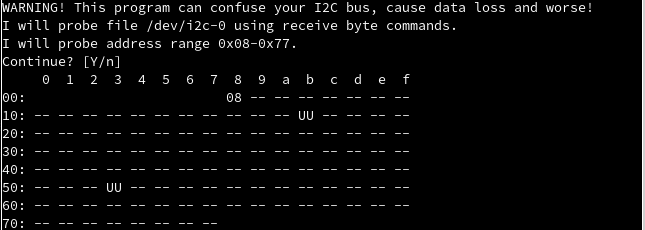
" I did it! I was able to detect my device from I2C, for whatever reason the Arduino would not talk whatsoever, the Deck uses 400KHz i2c clock so maybe too fast? but after some messing around I got my sketch running on a Pi Pico instead I can control LEDs!"
Using OpenRGB as an interface, CalcProgrammer1 with the Raspberry Pi Pico was able to get some functionality:
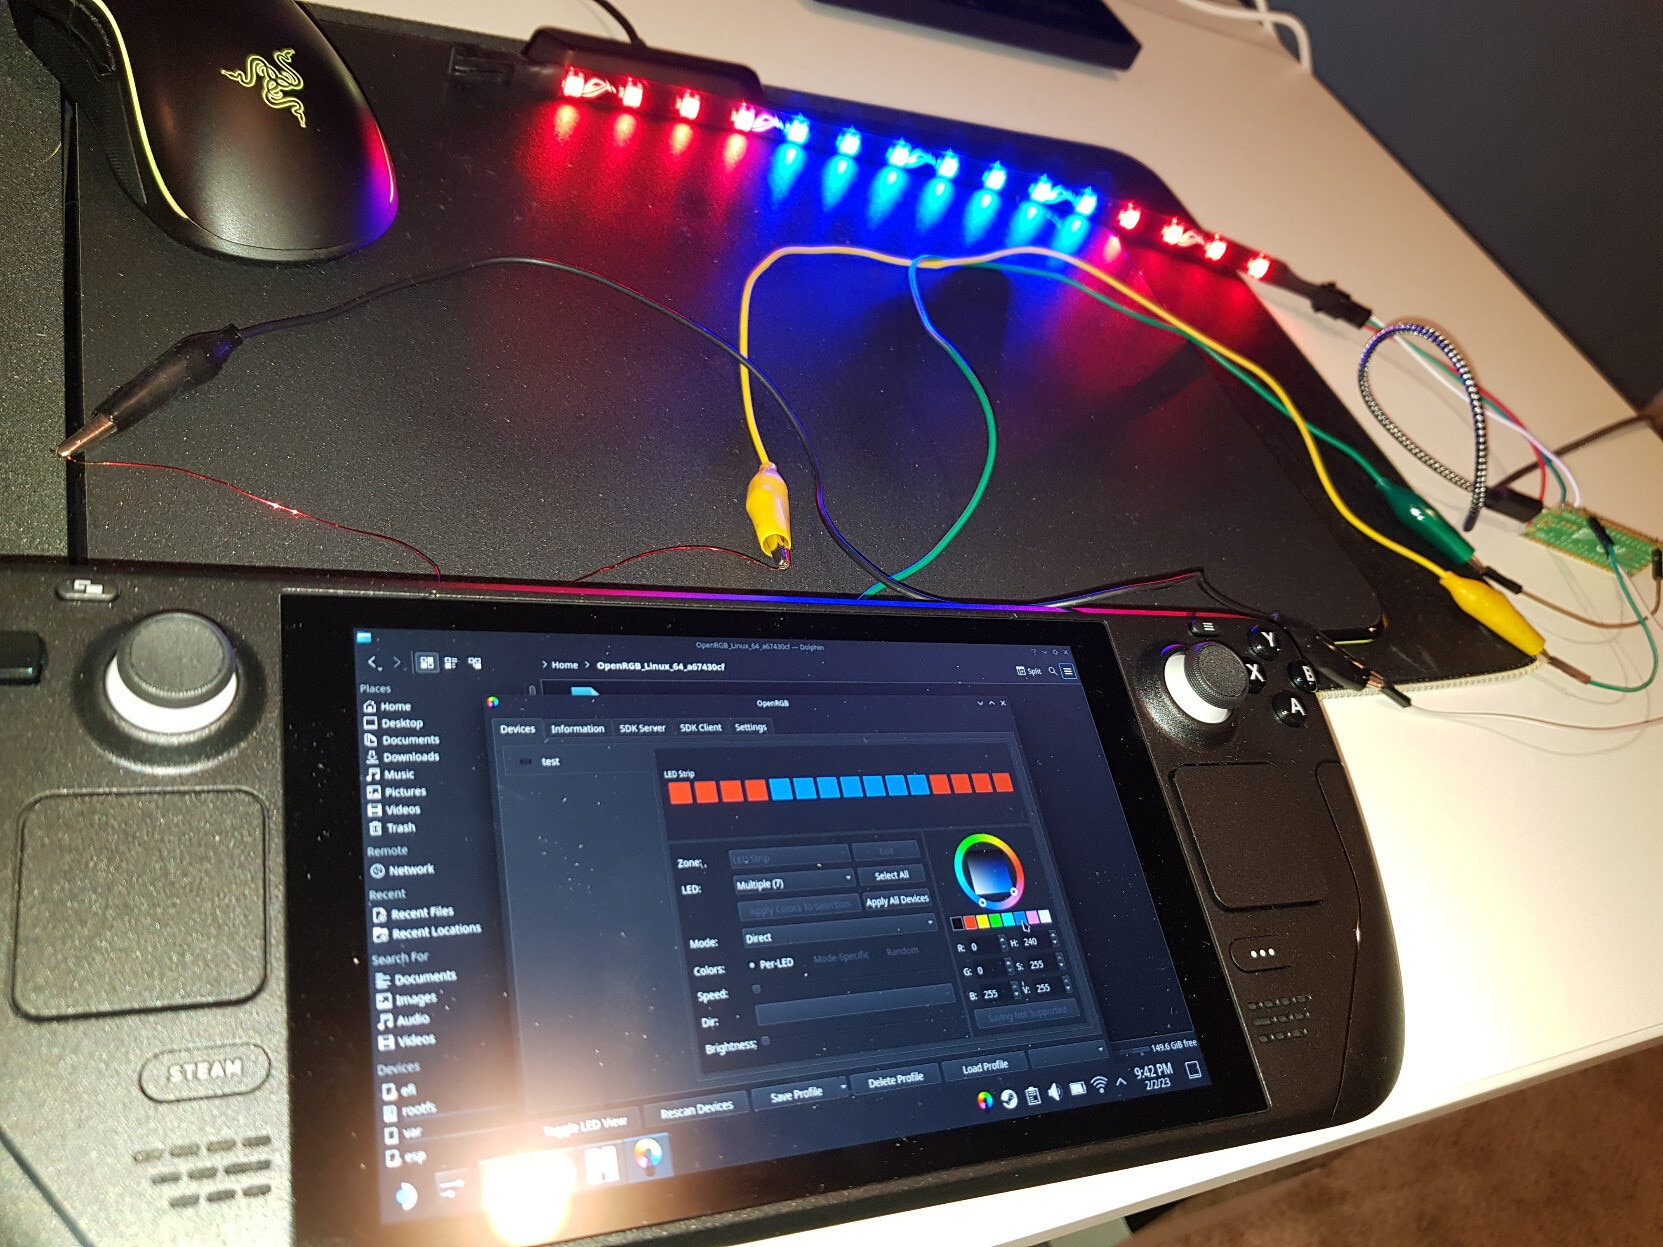
CalcProgrammer1 reflects that mods such as this are definitely tricky, and really require practicality:
"and even with a fine tip iron and thin magnet wire, it was difficult to solder them, and you don't want to pull on delicate solder joints or you can rip traces off the PCB, ideally we could make a board that goes in between the audio PCB and the RGB that plugs into the flat flex connector for the microphone and light sensor flex and then that flex connector plugs into the new board as a passthru, might have to get 5V elsewhere but we have SCL, SDA, and GND for sure"
So while iFixit may sell spare parts and the Steam Deck is hackable, there's certainly some way to go to still be able to make the device "your own" that is out of reach for many people, especially when it requires access to what's considered specialist hardware and knowledge up front. Even designing an interim PCB is out of most people's reach. Here are examples of CalcProgrammer1's setup:

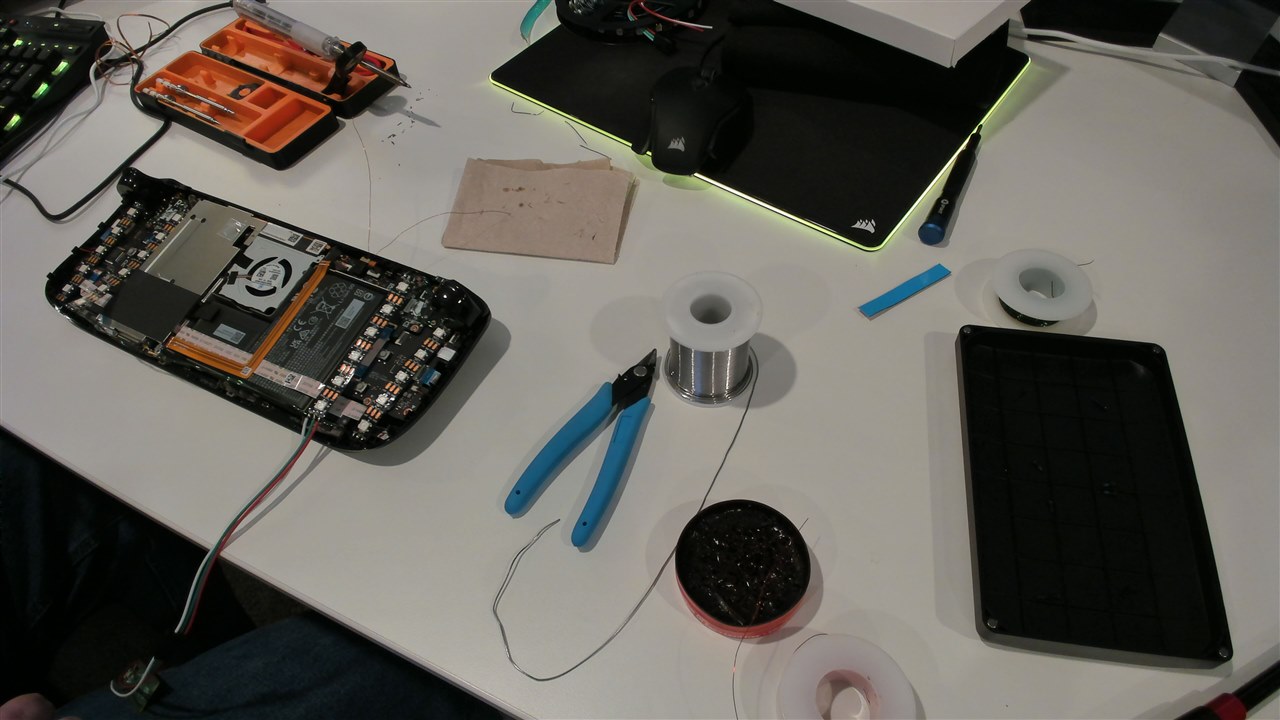
And the amazing results, which even include backlight synchronisation with what's on the screen! Ultimately while they started off with an Arduino, moved onto Pi Pico for prototyping, they ended up with the Adafruit Trinket M0 because of space and time considerations.
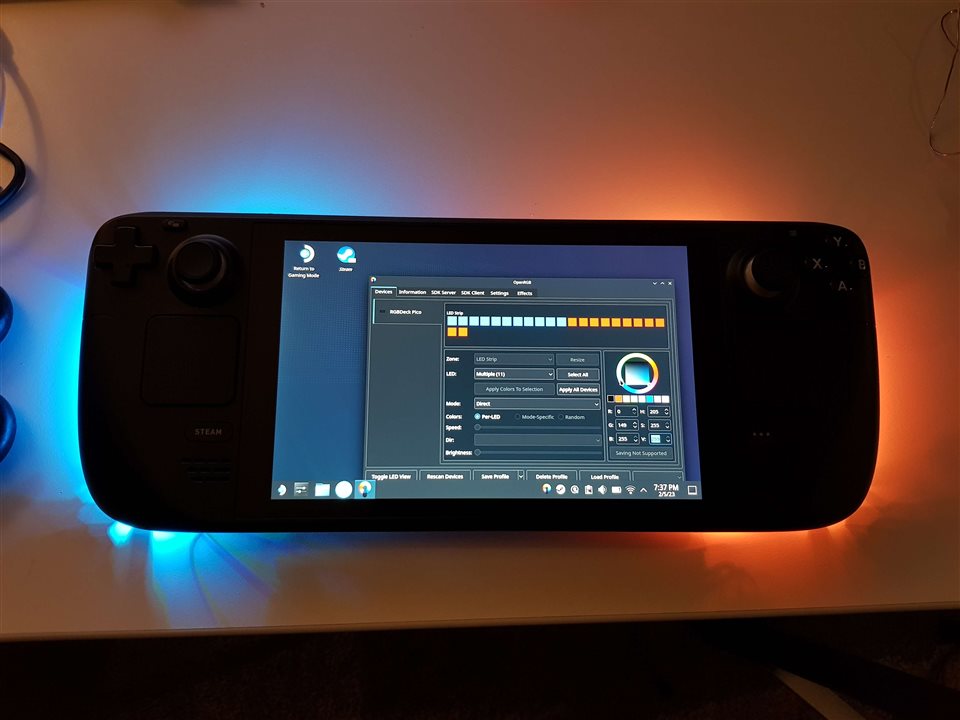

You can check out their reddit thread for more photo's and videos.
Edit Update 12th Feb 2023:
Not all is well in the world of modding, while being very entrepreneurial and opportunistic, CalcProgrammer1 attempted to support the LEDs by tapping into a 5v line on the steam deck. Unfortunately that's not without consequence.
You see, a problem with hacking into an existing design can be that you don't know its layout, tolerances and the schematic, and the limits of those lines, and of course, CalcProgrammer1 fell afoul of this.
The hack didn't hold as drawing 5v from the location on the board proved too much and attempted to pull more current than that pathway expected.
The consequence?
A component became too hot and de-soldered itself, and maybe went 'pop' a little. It even melted itself out of a little epoxy cocoon.
This very non-descript component has yet to be identified (though may have been a WLCSP-4 package), but what it connected to has been identified a little and rather confusingly, when bridged, the device works again. You can read more about the update on reddit.
Any ideas what the component might have been?
Needless to say, having a component near your microSD card input go 'pop' is rather alarming. Spares for the PCB components of the Steam Deck are still not yet available, so experimenting with a consumer device in this way is very risky unless you're prepared to either pay for 'official' repairs or buy a replacement. On this occassion, CalcProgrammer1 landed lucky-ish in that this component wasn't crucial.
Have you modded electronics in this kind of way? Have you produced a PCB to make it easier? What tips do you have to make this kind of reverse engineering easier? Let me know!
