


In this blog post, I’m going to use a new Raspberry Pi 2 with Node.JS with Sock.JS and Angular.JS to create a chat page. We’ll start from the basics with a simple “Hello World” web page and slowly build upon that to create a powerful chat page.
Installing Node.JS
The package of Node.JS that you will get if you run “apt-get install nodejs” is fairly out of date. So, in order to get something more recent, I built the latest from source. In order to do that, navigate over to:
http://nodejs.org/dist/latest/
That will have the latest version of Node.JS. What you are really looking for is the latest version number. In my case it is v0.12.0. Once you have that, you can download the source code by doing:
Once that is downloaded, unzip it and build it with the following commands:
After that is complete, we can test and make sure that Node.js is installed and working by having it print out the version number:
node –version
That should return 0.12.0.

Hello World – Node.JS Style
Now that we have all of the necessary software, let’s start out with the simplest Node.JS program:
The first line loads the module that lets us create an HTTP server. The second line defines the port that we are going to be listening on. In this case we are setting it to 1337.
The next line creates the HTTP server. The function that we pass into the createServer method will be called every time someone navigates to our HTTP server. In this case, all we want to do is to write back a simple response. The simple response comes in two parts: the header and the body. In the header we specify two things: a status code (200) and a content-type (text/plain). The status code of 200 means that everything went well. The content type just tells the client that we are sending over plain text. For the body of the response, we are just going to give it the string “Hello World\n”. (In case you were wandering, the “\n” is just a code for a new line – much like hitting enter.)
With the last line of the program, we start up the HTTP server and have it listen on the port that we already set up.
Now to test the program, copy the code into a text file called helloWorld.js and run it by doing:
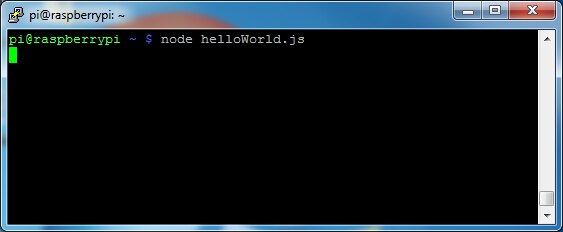
node helloWorld.js
This should be pretty uneventful. It should start up the program, but it will appear as though nothing is happening:
In order to see the real excitement, open up a browser and point it to:
127.0.0.1:1337
The 127.0.0.1 is an IP address. It happens to be a special one that points to the computer that you are currently using. The 1337 is the port that we typed into the program earlier. When you navigate there, you should see something like this:

As a side note, you can also view it from another computer. Just change the IP address to point to the IP address of your Raspberry Pi:

Hello World – Web Page
Now we weren't really sending back a web page in the previous example. We were just sending back a phrase and the browser was kind enough to show it to us. If you view the source for the web page (in chrome – right click and select ‘View page source’), you’ll see that there really isn’t much there:

So, now let’s upgrade this so that it returns a real web page, and not just some text.
To help turn this into a website, we need to install a Node.JS package called Express.JS. To do this, just execute the following command:
npm install express
Once Express.JS is installed, create a file called helloWebsite.js and put the following code in there:
This code is fairly similar to the first version. We are still importing and using the HTTP module on the first line. With the second line, we import the Express.JS module. On the third line, we create a new express application, and then set how it responds with lines 4 - 6. So, when the user asks for our base page (‘/’) we will respond with the ‘helloWebsite.html’ file.
The last two lines just define the port that we are going to run on and starts up the http server.
Finally, we need to create the helloWebsite.html file that we are going to return:
This creates a fairly simple web page that just displays “Hello Website” to the user. Here’s what the website looks like now:

And if we view the source again, we’ll see that this time it is the same information that we put in helloWebsite.html

Sock.JS + Angular.JS
Now, let’s step it up one more notch. Let’s get the hello message from a WebSocket. To do this, we need to install the Sock.JS module:
npm install sockjs
Once that completes, create a file called helloWebsocket.js and put the following code in there:
Hopefully by now the code is starting to look familiar. The first three lines just import some modules that we are going to use. The next block of code sets up the Express.JS application. This is very similar to the previous example, except this time we add an additional file (client.js). This is the code that is going to run on the client’s machine to receive the message that we send.
The next block of code sets up the WebSocket using Sock.JS. The first line creates a new WebSocket server. The next three lines define what happens when a new connection is established. In this case, all we do is respond back with the text “Hello WebSockets!”.
The last block of code sets up the HTTP server with the Express.JS application and the Sock.JS WebSocket server. Most of this is the same as the last time. Now we just make sure to install the WebSocket server handler. Here we set it up to response to the ‘/message’ relative path, so the full location would be ‘http://192.168.1.8:1337/message’.
Next we’ll create the webpage that will display the message to the user. Copy and paste this into a file called hello.html:
At first glance, this website looks very similar to the one before. It’s got basically the same structure, but this time we include some javascript code with the <script> tag. This is very similar to the “require” statements that we saw before on the server. It is a way to reference javascript libraries.
The next thing that jumps out is the {{message}} part in the body of the webpage. This is Angular.JS’s way of saying: put whatever is in the message variable here. So, now we aren’t hard coding the message that will be displayed to the user. We are going to get that from the server over a WebSocket connection.
The last differences are a little more subtle. There are two new attributes: ng-app and ng-controller. These tell Angular.JS where to find the code that is associated with this web page. Angular.JS is built for large websites with lots of javascript, so these help organize and isolate the code that backs the website.
Finally, we’ll write the code that is going to be executed on the client’s machine. Copy and paste this into a file called client.js:
This code starts out with the Angular.JS attributes that we just saw in the web page. The first line creates an Angular.JS application called myApp. The empty square brackets near the end of the line indicate that this application doesn’t have any dependencies. (Another way that Angular.JS helps manage the large amounts of code that back modern websites.)
The next line defines a controller. A controller contains the interaction for a piece of a website. The next line tells specifies what variables we want passed to us. In this case, we want the $scope variable which contains information about the current scope within the controller.
The next line defines a function that contains the logic for our controller and takes as an input the $scope variable that we said that we wanted earlier. (It might seem like we are repeating ourselves here a bit, and well we are. However, this is for good reason. Most websites use minification for their javascript code. When this happens, all of the variable names are changed to single letters, so our $scope function parameter will be renamed. When this happens, Angular.JS will have no way of knowing what we want. Since strings do not get minified, ‘$scope’ will not change. This is what Angular.JS will use to figure out what variable you want to get passed in.)
Inside our controller logic function, the first thing that we do is create a WebSocket connection to the server. We pass it in the full address of the WebSocket server. Then we define what should happen when a new message is received. In this case we want to update the message variable (within the current $scope) to the data that is sent from the server. The $scope.$apply function tells Angular.JS that one of the variables that it is concerned with is changing and that it should update the web page accordingly.
Here is what the web page looks like now:

Chat
Now that we have played with all of the important pieces and gotten a feel for how they work, let’s leverage their power to create a chat web page. It will be a simple page that just broadcasts all of the messages that are posted to all of the people participating in the conversation.
Let’s start with the server code; copy and paste this into a file called chatServer.js:
The vast majority of the code should look very familiar from the previous examples. The only part that is new and different is the code that is related to the WebSocket. The first addition is a method called broadcast that sends a given message to all of the clients that are currently connected. The code for this method should be fairly self-explanatory.
Handling the WebSocket connections is also fairly straight forward. When a new person connects, we add them to the clients object. When a new messages is sent, we broadcast that message to all currently connected clients. Finally, when a person leaves (closes the connection), we delete them from the clients object.
Next let’s look at the HTML code; copy and paste this into a file called client.html:
Ok, so the <head> part of the page just includes a bunch of libraries that we are going to be using. The new one is ng-dialog. We are going to use this to pop a dialog box up to the user when they first navigate to the page in order to get their user name. The page is going to look like this:

Looking at the <body> of the HTML, there are three distinct sections: sending a message, displaying messages, and getting the user name.
The first section contains a <form> that is used to get the message that the user would like to send. The first thing specified is the method that will be called (sendMessage) when the user submits the form. This allows the user to press enter and submit the current message. Wiring this up is done by the Angular attribute ng-submit. The first <input> is a text box where the user can type in a message to send. We use the ng-model attribute to tell Angular what variable to write the text within the text box to, so that we can access it in javascript. The second <input> is a button to click to send the message. This is the same thing as pressing enter within the text box. Notice that we call the same method (sendMessage) in both cases.
The next section displays the messages that have been received. Angular has a lot of power in this respect. We can use the ng-repeat attribute to display everything that is in a list. In this case, we want to display every message within the messages object. The “track by $index” part is in case a duplicate message is sent. By default Angular suppresses duplicates, so this part just forces the duplicates to be displayed.
The final section is the dialog that will be displayed to the client in order to get their user name. If you look at the <form> inside, it should look very similar to the previous <form> that got the message to be sent.
The last part is the client side javascript; copy and paste this into a file called client.js:
The basic structure of this file should look familiar after the previous examples. This time, when we receive a new message (sock.onmessage), we first parse the JSON object that is sent to us. The JSON object will look like this:
So, the object is fairly simple. In order to go from text to a Javascript object, we use the JSON.parse method. Once it is an object, we can add (push) the content of that message on to the messages object. If you remember, we saw that the messages object was used in the HTML code to display all of the messages in the web page.
The next section deals with getting the username from the client. A dialog box is created with the template that we specified in the HTML code earlier. We also create a separate Angular controller just for this dialog box. The controller is fairly simple in that it just defines the method selectUserName. When this method is called, it saves off the username that was typed in and it closes the dialog.
The last section defines a method called sendMessage that handles sending the message to the server. First we check to make sure that there really is a message. (Make sure that the user didn’t click the send button without typing in a message.) If there is a message, then we package it up into a Javascript object. This object has the format that we saw earlier when we were parsing the message that we received from the server. Once we have created this object (msg), we then turn it into a string using JSON.stringify (the opposite of the JSON.parse) and send it over the WebSocket to the server. Last but not least, we clear the message in the input text box.
Here’s a quick video of the chat application in action:
Conclusion
In this blog post, we create a chat web page using Node.JS, Express.JS, Sock.JS and Angular.JS. We were able to combine these extremely powerful frameworks together to create a chat web page very quickly. We just brushed the surface of the capabilities of these libraries but hopefully this was a nice easy introduction into what they can offer.
Top Comments