



In version 1, I set up the Raspberry Pi AI Camera and displayed the objects it detected in the terminal. A good start -- but this time, lets put those detections into a picture!
In this upcoming version, I'll take a photo and save two copies: the original image, and an annotated one with bounding boxes, labels, and confidence scores around the detected objects. This builds on the same detector source file as before, so no need to start from scratch again.
The project still follows the same progression: terminal detection first, saved pictures second, live detection third and finally an attempt to access the video from another PC.
WARNING: As the project advances, I'll go a bit further in the Python explanations. If needed, don't hesitate to ask a question in the comments below!! (;
Part 2 - From terminal output to an actual picture detection
Goal: Capture an image from the AI Camera and save two JPEG files, one raw and one annotated.
As explained before, the configuration of the AI Camera is the same, so its means both model and Detector.py source file will stay the same. The job here is to create a python script, photo_detect.py that will take a picture, save it, and another one with annotations on it.
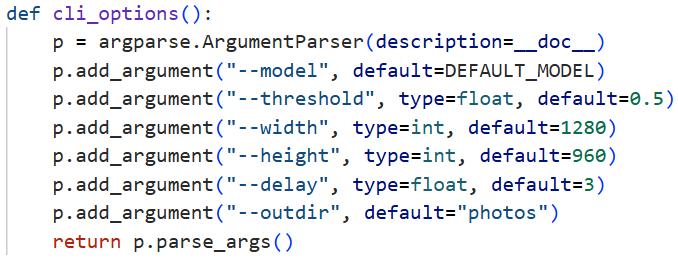
So, by default, the script requests a 1280x960 image, uses a confidence threshold of 0.5 and waits three seconds after detector initialization before taking its final readings.
Need a little more time to get into position, or want to keep only high-confidence detections? The command-line options are built for that:
What happens when the script runs?
- The detector is created with the model path, the threshold, the fallback labels path and the requested resolution. It loads the model and starts the camera.
- The script prints a message, then keeps calling det.read() during the chosen delay (3 secs by default), which let you or an object get in place facing the camera.
- It reads 5 more frames and keeps the last frame and its detection.
- The camera is closed via the function det.close().
- The frame is converted to an image, the output folder is created, and the original picture is saved.
- The annotated copy is saved
- the detected objects are listed in the terminal.
Step 1 to 4 looks like this in the script:
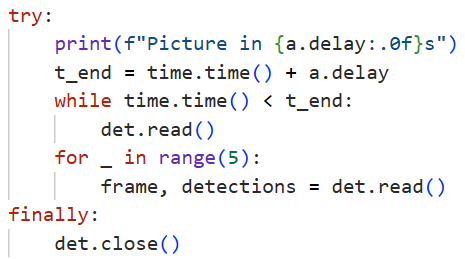
During the delay, the camera keeps running instead of just waiting, so exposure and white balance settle and lets the network produce its first result. The read() method returns an image array and a list of Detection objects. Each one holds a label, a confidence conf and a bounding box box stored as (x, y, w, h): the top-left position, the width and the height in image pixel. Detections with a score at or below the threshold are ignored.
Finally, the capture part is wrapped in a try/finally method, with det.close() in the final block: the script tries to stop and close the camera even if an error occurs during capture. Saving the pictures only happens after.
Drawing the boxes and saving both images
So I struggled a bit here. Before Pillow can save the picture, the captured array is converted to an image object. the frame comes in BGR channel order, not in RGB, so I've ended up having red instead of blue, green instead of yellow... It's not quite the artistic effect I was aiming for here... :P
Jokes aside, I was wondering why it kept happening, and finally after reading more of picamera2 documentation, that I will show you here:

They even mention that the results aren't intuitive... >:( Anyway, the last axis of the image object needs to be reversed so it gives Pillow RGB data, via this line of code:
- image = Image.fromarray(frame[:, :, ::-1])
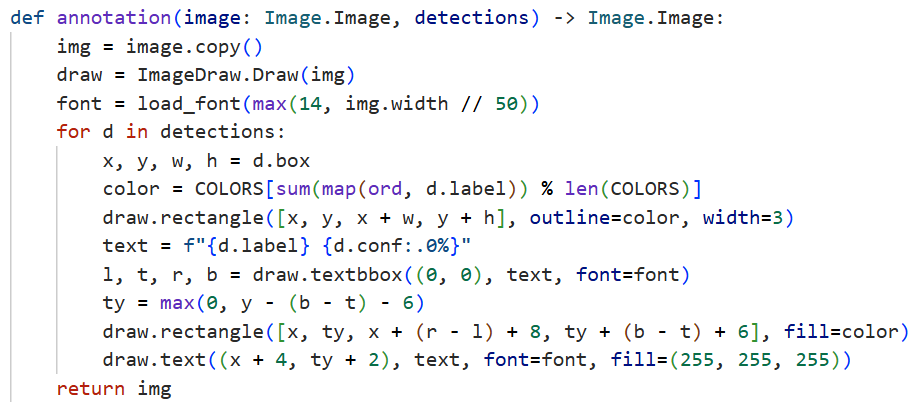
Then, comes the annotation()!
it starts with image.copy(), so the original stays unchanged while the boxes and text are drawn on a separate copy. For every detectionm Pillow draws a rectangle from (x, y) to (x+ w, y + h), then a label made of the object name and its confidence as a rounded percentage:
But, where do the pictures go??
The output folder is created automatically if needed. By default its called photos, relative to the folder from which the command is run. Both files share the same timestamp, so they are easy to match. The timestamp also helps prevent new captures from overwriting older ones:
photo_YYYYMMDD_HHMMSS.jpg is the unannotated image and photo_YYYYMMDD_HHMMSS_detected.jpg its annotated copy. Both are JPEG files saved with Pillow quality 95. "Raw" here only means "without annotations": its not a sensor RAW file:

Checking the results
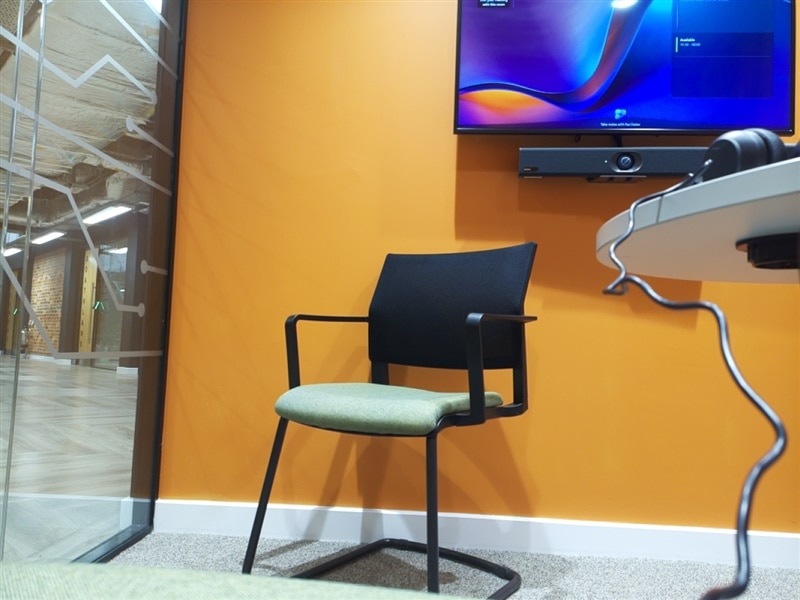
After saving, the script prints the number of detection kept, then each object with its confidence (sorted from highest to lowest) and the paths of the two images:
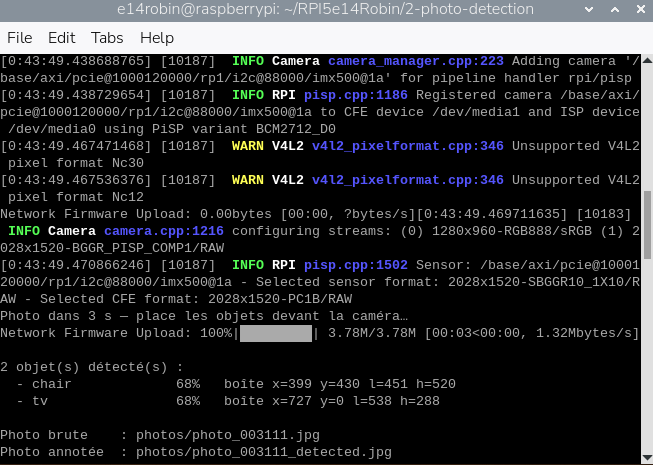
That gives me two ways to inspect a run: the terminal summary for the numbers, and the annotated image for the visual result. One thing to keep in mind is that the score is reported by the model, not a guarantee that a label is correct...
You can see that the timestamp is a little different in the terminal output from whats explained in the python code above, I just removed the %Y%m%d to process the pictures a bit easier in the photos folder, as I took a lot of pictures the same day.
Conclusion
Thats it for the detection on picture of the project! The same camera and detector now give me two pictures to keep: the original and an annotated copy showing the detected objects. The terminal output is still useful, but the bounding boxes make the results easier to understand at a glance.
Next, I'll bring those annotations into a live video stream instead of saving a single picture. One feature at a time -- the camera already has enough to look at 