



As an intern for the element14 community, I carried out this project as part of the tasks I had during my internship. The idea is simple: use a Raspberry Pi 5 and a Raspberry Pi AI Camera to recognize everyday objects, and build the project in four steps so that each one adds a single new feature to the previous one.
Here is the progression. First, version 1: I set up the camera and print the objects it detects in the terminal. Second, version 2: I take a photo and save it, together with a copy annotated with the detected objects. Third, version 3: I run detection on a live video stream. Fourth, version 4: I'll try to make the video stream reachable from another PC.
What Hardware and Software I used
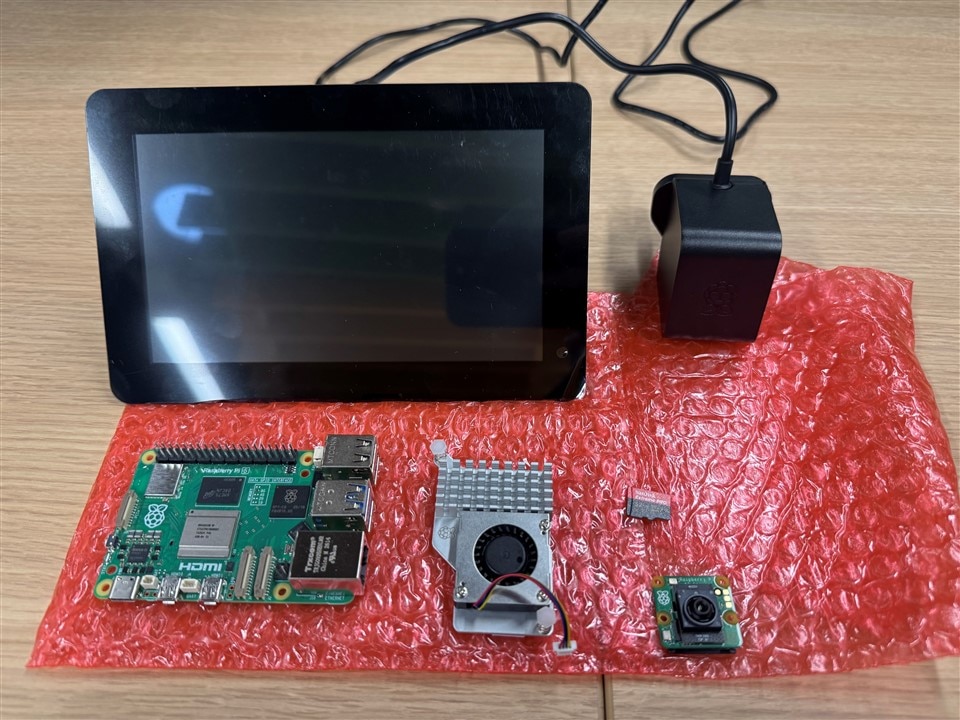
To get this project going, I used a Raspberry Pi 5 8GB (RAM is optional but try to get one >= 8GB, even with nowadays RAM price inflation >:(...) with its dedicated Active Cooler, and a Raspberry Pi AI Camera, with its sensor called IMX500. What makes this camera special is that it runs its neural network (the model that recognize objects) on the camera itself, not on the Pi's processor, it receives only the images and the results.
You'll also need some storage, like a microSD card not less than 32GB, to carry out the OS and potential pictures taken (if you get to this step  ). To power up all this, the official PSU from Raspberry Pi works perfectly, and to avoid using your beloved monitor and unplug it from your beautiful PC setup, a Touch Display 2 7" will do the job wonderfully.
The model used in every version is the file /usr/share/imx500-models/imx500_network_ssd_mobilenetv2_fpnlite_320x320_pp.rpk. From its name, it is an SSD MobileNetV2 FPNLite model with a 320x320 input. The .rpk extension is the packaged format loaded onto the camera ==> I didn’t just pull that out of the hat; you'll see how I did it in a minute!
From the import lines of my files, the Python libraries involved are picamera2 (camera control), libcamera, numpy, Pillow (image saving and drawing, step2) and openCV (cv2, live display, step3). The live window of step3 also needs a desktop session on the Pi.
Version 1 - Setup the environment and the camera
Goal: Check that the camera works and that it can detect objects, printed as text in the terminal
**You can read through that link on how to configure your Raspberry Pi**
First of all: it is needed to ask the Pi if any updates are available, and install everything we'll need onto it: the different python packages mentioned earlier, as well as the imx500 resources.
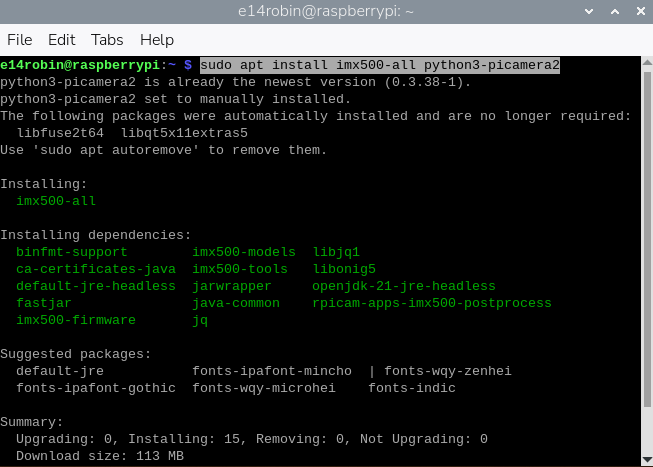
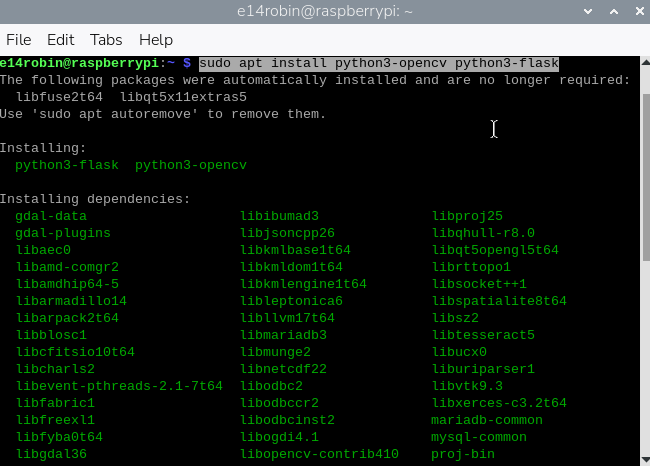
Once those have been installed, a well deserved REBOOT is needed for our Pi. Then to keep it in the momentum and not let it cool down, lets see how we can get the model quoted higher:
- First, to see if the AI Camera is detected, the command rpicam-hello --list-camera is perfectly well designed, and we search through the imx500 directory(tab key will be your best friend):
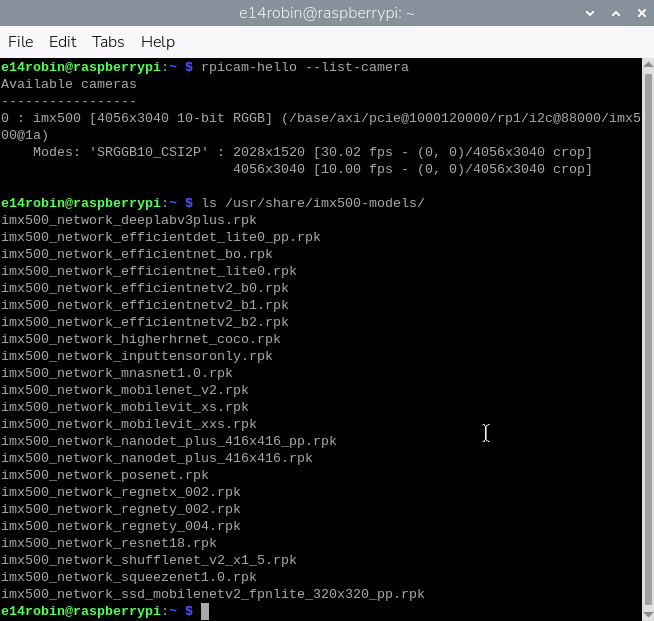
And we can see at the end of the list our model! Lovely!
Then we need to load the model into the camera, start the video stream and decode the results. A python source file is in charge of that, which I named... Detector.py. Not very original I reckon... :P
It has a function named read(), that returns one video frame and a list of detections:
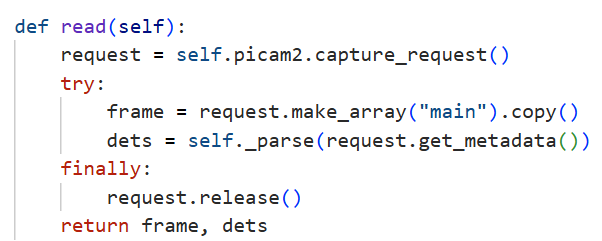
The test script hello_detect.py then simply calls read() from Detector.py in a loop and prints in the terminal what it finds using the Objects.txt file (labels list):
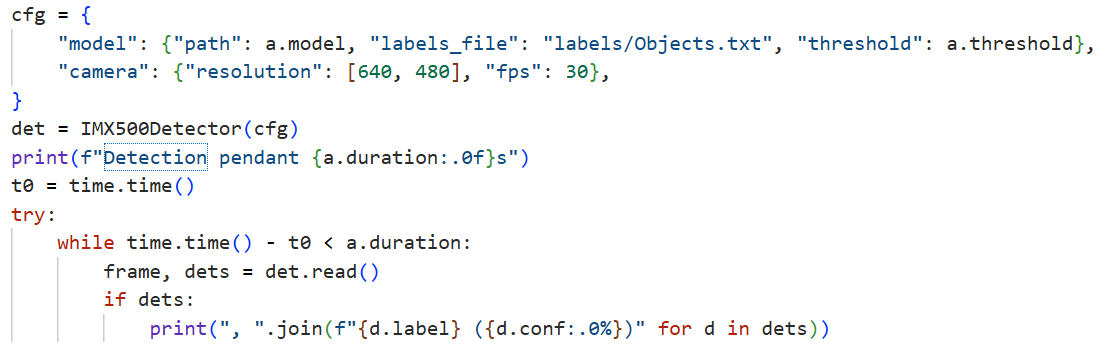
The defaults are a threshold of 0.55 and a duration of 15 seconds, both adjustable with --threshold and --duration in the main python file named hello_detect.py
Now, lets try to launch the main python file to see if anything works:
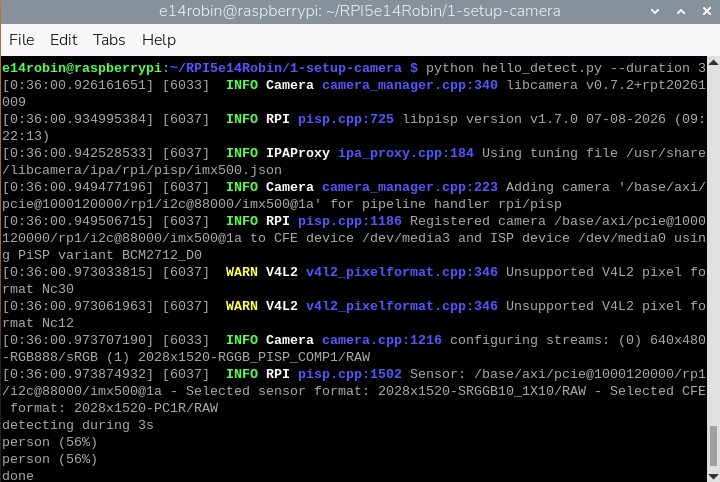
And... it works! As you can see at the end of the output, the camera detected a person standing in front of it. Was it me? Maybe... :P
As mentioned earlier, I showcase the arguments I created in hello_detect.py by using --duration, setting the time capture for this demo at 3 seconds.
Difficulty encountered / that may happen
Those are basics but really time wasting and frustrating:
- Camera not detected? Take a look at your connections to the Pi (:
- One that really got me on my nerves is microSD card being on read-only after a re-write. I started on a different Pi, first OS write has been successful on the first try. Once I got the one Pi that I ordered, I told myself that I'll start from the beginning again! Well... I don't know how, but when I wanted to re-write on the SAME microSD card, I couldn't, which took me fairly one hour to understand why...
Conclusion
And that's it for the version 1 of this project! I've set up the AI Camera, loaded an object-detection model, and confirmed that detections appear in the terminal. It's a simple first step, but it lays the foundations for the version 2: Taking a photo and saving an annotated copy with the detected objects marked on it.

