



element14 Community
element14 Community
    Register Log In
  • Site
  • Search
  • Log In Register
  • Community Hub
    Community Hub
    • What's New on element14
    • Feedback and Support
    • Benefits of Membership
    • Personal Blogs
    • Members Area
    • Achievement Levels
  • Learn
    Learn
    • Ask an Expert
    • eBooks
    • element14 presents
    • Learning Center
    • Tech Spotlight
    • STEM Academy
    • Webinars, Training and Events
    • Learning Groups
  • Technologies
    Technologies
    • 3D Printing
    • FPGA
    • Industrial Automation
    • Internet of Things
    • Power & Energy
    • Sensors
    • Technology Groups
  • Challenges & Projects
    Challenges & Projects
    • Design Challenges
    • element14 presents Projects
    • Project14
    • Arduino Projects
    • Raspberry Pi Projects
    • Project Groups
  • Products
    Products
    • Arduino
    • Avnet & Tria Boards Community
    • Dev Tools
    • Manufacturers
    • Multicomp Pro
    • Product Groups
    • Raspberry Pi
    • RoadTests & Reviews
  • About Us
    About the element14 Community
  • Store
    Store
    • Visit Your Store
    • Choose another store...
      • Europe
      •  Austria (German)
      •  Belgium (Dutch, French)
      •  Bulgaria (Bulgarian)
      •  Czech Republic (Czech)
      •  Denmark (Danish)
      •  Estonia (Estonian)
      •  Finland (Finnish)
      •  France (French)
      •  Germany (German)
      •  Hungary (Hungarian)
      •  Ireland
      •  Israel
      •  Italy (Italian)
      •  Latvia (Latvian)
      •  
      •  Lithuania (Lithuanian)
      •  Netherlands (Dutch)
      •  Norway (Norwegian)
      •  Poland (Polish)
      •  Portugal (Portuguese)
      •  Romania (Romanian)
      •  Russia (Russian)
      •  Slovakia (Slovak)
      •  Slovenia (Slovenian)
      •  Spain (Spanish)
      •  Sweden (Swedish)
      •  Switzerland(German, French)
      •  Turkey (Turkish)
      •  United Kingdom
      • Asia Pacific
      •  Australia
      •  China
      •  Hong Kong
      •  India
      •  Japan
      •  Korea (Korean)
      •  Malaysia
      •  New Zealand
      •  Philippines
      •  Singapore
      •  Taiwan
      •  Thailand (Thai)
      •  Vietnam
      • Americas
      •  Brazil (Portuguese)
      •  Canada
      •  Mexico (Spanish)
      •  United States
      Can't find the country/region you're looking for? Visit our export site or find a local distributor.
  • Translate
  • Profile
  • Settings
Raspberry Pi
  • Products
  • More
Raspberry Pi
Blog Essential Raspberry Pi Peripherals #2 (annex 1): Making a custom frame for the 7" LCD touch screen display
  • Blog
  • Forum
  • Documents
  • Quiz
  • Events
  • Polls
  • Files
  • Members
  • Mentions
  • Sub-Groups
  • Tags
  • More
  • Cancel
  • New
Join Raspberry Pi to participate - click to join for free!
Featured Articles
Announcing Pi
Technical Specifications
Raspberry Pi FAQs
Win a Pi
GPIO Pinout
Raspberry Pi Wishlist
Comparison Chart
Quiz
  • Share
  • More
  • Cancel
Group Actions
  • Group RSS
  • More
  • Cancel
Engagement
  • Author Author: balearicdynamics
  • Date Created: 25 Sep 2015 8:08 AM Date Created
  • Views 2737 views
  • Likes 2 likes
  • Comments 9 comments
Related
Recommended
  • display_frame
  • drobott_com
  • accessory
  • container
  • protective_frame
  • raspberry_pi
  • lcd_case
  • lcd_frame
  • raspberry-pi_essentials

Essential Raspberry Pi Peripherals #2 (annex 1): Making a custom frame for the 7" LCD touch screen display

balearicdynamics
balearicdynamics
25 Sep 2015

Introduction

This post and few other will appear as annex to the Essential Raspberry Pi Peripherals #2. The reason is that when it was planned this series of tutorials the 7" touch-LCD created for the PI was not yet on the market. When the first unit has been received, I started immediately to study the hardware and software; in these #2 annexes we explore some mods and installation that can be helpful for the users to get the best from this incredible accessory inside their projects.


Taking advices and suggestions here and there and seeing some issues that may occur with the 7" touch screen display for the Raspberry PI I have done a prototype of a frame to secure the display when mounted with the control board and the Raspberry PI. My actual usage is for an Info-Point based on the Raspberry PI 2 Mod B.


Note that this blog post will show the prototype building of a full working frame for the display while the "commercial" version will be done with white plastic laser-cut based on the same design. The second part will show the building of the back side enclosure to cover the electronic parts. Until now I have not yet found a protective frame of the display also for the front side including the back parts.


Where to find it

You can find the product at Drobott.com Don't forget to apply the Element14 discount code W0E49MYQ (10% off) reserved to the community users!


How the product appears
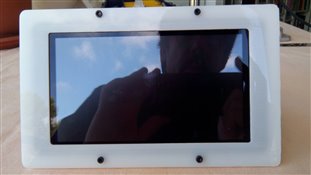
imageimageimage

The full description by images can be found on the following Google Album.


Creating the frames

Measuring the display on both sides I have created three different frames: one front-frame and two back frames.


Front frame

image

Front view of the front-frame; the two extra-area corresponding to the top and bottom sides are used to keep the front and back frames together. This model is so shaped because these are also the supports that keep the display inside the info-pointsupport. A further version with a full thick border will be producer with the same characteristics.
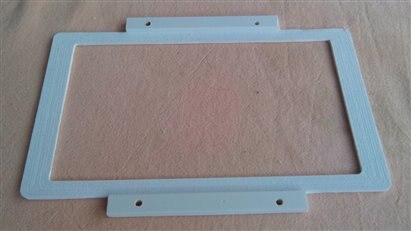
 

imageimage

Back of the front-frame. The two elements that are part of the structure will also help to keep correctly positioned the touch surface over the LCD surface.


Back frames

There are two frames on the back side of the screen. The first is locked with four allen screws with the front-frame while the second frame protect the remaining part and offers the base for the back cover of the electronic parts (cables, dipslay control board and Raspberry PI). The opacity in the frames of the images below depends on the prototype manual refining. In this prototype I have used a 2.5 mm thick acrylic but the right final material should be opaque, white 3 mm thick.


image

First back-frame, the nearest to the screen surface.


image

Second back-frame.


Assembling

After the pieces are done, the assembly phase is very easy:


image

1) Put the front-frame on a flat surface and the screen device on it (the Raspberry PI should not yet be fixed with screws on the display controller board) remember to remove the protective label from the front side of the screen.
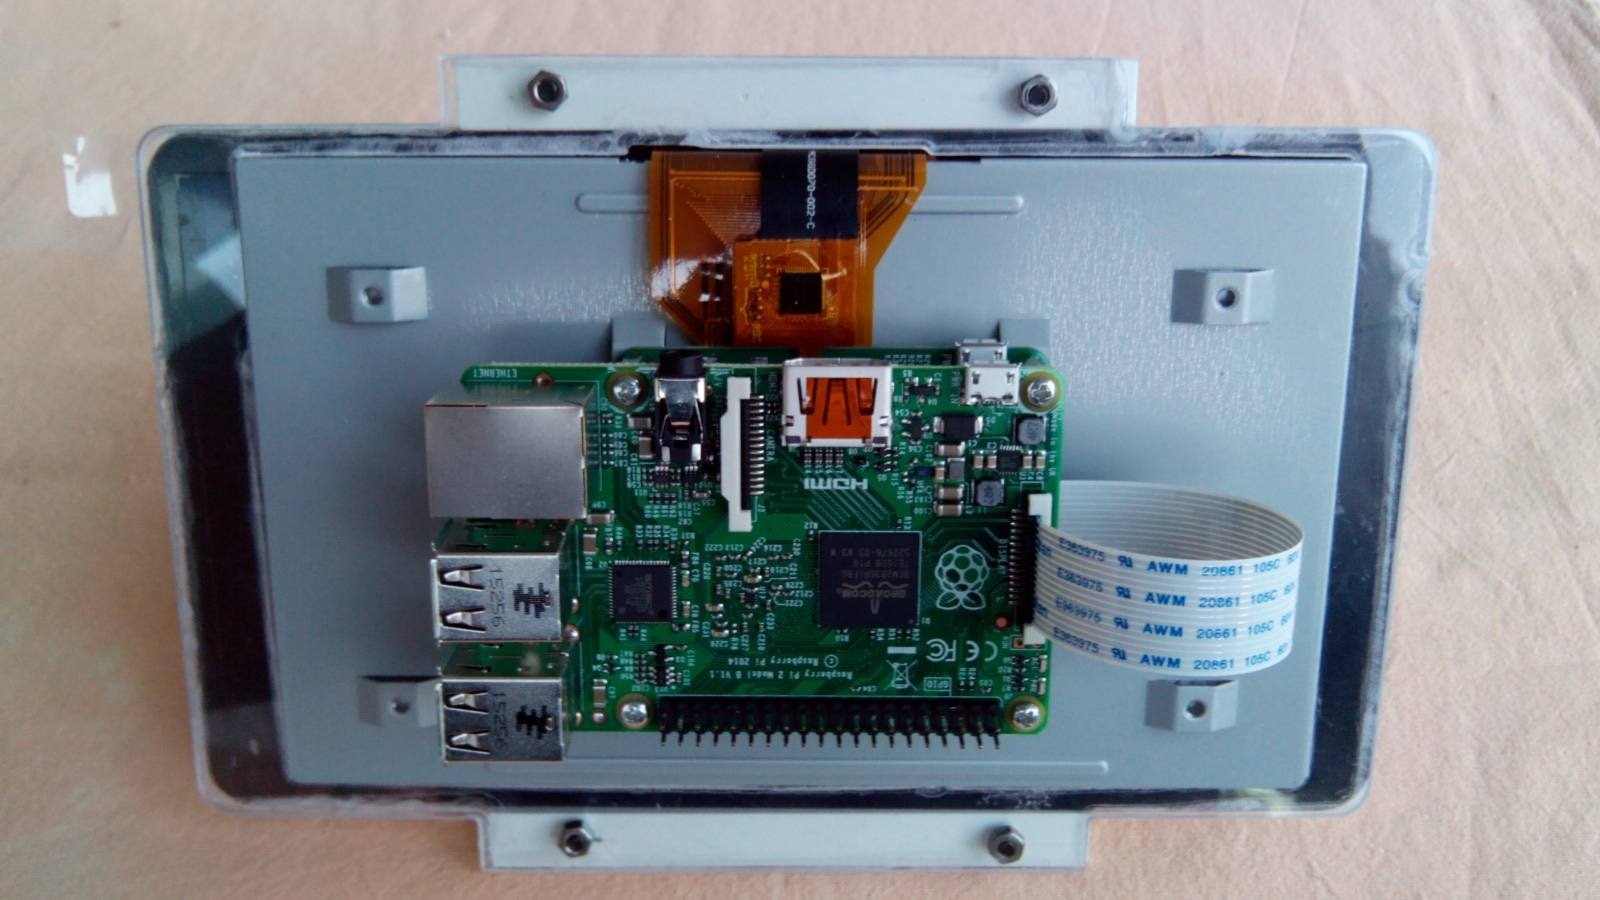
image

2) Place the first back-frame on the screen and insert the four allen screws. Then close firmly the four nuts.

image

3) place the second back-frame and fix it to the aluminium display four holes with screws. Last, fix with the four screws the Raspberry PI over the display control board.

In the image above the top frame is locked with two black pieces of plastic, that can be replaced with a 3D printed cover to protect all the electronic parts.


Ready to use

The following image shows the finished frame.
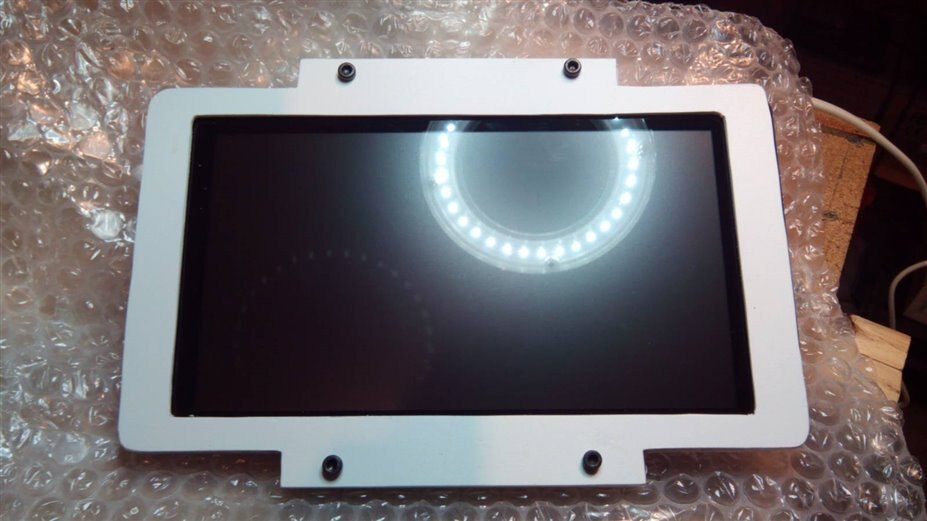
image

  • Sign in to reply

Top Comments

  • balearicdynamics
    balearicdynamics over 10 years ago in reply to shabaz +2
    Thank you Shabaz. There will be two versions. One is with the full border around and smaller screws but the principle remain the same. I think that this will be the first version not only due my needs…
  • balearicdynamics
    balearicdynamics over 10 years ago in reply to spannerspencer +1
    Sure, all ports must be accessible as well. I have to use them BTW, the next annex about the LCD will be on Kivy installation that - as I have done and tested during these last two days - is the better…
  • balearicdynamics
    balearicdynamics over 10 years ago in reply to jw0752

    Hi John,


    the front frame is with super compact foam, as it is fast to machine just to see measures and mechanics working. The back instead is plexiglass that is not the ideal to be machined as also using a low spindle rotation (about 4000 rpm) and a fast tool axis movement (about 100 mm/min) tends to hot and fuse. It was the only test material I have at home and the back frames thickness is only 2.3 mm while it is needed 3 mmm every frame. I have used a 3-axis mill machine (always the same I use for almost all including PCB image)


    As it seems working perfectly I will make a laser cut to a service here on the Island of the right thickness and acrylic plastic that is perfect for this job.


    Enrico

    • Cancel
    • Vote Up 0 Vote Down
    • Sign in to reply
    • More
    • Cancel
  • balearicdynamics
    balearicdynamics over 10 years ago in reply to DAB

    Thank you DAB.


    Next step, the back cover and the full info point.


    Enrico

    • Cancel
    • Vote Up 0 Vote Down
    • Sign in to reply
    • More
    • Cancel
  • jw0752
    jw0752 over 10 years ago

    Excellent looking frame for the touch screen. What did you use to cut the plastic for the prototype?

    John

    • Cancel
    • Vote Up 0 Vote Down
    • Sign in to reply
    • More
    • Cancel
  • DAB
    DAB over 10 years ago

    Nice build.


    DAB

    • Cancel
    • Vote Up 0 Vote Down
    • Sign in to reply
    • More
    • Cancel
<
element14 Community

element14 is the first online community specifically for engineers. Connect with your peers and get expert answers to your questions.

  • Members
  • Learn
  • Technologies
  • Challenges & Projects
  • Products
  • Store
  • About Us
  • Feedback & Support
  • FAQs
  • Terms of Use
  • Privacy Policy
  • Legal and Copyright Notices
  • Sitemap
  • Cookies

An Avnet Company © 2026 Premier Farnell Limited. All Rights Reserved.

Premier Farnell Ltd, registered in England and Wales (no 00876412), registered office: Farnell House, Forge Lane, Leeds LS12 2NE.

Follow element14

  • X
  • Facebook
  • linkedin
  • YouTube