element14 Community
element14 Community
    Register Log In
  • Site
  • Search
  • Log In Register
  • Community Hub
    Community Hub
    • What's New on element14
    • Feedback and Support
    • Benefits of Membership
    • Personal Blogs
    • Members Area
    • Achievement Levels
  • Learn
    Learn
    • Ask an Expert
    • eBooks
    • element14 presents
    • Learning Center
    • Tech Spotlight
    • STEM Academy
    • Webinars, Training and Events
    • Learning Groups
  • Technologies
    Technologies
    • 3D Printing
    • FPGA
    • Industrial Automation
    • Internet of Things
    • Power & Energy
    • Sensors
    • Technology Groups
  • Challenges & Projects
    Challenges & Projects
    • Design Challenges
    • element14 presents Projects
    • Project14
    • Arduino Projects
    • Raspberry Pi Projects
    • Project Groups
  • Products
    Products
    • Arduino
    • Avnet & Tria Boards Community
    • Dev Tools
    • Manufacturers
    • Multicomp Pro
    • Product Groups
    • Raspberry Pi
    • RoadTests & Reviews
  • About Us
  • Store
    Store
    • Visit Your Store
    • Choose another store...
      • Europe
      •  Austria (German)
      •  Belgium (Dutch, French)
      •  Bulgaria (Bulgarian)
      •  Czech Republic (Czech)
      •  Denmark (Danish)
      •  Estonia (Estonian)
      •  Finland (Finnish)
      •  France (French)
      •  Germany (German)
      •  Hungary (Hungarian)
      •  Ireland
      •  Israel
      •  Italy (Italian)
      •  Latvia (Latvian)
      •  
      •  Lithuania (Lithuanian)
      •  Netherlands (Dutch)
      •  Norway (Norwegian)
      •  Poland (Polish)
      •  Portugal (Portuguese)
      •  Romania (Romanian)
      •  Russia (Russian)
      •  Slovakia (Slovak)
      •  Slovenia (Slovenian)
      •  Spain (Spanish)
      •  Sweden (Swedish)
      •  Switzerland(German, French)
      •  Turkey (Turkish)
      •  United Kingdom
      • Asia Pacific
      •  Australia
      •  China
      •  Hong Kong
      •  India
      •  Korea (Korean)
      •  Malaysia
      •  New Zealand
      •  Philippines
      •  Singapore
      •  Taiwan
      •  Thailand (Thai)
      • Americas
      •  Brazil (Portuguese)
      •  Canada
      •  Mexico (Spanish)
      •  United States
      Can't find the country/region you're looking for? Visit our export site or find a local distributor.
  • Translate
  • Profile
  • Settings
Raspberry Pi
  • Products
  • More
Raspberry Pi
Blog Go Go Gadet Raspberry Pi Zero W
  • Blog
  • Forum
  • Documents
  • Quiz
  • Events
  • Polls
  • Files
  • Members
  • Mentions
  • Sub-Groups
  • Tags
  • More
  • Cancel
  • New
Join Raspberry Pi to participate - click to join for free!
Featured Articles
Announcing Pi
Technical Specifications
Raspberry Pi FAQs
Win a Pi
GPIO Pinout
Raspberry Pi Wishlist
Comparison Chart
Quiz
  • Share
  • More
  • Cancel
Group Actions
  • Group RSS
  • More
  • Cancel
Engagement
  • Author Author: clem57
  • Date Created: 14 Mar 2017 4:48 PM Date Created
  • Views 1888 views
  • Likes 11 likes
  • Comments 10 comments
Related
Recommended
  • rndis
  • 923029.
  • ssh remote connection
  • headless
  • raspberry pi zero wireless
  • pi day
  • jessie lite

Go Go Gadet Raspberry Pi Zero W

clem57
clem57
14 Mar 2017

Go Go Gadget Raspberry Pi Zero W


                    Happy Birthday from Raspberry Pi Foundation!!!

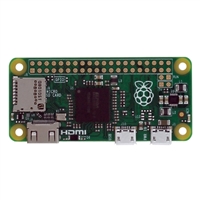
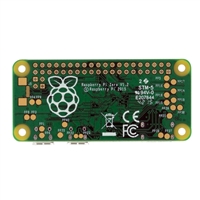
     March 7 was Raspberry Pi’s fifth birthday: it has been five years since we launched the original Raspberry Pi, selling a hundred thousand units in the first day, and setting us on the road to a lifetime total (so far) of over twelve million units. To celebrate, we’re announcing a new product: meet Raspberry Pi Zero W, a new variant of Raspberry Pi Zero with wireless LAN and Bluetooth, priced at only $10.


From: https://www.raspberrypi.org/blog/raspberry-pi-zero-w-joins-family/

image


     With this announcement, I was excited to see this as an important upgrade. Finally a way to use the Zero W with WiFi from Cypress using the CYW43438 wireless chip just like the older brother the Raspberry Pi 3. The only problem was how to get one when they sell like hotcakes.Then I got my chance when on Saturday Micro Center announced stock of Zero W as 923029. So bright and early Sunday morning I went down there to get me one. Talking to the sales rep, I found they dropped shipped 200 to this store which was not their normal shipment. And yes they were going fast. BTW, the second one cost 14.99 which is still not bad.

     In addition today is Pi day! Not Raspberry Pi but that other famous Pi 3.14 etc. What more reason to read this little(ish) tutorial. I am sorry for the many steps, but I wanted a complete setup for noobs and experienced users alike. So lets get on with it.


                                        457746_925313_01_front_thumbnail.jpg?1488940459712                457746_925313_02_front_thumbnail.jpg

    The Dilemma


So I get home and start looking at the new small board and ponder how to setup this wonder without a keyboard, mouse, and HDMI monitor. Yes, I could use them and be done, but that is not the way most people would try it. Even though wireless should work, how was the configuration of wireless to get started without keyboard and monitor.

After Googling the net, I came up with an idea! The good folks at Adafruit had this article https://learn.adafruit.com/turning-your-raspberry-pi-zero-into-a-usb-gadget/ethernet-tweaks?view=all. This seemed the way to go thinking of the choices. But it was not without trials and tribulations. The serial USB seems to be the simplest until I found no logon till the TTY was setup first. A chicken and an egg problem to be sure. So without further ado, here we go.


     Ready Set ...


  1. Find the latest Jessie Rasbian Lite at https://www.raspberrypi.org/downloads/raspbian/ and download it. I chose this because it can work on a small SD card of 4 GB and does not have a graphical interface to run. This means I load only what I need. For reference I used 3/2/2017 version

  2. Next I mounted the micro SD card on a USB interface on Windows computer. I chose a  need tool called Etcher at https://etcher.io/, It is smart and simple to use. Also you can flash more than one card at a time. It will verify the image as well.

  3. Even though the tool does an "Eject" on the card for you, remove and reinsert the same card since we have a few hings to do.

  4. Look for boot (E:) on Windows. For Linux or Mac, this would be the first partition FAT32. Later it is mounted at /boot in the tree. Edit config(.txt) file with either Notepad or Wordpad. If you use Wordpad, you must be careful to save as TXT and not anything else. Firstly, save a backup copy as config2.txt to be safe. Now add the following line as the last line in file:

    dtoverlay=dwc2


    Now we can do a save as config.txt and reply Yes to overlay it.

  5. Next we edit cmdline.txt same as above. Again save a backup as cmdline2.txt. Now add the following after "rootwait" with just a space before and after. Do not hit the enter key since this file is very particular.


    modules-load=dwc2,g_ether

  6. One last edit, edit config.txt in Notepad. Do a save as and in the bottom the name is "ssh." include the period but not the quotes. Make sure all files are selected not just plain text. Then hit the save button. You should see this as a file not a text file. This will allow ssh the first time.

  7. Now properly Eject the card to use in the new Pi Zero W.

  8. Put micro SD card into Pi Zero W. Plug a micro USB into the inside called USB not PWR. I plugged this other end into a Pi 3. Why not Windows? Because of missing RDNIS driver for Windows 10 and Bonjour for Windows 10. For Windows, go to Directory: /static/beaglebone/latest/Drivers/. Select the correct version for Windows checking for 64 bit or not. Follow install procedures. Next go to https://support.apple.com/downloads/Bonjour_for_Windows, and select "Download Bonjour Print Services for Windows Vx.x.x'. Again follow install and now Windows can handle name resolution as well as RNDIS USB driver.

  9. On the Pi 3 they have both included in a full Jessie Rasbian desktop. Later I will locate and add when I find the drivers.

  10. Under the Pi 3, I opened a terminal window. Here I entered:


    lsusb

    Look for                    ID 0525:a4a2 Netchip Technology. Inc Linux-USB Ethernet/RNDIS Gadget

  11. Now we can SSH into the Zero W with: See note 1 below for more information.


    ssh pi@raspberrypi.local

  12. Reply Yes to next message to add ECDSA key and next the default password of "raspberry" (no quotes of course)

  13. Enter config file to change password and optionally host name. Also turn on SSH for future use.


    sudo raspi-config
    Interfacing Options
    P2 SSH
    <YES>
    <OK>
    <FINISHED>  
    <NO> to reboot now option

  14. Now to setup wireless settings with your SSID and PSK after any lines already there, paste and change the correct values:


    sudo nano /etc/wpa_supplicant/wpa_supplicant.conf
    
    network={
      ssid="testing"
      psk="testingPassword"
    }


    cntl-o
    Enter
    cntl-x

  15. Edit the interfaces file to fix up a static USB0 so logins can be done by IP address: Skip this as it did not work as intended/image


    sudo nano /etc/network/interfaces
    
    allow-hotplug usb0
    iface usb0 inet static
      address 192.168.5.2
      netmask 255.255.255.0
      network 192.168.5.0
      broadcast 192.168.5.255
      gateway 192.168.5.1
    
    
    cntl-o
    enter
    cntl-x

  16. Now reboot the Zero W with:


    sudo reboot

  17. Wait a while and try to re-login. Note any changes to the host name will affect the xxx.local name or just use the static IP of 192.168.5.2


  18. Try a ping test like:


    ping 8.8.8.8

  19. After all this bask in the sunlight and enjoy a cup of Java. Oh that is another topic. Adios amigos.

  • Sign in to reply

Top Comments

  • fvan
    fvan over 8 years ago +5
    There's an easier way for the SSH and wifi: * flash the card with etcher * put empty file called "ssh" on SD card * put "wpa_supplicant.conf" file on SD card * insert SD card in Pi Zero W You're done,…
  • clem57
    clem57 over 8 years ago in reply to fvan +4
    But I can use this for the none wireless version of Zero as well, Besides this is a learning experience for me and hopefully others as well. You are correct. Thanks for pointing this out. Clem
  • jkutzsch
    jkutzsch over 8 years ago +3
    I am so hoping the next time I am near a Micro Center they still have 1. Considering I should be near one this Friday, we shall see! :-)
  • Workshopshed
    Workshopshed over 7 years ago in reply to clem57

    Yes this works for a Pi with a Wifi Dongle

    • Cancel
    • Vote Up 0 Vote Down
    • Sign in to reply
    • More
    • Cancel
  • clem57
    clem57 over 8 years ago in reply to jkutzsch

    I just finished installing Pi Hole to kill off ads from many sites today. If it does well under test, I may use two as primary/secondary DNS at the IP router side. I see at Micro Center they got a new batch to sell after selling the original ones. Seems like they are producing the little devils image in good volumes.

    • Cancel
    • Vote Up +2 Vote Down
    • Sign in to reply
    • More
    • Cancel
  • jkutzsch
    jkutzsch over 8 years ago in reply to jkutzsch

    clem57 Woohoo, now the proud owner of a new Raspberry PI Zero W!  Sadly the little guy is going on the shelf for a little while so it does not distract me from current projects, but I was able to get one!  :-)

    • Cancel
    • Vote Up +2 Vote Down
    • Sign in to reply
    • More
    • Cancel
  • clem57
    clem57 over 8 years ago in reply to Workshopshed

    I found that changed from Wheezy to Jessie and so I took this step out. Turns out with install of Bonjour from apple it is not needed.

    • Cancel
    • Vote Up +3 Vote Down
    • Sign in to reply
    • More
    • Cancel
  • Workshopshed
    Workshopshed over 8 years ago

    To setup a static IP you need to change the DHCP config not the Interfaces, took me ages to work that out when I was setting up the render farm earlier in the year.

    Building a Render Farm with a Bitscope Blade Quatro - Setup of the nodes

    • Cancel
    • Vote Up +3 Vote Down
    • Sign in to reply
    • More
    • Cancel
>
element14 Community

element14 is the first online community specifically for engineers. Connect with your peers and get expert answers to your questions.

  • Members
  • Learn
  • Technologies
  • Challenges & Projects
  • Products
  • Store
  • About Us
  • Feedback & Support
  • FAQs
  • Terms of Use
  • Privacy Policy
  • Legal and Copyright Notices
  • Sitemap
  • Cookies

An Avnet Company © 2025 Premier Farnell Limited. All Rights Reserved.

Premier Farnell Ltd, registered in England and Wales (no 00876412), registered office: Farnell House, Forge Lane, Leeds LS12 2NE.

ICP 备案号 10220084.

Follow element14

  • X
  • Facebook
  • linkedin
  • YouTube