


Recently I came across the nanonets.io website which provides APIs for image classification and detection. The one thing that caught my eye is the ease of use. Whenever you work around AI, it involves two steps, first is the training where a model is created from known data sets and the second phase involves the classification of unknown data by using the obtained model. The model’s accuracy increases as the training data sets size and quality increases. This is important because the image or data to be classified are pretty noisy in deployment scenarios.
This blog post is all about using nanonets.io APIs with Raspberry Pi and an attached Pi Camera. The programming language I will be using is Python, but you can do so in any language of your choice, as this project is around HTTP calls only.
Step 1: Training and Creating a model using known dataset:
NanoNets has some great documentation for getting started, and they work as expected. In this step, we first need to create a model from known images to enable classification. Navigate to nanonets.io and click on start building to sign in or sign up. After successful sign in it will redirect you to https://app.nanonets.com/#/. After that follow the steps as below,
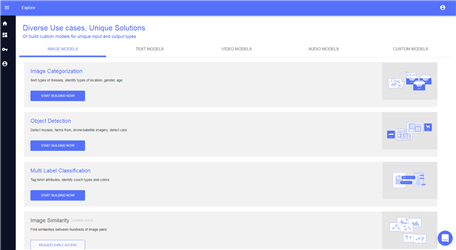
- Now click on Image Categorization. In the next page select the custom model as we are going to create our own model. If you are going to classify images that are already available in NanoNets like gender detection, you can use the demo models. For me, the images I am going to classify are of electronics components and the model is not available by default. Thus need to create one.

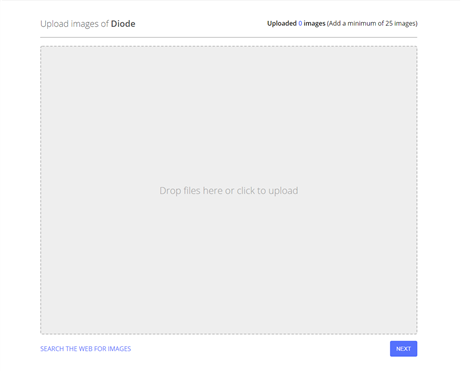
After that in the next window add the categories that you require. These are the categories or classes the images are to be classified into. For me, these are like Zenner Diode, Diode, LED, Tactile Switch, Wire
wound resistor, Electrolytic Capacitor, Transistor, Transistors, Ceramic Capacitors, and Resistor.
- Next step is to add the images to respective categories. The easiest way is to let NanoNets search for the images related to the categories but the issue is the image data sets are quite noisy and it doesn't provide a method of removing nonrelevant images manually. For demo tests, these works though and save so much of time. In case you want to use the model for deployment, you need to upload the images manually and make sure the images are of good quality.


iv. After the above step, the system now trains the model and it may take a bit of time. It also provides a model ID that we are going to use in our future API requests. It shows accuracy and other matrices. You can test out the accuracy of classification by getting into Test and uploading a new image from a camera or any website and check out the JSON response. It gives out the % of matching of the selected or uploaded item to a particular category we created during step-iii. This page also shows information about the created model.


v. To integrate with own application, click on integrate. This screen provides code snippets for different programming languages. Just copy the code you need depending upon the language you intend to use, For me it is python. There exist two versions and I have used the file one. In this API you can upload an image file and that will be classified and the response will be the classification result. The API snippet that I copied from nanonets.io looks like,
import requests
url = 'https://app.nanonets.com/api/v2/ImageCategorization/LabelFile/'
data = {'file': open('REPLACE_IMAGE_PATH.jpg', 'rb'), 'modelId': ('', 'cb9925c9-e4b9-40a7-86d9-e8f68a8573c8')}

response = requests.post(url, auth= requests.auth.HTTPBasicAuth('bmGw4ITt8JlmzPTrcA5GsuHq4mik68CG', ''), files=data)

print(response.text)
In the next step, we are going to develop a python application with a UI and Raspberry Pi camera around the above API code.
Step 2: The Application:
After successfully implementing the model in the cloud, the next step is to develop a UI that will let the user browse for any image in the Pi to classify it or take an image of a component using the attached pi camera and classifying it. In both the cases the image is uploaded to nanonets.io with the provided API and in response, it sends a JSON file with the probability of the image to be of a certain category. The application checks for if the probability is higher then 50% or the image is classified as unclassified. Otherwise, the image is classified as to the category which is having a higher probability. Then the image is moved to the respective folder to which it is classified as or to the unsorted folder if it is not classified. The classification results are logged to CSV file as well. A sample JSON response is like,
{
  "message": "Success",
  "result": [
  {
  "message": "",
  "prediction": [
  {
  "label": "Tactile_Switch",
  "probability": 0.93850183
  },
  {
  "label": "LED",
  "probability": 0.036346328
  },
  {
  "label": "Transistors",
  "probability": 0.0074488334
  },
  {
  "label": "Electrolytic_Capacitor",
  "probability": 0.007120288
  },
  {
  "label": "Wire_wound_resistor",
  "probability": 0.0041420963
  },
  {
  "label": "Transistor",
  "probability": 0.0033664247
  },
  {
  "label": "Ceramic_Capacitors",
  "probability": 0.0016249806
  },
  {
  "label": "Diode",
  "probability": 0.00085564214
  },
  {
  "label": "Resistor",
  "probability": 0.00036442486
  },
  {
  "label": "Zenner_Diode",
  "probability": 0.00022906
  }
  ],
  "file": "dc66782f-6959-4484-86a7-942db70f5efb.jpeg"
  }
  ]
}
You can see the probability for the tactile switch label is the highest one and is above 50%, so the image is classified as a tactile switch and moved to the respective folder. The UI is developed using Tkinter. The application is divided into two files one responsible for UI and the other for background activities. The code is a simple one and doesn't involve any complex python frameworks or algorithms. If you have any input regarding the code, you are welcome.
You can download the attached code.
Top Comments