element14 Community
element14 Community
    Register Log In
  • Site
  • Search
  • Log In Register
  • Community Hub
    Community Hub
    • What's New on element14
    • Feedback and Support
    • Benefits of Membership
    • Personal Blogs
    • Members Area
    • Achievement Levels
  • Learn
    Learn
    • Ask an Expert
    • eBooks
    • element14 presents
    • Learning Center
    • Tech Spotlight
    • STEM Academy
    • Webinars, Training and Events
    • Learning Groups
  • Technologies
    Technologies
    • 3D Printing
    • FPGA
    • Industrial Automation
    • Internet of Things
    • Power & Energy
    • Sensors
    • Technology Groups
  • Challenges & Projects
    Challenges & Projects
    • Design Challenges
    • element14 presents Projects
    • Project14
    • Arduino Projects
    • Raspberry Pi Projects
    • Project Groups
  • Products
    Products
    • Arduino
    • Avnet & Tria Boards Community
    • Dev Tools
    • Manufacturers
    • Multicomp Pro
    • Product Groups
    • Raspberry Pi
    • RoadTests & Reviews
  • About Us
    About the element14 Community
  • Store
    Store
    • Visit Your Store
    • Choose another store...
      • Europe
      •  Austria (German)
      •  Belgium (Dutch, French)
      •  Bulgaria (Bulgarian)
      •  Czech Republic (Czech)
      •  Denmark (Danish)
      •  Estonia (Estonian)
      •  Finland (Finnish)
      •  France (French)
      •  Germany (German)
      •  Hungary (Hungarian)
      •  Ireland
      •  Israel
      •  Italy (Italian)
      •  Latvia (Latvian)
      •  
      •  Lithuania (Lithuanian)
      •  Netherlands (Dutch)
      •  Norway (Norwegian)
      •  Poland (Polish)
      •  Portugal (Portuguese)
      •  Romania (Romanian)
      •  Russia (Russian)
      •  Slovakia (Slovak)
      •  Slovenia (Slovenian)
      •  Spain (Spanish)
      •  Sweden (Swedish)
      •  Switzerland(German, French)
      •  Turkey (Turkish)
      •  United Kingdom
      • Asia Pacific
      •  Australia
      •  China
      •  Hong Kong
      •  India
      •  Japan
      •  Korea (Korean)
      •  Malaysia
      •  New Zealand
      •  Philippines
      •  Singapore
      •  Taiwan
      •  Thailand (Thai)
      •  Vietnam
      • Americas
      •  Brazil (Portuguese)
      •  Canada
      •  Mexico (Spanish)
      •  United States
      Can't find the country/region you're looking for? Visit our export site or find a local distributor.
  • Translate
  • Profile
  • Settings
Raspberry Pi
  • Products
  • More
Raspberry Pi
Blog Raspberry Pi 2 - Plex Media Server
  • Blog
  • Forum
  • Documents
  • Quiz
  • Events
  • Polls
  • Files
  • Members
  • Mentions
  • Sub-Groups
  • Tags
  • More
  • Cancel
  • New
Join Raspberry Pi to participate - click to join for free!
Featured Articles
Announcing Pi
Technical Specifications
Raspberry Pi FAQs
Win a Pi
GPIO Pinout
Raspberry Pi Wishlist
Comparison Chart
Quiz
  • Share
  • More
  • Cancel
Group Actions
  • Group RSS
  • More
  • Cancel
Engagement
  • Author Author: biglesp
  • Date Created: 3 Mar 2016 1:15 PM Date Created
  • Views 10274 views
  • Likes 4 likes
  • Comments 40 comments
Related
Recommended
  • plex_media_server_software
  • rpiintermediate
  • project
  • rpibeginner
  • internet_of_things
  • pi2_project
  • raspberrypi_project
  • raspberrypi
  • iot
  • raspberrypi2
  • media_library
  • plex
  • raspbian
  • multi_room_audio
  • pi2
  • home_entertainment

Raspberry Pi 2 - Plex Media Server

biglesp
biglesp
3 Mar 2016

With our ever increasing media libraries containing movies, TV shows, music and pictures we need something that can serve this content to any of our devices.


25100202219_0e81f79d0e_b_d.jpg


If you fancy opera in the kitchen, jazz in the bathroom and the latest Hollywood blockbuster in your pocket, then you need a media server and the Raspberry Pi 2 is the ideal low cost candidate.

To replicate this project you will need:


  • A Raspberry Pi 2
  • A laptop running Windows/Mac or Linux
  • A minimum of 8GB SD card
  • A 2A power supply
  • An Ethernet cable connected to a router.
  • An external USB hard drive


16249575259_467b219fb4_k_d.jpg


We start the project by installing the latest version of Raspbian on to an 8GB or greater SD card. The best tutorial on how to do this is provided by the Raspberry Pi Foundation and can be found on their blog

With Raspbian installed we now need to boot our Raspberry Pi. Insert the microSD into the Raspberry Pi, then attach any peripherals such as keyboard, mouse, HDMI, Ethernet to the Pi. Lastly attach the power cable to boot the Pi.

When your Pi has booted to the desktop, click on the menu to the top left of the screen and go to the Preferences menu. From there select the Raspberry Pi Configuration application.

In this application we need to change the boot behaviour so that the Pi boots to the terminal and is logged in. We’ll also change the memory for the GPU to only use 16MB of RAM, and overclock the Pi 2 to 1GHz.

With these changes made, save and exit the application. You will be asked to reboot, do so before progressing.

With our Pi rebooted we now find ourselves at the terminal. It may seem a little scary at first but the terminal is the best way to work with a Linux computer.

Setup software

Our next goal is to install the software necessary for our Pi.

First we update our list of available software. In the terminal type.


sudo apt-get update


The update will take a few moments to complete. When the terminal is returned to you enter the next command to install the HTTPS transport package to enable access to HTTPS content over the Internet.


sudo apt-get install apt-transport-https -y --force-yes


Next we shall download a key that will authenticate our downloads to ensure they are safe


wget -O - https://dev2day.de/pms/dev2day-pms.gpg.key  | sudo apt-key add -


With the key downloaded we now add a new repository to our list, this repository is provided by dev2day.de who has worked on the packages that will power our Plex install.

In the terminal type


echo "deb https://dev2day.de/pms/ jessie main" | sudo tee /etc/apt/sources.list.d/pms.list


We now update our list again, to ensure that we now have the latest updates for the Plex Media Server.


sudo apt-get update


Lastly we install the Plex Media Server software.


sudo apt-get install -t jessie plexmediaserver -y


The install will only take a few minutes and once completed the Plex Media Server will automatically start as a background service on your Pi.

Fix IP address of the Pi

To ensure that we can discover our Pi on a network we will now fix the IP address of the Pi.

First we need to find out the IP address, in the terminal type.


hostname -I


Write down your IP address!

Now let's fix the IP address, in the terminal type


sudo nano /boot/cmdline.txt


At the very end of the line we will add the IP address that we earlier wrote down. So type


ip=THE IP ADDRESS YOU WROTE DOWN


With the IP entered press CTRL + O, then Enter to save your changes.

Now press CTRL + X to close the file.

Now reboot your Pi to make the changes permanent.


sudo reboot


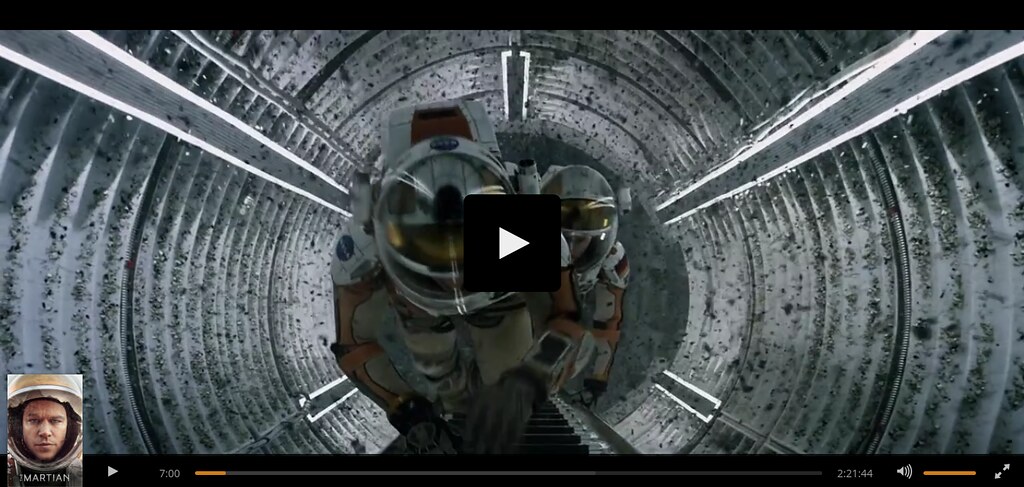
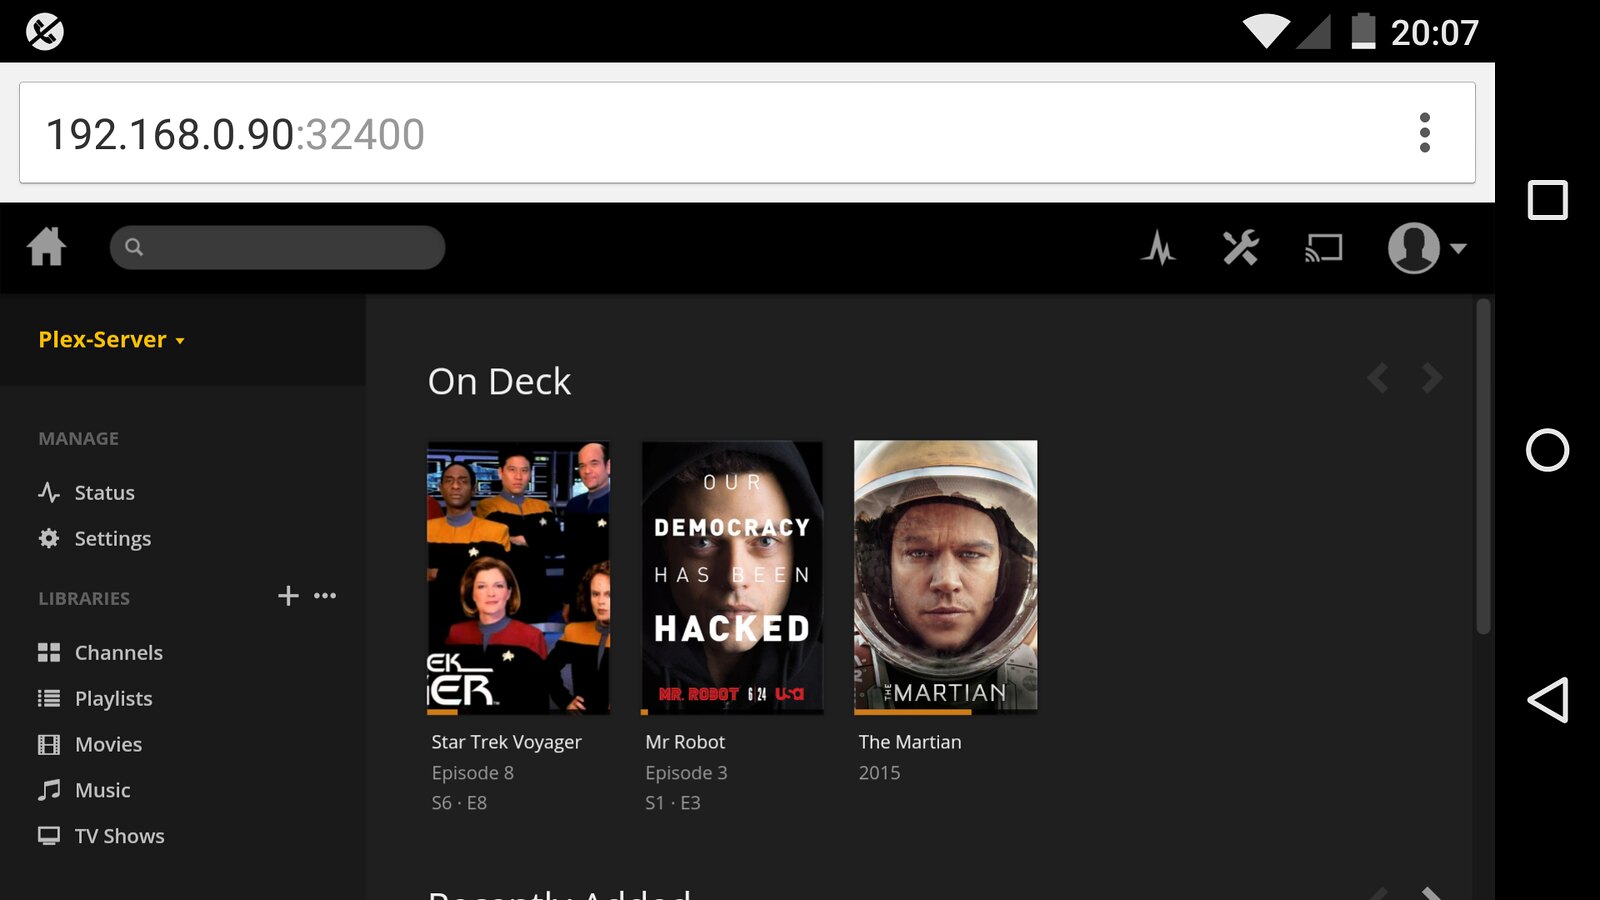
With your Pi rebooted we shall now test that we can access the Plex server. On your laptop or desktop PC open a web browser and type your IP address followed by :32400/web so for example I typed.


192.168.0.90:32400/web


24841031413_78331093d4_b_d.jpg


This will now open the Plex Media Server software and we will need to read and accept the Terms and Conditions before progressing.

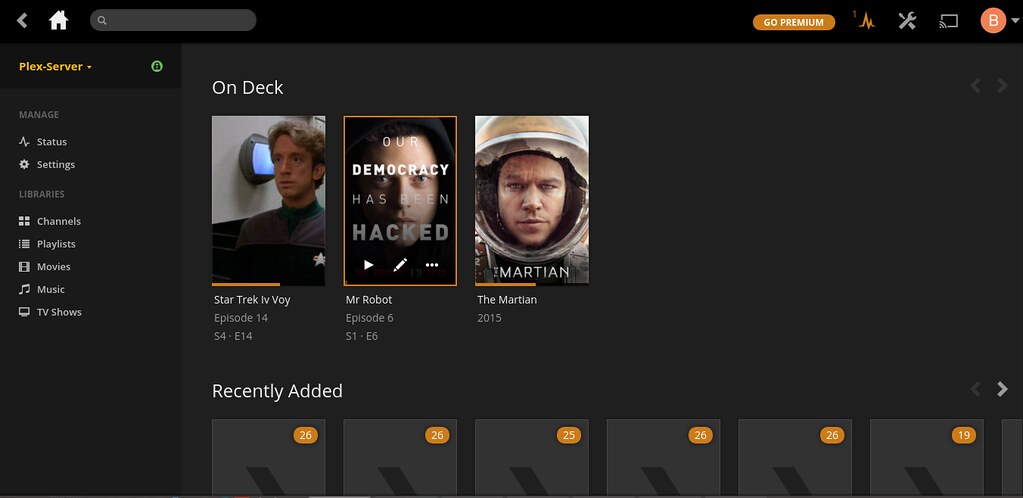
Once Plex has loaded take a few moments to get familiar with the interface. Specifically the libraries, which will house your media collection.

The SD card of our Raspberry Pi is rather small, so let's add an external hard drive and store our media there.

Plug in your USB drive. Nothing will happen in Plex until we mount the drive. In Linux, mounting a drive means that it is ready to be used. On your Raspberry Pi, in the terminal type


dmesg


You will see a lot of text whizz up the screen but keep a look out for your hard drive.

So now lets create somewhere to link our hard drive to the Raspberry Pi this will be a directory called “library”. In the terminal type


sudo mkdir /mnt/library


Now we shall open a text editor and add a line of code to mount the drive on boot. For our drive we used a FAT32 formatted drive. As this is the only USB drive it will be given the assignment “sda” and if the drive has one partition, where our data is stored, then it will be “1”. This gives us the location of our media which is “sda1”.


sudo nano /etc/fstab


25467761615_c0b2d45027_b_d.jpg


So now we shall mount our drive, got to the last line which starts with a “/” and make a new line under it. Enter the following and try and keep your spacing similar to those above.


/dev/sda1    /mnt/library   vfat   defaults    0    0


To save your work press CTRL + O followed by Enter. Then to exit press CTRL + X.

Reboot your Raspberry Pi.


sudo reboot


Once the Pi has booted back up navigate to your content by typing.


cd /mnt/library


Now we need to see where our content is, so to find it type


ls


You should see lots of directories and files, just as you arranged them on your main computer.

Our next step involves enabling access to the files for any user. As our server will be in our home we shall enable access to all of the content for all of the users. Typically this is not the done thing for big servers in production but for our server this is fine. So to enable access we need to type


sudo chmod 777 -R /mnt/library


Now this might take some time so be patient.


25349753862_c979d92f73_h_d.jpg


So now that we our drive ready to serve our media, let's start using it!

Back to our laptop/PC and open your web browser to your Plex Media Server.

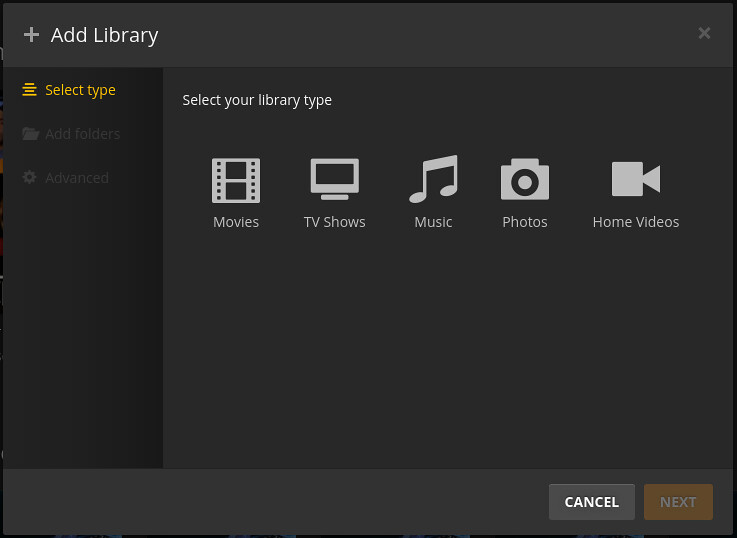
You will be prompted to add a library, so go ahead and do so. Now which library you add depends on what you have. I chose to add a couple of TV series. When ready click on “Add Library” to import the media.


24837201614_aacabb5271_b_d.jpg

24841031493_351b6b9f21_b_d.jpg


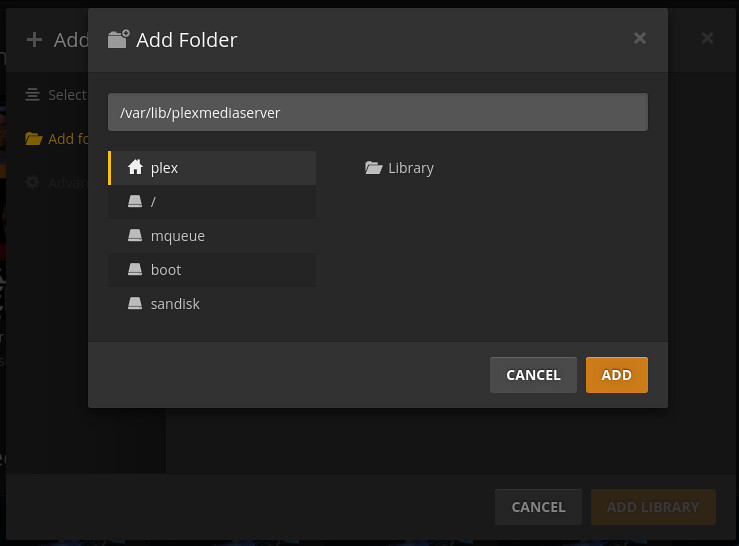
Depending on the amount of media that you have to import this process may take minutes or hours, so please be patient and wait for the process to finish.

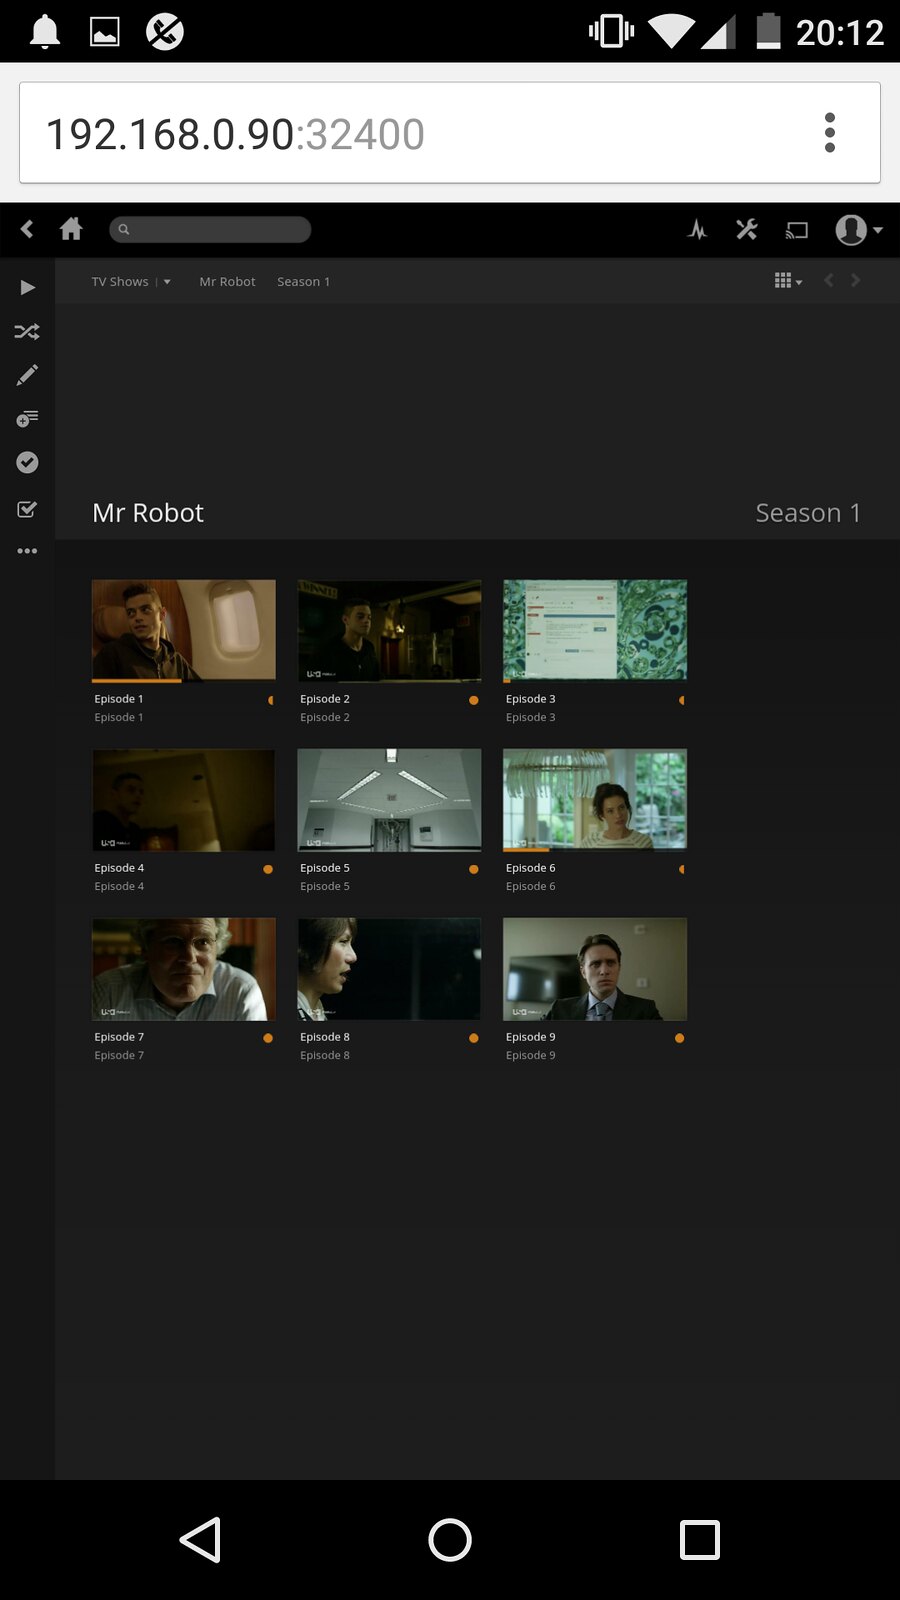
When the media is imported, Plex will try its best to grab the metadata, the information about the content such as genre, IMDB data, actor details etc.


24841467453_b9cea3a480_h_d.jpg

Multi User Access

The huge benefit of Plex is that any user on the home network can access any of the media in the library. So children can watch their favourite films on the mobile device, parents can listen to music or podcasts or share their family photos on their laptops.

Plex can also be streamed to a chromecast device, enabling high definition movies to be enjoyed on the big screen.

Listen to all of your music across your entire home and all you need is a Raspberry Pi and a little Linux know how.

  • Sign in to reply

Top Comments

  • spannerspencer
    spannerspencer over 10 years ago +2
    My smart TV has Plex, but it makes my old NAS crawl to run the server. This'd be a good way to effectively update the NAS and start using Plex again! Nice work!
  • Matt
    Matt over 10 years ago +1
    Awesome. I've heard really good things about Plex.. thanks for putting together all these instructions for how to get it working on a Pi
  • biglesp
    biglesp over 10 years ago in reply to clem57 +1
    Hi Clem Plex is a product that comprises of a server providing content to clients on a network.
  • Former Member
    Former Member over 9 years ago

    I wanted to use my new Pi2 as a "random picture display", but I didn't want to install the "media center"
    I was very frustrated with using python and the pygame "resources" (whatever they call it)
    Ultimately, I decided to try a different approach; html with javascript!

    Here's the html/javascript solution, which works perfectly!

    copy everything below!  and have fun!!


    // this is a "random picture display" javascript
    // you open it with your browser and the browser does all the work
    // well, aside from your having to put the image informtion in
    // I will the datadable on my windows machine, using a visual basic program that i wrote
    // hope this works for you as well as it does for me!

    // I'm running it on a Raspberyy Pi 2, with the standard installation (not the media install)
    // the display is set to portrait orientation on the Pi in the config file
    // by using sudo nano boot/config.txt
    // adding the line
    // display_rotate=3
    // which results in a clock wise 270 degree screen rotation

    // if you added instead
    // display_rotate=1
    // it would result in a clock wise90 degree screen rotation


    <form id="newwindow" name="newwindow">
    </form>
    <>
    <html>
    <head>

    <title>Awesome Images</title>
    <meta http-equiv="Content-Type"  content="text/html; charset=iso-8859-1">
    </head>

    <body bgcolor="#000000" text="#000000">

    </body>

    <table width="100%" height="97%" border="0">

    <tr>

    <td>
    <p align="center" valign="center">
    <img name="SlideC">

    </td>
    </tr>

    </table>


    </html>


    <script language="JavaScript1.2" >

    var newimg;
    var wid;
    var hit;
    var currentdate = 0;
    var theranlink = " ";
    var core = 0;
    var created = 0;
    var imgstrt = 0;
    var imgstp = 0;
    var imgcnt = 0;
    var imgary = 0;
    var chk = 0;
    var hrat = 0;
    var wrat = 0;
    var intvl=15000;

    // maxwid is the width of your Pi's display in pixels
    // maxhit is the heigth of your Pi's display in pixels
    // this is set up for a monitor rotated to a Portrait orientation
    var maxwid=728;
    var maxhit=1266;
    // if you wanted a landscape orientation you would comment the two line above (use leading //)
    // and uncomment the two lines below
    //var maxwid=1266;
    //var maxhit=728;


    // picpath points to the "root directory" of your images
    // this way you can copy this file to your desktop once filled with the picture array
    var picpath="/media/pi/Transcend/pics/";


    g_iimg = 0;
    g_imax = 0;
    g_ImageTable = new Array();

    var time = new Date().getTime();

    function ChangeImage(fFwd)
    {
    g_iimg=Math.floor((Math.random()*g_imax));
    Update();
    }

    function Update()
    {
    mag=1;

    //centimg=picpath + g_ImageTable[g_iimg][0];

    centimg=g_ImageTable[g_iimg][0];
    newWindow2(centimg);
    }

    function Next()
    {
    mag=1;
    ChangeImage(true);
    }

    function main()
    {
    if(new Date().getTime() - time >= intvl){

    ChangeImage();
    }else{
          
    }
    }


    function newWindow2(newimg)
    {
    wid=g_ImageTable[g_iimg][1];
    hit=g_ImageTable[g_iimg][2];
    wwid=(wid);
    whit=(hit);
    wrat=wwid/maxwid;
    hrat=whit/maxhit;

    chk=0;
    if (hrat>1){
    chk=1}
    if (wrat>1){
    chk=1}

    irat=hrat/wrat;
    if (chk=1){
    if (hrat>wrat) {

    SlideC.src=newimg;
    SlideC.width=wwid/hrat;
    slideC.height=whit/hrat;

    } else {

    SlideC.src=newimg;
    SlideC.width=wwid/wrat;
    slideC.height=whit/wrat;

    }

    }
    }

    // ********************************************************** insert data table here ***********************************************************************************
    // the data table must follow this format, and the quotation marks must remain
    // g_ImageTable[g_imax++] = new Array ("imge name","image width in pixels","image heigth in pixels");
    // an example of the array where it is used directly iin the directoy is below
    // g_ImageTable[g_imax++] = new Array ("flower.jpg","768","1024");

    // if you have multiple directories under the root that you want it to access then the array is this format
    // g_ImageTable[g_imax++] = new Array ("directory name/image name","image width in pixels","image heigth in pixels");
    // an example of the array where it is used from a root directoy is below
    // g_ImageTable[g_imax++] = new Array ("garden_pictures/flower.jpg","768","1024");


    //******************************************** end of data table *************************************btw, it is unlimited in the number of images you can insert bove


    // dely makes a 0 to 20 second pause
    dely=Math.floor((Math.random()*20000));

    // the variable dely above is added to a "standard delay" of 20 seconds
    // this yields a variable refresh time of 20 to 40 seconds
    intvl=20000+dely;


    //do not add anything below this line
    setInterval(main, intvl);

    Next();

    mag=1;
    g_iimg=Math.floor((Math.random()*g_imax));

    </script>

    • Cancel
    • Vote Up 0 Vote Down
    • Sign in to reply
    • More
    • Cancel
  • Former Member
    Former Member over 9 years ago

    Hi guys...


    I cant seem to find plex.js for being able to change it to becoming transcoding my subtitles, because when i try to run them, it's given an error that the "server is not powerful enough". I don't get it. Why does not someone do a fix for the recent version of plex. That's if someone could ever gott to work.


    Cheers!

    • Cancel
    • Vote Up 0 Vote Down
    • Sign in to reply
    • More
    • Cancel
  • clem57
    clem57 over 9 years ago in reply to Former Member

    Hans v. Werkhoven

    192.168.178.15:32400/web

    What is the /web at the end?

    Otherwise check your router if 32400 is allowed trough the firewall.

    Clem

    • Cancel
    • Vote Up 0 Vote Down
    • Sign in to reply
    • More
    • Cancel
  • Former Member
    Former Member over 9 years ago

    Hi, I have configurate the rasbian and the Plex software button I can't open the website after the installation.

    I can ping the ip-adress  (192.168.178.15) but it die not  open the website 192.168.178.15:32400/web.

    Wat do I wrong?

    Sorry for my bad Englisch.

    • Cancel
    • Vote Up 0 Vote Down
    • Sign in to reply
    • More
    • Cancel
  • Former Member
    Former Member over 9 years ago in reply to Former Member

    sudo raspi-config


    and it's the first option in the menu, more info here : https://www.raspberrypi.org/documentation/configuration/raspi-config.md

    • Cancel
    • Vote Up 0 Vote Down
    • Sign in to reply
    • More
    • Cancel
<>
element14 Community

element14 is the first online community specifically for engineers. Connect with your peers and get expert answers to your questions.

  • Members
  • Learn
  • Technologies
  • Challenges & Projects
  • Products
  • Store
  • About Us
  • Feedback & Support
  • FAQs
  • Terms of Use
  • Privacy Policy
  • Legal and Copyright Notices
  • Sitemap
  • Cookies

An Avnet Company © 2026 Premier Farnell Limited. All Rights Reserved.

Premier Farnell Ltd, registered in England and Wales (no 00876412), registered office: Farnell House, Forge Lane, Leeds LS12 2NE.

ICP 备案号 10220084.

Follow element14

  • X
  • Facebook
  • linkedin
  • YouTube