element14 Community
element14 Community
    Register Log In
  • Site
  • Search
  • Log In Register
  • Community Hub
    Community Hub
    • What's New on element14
    • Feedback and Support
    • Benefits of Membership
    • Personal Blogs
    • Members Area
    • Achievement Levels
  • Learn
    Learn
    • Ask an Expert
    • eBooks
    • element14 presents
    • Learning Center
    • Tech Spotlight
    • STEM Academy
    • Webinars, Training and Events
    • Learning Groups
  • Technologies
    Technologies
    • 3D Printing
    • FPGA
    • Industrial Automation
    • Internet of Things
    • Power & Energy
    • Sensors
    • Technology Groups
  • Challenges & Projects
    Challenges & Projects
    • Design Challenges
    • element14 presents Projects
    • Project14
    • Arduino Projects
    • Raspberry Pi Projects
    • Project Groups
  • Products
    Products
    • Arduino
    • Avnet & Tria Boards Community
    • Dev Tools
    • Manufacturers
    • Multicomp Pro
    • Product Groups
    • Raspberry Pi
    • RoadTests & Reviews
  • About Us
    About the element14 Community
  • Store
    Store
    • Visit Your Store
    • Choose another store...
      • Europe
      •  Austria (German)
      •  Belgium (Dutch, French)
      •  Bulgaria (Bulgarian)
      •  Czech Republic (Czech)
      •  Denmark (Danish)
      •  Estonia (Estonian)
      •  Finland (Finnish)
      •  France (French)
      •  Germany (German)
      •  Hungary (Hungarian)
      •  Ireland
      •  Israel
      •  Italy (Italian)
      •  Latvia (Latvian)
      •  
      •  Lithuania (Lithuanian)
      •  Netherlands (Dutch)
      •  Norway (Norwegian)
      •  Poland (Polish)
      •  Portugal (Portuguese)
      •  Romania (Romanian)
      •  Russia (Russian)
      •  Slovakia (Slovak)
      •  Slovenia (Slovenian)
      •  Spain (Spanish)
      •  Sweden (Swedish)
      •  Switzerland(German, French)
      •  Turkey (Turkish)
      •  United Kingdom
      • Asia Pacific
      •  Australia
      •  China
      •  Hong Kong
      •  India
      •  Japan
      •  Korea (Korean)
      •  Malaysia
      •  New Zealand
      •  Philippines
      •  Singapore
      •  Taiwan
      •  Thailand (Thai)
      •  Vietnam
      • Americas
      •  Brazil (Portuguese)
      •  Canada
      •  Mexico (Spanish)
      •  United States
      Can't find the country/region you're looking for? Visit our export site or find a local distributor.
  • Translate
  • Profile
  • Settings
Raspberry Pi
  • Products
  • More
Raspberry Pi
Blog Raspberry Pi laptop
  • Blog
  • Forum
  • Documents
  • Quiz
  • Events
  • Polls
  • Files
  • Members
  • Mentions
  • Sub-Groups
  • Tags
  • More
  • Cancel
  • New
Join Raspberry Pi to participate - click to join for free!
Featured Articles
Announcing Pi
Technical Specifications
Raspberry Pi FAQs
Win a Pi
GPIO Pinout
Raspberry Pi Wishlist
Comparison Chart
Quiz
  • Share
  • More
  • Cancel
Group Actions
  • Group RSS
  • More
  • Cancel
Engagement
  • Author Author: fustini
  • Date Created: 7 Sep 2012 10:48 PM Date Created
  • Views 17963 views
  • Likes 6 likes
  • Comments 48 comments
Related
Recommended
  • rpibeginner
  • motorola
  • raspberry_pi
  • lapdock
  • rpi
  • atrix

Raspberry Pi laptop

fustini
fustini
7 Sep 2012
imageWant to build this project?
View Parts


My last post showed how I assembled a portable Pi using a 3.5" composite LCD.  Well, I've got a better option this time around, the Motorola Atrix lapdock!
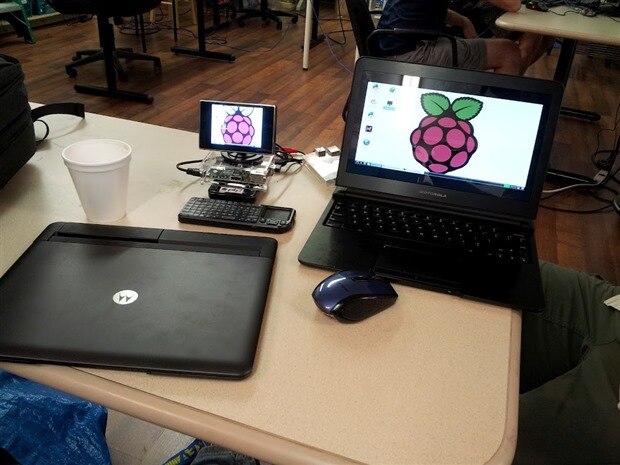
image

The Atrix lapdock was originally intended for Motorola's Atrix Android smartphone.  It didn't sell very well for it's original purpose, so you can pick one up for around to $50 to $100 on eBay and Amazon.  I ordered mine from eBay for $50 (shockingly my seller is now listing at $199).  It was listed as refurbished but is in great condition.  The beauty of its 11.6" HD display is a stark constrast to my 3.5" composite LCD:
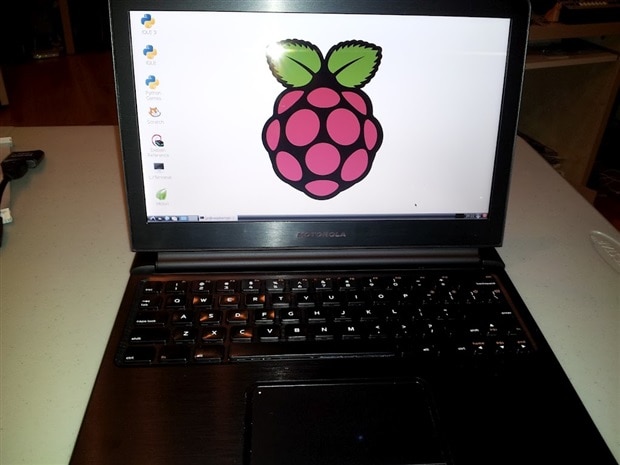
image

I recommend checking out this insightful blog which details how to use it with the Pi: Raspberry Pi and Atrix Lapdock.  Adafruit also has a helpful video from Becky Stern on how to hack together an appropriate USB cable:


You don't have permission to edit metadata of this video.
Edit media
x
image
Upload Preview
image


However, the USB cabling described in the above blog and video is only needed for Raspberry Pi's that have F1/F2 polyfuses.  "Fresher" Pi's now have either 0-ohm resistors on F1/F2 (Model B Revision 1.0 + ECN0001) or no F1/F2 pads at all (Model B Revision 2.0).  More info on the board revisions is on the Foundation's blog.  I got a Pi from MCM Electronics last week, and it has 0-ohm resistors (labelled "000" in the upper right corner of the board):
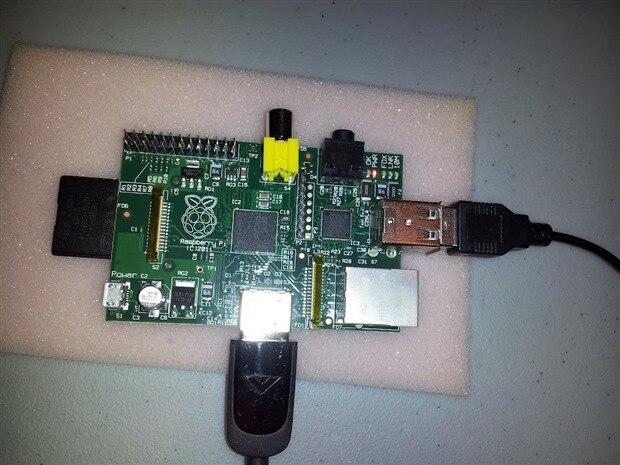
image

With those polyfuses gone, the Pi can be powered via it's USB host ports as an alternative to the micro USB jack.  This is great for the Atrix lapdock as it was designed to both power the Atrix phone and connect it to USB devices over the same connected.  This means that no USB cable modifications are needed at all.  Here's my setup:
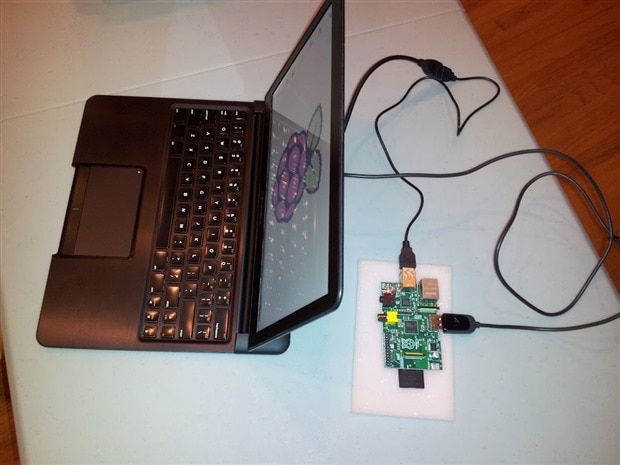
image

A close-up of the back of the lapdock with micro HDMI on the right and micro USB on the left:
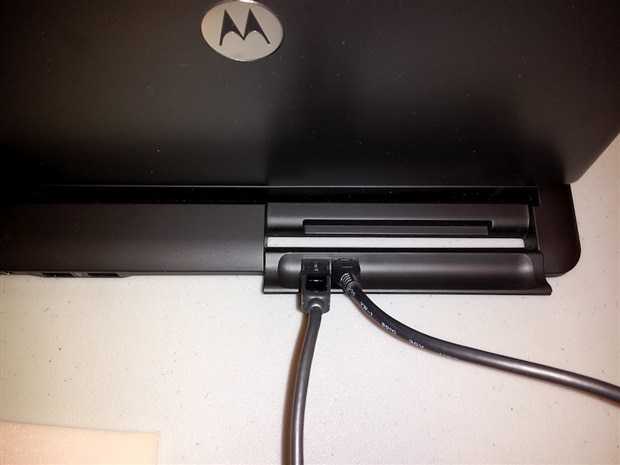
image

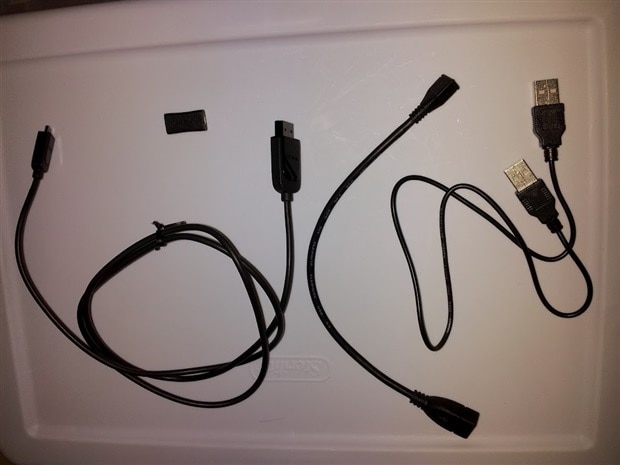
My cables and connectors (from left to right):

  • male micro to full-size male HDMI cable
  • female to female micro HDMI coupler (little black rectangle at top)
  • female micro type B to female USB type A USB cable
  • male Type A to male Type A USB cable

image

I highly recommend buying an Atrix lapdock while they are still available for cheap.  Beyond the Pi, it can be used as a HDMI display for an array of other devices, too.


[UPDATE: check out Raspberry Pi lapdock tricks]


[UPDATE: I received a male Type A to male Type A adapter from Amazon and a HDMI Male to Micro HDMI Female Adapter from DealExtreme.  Along with the micro HDMI extension cable that came with my lapdock, the result is a more compact setup without long HDMI or USB cabling:
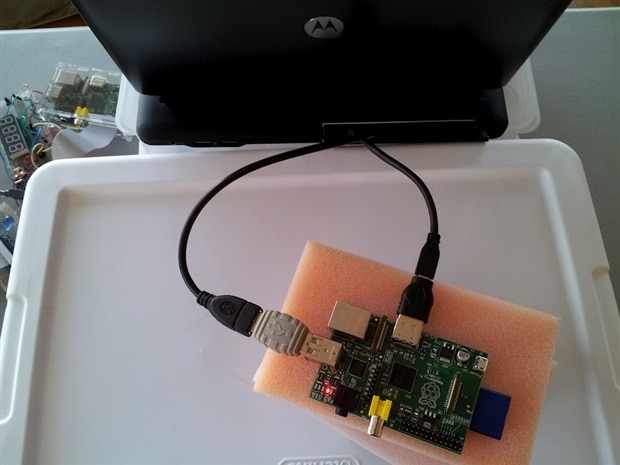
image


image


Cheers,

Drew

http://twitter.com/pdp7


Product Name*DescriptionSupplier
Raspberry Pi Model B Raspberry Pi model BRaspberry Pi
Buy Now
Pre-Programmed 4GB SD Card 4GB Class 4 SD card preloaded with Debian 6 LinuxSamsung
Buy Now
Motorola Atrix Lapdock w/included cablesSelf contained battery powered unit with display, keyboard and trackpadMotorola
HDMI Male to Micro HDMI Female AdapterMale standard HDMI to female micro HDMI adapterImported
USB A to A Male CouplerUSB type A to A male couplerDistributed By MCM
Buy Now


*Products and resources listed are listed to help members build their own Pi Projects. They are suggestions and listed for educational purposes. For substitutions of any parts, please post a question asking the original author.

  • Sign in to reply

Top Comments

  • e14 Contributor
    e14 Contributor over 13 years ago +2
    Earlier I posted a note about mounting a Pi on the back of a Lapdock with magnetic sheet. After that I set about making a much smaller and neater Pi. You can see the current result at http://www.kappa…
  • e14 Contributor
    e14 Contributor over 13 years ago +2
    Here's one of the images:
  • e14 Contributor
    e14 Contributor over 11 years ago +2
    I have got to thank you big time. I read the information you provided and it was very helpful! I had an Atrix 4G for quite some time and tried different methods of getting the Pi to work with it. When…
  • johnbeetem
    johnbeetem over 13 years ago

    I just got my Lapdock working!  I used the same cables and adapters as Drew's first list, except for a short USB A male to A male adapter as in Update #2.  I also used a different HDMI micro male to HDMI full-size male from Drew's.  They're all the same, right?


    Well, it didn't work at first.  I didn't want to send the Lapdock back, since I didn't know if the problem was the Lapdock or one of the HDMI cables or adapters.  I was easily able to test the USB cables and adapters -- they were fine.


    So I opened up the Lapdock and figured out how it detects that an HDMI source is connected.  It turns out that it uses the DDC/CEC/Ground line and sees if it's shorted to another ground.


    Here's the problem: not all HDMI cables are the same.  A lot of cheap HDMI cables do not implement the individual ground signals.  Instead, they just have a common foil shield that's connected to the connector shells at both ends.  This works in most HMDI applications, but if your application requires individual ground lines -- like Lapdock -- it won't work.


    My solution?  Well, rather than wait for and try another cable I added a tiny solder bridge to a tiny connector in the Lapdock so now it thinks there's always an HDMI cable attached.  Now Lapdock works great with RasPi.  I added a switch to USB +5V to prevent power from getting to RasPi when Lapdock is closed.


    I'm going to write up my findings in another 'blog post, probably tomorrow.  I'd hate for all the work I did analyzing the Lapdock connector to go waste by not sharing it.

    • Cancel
    • Vote Up +1 Vote Down
    • Sign in to reply
    • More
    • Cancel
  • fustini
    fustini over 13 years ago in reply to e14 Contributor

    Interesting question about the magnets.  I know magnets are bad for hard disks and CRT monitors, but we don't have to worry about those.  I've never tried to see what effects magnets would have on LCDs, SD cards and other electronic components... thanks for the link.

    • Cancel
    • Vote Up 0 Vote Down
    • Sign in to reply
    • More
    • Cancel
  • e14 Contributor
    e14 Contributor over 13 years ago in reply to fustini

    This is what I hope to accomplish.  To make it look nice, and convenient to use on the go.  What do you think about using magnets to mount accessories, i.e. the Pi, usb hub, my phone, perhaps a portable hard drive.  I just wondering if there might be any adverse affects.  Well, we shall see.  Perhaps i'll post some pics of the setup.


    The fireworks video is here

    http://www.youtube.com/watch?v=q1yLRK2M8YQ


    I see some other versions also, may check them out too.

    • Cancel
    • Vote Up 0 Vote Down
    • Sign in to reply
    • More
    • Cancel
  • fustini
    fustini over 13 years ago

    A tip for overclockers: it's probably best to turn it off when powering the Pi from lapdock's micro USB port.  My "Model B Revision 1.0 + ECN0001 (no fuses, D14 removed)" Pi reset when I had overclocking set to Turbo mode (up to 1GHz) and started a level in Quake.  My suspicion is that it tried to pull more current than the lapdock can supply.  I disabled overclocking and the Pi was to run Quake ok. (Quake + Turbo mode does work fine if power via 1A power supply)

    • Cancel
    • Vote Up 0 Vote Down
    • Sign in to reply
    • More
    • Cancel
  • fustini
    fustini over 13 years ago in reply to e14 Contributor

    The only downside to the Pi + lapdock is that I've not figured out how to package into something that looks nice.  That laptop fan looks like an interesting idea.


    Would you be able to share a link to download that video?

    • Cancel
    • Vote Up 0 Vote Down
    • Sign in to reply
    • More
    • Cancel
<>
element14 Community

element14 is the first online community specifically for engineers. Connect with your peers and get expert answers to your questions.

  • Members
  • Learn
  • Technologies
  • Challenges & Projects
  • Products
  • Store
  • About Us
  • Feedback & Support
  • FAQs
  • Terms of Use
  • Privacy Policy
  • Legal and Copyright Notices
  • Sitemap
  • Cookies

An Avnet Company © 2026 Premier Farnell Limited. All Rights Reserved.

Premier Farnell Ltd, registered in England and Wales (no 00876412), registered office: Farnell House, Forge Lane, Leeds LS12 2NE.

Follow element14

  • X
  • Facebook
  • linkedin
  • YouTube