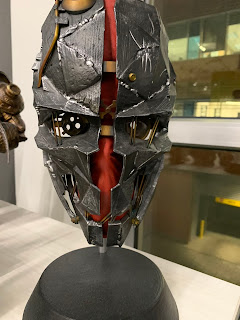
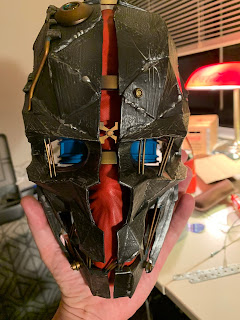
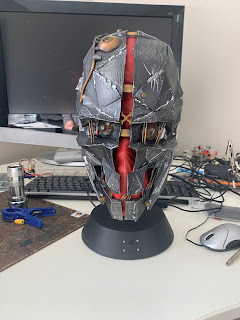
For Halloween I decided to modify my Dishonored II collectors edition mask to give it glowing eyes that followed people who walked by and looked at it.
It's a steampunk style mask with two different shaped eyes solidly connected to the mask.
The Mask is controlled by a Raspberry Pi 3 with a standard camera, a small servo connected to a PCA9865 servo controller and 4 LEDS connected to the Raspberry Pi 3.
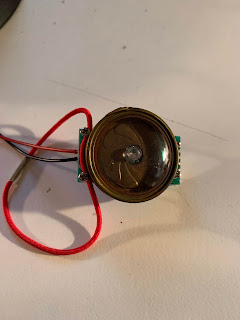
- The left eye has a single hole and is covered by a large lense.
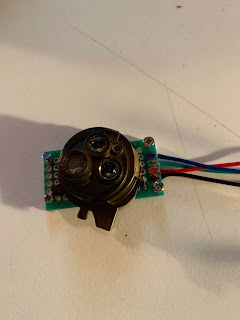
- The right eye has 3 smaller holes each covered by a small lense.
- I first cut the eyes out and cut out any excess plastic from the mask and the eyes.
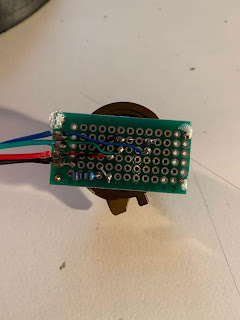
- I placed a red LED in the left eye. The red led runs on 2.2v so I added a 45 ohm resistor.
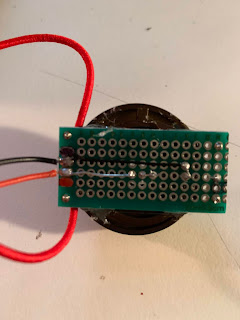
- The resistor and the LED are mounted onto the back of the eye with a piece solderable breadboard cut to size.
- There are 3 holes in the right eye. 2 were big enough for LEDs to fit, but 1 was a bit too small.
- I drilled this hole out to enlarge it enough to fit an LED. I also removed the front lens.
- 1 of the 2 holes that were large enough for the LED was also a bit too shallow for the LED to fit all the way in. So I removed the front lens.
- I then inserted a Red, Green and Blue LED into the 3 holes.
- Like the left eye, the Red LED needed a resistor, but the Green and Blue run on 3.3v so they did not need a resistor.
- All of the LEDs and the resistor are mounted to a solderable breadboard like the left eye. I have a red, green and blue wire running to the board with a single black ground wire running out.
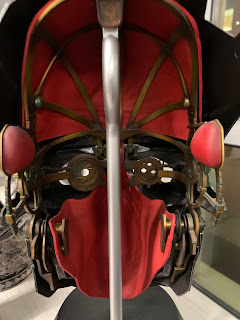
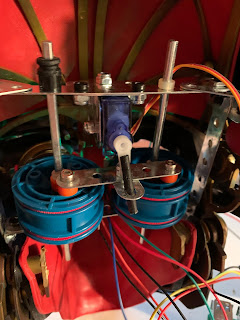
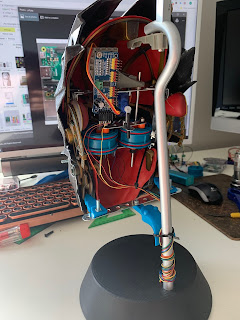
- I mounted a chassis inside the mask made of erector set parts. I used wheels, with the rubber tread removed, to mount the eyes to to allow them to rotate left/right.
- A single servo is mounted above the wheels with a jury rigged control rod moving a tie rod connecting the 2 wheels.
- The servo is controlled by the PCA9865 servo controller with 3 AA batteries attached for 4.5v.
- I could have run the LEDS with this controller but I decided to go with the 3.3v output from the Raspberry Pi 3.
- The chassis rotates outward on hinges on the bottom to allow for easy access to the front of the wheels.
- The eyes are secured to the wheels using a red hair band. This allows for easy adjustment and removal.
- The pole on the stand didn't fit in the mask with the chassis inside so I had to add an extension piece and and extra stabilizer piece for the bottom of the mask. These were also made with erector set parts.
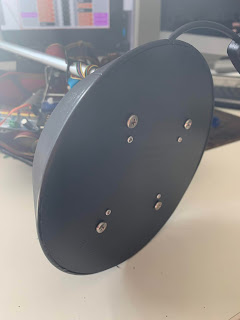
- I removed the bottom of the base by breaking the glue of the 4 connecting pillars inside. This was a bit difficult but with a skinny flat head screwdriver I managed it.
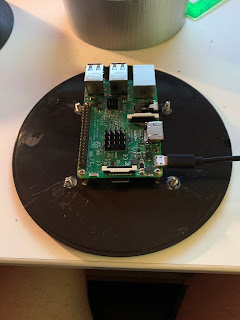
- I then mounted the Raspberry Pi to the base.
- I drilled a hole for the camera lens to stick out of the front of the base and mounted the camera to the inside of the base.
- I ran the wires from the eyes and the servo controller through a hole in the top of the base.
- I then connected all of the wires and the camera to the Raspberry Pi.
- The servo controller uses the I2C1 pins (GPIO 2 and 3) as well as physical pin 1 for 3.3 logic power.
- The LEDS use GPIO pins 4, 17, 27 and 22.
- All of the LEDS and the servo controller are grounded to pysical pin 9 (3 black wires).
- I do still need to drill some ventilation holes.
- I secured the bottom of the base to the top with screws as the pillars it was previously glued to were luckily hollow.
- In the video I have showing the eyes following me, the board and the camera are not yet permanently mounted, but the functionality of the final product is the same.
- The main control code uses Python 3.
- I use crontab to autostart mask.py on boot.
- The system uses OpenCV to do face detection. I have a custom C++ module that interfaces with OpenCV to return a list of tuples of (x,y,w,h) for each detected face.
- I sort this list by x so the left most face is always 1st in the list. I plan to also sort by size to attempt to look at the closest face. But without the x sorting OpenCV returns the faces in non-deterministic order causing the eyes to flicker back and forth between faces too quickly.
- The system randomly selects from the available faces and stares at the face at that selected index until it is no longer available, at which point it will attempt to pick another.
- If looking at faces, every 5 seconds the system will randomly select a new face to look at. It could be the same face as before. This will however prevent the face from switching back and forth quicker than 5 seconds.
- I also limit the speed at which the eyes can track to prevent them from being too jerky.
- The LED intensities are controlled by PWM. Since these pins are not hardware PWM this is software simulated, but it's good enough for me. It gives the eyes a bit of a flicker which I think adds to the spookiness.
- The LED intensity varies based on the size of the face it is looking at relative to the maximum face size it has seen since starting. So getting closer to the camera then stepping back will make they eyes brighten and dim.
- When the camera is looking at you the Red LEDS in both eyes are at the same intensity. The Blue LED is on for any face with an even index, and the Green LED is on for any face with an odd index.
- When the mask stops detecting faces for a few seconds the eyes will return to center and all LEDS will shut off. I turn off the servo to preserve power.
- I then just keep looking for faces and wake up and target the face when detected.
- If after 10 seconds of "sleep" no faces have been detected, I wake the mask up, turn all of the LEDS on and look left/right 2 times. The mask will then re-center and go back to sleep.
- The eye rotation range is +/-25 degrees.
- The face detection range obviously varies by the available amount of light, but it's easily over 10 feet and maybe up to 15.
- The code is located atGitHub Maskwith the C++ OpenCV interface module atGitHub CheckFace.
Since the camera needs light to see, but the LEDs in the eyes are spookier the darker the light, getting the right lighting is tricky.
I attempted to use a Raspberry Pi Zero but the single core could not return face results fast enough for good eye tracking even with the picture size quartered.
I am using a 3amp power supply with a built in power switch.
The system can also run on a 2.5amp 5v battery pack for about 5 hours.
I had the mask at work for 2 days, plus testing at home for a few days and never drained the 3 AA batteries.
Here are the pictures of the final product.
The End



Top Comments