element14 Community
element14 Community
    Register Log In
  • Site
  • Search
  • Log In Register
  • About Us
  • Community Hub
    Community Hub
    • What's New on element14
    • Feedback and Support
    • Benefits of Membership
    • Personal Blogs
    • Members Area
    • Achievement Levels
  • Learn
    Learn
    • Ask an Expert
    • eBooks
    • element14 presents
    • Learning Center
    • Tech Spotlight
    • STEM Academy
    • Webinars, Training and Events
    • Learning Groups
  • Technologies
    Technologies
    • 3D Printing
    • FPGA
    • Industrial Automation
    • Internet of Things
    • Power & Energy
    • Sensors
    • Technology Groups
  • Challenges & Projects
    Challenges & Projects
    • Design Challenges
    • element14 presents Projects
    • Project14
    • Arduino Projects
    • Raspberry Pi Projects
    • Project Groups
  • Products
    Products
    • Arduino
    • Avnet Boards Community
    • Dev Tools
    • Manufacturers
    • Multicomp Pro
    • Product Groups
    • Raspberry Pi
    • RoadTests & Reviews
  • Store
    Store
    • Visit Your Store
    • Choose another store...
      • Europe
      •  Austria (German)
      •  Belgium (Dutch, French)
      •  Bulgaria (Bulgarian)
      •  Czech Republic (Czech)
      •  Denmark (Danish)
      •  Estonia (Estonian)
      •  Finland (Finnish)
      •  France (French)
      •  Germany (German)
      •  Hungary (Hungarian)
      •  Ireland
      •  Israel
      •  Italy (Italian)
      •  Latvia (Latvian)
      •  
      •  Lithuania (Lithuanian)
      •  Netherlands (Dutch)
      •  Norway (Norwegian)
      •  Poland (Polish)
      •  Portugal (Portuguese)
      •  Romania (Romanian)
      •  Russia (Russian)
      •  Slovakia (Slovak)
      •  Slovenia (Slovenian)
      •  Spain (Spanish)
      •  Sweden (Swedish)
      •  Switzerland(German, French)
      •  Turkey (Turkish)
      •  United Kingdom
      • Asia Pacific
      •  Australia
      •  China
      •  Hong Kong
      •  India
      •  Korea (Korean)
      •  Malaysia
      •  New Zealand
      •  Philippines
      •  Singapore
      •  Taiwan
      •  Thailand (Thai)
      • Americas
      •  Brazil (Portuguese)
      •  Canada
      •  Mexico (Spanish)
      •  United States
      Can't find the country/region you're looking for? Visit our export site or find a local distributor.
  • Translate
  • Profile
  • Settings
Raspberry Pi
  • Products
  • More
Raspberry Pi
Raspberry Pi Forum How to connect a ADAFRUIT16x32 RGB LED Matrix Panel to a Raspberry Pi 4
  • Blog
  • Forum
  • Documents
  • Quiz
  • Events
  • Polls
  • Files
  • Members
  • Mentions
  • Sub-Groups
  • Tags
  • More
  • Cancel
  • New
Join Raspberry Pi to participate - click to join for free!
Featured Articles
Announcing Pi
Technical Specifications
Raspberry Pi FAQs
Win a Pi
Raspberry Pi Wishlist
Actions
  • Share
  • More
  • Cancel
Forum Thread Details
  • State Suggested Answer
  • Replies 15 replies
  • Answers 7 answers
  • Subscribers 664 subscribers
  • Views 4275 views
  • Users 0 members are here
  • raspberry_pi
Related

How to connect a ADAFRUIT16x32 RGB LED Matrix Panel to a Raspberry Pi 4

harness68
harness68 over 5 years ago

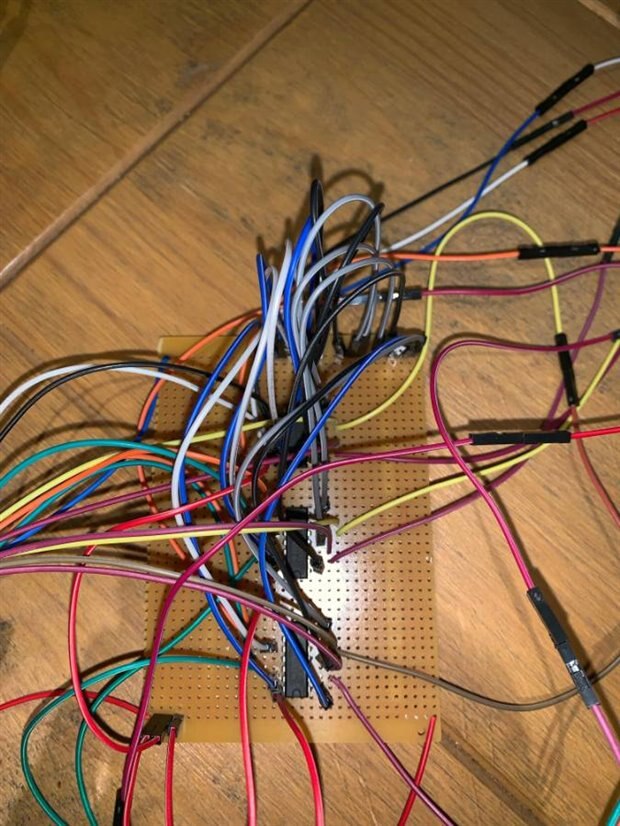
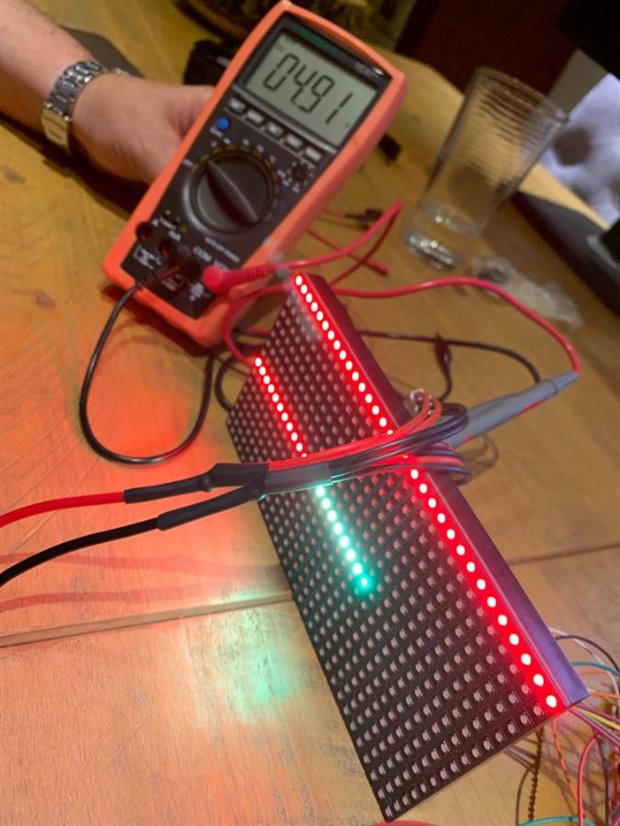
I am having difficulty.  I assume I have connected the 16x32 RGB LED Matrix Panel to a Raspberry Pi 4 I have but It never displays.  I have followed all the tutorials on ADAFRUIT but they only confirm the pin out connection to a Pi3.  has anyone ever got this to work?

  • Sign in to reply
  • Cancel
Parents
  • shabaz
    0 shabaz over 5 years ago

    As Clem says, it's very likely that the logic levels are incompatible. A lot of these 5V display boards use older logic ICs with non-3.3V-compatible inputs, and you'll either get nothing on the display, or stuff that looks like it sometimes works with corruption.

    There's also a high chance of power related issues, or software issues, if you're trying with a different version Pi. So, it's not surprising it isn't working. But, without photos showing your setup, including power source, and the output you got when installing and running the code (since you mention it did give you issues) it isn't possible to troubleshoot those aspects easily.

    • Cancel
    • Vote Up +4 Vote Down
    • Sign in to reply
    • Verify Answer
    • Reject Answer
    • Cancel
  • harness68
    0 harness68 over 5 years ago in reply to shabaz

    imageimageimageimage

    • Cancel
    • Vote Up 0 Vote Down
    • Sign in to reply
    • Verify Answer
    • Cancel
  • shabaz
    0 shabaz over 5 years ago in reply to harness68

    Hi Leo,


    It's great you've got the level converters, and if you're getting some output, then there's also a chance that the driver or interface software is likely to be functioning on the Pi 4 too.

    However, that Adafruit level converter circuit is bad.. they ought to have 100nF capacitors close to the supply pins on the chip. I couldn't see them on your photo either, so it is worth adding them if they are missing.

    The 2A PSU may not be enough (check the specs for the display boards, in case it specifies the recommended minimum) but since you're only trying to illuminate a few lines, this hopefully isn't an issue.. your multimeter is reporting a good value.

    • Cancel
    • Vote Up +1 Vote Down
    • Sign in to reply
    • Verify Answer
    • Reject Answer
    • Cancel
  • harness68
    0 harness68 over 5 years ago in reply to shabaz

    so you are suggesting 100nf cap across the power and ground pins on the ICs.

    • Cancel
    • Vote Up 0 Vote Down
    • Sign in to reply
    • Verify Answer
    • Cancel
  • shabaz
    0 shabaz over 5 years ago in reply to harness68

    Yes, with a short path, i.e. point-to-point on top or the underside. Like this:

    image

    • Cancel
    • Vote Up +1 Vote Down
    • Sign in to reply
    • Verify Answer
    • Reject Answer
    • Cancel
  • shabaz
    0 shabaz over 5 years ago in reply to harness68

    Also, the wiring is extremely long, and that can have issues at the speed at which the Pi's interface will be controlling that display panel. Hopefully the capacitors can help, but also a few hours spent shortening and tidying the wiring could be useful. The jumper cables are being used in an unusual way, they don't need to be soldered onto the proto board. Instead, it could be better to get a length of insulated wire and strip, twist and solder it, because then the wiring can be of the right length. If you need jumper sockets/plugs at the display end, then you could cut one end off from the jumper wire (or buy the jumper sockets and manually crimp them to your wire - that needs some more equipment though, although it is possible to get away with soldering the crimp terminals to the wire).

    If you need to extend a wire, then rather than chaining the jumper wires, another technique is to cut the jumper wire in half, then solder a wire, and then put heatshrink over it (needs a hot air tool, but a candle can be used).

    Anyway, the above is just some tips for prototyping slightly better, if the capacitors do not help.

    Here is an example of wiring onto a proto board, you can see all the on-board wiring is short, and any off-board wiring is reasonably tidy (the example here is using screw terminals and also header pins and jumper wires, but you could also directly solder off-board wiring too, it is just less maintainable, and might need some glue or tying down for strain relief). The 100nF capacitors are blue.

    image

    Here's another example using breadboard but the concepts are similar. When using a breadboard, solid core wire can sometimes be easier. Again the 100nF capacitors are there, in blue. Also you can see some jumper wires, that were made by using crimps, and then putting heatshrink sleeving around them. This way the off-board wiring can be made to the desired length.

    image

    • Cancel
    • Vote Up +1 Vote Down
    • Sign in to reply
    • Verify Answer
    • Reject Answer
    • Cancel
Reply
  • shabaz
    0 shabaz over 5 years ago in reply to harness68

    Also, the wiring is extremely long, and that can have issues at the speed at which the Pi's interface will be controlling that display panel. Hopefully the capacitors can help, but also a few hours spent shortening and tidying the wiring could be useful. The jumper cables are being used in an unusual way, they don't need to be soldered onto the proto board. Instead, it could be better to get a length of insulated wire and strip, twist and solder it, because then the wiring can be of the right length. If you need jumper sockets/plugs at the display end, then you could cut one end off from the jumper wire (or buy the jumper sockets and manually crimp them to your wire - that needs some more equipment though, although it is possible to get away with soldering the crimp terminals to the wire).

    If you need to extend a wire, then rather than chaining the jumper wires, another technique is to cut the jumper wire in half, then solder a wire, and then put heatshrink over it (needs a hot air tool, but a candle can be used).

    Anyway, the above is just some tips for prototyping slightly better, if the capacitors do not help.

    Here is an example of wiring onto a proto board, you can see all the on-board wiring is short, and any off-board wiring is reasonably tidy (the example here is using screw terminals and also header pins and jumper wires, but you could also directly solder off-board wiring too, it is just less maintainable, and might need some glue or tying down for strain relief). The 100nF capacitors are blue.

    image

    Here's another example using breadboard but the concepts are similar. When using a breadboard, solid core wire can sometimes be easier. Again the 100nF capacitors are there, in blue. Also you can see some jumper wires, that were made by using crimps, and then putting heatshrink sleeving around them. This way the off-board wiring can be made to the desired length.

    image

    • Cancel
    • Vote Up +1 Vote Down
    • Sign in to reply
    • Verify Answer
    • Reject Answer
    • Cancel
Children
  • clem57
    0 clem57 over 5 years ago in reply to shabaz

    Great examples shabaz. Good pictures. I am hoping to get a new phone/camera from china that can match the quality...

    • Cancel
    • Vote Up +1 Vote Down
    • Sign in to reply
    • Verify Answer
    • Cancel
element14 Community

element14 is the first online community specifically for engineers. Connect with your peers and get expert answers to your questions.

  • Members
  • Learn
  • Technologies
  • Challenges & Projects
  • Products
  • Store
  • About Us
  • Feedback & Support
  • FAQs
  • Terms of Use
  • Privacy Policy
  • Legal and Copyright Notices
  • Sitemap
  • Cookies

An Avnet Company © 2025 Premier Farnell Limited. All Rights Reserved.

Premier Farnell Ltd, registered in England and Wales (no 00876412), registered office: Farnell House, Forge Lane, Leeds LS12 2NE.

ICP 备案号 10220084.

Follow element14

  • X
  • Facebook
  • linkedin
  • YouTube