


Introduction
For a beginner to the world of raspberry pi, there are a number of projects that can become the start of something big. In this article, I discuss such a simple project which is adding a button that can be used to shutdown the raspberry pi using a bit of software tinkering. I wrote a similar article in 2013 at my blog “embeddedcode.wordpress.com” and its got its share of attention since a lot of people starting out with a single board computer, kept looking for a power button. Additionally, those who wanted a headless system, needed a way to shutdown the computer without the mess of connecting to it over the network or attaching a monitor and keyboard to it. In this article, I revisit the tutorial on how to add a shutdown button while trying to explain the workings and perhaps beginners will find it an amusing to add find more things to do with this little recipe.
What do you need?
Here is a basic bill of materials required for this exercise.
- Raspberry Pi B+(Product LinkProduct Link)
- A push button
- Connecting wires
- Breadboard OR...
- Nipper & Soldering Iron and related stuff(not necessary)
The Raspberry Pi B+ can be replaced by another Pi model but for this exercise, I will be explaining things with the RPi B+ as a reference. The push button also depends on availability and preference. Do you prefer a BIG RED BUTTON? No problem… use that. The Connecting wires are required since we need to connect the button to the Raspberry Pi GPIOs. I will start with using the breadboard and upgrade to a soldered button. In case you have something like a button break out which does not need soldering, thats fine too. We will make these decisions at the end. Right now lets get prototyping.
Step 1. Setup the RPi
We need a raspberry Pi fully setup with the latest version of Raspbian OS. Since the you probably have that done, I won’t go into the details but for those who have not done it yet, I have a few links you might like to visit.
https://embeddedcode.wordpress.com/2013/07/10/the-geek-getting-started-guide-to-the-raspberry-pi/
https://www.raspberrypi.org/help/noobs-setup/
https://www.raspberrypi.org/help/quick-start-guide/
Connect up a monitor, keyboard, mouse, ethernet cable(not necessary) and the power adaptor. Boot up the RPi and login.
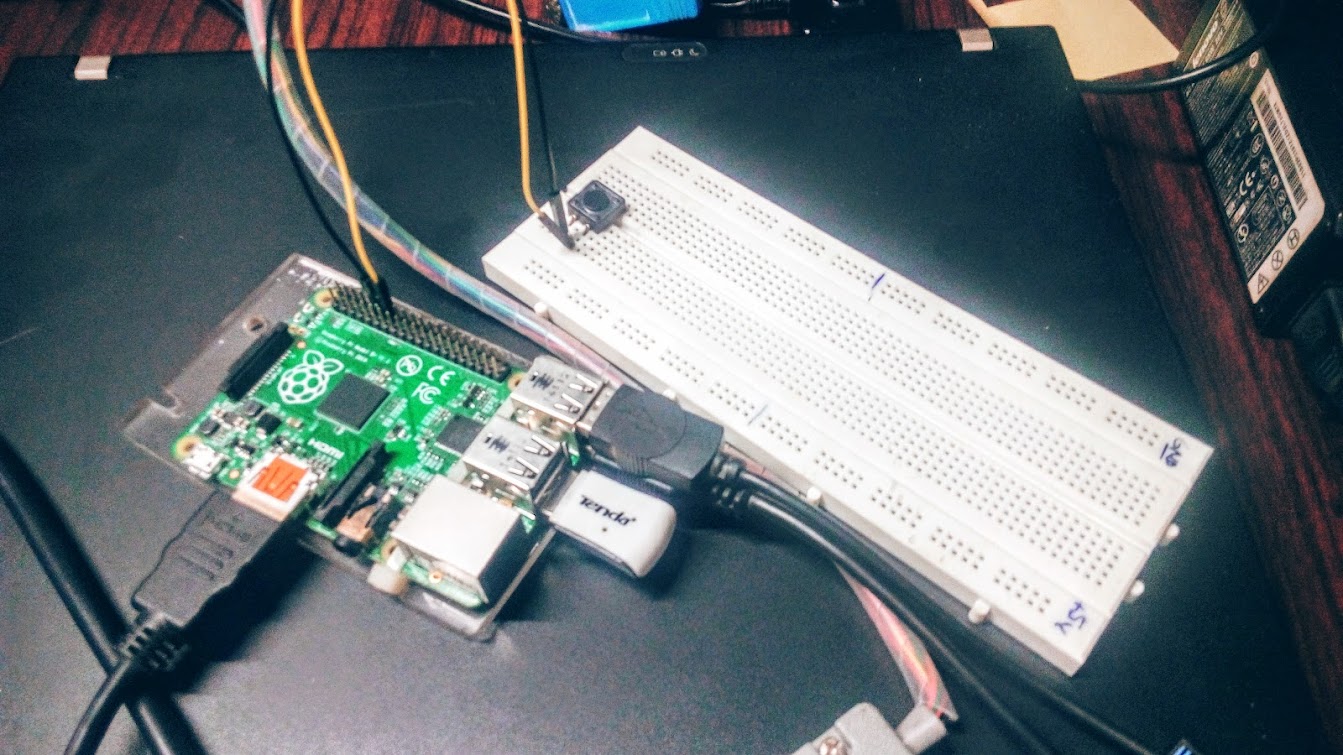
Step 2. Connecting the button
Next we need to add the button. I added a push button to the breadboard and added the connecting wires. This part will vary with the button availability. Now where do we connect it to the RPi? Well lets take a look at the diagram below.
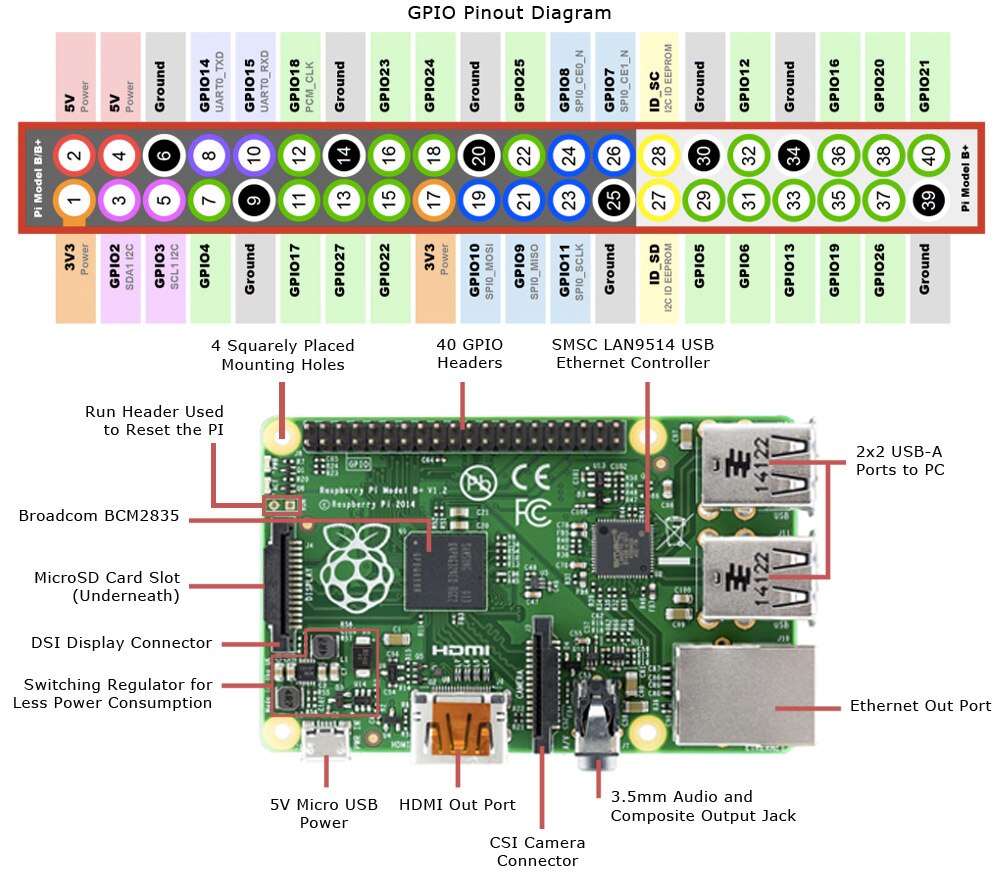
From the diagram its clear that some of the GPIOs have dual roles as well such as UART, I2C, SPI etc. From these I chose GPIO18 because its near the GND or ground pin but you can choose one that fits your need. I suggest staying away from the dual purpose pins since you never know when you might want to add an SPI, I2C or serial peripheral in you next project. 
The image below shows my setup and you should make sure you connected the pins right.
Step 3. Writing a Python Script
There are other ways to do a shutdown script but over time, I have come to the understanding that since python has gained so much popularity, its better go this route and if you want to extend functionality to say starting or stopping a service, we can do that as well. In order to keep things organised, we create a folder called ‘Scripts’ and then an empty file called shutdown_pi.py
mkdir Scripts
cd Scripts
touch shutdown_pi.py
Next we need to edit the file and add the contents. Execute the command
nano shutdown_pi.py
and then type the following into it.
#!/bin/python
# Simple script for shutting down the raspberry Pi at the press of a button.
# by Inderpreet Singh

import RPi.GPIO as GPIO
import time
import os

# Use the Broadcom SOC Pin numbers
# Setup the Pin with Internal pullups enabled and PIN in reading mode.
GPIO.setmode(GPIO.BCM)
GPIO.setup(18, GPIO.IN, pull_up_down = GPIO.PUD_UP)

# Our function on what to do when the button is pressed
def Shutdown(channel):
    os.system("sudo shutdown -h now")

# Add our function to execute when the button pressed event happens
GPIO.add_event_detect(18, GPIO.FALLING, callback = Shutdown, bouncetime = 2000)

# Now wait!
while 1:
    time.sleep(1)
Save the file by pressing CTRL+X and then y, Enter
Note that in Python, you do not need parentheses({}) to create a sub-section. The tabbed or indented format tells the interpreter that its a sub block so please make sure that the spacing matches the above code.
Now since our python script is trying to access some GPIOs and trying to shutdown the system this scripts needs to be run as root. To test its working, enter the following command
sudo python shutdown_pi.py
The ‘sudo’ ensures that python is given all the privileges for this run. If at this point you press the button, the RPi should shutdown. If it doesn’t then you need to check the script as well as the connections. No Pull up resistances are needed since we enable the internal pull-ups on the Pi itself.
Step 4. Adding it to startup
We need our python script to run automatically every time the RPi starts. For this we need to do a little manual editing of the RPI generated files. Run the following command
sudo nano /etc/rc.local
This file is what gets executed everytime your RPi boots up. We need to add our python command before the last line which closes the if loop. Therefore, add the following line before the #fi at the end of the file.
sudo python /home/pi/Scripts/shutdown_pi.py &
Please note that everything is case sensitive so Scripts is not the same as scripts. The & at the end of the command tells it to run the process in the background. If you omit it, then your login prompt probably will not appear.
Now reboot the RPi. Thats it! You are done and once you get everything working, you can start making modifications to the script for adding more buttons to start a process such as a GUI etc or kill the process, send a command over the network etc. The possibilities are endless and I would love feedback on how you made your own shutdown button.
Step 5. More to do
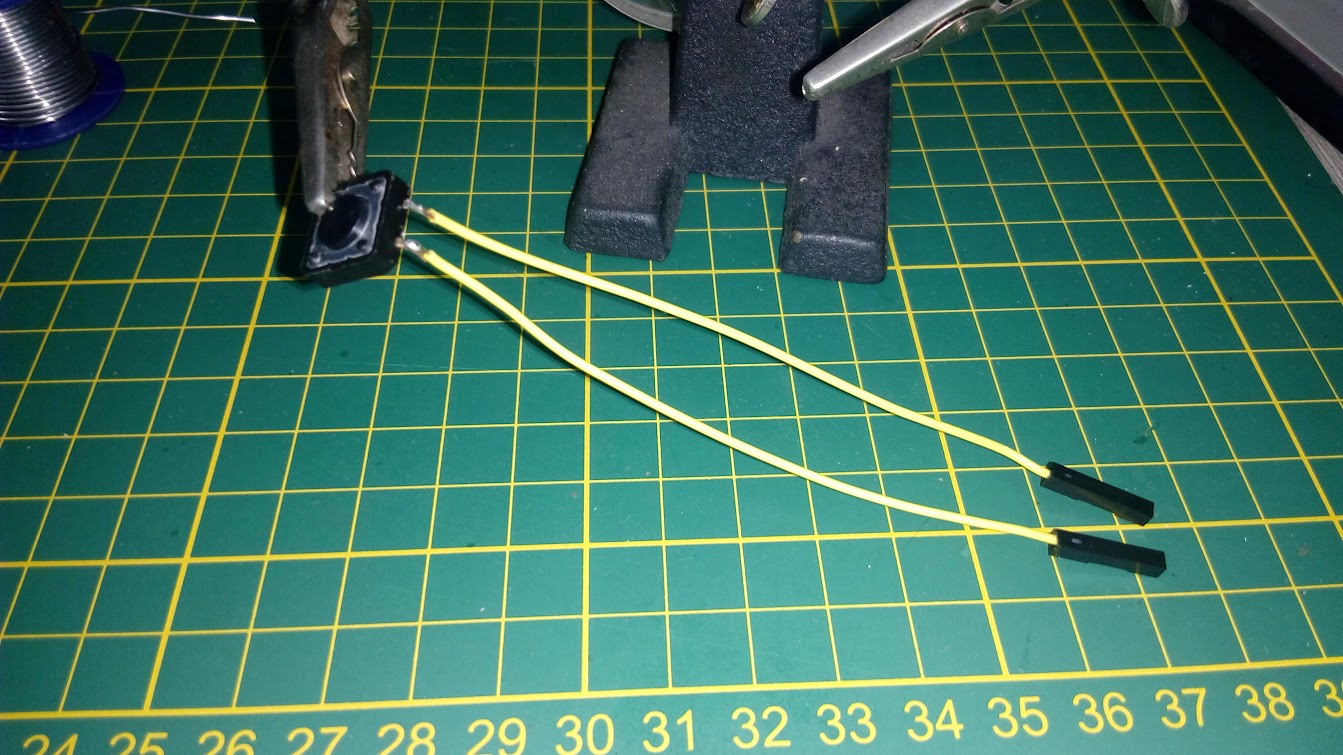
Since we have a working prototype we may want to improve the ergonomics. I simple soldered two wires to the press button and use a little hot glue to stick the button to the side of the RPi Case. You may chose to use a panel mount button but the connections remain the same.
If you happen to have a 3D printer, then you may print your own case such as the one at ([Project VIRUS][Week 6] A bit on 3D printing)
Have fun!
IP
-

Former Member
-
Cancel
-
Vote Up
0
Vote Down
-
-
Sign in to reply
-
More
-
Cancel
-

Former Member
in reply to Former Member
-
Cancel
-
Vote Up
0
Vote Down
-
-
Sign in to reply
-
More
-
Cancel
-

Former Member
in reply to Former Member
-
Cancel
-
Vote Up
0
Vote Down
-
-
Sign in to reply
-
More
-
Cancel
Comment-

Former Member
in reply to Former Member
-
Cancel
-
Vote Up
0
Vote Down
-
-
Sign in to reply
-
More
-
Cancel
Children