


![]()
Hi all. Hope everyone is well.
This is the third blog of my series of the Road Test for the AMD Xilinx Kria KV260 Vision AI Starter Kit .
Next in the series - this post - I'm going into detail on how to create a Machine Learning model that can detect license plates and extract the text on those license plates.
The ultimate goal is to recognize my license plates and open the garage door automatically.
Here I'm going to explain how to create a model using TensorFlow Object detection API .
I also did this using YOLOv7 that I will also explain in a future post.
Xilinx Kria KV260 supports deploying both YOLO and TensorFlow models for AI. That's why I've tried both . They have strenghts and weaknesses and I'll try to explain that through my point of view.
Object Detection
Before we can have the KV260 recognizing license plates, we need to have a model ready so that we can deploy it there. The training and model creation are done in a desktop computer and then quantized for the KV260.
Quantized means transforming the model from used in a desktop computer with almost no constrains to work with a less powerfull device (edge devices) where memory, processor and power are restricted.
I've already talked about this in a previous post, from another project here on Element14's website. Read more here - /challenges-projects/design-challenges/pi-fest/b/blog/posts/songspire---tinyml
What is object detection ?
Object detection is a computer vision task that has seen massive improvement because of Machine Learning. It involves identiying and locating objects within an image or video and drawing bounding boxes around each object.
How does it work ?
A dataset of images that are annotated with bounding boxes and class labels for the objects we want to detect are used my a machine learning framework, such as TensorFlow, PyTorch or scikit-learn, to build and train a model to detect the objects.
When building a model, data is key. With more data, more accurate will the model be. The are always challenges when trying to build a model from scratch:
- Lack of data: It's time consuming to create a high-quality dataset that's ready to use. Further down you'll see how this is done and the time it takes. This is more true if the objects we're trying to detect are unsual.
- Data augmentation: objects can and will vary their appearence, shape, color and size. This is challenging for object dection models .
- Scale: objects size and perspective will vary from image to image. Consistency is key.
What can we do to overcame this ? Transfer learning
Transfer learning
Transfer Learning is a ML technique that uses pre-trained models as a starting point for a new detection task . We use an already trained model, insted of creating a new one from scratch, for building a new custom object detection model. This will save resources and time and will allow us to use the knowledge learned from a larger dataset that can help improve the performance of our model.
Software
Training a custom object detection model using TensorFlow requires several steps, like the following:
- Creating a workspace to hold all the files and directories needed
- Installation of the Object Detection API
- Preparing the data
- Configuring the model
- Training the model
- Evaluating the model
Environment
Create a project directory to hold all what we need
mkdir TFCustomDetector
cd TFCustomDetector
Let's create a Virtual Environment to work
python -m venv tf2_obdetect
Activate the environment
source tf2_obdetect/bin/activate

Install TensorFlow
pip install tensorflow
Install TensorFlow Model Garden
Now, let's install TensorFlow Model Garden by cloning the repository.

Make sure you are in the TFCustomDetector directory
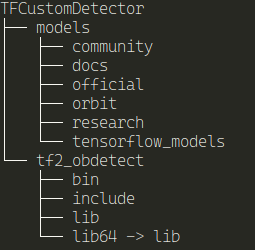
git clone https://github.com/tensorflow/models.git
After cloning the repository, you should have something like this:
Install Protobuf
Head to Github protobuf page and download the latest version available
In the TFCustomDetector directory, along with all the other directories, create a protoc folder.
mkdir protoc
cd protoc
wget https://github.com/protocolbuffers/protobuf/releases/download/v22.2/protoc-22.2-linux-x86_64.zip
unzip it in that directory
unzip protoc-22.2-linux-x86_64.zip
And this should be the result

and here's the directory structure

Now, we need compile all the proto files in the models
For this to work, we need to be in the models/research directory
cd models/research
Execute the protoc command to compile all the models
../../protoc/bin/protoc object_detection/protos/*.proto --python_out=.
If you didn't get any errors, let's continue
Install the COCO API
COCO API is a dependency that does not comes with the Object Detection API. We need to install it.
pip install cython
git clone https://github.com/cocodataset/cocoapi.git
cd cocoapi/PythonAPI
make
cp -r pycocotools ../../models/research/
This is the directory structure so far

Install the Object Detection API
The final step of the setup is the installation of the API itself.
cd to the models/research directory and run the following commands
cd models/research
cp object_detection/packages/tf2/setup.py .
python -m pip install .
After a while, you should have all the files needed installed.
And now test the installation
From the models/research directory:
python object_detection/builders/model_builder_tf2_test.py

At the end, it should give OK for all the tests. It may skip some, but that's ok.
If you get the following error:
ImportError: cannot import name 'builder' from 'google.protobuf.internal' (/home/feiticeir0/Programming/TFCustomDetector/tf2_obdetect/lib/python3.10/site-packages/google/protobuf/internal/__init__.py)
Let's solve this (solution found here)
pip install --upgrade protobuf
If it gives you errors about dependencies, don't mind them, let's procede.
copy builder.py from the python enviroment (created above) to another directory - say your home folder
From the TFcustomDetect directory:cp tf2_obdetect/lib/python3.10/site-packages/google/protobuf/internal/builder.py ~/
Install a compatible protobuf version (I now what it is because of the following error that is thrown when running the tests):
python object_detection/builders/model_builder_tf2_test.py
2023-03-21 23:38:06.036127: I tensorflow/core/platform/cpu_feature_guard.cc:193] This TensorFlow binary is optimized with oneAPI Deep Neural Network Library (oneDNN) to use the following CPU instructions in performance-critical operations: AVX2 FMA
To enable them in other operations, rebuild TensorFlow with the appropriate compiler flags.
Traceback (most recent call last):
File "/home/feiticeir0/Programming/TFCustomDetectorv2/models/research/object_detection/builders/model_builder_tf2_test.py", line 21, in <module>
import tensorflow.compat.v1 as tf
File "/home/feiticeir0/Programming/TFCustomDetectorv2/tf2_obdetect/lib/python3.10/site-packages/tensorflow/__init__.py", line 37, in <module>
from tensorflow.python.tools import module_util as _module_util
File "/home/feiticeir0/Programming/TFCustomDetectorv2/tf2_obdetect/lib/python3.10/site-packages/tensorflow/python/__init__.py", line 37, in <module>
from tensorflow.python.eager import context
File "/home/feiticeir0/Programming/TFCustomDetectorv2/tf2_obdetect/lib/python3.10/site-packages/tensorflow/python/eager/context.py", line 28, in <module>
from tensorflow.core.framework import function_pb2
File "/home/feiticeir0/Programming/TFCustomDetectorv2/tf2_obdetect/lib/python3.10/site-packages/tensorflow/core/framework/function_pb2.py", line 16, in <module>
from tensorflow.core.framework import attr_value_pb2 as tensorflow_dot_core_dot_framework_dot_attr__value__pb2
File "/home/feiticeir0/Programming/TFCustomDetectorv2/tf2_obdetect/lib/python3.10/site-packages/tensorflow/core/framework/attr_value_pb2.py", line 16, in <module>
from tensorflow.core.framework import tensor_pb2 as tensorflow_dot_core_dot_framework_dot_tensor__pb2
File "/home/feiticeir0/Programming/TFCustomDetectorv2/tf2_obdetect/lib/python3.10/site-packages/tensorflow/core/framework/tensor_pb2.py", line 16, in <module>
from tensorflow.core.framework import resource_handle_pb2 as tensorflow_dot_core_dot_framework_dot_resource__handle__pb2
File "/home/feiticeir0/Programming/TFCustomDetectorv2/tf2_obdetect/lib/python3.10/site-packages/tensorflow/core/framework/resource_handle_pb2.py", line 16, in <module>
from tensorflow.core.framework import tensor_shape_pb2 as tensorflow_dot_core_dot_framework_dot_tensor__shape__pb2
File "/home/feiticeir0/Programming/TFCustomDetectorv2/tf2_obdetect/lib/python3.10/site-packages/tensorflow/core/framework/tensor_shape_pb2.py", line 36, in <module>
_descriptor.FieldDescriptor(
File "/home/feiticeir0/Programming/TFCustomDetectorv2/tf2_obdetect/lib/python3.10/site-packages/google/protobuf/descriptor.py", line 561, in __new__
_message.Message._CheckCalledFromGeneratedFile()
TypeError: Descriptors cannot not be created directly.
If this call came from a _pb2.py file, your generated code is out of date and must be regenerated with protoc >= 3.19.0.
If you cannot immediately regenerate your protos, some other possible workarounds are:
1. Downgrade the protobuf package to 3.20.x or lower.
pip install protobuf==3.19.4
Again, don't mind the errors about dependencies
And now copy the previous copied builder.py from your home directory (in my case) to the location in the Python libraries.
From the TFCustomDetector base directorycp ~/builder.py tf2_obdetect/lib/python3.10/site-packages/google/protobuf/internal
Let's run the tests again
From the models/research directory
python object_detection/builders/model_builder_tf2_test.py
At the end, it should give you an OK message - with probably some skipped tests.

Data preparation
Now, after the environment is ready, let's think of the data. For our Model to be trained, data is necessary.
The models that are based on TensorFlow object detection API need a special format for all the input data. This format is called TFRecord. But, to create the TFRecord, we need images (data).
First, let's create another directory to hold all of our data. Let's call it workspace
From the TFCustomDetect directory
mkdir workspace
To hold the data and data related files, inside the workspace, create a new directory called data
cd workspace
mkdir data
Dataset
I've used a dataset freely available on Kaggle. This is a dataset with 433 images already annotated in PASCAL VOC format.
This dataset has the images with the license plates and a XML file with the same name.
Download it and unzip it in the data directory
unzip archive.zip
This should have created two directories: annotations and images
In the annotations directory, you should see the XML files that define the bounding boxes for each image (same filename, diferent extension).

In the images directory you'll see all the images with the license plates.

This is all good now, but to create the TFRecord files, both XML and PNG files must be in the same directory.
Let's split the data into train and test.
Spliting the data
Because the amount of images is small, let's just split this into train and test .
Inside the images directory, create two more - train and test
mkdir train
mkdir test
Let's move 400 images (and corresponding XML annotations) to the directory train and the remaining 33 to the test directory.
Best pratices say 80% to train, 10% to test and 10% to validation.This is roughly the same without the validation. 
I've choose to move from Car0.png to Cars399.png to the train directory and the remaining - Cars400.png to Cars432.png to the test directory.
Do the same with the XML annotations. Move them from the annotations directory to the train and test directories.
You should end with something like this:

Don't delete the annotations directory. We're going to need it.
By now, our directories should be like this:

Creating TFRecords and Label Map
Because the dataset that I've used already comes with the annotations in XML format (PascalVOC format), I need a script to convert XML to TFRecord format.
The TensorFlow Object Detection Maintainers have an awesome script to transform the XML to TFRecord.
I've used this one from Nicholas Renotte . If don't know who is his, just chechout is videos on Youtube about Machine Learning. Awesome.
Label Map
Before creating the TFRecords, we need to create a Label Map. This is a simple text file ( .pbtxt ) in protobuf format that maps each of our used labels to an integer value.
It will be used by the training and detection processes.
Here's an example of a label map for a dataset with two labels:
item {
    id: 1
    name: 'cat'
}

item {
    id: 2
    name: 'dog'
}
Since we only have one label - licence - ours will be :
item { name:'licence' id:1}
Save it in workspace/data/annotations directory with the name label_map.pbtxt .
Now, we're ready to create the TFRecords
Creating the TFRecords
We will use the script above to create the TFRecords file for the training test images
Assuming that you're in the TFCustomDetect directory and the script is there.
Create the train.record file
python generate_tfrecord.py -x workspace/data/images/train/ -l workspace/data/annotations/label_map.pbtxt -o workspace/data/annotations/train.record
You should receive a sucess message
Successfully created the TFRecord file: workspace/data/annotations/train.record
Do the same for the test.record file
python generate_tfrecord.py -x workspace/data/images/test/ -l workspace/data/annotations/label_map.pbtxt -o workspace/data/annotations/test.record
and the same for this one:
Successfully created the TFRecord file: workspace/data/annotations/test.record
If you see the generate_tfrecord.py file, the arguments are:
- -x is the path where the XML annoations are
- -l is where the label map file is
- -o is where to save the TFRecord file
Now, our workspace/data/annotations directory should have the new files:

We are ready now to choose the model that we're going to use to train our custom data.
Now, just a bonus. Move to the next section - Model Selection - if you don't want to se how to create annotations
Creating annotations
For this, I've used an already available dataset, but will add some more pictures with Portuguese licenses, although it may not be necessary.
This dataset already is annotated. This means that all the regions for the objects of interest (in this case, license plates) are define. Bellow is an example of how this is done.
To create the annotations, I'm going to use a python program named labelImg
Here's an example of the Portuguese license plates

I've used Images that are available from the Internet
First, lets open the directory where I've stored the images

Next, we need to create a box where the license plate is.
Click on "Create RectBox"

Next we click on one of the corners and drag a box until the next opposite corner.

After reaching the opposite corner and releasing the mouse button, a new window appear for us to create a label.

despite all the ones already available, I'm going to create a new one, the same like the one I already have from the Kaggle dataset that I've downloaded.
In the end, this is the final appearance

Now, just press Save to save the label and click "Next Image" to do the same thing for all the images
After all the images are annotated, a new XML file is save with the same name has the image, with the following format:
<annotation> <folder>data_plus</folder> <filename>Cars433.jpg</filename> <path>/home/feiticeir0/data_plus/Cars433.jpg</path> <source> <database>Unknown</database> </source> <size> <width>640</width> <height>427</height> <depth>3</depth> </size> <segmented>0</segmented> <object> <name>licence</name> <pose>Unspecified</pose> <truncated>0</truncated> <difficult>0</difficult> <bndbox> <xmin>189</xmin> <ymin>133</ymin> <xmax>506</xmax> <ymax>228</ymax> </bndbox> </object></annotation>

Now, I'm going to copy this to the dataset folder, to add to the already existing images and annotations. I'm certain this will not make any difference, because I'm going only to use the xmin, ymin, xmax and ymax values, but the folder and path tags are not the same.
Because I'm using an already ready script from - put here - and tailored for the XML format of the dataset from kaggle, I need to remove some lines from my XML files
<annotation> <folder>data_plus</folder> <filename>Cars433.png</filename> <path>/home/feiticeir0/data_plus/Cars433.jpg</path> <source> <database>Unknown</database> </source> <size> <width>640</width> <height>427</height> <depth>3</depth> </size> <segmented>0</segmented> <object> <name>licence</name> <pose>Unspecified</pose> <truncated>0</truncated> <occluded>0</occluded> <difficult>0</difficult> <bndbox> <xmin>189</xmin> <ymin>133</ymin> <xmax>506</xmax> <ymax>228</ymax> </bndbox> </object></annotation>
Model Selection
We're not going to create a model from scratch, but use one already pre-trained provided by TensorFlow.
The TensorFlow 2 Detection Model Zoo has a few:

- First, let's chose the one we want
- Configure it to suit our needs
Selecting the model
TensorFlow offers state of the art models, pre-trained on the COCO dataset. We now need to download the one we want. That's a personal choice and based on what we wan't to do.
I'm going to use the SSD MobileNet V2 FPNLIte 320x320
Download the model.
Within the workspace directory, create a new directory called pre_trained_models
mkdir pre_trained_models
extract your downloaded model to this directory
tar xvf ssd_mobilenet_v2_fpnlite_320x320_coco17_tpu-8.tar.gz
This is what the workspace directory looks like now:

Remember that this step can be done with all the models you desire. Each one will have its own directory inside the pre_trained_models
Configuring the model pipeline
Now that we have the model selected, let's configure it.
Why do we need to configure it ? There's multiple reasons, but here's two:
- Our dataset is different than the one that was used to train the model
- We have less classes
- We want to detect objects different than the ones detected in the model
- etc...
The configuration is done in the file pipeline.config, that comes along the pre-trained model.
Now, we need to create a directory for our training job.
Inside the workspace, create a new directory called models
mkdir models
Inside of this one, create a new one to hold the configurations of the current model we are experimenting with. Remember that we can test a multitude of models, and for each one, we need a new directory for the training jobs
mkdir my_ssd_mobilenet_v2
Now, our directory structure of the workspace should be:

Now, copy the pipeline.config from the pre-trained model you've download to your model directory.
From the workspace directory
cp pre_trained_models/ssd_mobilenet_v2_fpnlite_320x320_coco17_tpu-8/pipeline.config models/my_ssd_mobilenet_v2/
What you should see now is:

If you open the file in a text editor, you'll should see something like this:

Changes
Because this is based on a pre-trained model, we need to make some changes
Number of classes
num_classes: 1
Batch size - this should be set according to available memory. Some recomendations set this to 8, but I've tried with 16 and it worked well. I have 32GB of memory and 12GB GPU
batch_size: 16
Fine tune checkpoint is the path to the checkpoint of the pre-trained model from withint the workspace directory
fine_tune_checkpoint: "pre-trained_models/ssd_mobilenet_v2_fpnlite_320x320_coco17_tpu-8/checkpoint/ckpt-0"
checkpoint type should be set to detection because we want to train a detection model
fine_tune_checkpoint_type: "detection"
The path to the label map. This has to be set in two locations - train_input_reader and eval_input_reader
label_map_path: "data/annotations/label_map.pbtxt"
The input path for the TFRecord files. Again, filled in both locations, but don't forget to change the name. train.record for the train_input_reader and test.record for the eval_input_reader.
Here's an example for the eval_input_reader
eval_input_reader { label_map_path: "data/annotations/label_map.pbtxt" shuffle: false num_epochs: 1 tf_record_input_reader { input_path: "data/annotations/test.record" }}
Now we've finished a basic and working configuration.
Training the model
Now, let's train the model on the dataset. I'm using Tensorflow with GPU support.
Inside your TFCustomDetect directory, let's copy the python script model_train_tf2.py to the workspace directory
cp models/research/object_detection/model_main_tf2.py workspace/
Now, let's start training the model.
From the workspace directory:
python model_main_tf2.py --pipeline_config_path=models/my_ssd_mobilenet_v2/pipeline.config --model_dir=models/my_ssd_mobilenet_v2/ --num_workers=10 --num_train_steps=10000
After a while, it should start training.
An explanation of the arguments:
- pipeline_config_path : The path to the config file that we're going to use for the training. Should be a config from ./models/<folder_with_model_of_choice>/
- model_dir : The path to a directory where all of our future models attributes will be placed. ./models/<folder_with_model_of_choice>
- num_workers : With a multi-core CPU, the number of cores for the training job
- num_train_steps : how many steps should be used for training. Unless changed in the config file, the default is 50000.
If you get any errors before start training, check the paths. I had to add "../workspace/" to the checkpoint path. This is the final configuration:
fine_tune_checkpoint: "../workspace/pre_trained_models/ssd_mobilenet_v2_fpnlite_320x320_coco17_tpu-8/checkpoint/ckpt-0"
Because I'm using Tensorflow with CUDA and CUDNN, i got the following error
error: Can't find libdevice directory ${CUDA_DIR}/nvvm/libdeviceerror: Can't find libdevice directory ${CUDA_DIR}/nvvm/libdeviceerror: Can't find libdevice directory ${CUDA_DIR}/nvvm/libdeviceerror: Can't find libdevice directory ${CUDA_DIR}/nvvm/libdeviceerror: Can't find libdevice directory ${CUDA_DIR}/nvvm/libdeviceerror: Can't find libdevice directory ${CUDA_DIR}/nvvm/libdevice
One solution is (and it worked) to copy the directory nvvm from /opt/cuda to the directory where the script is - TFCustomDetector/workspace
Inside the workspace directory:
sudo cp -r /opt/cuda/nvvm .
Now, let's train it again
Here's the GPU memory utilization before starting the train:

and here's while training

And I get an out of memory - GPU memory - error:
But now I know where I did wrong.
In the pipline configuration (pipeline.config file), I have batch_size=128, but must change it to another value - 8 is the recommended setting, but 16 did work.
Now I know it's working because the GPU utilization went through the roof:

GPU Temperature:

here's how my Conky (System monitor) look like:

The following screen is the training session with GPU enabled acceleration

and this one is just using the CPU - no GPU (from a previous training session)

Did you notest the per-step time is cut by half ? Cool.
While is it running and training, we can evaluate the model - or you can wait for it to finish and see the performance then. Is up to you.
Evalutation
If launch during the training is called validation - the training process creates checkpoints, that are snapshots of the model at given steps. When a checkpoint is generated, the evaluation process uses those files and evalutates the model on how well it is detecting objects in the test dataset. The results are summarised in the form of some metrics.
We've already configured the pipeline.config to use the COCO metrics and we've also download the COCO API, so we're good to go.
Launching the evalutation process:
python model_main_tf2.py --pipeline_config_path=models/my_ssd_mobilenet_v2/pipeline.config --model_dir=models/my_ssd_mobilenet_v2/ --checkpoint_dir=models/my_ssd_mobilenet_v2/ --sample_1_of_n_eval_examples=1
Where:
- pipeline_config_path : The path to the config file used for training. Should be a config from ./models/<folder_with_model_of_choice>/
- model_dir : The path to the directory where the evalutation job will write some files ./models/<folder_with_model_of_choice>
- checkpoint_dir: The path where the training job writes all the checkpoint files. It should be the same above
At the same time, in another terminal, launch Tensorboard for the graphics
tensorboard --logdir=models/my_ssd_mobilenet_v2/
where logdir is the directory of our model

Here's the result, using Tensorboard, some metrics of the model at the end:

Now, we can export the model to be able to use it in other systems - edge devices - to do inference.
Inference
But, we can still see if it works by loading a checkpoint and run inference on an image
Here's a result, detecting a Portuguese license plate .

Here's the code
import tensorflow as tf
import os
from object_detection.utils import config_util
from object_detection.protos import pipeline_pb2
from google.protobuf import text_format
from object_detection.utils import visualization_utils as viz_utils
from object_detection.utils import label_map_util
from object_detection.builders import model_builder
import cv2
import numpy as np
import matplotlib
matplotlib.use('TKagg')
from matplotlib import pyplot as plt

#loging TF
os.environ['TF_CPP_MIN_LOG_LEVEL'] = '2'    # Suppress TensorFlow logging (1)
tf.get_logger().setLevel('ERROR')           # Suppress TensorFlow logging (2)


# example from https://github.com/nicknochnack/RealTimeAutomaticNumberPlateRecognition/blob/main/Automatic%20Number%20Plate%20Detection.ipynb

LABEL_MAP_NAME = 'label_map.pbtxt'
files = {
    'LABELMAP' : 'data/annotations/' + LABEL_MAP_NAME,
    'PIPELINE_CONFIG' : 'models/my_ssd_mobilenet_v2/pipeline.config'
}

# Prevent GPU complete consumption
gpus = tf.config.list_physical_devices('GPU')
if gpus:
    try:
        tf.config.experimental.set_virtual_device_configuration(
            gpus[0], [tf.config.experimental.VirtualDeviceConfiguration(memory_limit=5120)])
    except RunTimeError as e:
        print(e)

# Let's try it
# Load pipeline
configs = config_util.get_configs_from_pipeline_file(files['PIPELINE_CONFIG'])
#print (configs['model'])

detection_model = model_builder.build(model_config=configs['model'], is_training=False)

#restore checkpoint
ckpt = tf.compat.v2.train.Checkpoint(model=detection_model)
ckpt.restore('models/my_ssd_mobilenet_v2/ckpt-13').expect_partial()


@tf.function
def detect_fn(image):
    image, shapes = detection_model.preprocess(image)
    prediction_dict = detection_model.predict(image, shapes)
    detections = detection_model.postprocess(prediction_dict, shapes)
    return detections

# Detect from image
category_index = label_map_util.create_category_index_from_labelmap(files['LABELMAP'])

image_path = 'data/images/testImage2.jpg'

img = cv2.imread(image_path)
image_np = np.array(img)

input_tensor = tf.convert_to_tensor(np.expand_dims(image_np, 0), dtype=tf.float32)
detections = detect_fn(input_tensor)

num_detections = int(detections.pop('num_detections'))
print (f"Detections: {num_detections}")

detections = {key: value[0, :num_detections].numpy()
                for key, value in detections.items()}
detections['num_detections'] = num_detections

#detection classes should be ints
detections['detection_classes'] = detections['detection_classes'].astype(np.int64)

label_id_offset = 1
image_np_with_detections = image_np.copy()
viz_utils.visualize_boxes_and_labels_on_image_array(
            image_np_with_detections,
            detections['detection_boxes'],
            detections['detection_classes']+label_id_offset,
            detections['detection_scores'],
            category_index,
            use_normalized_coordinates=True,
            max_boxes_to_draw=5,
            min_score_thresh=.5,
            agnostic_mode=False)

plt.imshow(cv2.cvtColor(image_np_with_detections, cv2.COLOR_BGR2RGB))
plt.show()
You can see part of this code on the TensorFlow readthedocs.io
I've done the same using Yolov7 and my opinion that it's easy to setup the environment than TensorFlow. A post using Yolov7 soon.
Exporting
Because just like it is wont help us, we need to export the model or freeze the graph.
Freezing the graph
Freezing the graph means combining the structure of the model with its weights. You can read mode about it here.
Now, from the TFCustomDetector directory, let's create a new directory to hold the exported graph
mkdir models/my_ssd_mobilenet_v2/export
Let's copy the file to export the model from the Tensorflow directory
cp models/research/object_detection/exporter_main_v2.py .
Now, let's freeze the graph
python exporter_main_v2.py --input_type=image_tensor --pipeline_config_path=models/my_ssd_mobilenet_v2/pipeline.config --trained_checkpoint_dir=models/my_ssd_mobilenet_v2/ --output_directory=models/my_ssd_mobilenet_v2/export/
An explanation of the flags:
- --pipeline_config_path : where's the pipeline.config file of our model.
- --trained_checkpoint_dir : where are our checkpoints of the training
- --output_directory : where to save the freezed graph
And, now you'll have the following in the export directory:

Exporting to TFLite - method 1
TFlite is a version of TensorFlow specifically for edge devices, like Raspberry PI or Kria KV260 .
You can read mode about TFLite here.
More about the conversion of TensorFlow models here. The recommended method is to use the Python API. Let's do that.
Here's the code to convert the saved model to TFLite
import tensorflow as tf
import os

#convert the model
saved_model_path = 'models/my_ssd_mobilenet_v2/export/saved_model'
tflite_path = 'models/my_ssd_mobilenet_v2/export/tflite'
tflite_model_name = 'license_plate.tflite'

#let's check if exits
if not os.path.exists(tflite_path):
    os.makedirs(tflite_path)

converter = tf.lite.TFLiteConverter.from_saved_model(saved_model_path)
converter.target_spec.supported_ops = [
  tf.lite.OpsSet.TFLITE_BUILTINS, # enable TensorFlow Lite ops.
  tf.lite.OpsSet.SELECT_TF_OPS # enable TensorFlow ops.
]

tflite_model = converter.convert()

#save the model

open(os.path.join(tflite_path,tflite_model_name),'wb').write (tflite_model)
Let's run the code
python export_to_tflite.py
And here's the result

A bit of explanation
At the first try, I was getting this error:
File "/home/feiticeir0/Programming/TFCustomDetector/tf2_obdetect/lib/python3.10/site-packages/tensorflow/lite/python/convert.py", line 310, in convert raise converter_errortensorflow.lite.python.convert_phase.ConverterError: <unknown>:0: error: loc(callsite(fused["StridedSlice:", "map/while/strided_slice@map_while_body_7735"] at callsite(callsite(fused["StatelessWhile:", "map/while@__inference_call_func_11394"] at fused["StatefulPartitionedCall:", "StatefulPartitionedCall@__inference_signature_wrapper_13768"]) at fused["StatefulPartitionedCall:", "StatefulPartitionedCall"]))): 'tf.StridedSlice' op is neither a custom op nor a flex op<unknown>:0: note: loc(callsite(callsite(fused["StatelessWhile:", "map/while@__inference_call_func_11394"] at fused["StatefulPartitionedCall:", "StatefulPartitionedCall@__inference_signature_wrapper_13768"]) at fused["StatefulPartitionedCall:", "StatefulPartitionedCall"])): called from<unknown>:0: note: loc(fused["StatefulPartitionedCall:", "StatefulPartitionedCall"]): called from<unknown>:0: note: loc(callsite(fused["StridedSlice:", "map/while/strided_slice@map_while_body_7735"] at callsite(callsite(fused["StatelessWhile:", "map/while@__inference_call_func_11394"] at fused["StatefulPartitionedCall:", "StatefulPartitionedCall@__inference_signature_wrapper_13768"]) at fused["StatefulPartitionedCall:", "StatefulPartitionedCall"]))): Error code: ERROR_NEEDS_FLEX_OPS<unknown>:0: error: loc(callsite(callsite(fused["StatelessWhile:", "map/while@__inference_call_func_11394"] at fused["StatefulPartitionedCall:", "StatefulPartitionedCall@__inference_signature_wrapper_13768"]) at fused["StatefulPartitionedCall:", "StatefulPartitionedCall"])): failed while converting: 'map/while_body': Some ops are not supported by the native TFLite runtime, you can enable TF kernels fallback using TF Select. See instructions: https://www.tensorflow.org/lite/guide/ops_select TF Select ops: StridedSliceDetails: tf.StridedSlice(tensor<?x?x3xf32>, tensor<4xi32>, tensor<4xi32>, tensor<4xi32>) -> (tensor<1x?x?x3xf32>) : {begin_mask = 14 : i64, device = "", ellipsis_mask = 0 : i64, end_mask = 14 : i64, new_axis_mask = 1 : i64, shrink_axis_mask = 0 : i64}<unknown>:0: note: loc(fused["StatefulPartitionedCall:", "StatefulPartitionedCall"]): called from
This is because this model, exported from TensorFlow Object Detection API has TF ops that don't have a corresponding TFlite implementation.
The solution is to select the TensorFlow operators when exporting to TFlite. Just adding this code to the conversion options works:
converter.target_spec.supported_ops = [ tf.lite.OpsSet.TFLITE_BUILTINS, # enable TensorFlow Lite ops. tf.lite.OpsSet.SELECT_TF_OPS # enable TensorFlow ops.]
The tradeoff is that we need to use a TensorFlow Lite Runtime that also includes the necessary TensorFlow ops. For Python and Linux, when installing the Tensorflow pip package already comes with it or we can only install the TensorFlow Lite Interpreter pip package.
Export to TFLite - method 2
The Object Detection API already has some code to export to TFLite.
Inside the models/research/object_detection directory there are several files that can export to TFLite format, but only suports SSD meta-architectures for now. Since I've used a SSD mobilenet architecture, it should work.
python models/research/object_detection/export_tflite_graph_tf2.py --pipeline_config_path workspace/models/my_ssd_mobilenet_v2/pipeline.config --trained_checkpoint_dir workspace/models/my_ssd_mobilenet_v2/ --output_directory workspace/models/my_ssd_mobilenet_v2/export/

Now that we have the intermediate SavedModel, let's use the TfLite converter - that comes with TensorFlow pip package - to convert the savedmodel to TfLite format.
tflite_convert --output_file workspace/models/my_ssd_mobilenet_v2/export/tflite/license_plate_v2.tflite --saved_model_dir workspace/models/my_ssd_mobilenet_v2/export/saved_model

Now, let's try it. This should present an advantage over the method above because we could just use the TensorFlow Lite runtime package.
Next Steps
Well, I have the model ready . Now, I just need to find out how to run this on a Xilinx KV260 Vision Kit .
References
https://tensorflow-object-detection-api-tutorial.readthedocs.io/en/latest/training.html
https://neptune.ai/blog/how-to-train-your-own-object-detector-using-tensorflow-object-detection-api
https://python.plainenglish.io/building-a-custom-object-detection-model-with-tensorflow-9c222f36a76b
https://cv-tricks.com/how-to/freeze-tensorflow-models/
https://backstreetcoder.com/convert-tensorflow-pb-model-to-keras-h5-model/
https://www.tensorflow.org/api_docs/python/tf/keras/saving/save_model


