


The next part of my roadtest with the CapTIvate sensors is to see how they perform with different front panel materials. If you think of the basics a capacitor is two conductors separated by an insulator. If we put in thick insulator with different dialectric properties to air then we are going to have a significant effect on the sensor. I picked two thicker challenging materials and one that I might consider for a front panel.
The materials I had to hand were:
- 6mm Toughened Glass
- 2mm Polystyrene (not expanded)
- 10mm Acrylic

Calibrating the board
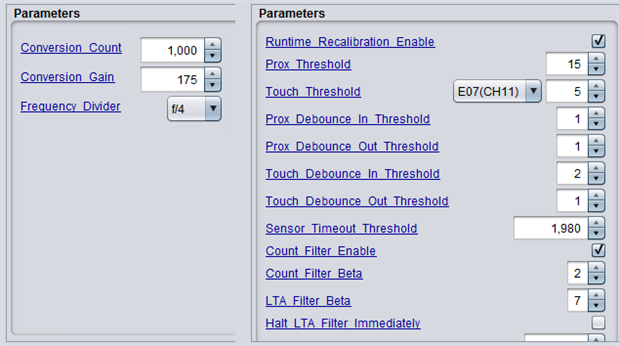
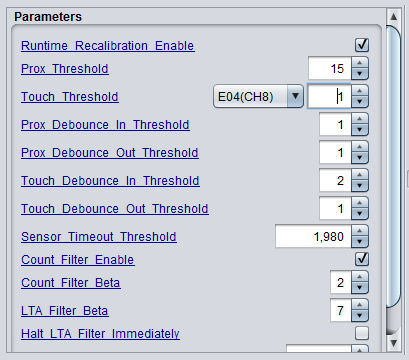
Before starting the test I opened the Captivate Design Centre and took a look at the setting used by the proximity boards and compared this to the out of the box demo. The key difference was the conversion count. This is described by the help as "Conversion Gain and Conversion Count are the fundamental parameters used to establish the performance of the sensor".
Switching back to the BSWP project and focusing on the numeric keypad, I experimented with the gain and count. I used the channel data graph to see how the settings affected the readings. As previously mentioned, it is possible to upload new parameters without the need to build and load new software to the board.
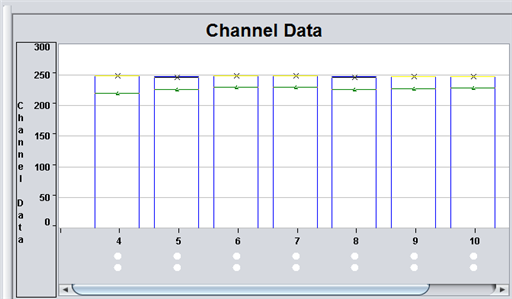

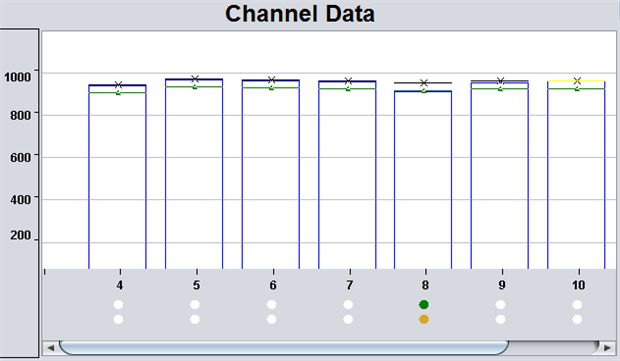
Channel Data No touch
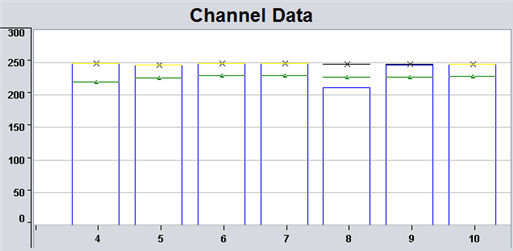
Channel Data with Press on channel 8
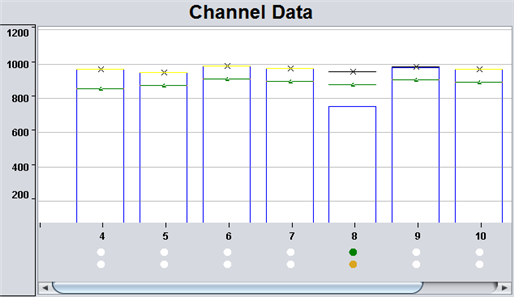
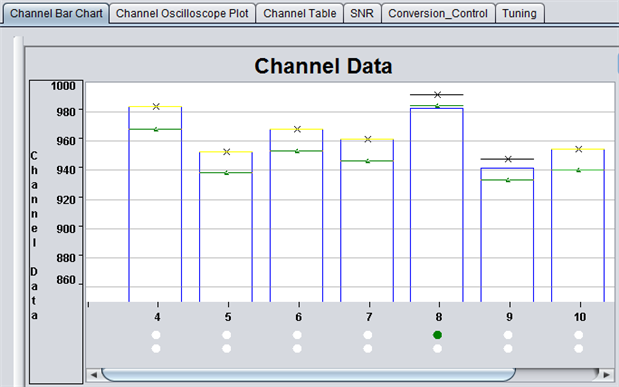
Channel Data with increased conversion count.
With the higher conversion count setting you can see how the graph for the count drops a lot lower. Having found the right settings to tune, I proceeded to try my first material. I found setting the conversion count to values over 1000 caused instability and it failed to detect presses.
Glass 6mm
After placing the glass on the board the device got quite confused thinking that all the buttons were pressed. I forced it to recalibrate and these were all reset. Note that the default option is for the sensors to recalibrate on startup. I found that an increase in the conversion count also increased noise and you could compensate for this by increasing the gain. I also reduced the touch threshold to 5 to get the sensor to detect presses. Note that you need to tune this setting for each of the channels.
Polystyrene 2mm
This is not the expanded polystyrene you get in packaging but a clear sheet with no bubbles. I picked this material as it would likely be one of the first options I'd go for if I was making a front panel. It's inexpensive and easy to work with. At 2mm it's stiff enough to stay in place with just a couple of surrounding clips. I used the same settings here as for the glass and the key pad worked very well with presses registering for all of the buttons.
Acrylic 10mm
This material is not really that suited to a front panel, it's sufficiently thick that you could get parallax issues and not be able to see which button you were pressing. However I thought it would be a good challenge for the board and wondered if I'd get it to detect properly. Even after a recalibrate the settings seemed all over the place. I did however get it to detect presses by further decreasing the touch threshold to 1. At this low setting I did find that adjacent buttons would also trigger even when not pressed. You should be able to compensate for that in software but this material seems right on the limit of what this design can cope with. As for any capacitive technology you can improve the characteristics with larger buttons and larger separation between buttons.
Summary
The CapTIvate technology can cope well with a range of front panel materials. The design centre makes tuning for different materials straight forward and it is easy to compare settings.
Top Comments