element14 Community
element14 Community
    Register Log In
  • Site
  • Search
  • Log In Register
  • Community Hub
    Community Hub
    • What's New on element14
    • Feedback and Support
    • Benefits of Membership
    • Personal Blogs
    • Members Area
    • Achievement Levels
  • Learn
    Learn
    • Ask an Expert
    • eBooks
    • element14 presents
    • Learning Center
    • Tech Spotlight
    • STEM Academy
    • Webinars, Training and Events
    • Learning Groups
  • Technologies
    Technologies
    • 3D Printing
    • FPGA
    • Industrial Automation
    • Internet of Things
    • Power & Energy
    • Sensors
    • Technology Groups
  • Challenges & Projects
    Challenges & Projects
    • Design Challenges
    • element14 presents Projects
    • Project14
    • Arduino Projects
    • Raspberry Pi Projects
    • Project Groups
  • Products
    Products
    • Arduino
    • Avnet Boards Community
    • Dev Tools
    • Manufacturers
    • Multicomp Pro
    • Product Groups
    • Raspberry Pi
    • RoadTests & Reviews
  • Store
    Store
    • Visit Your Store
    • Choose another store...
      • Europe
      •  Austria (German)
      •  Belgium (Dutch, French)
      •  Bulgaria (Bulgarian)
      •  Czech Republic (Czech)
      •  Denmark (Danish)
      •  Estonia (Estonian)
      •  Finland (Finnish)
      •  France (French)
      •  Germany (German)
      •  Hungary (Hungarian)
      •  Ireland
      •  Israel
      •  Italy (Italian)
      •  Latvia (Latvian)
      •  
      •  Lithuania (Lithuanian)
      •  Netherlands (Dutch)
      •  Norway (Norwegian)
      •  Poland (Polish)
      •  Portugal (Portuguese)
      •  Romania (Romanian)
      •  Russia (Russian)
      •  Slovakia (Slovak)
      •  Slovenia (Slovenian)
      •  Spain (Spanish)
      •  Sweden (Swedish)
      •  Switzerland(German, French)
      •  Turkey (Turkish)
      •  United Kingdom
      • Asia Pacific
      •  Australia
      •  China
      •  Hong Kong
      •  India
      •  Korea (Korean)
      •  Malaysia
      •  New Zealand
      •  Philippines
      •  Singapore
      •  Taiwan
      •  Thailand (Thai)
      • Americas
      •  Brazil (Portuguese)
      •  Canada
      •  Mexico (Spanish)
      •  United States
      Can't find the country/region you're looking for? Visit our export site or find a local distributor.
  • Translate
  • Profile
  • Settings
RoadTests & Reviews
  • Products
  • More
RoadTests & Reviews
Blog Preview of the STM32H7B3I-DK -  DISCOVERY KIT
  • Blog
  • RoadTest Forum
  • Documents
  • RoadTests
  • Reviews
  • Polls
  • Files
  • Members
  • Mentions
  • Sub-Groups
  • Tags
  • More
  • Cancel
  • New
Join RoadTests & Reviews to participate - click to join for free!
  • Share
  • More
  • Cancel
  • Author Author: waleedelmughrabi
  • Date Created: 16 Jul 2020 10:55 PM Date Created
  • Views 2617 views
  • Likes 4 likes
  • Comments 11 comments
Related
Recommended
  • gui
  • graphical_user_interface
  • stm32
  • cube ide
  • stm32h7b3i-dk
  • stm32h7b3i-dk - discovery kit*
  • touchgfx

Preview of the STM32H7B3I-DK -  DISCOVERY KIT

waleedelmughrabi
waleedelmughrabi
16 Jul 2020

Getting started with the STM32H7B3I-DK

Posted to support the STM32H7B3I-DK -  DISCOVERY KIT roadtest.

image


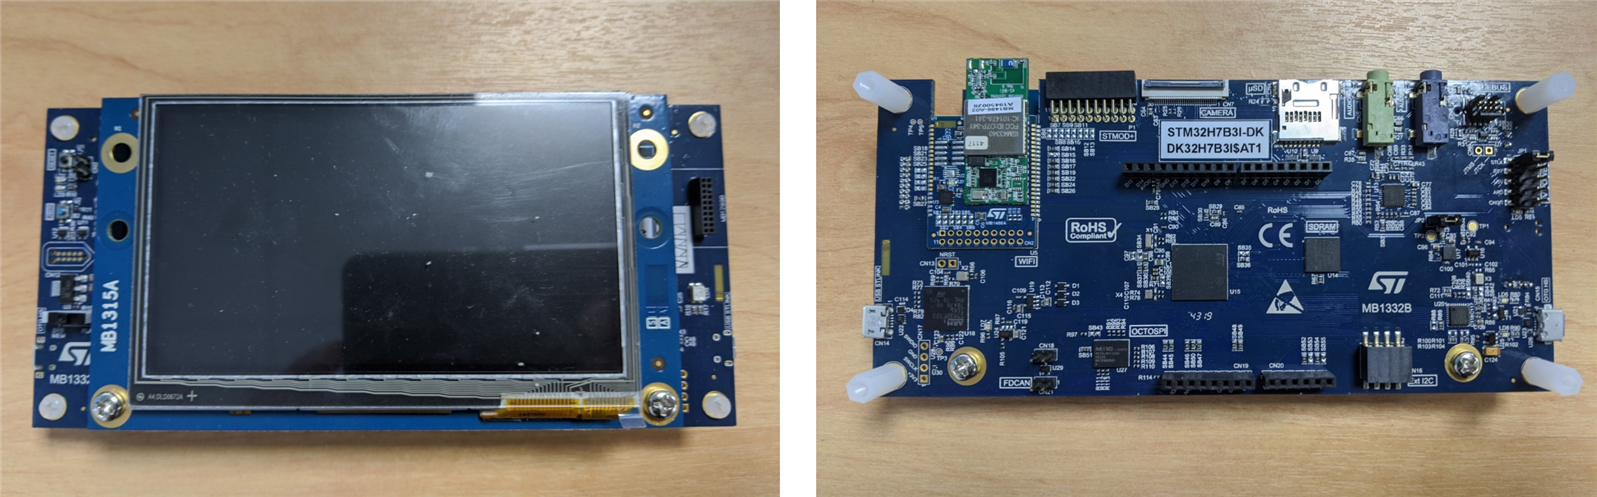
The following items are recommended by ST to explore and test the various features of the STM32H7B3I-DK:

  • Java 8.241
  • STM32CubeIDE 1.3.0
  • STM32CubeMX 5.6.0
  • STM32CubeProgrammer 2.4.0
  • TouchGFX Designer 4.13.0
  • STM32Cube_FW_H7_V1.7.0
  • X-CUBE-TOUCHGFX


TouchGFX Designer

It is a user friendly software to facilitate creating graphics, especially for touchscreen displays.

It is a modern tool that can help developers create applications with a backwards approach starting from the user interface then back to low level coding.


Application templates

• TouchGFX Designer is based on Application Templates (AT)

• An AT is a complete setup for a given ST development Kit (HAL, Drivers, etc.)

• Once selected the AT is downloaded from a remote server (internet connection)


Tutorial

  • First we need to creating an application template
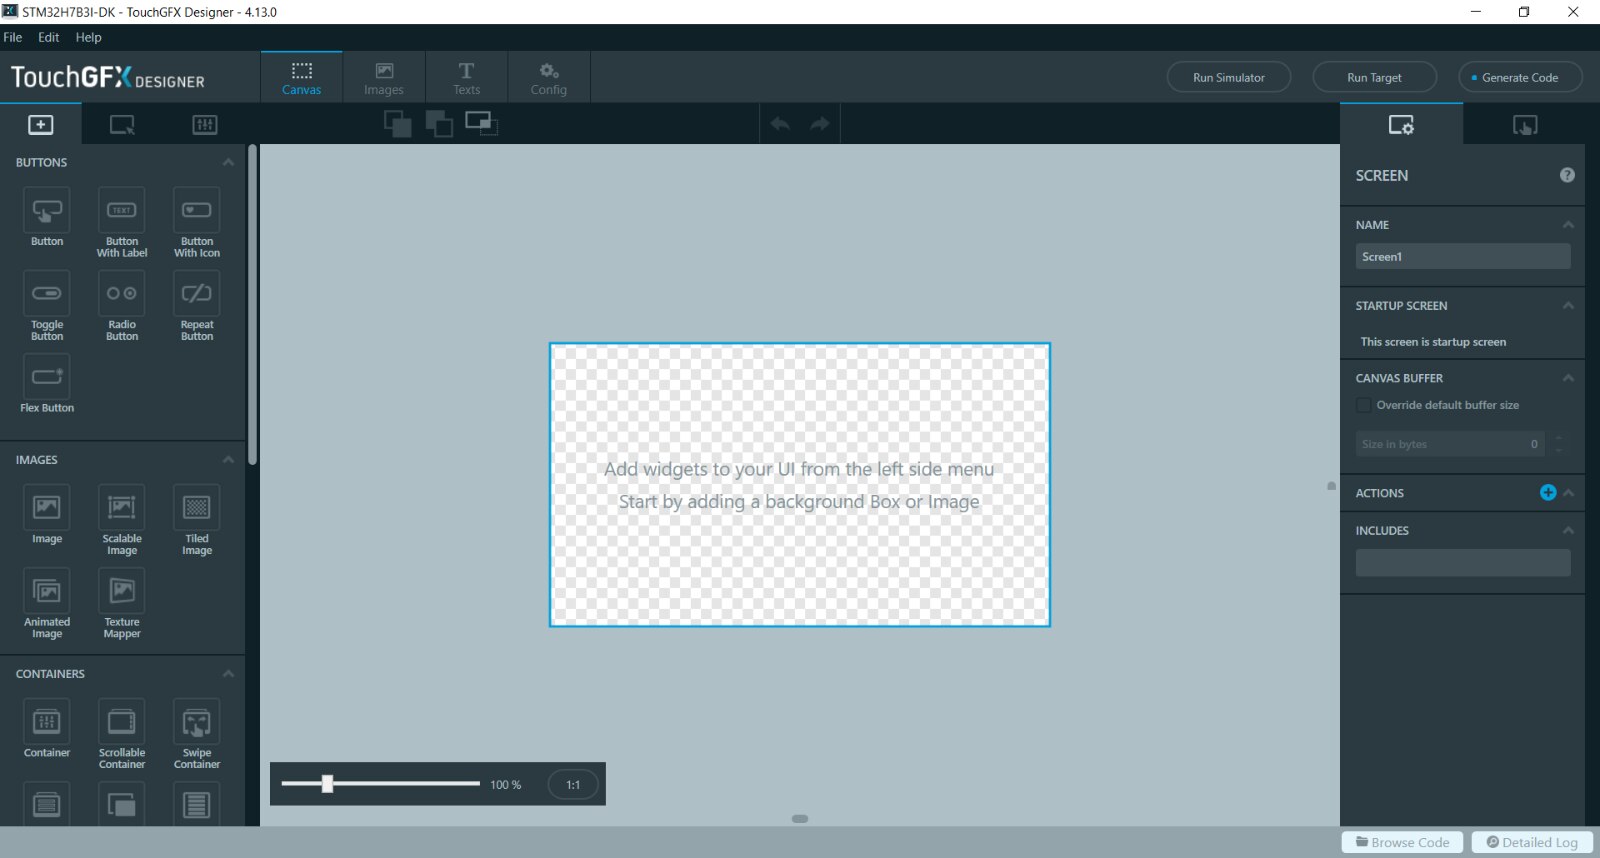
  • Start TouchGFX Designer
  • Startup screen looks like the following

image

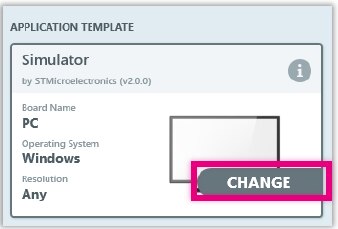
  • Hover the mouse cursor over the Simulator box, a pop up window appears, press "Change"

image

  • Scroll until you find the STM32H7B3I-DK template then select it

image

  • You can also hover the cursor over the "Blank UI box" and choose an exapmle UI, but for this tutorial it will be left as blank.
  • Change the Application name and directory if needed.

image

  • Click on create.
  • Now the template has been created, the designer screen looks like the following:

image

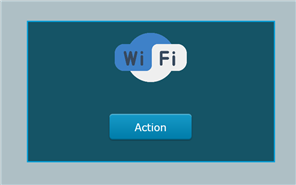
  • To choose a background we will create a box and choose a fill colour for it.
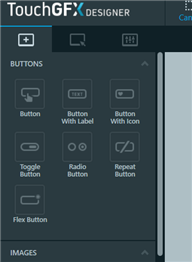
  • The left side menu has various widgets, scroll down to shapes then select the box widget.
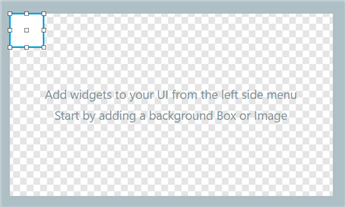
  • This will create a box in the corner of the design.

image

  • Resize the box to cover the screen.
  • Choose a colour from the appearance menu on the right (make sure the box is selected).

image

  • Next we will add a button, by going back to the widgets menu

image

  • The created button can be dragged to desired location.
  • Various options for the button can be set in the menu, change text to "Action"

image

  • Now select a new widget, this time it is the scalable image.

image

  • Once the widget is placed the options menu appear.

image


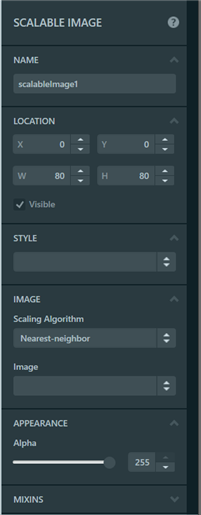
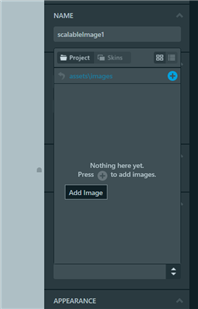
  • Click on the image bar to browse for the image you want to use.

image

  • Once the image was selected, I dragged it to the centre and resized it.

image


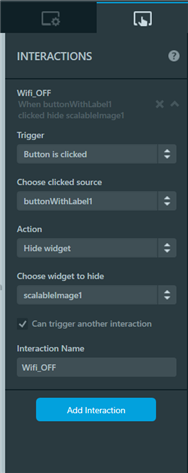
  • Now we need to configure the behaviour and functionality of these widgets.
  • This reminds me of designing mobile apps using Xamarin by selecting an action for events.
  • In the menu on the right side of the work space we can switch to the interactions tab to add the first interaction.

image


image

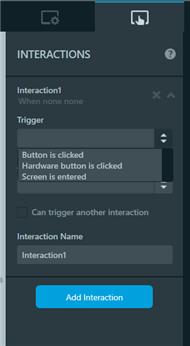
  • We can rename the interaction and choose how it is triggered, by what event, and its functionality.
  • In this example we will only add one interaction, but we can add more if needed, and have interactions trigger eachother.
  • Since it is only one interaction in this example we need to uncheck the option: "Can trigger another action"

image


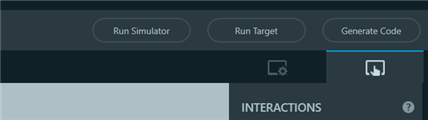
  • Before generating your code and switching to Cube IDE to test the application on your board, you can run a simulation, by clicking on the word simulation above the workspace.


You don't have permission to edit metadata of this video.
Edit media
x
image
Upload Preview
image


  • Now that we verified that the application works as it should, it is time to test it on the target.
  • We start by clicking on Generate Code.

image


  • Once done the option to browse to the directory where the code was generated becomes available in the lower right corner.


image


  • When the folder opens go one folder back, in my case it is C:\TouchGFXProjects\STM32H7B3I-DK-RoadTest
  • click to STM32CubeIDE and open .project in CubeIDE tool
  • Click launch
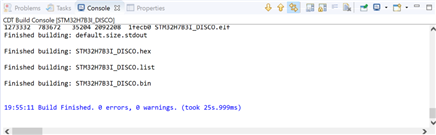
  • Right click on the project and build.
  • Once done the console window should look like the following

image

  • Connect the board using a micro usb cable
  • (the Cube IDE might detect an old ST link firmware, update if necessary)
  • Now to configure the debugging configurations.

image

image

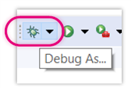
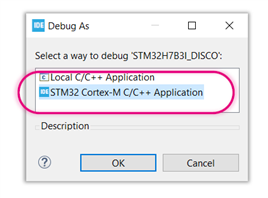
  • Click on the debugger tab.
  • Leave all settings at default values, except for the external loader.
  • Scroll down and tick the external loader box.

image

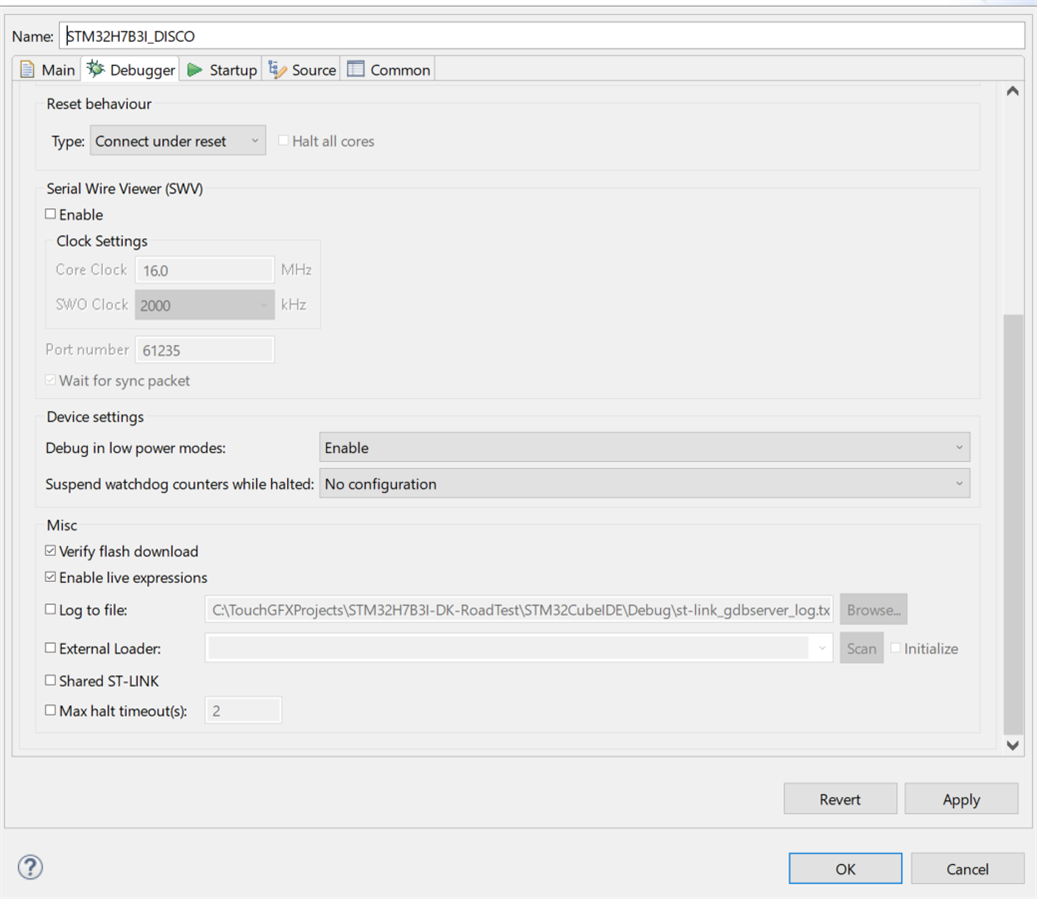
  • The scan button should be able to find your board automatically, but be careful it will not work for this board, it will select a wrong loader, it needs to be selected manually

image

  • Press OK and start the debug session.
  • The execution will halt at the beginning of the "main" function.
  • Press resume (F8) to run the code.

image

You don't have permission to edit metadata of this video.
Edit media
x
image
Upload Preview
image

  • Sign in to reply

Top Comments

  • waleedelmughrabi
    waleedelmughrabi over 4 years ago in reply to crisv22 +1
    Hi, Sorry I haven't tested WIFI on this board yet however same as other Inventek modules the firmware works with AT commands over UART or SPI not sure which one is the default on this board (either UART2…
  • waleedelmughrabi
    waleedelmughrabi over 4 years ago in reply to crisv22 +1
    Hi Cristian, sorry for my late reply. the B-L475E-IOT01A development board also has an inventek WIFI module, worth using it as a reference. I have tested this board using this example https://os.mbed.com…
  • crisv22
    crisv22 over 4 years ago in reply to crisv22

    the file password is stm32h7b3i-crisv22

    • Cancel
    • Vote Up 0 Vote Down
    • Sign in to reply
    • More
    • Cancel
  • crisv22
    crisv22 over 4 years ago in reply to waleedelmughrabi

    Hello my friend!!

    this is my example but it has some inconsistencies I hope you can help me

    https://community.st.com/s/question/0D53W00000MC0XcSAL/wifi-http-server-stm32h7b3idk-with-wifi-module-ism43340m4gl4410-c…

    • Cancel
    • Vote Up 0 Vote Down
    • Sign in to reply
    • More
    • Cancel
  • crisv22
    crisv22 over 4 years ago in reply to waleedelmughrabi

    hello my friend

    I managed to configure the module with the stm32cubeide editor with the only drawback that sometimes it loads the page and sometimes it doesn't

    I don't know where I have to modify the response times


    #include "wifi.h"

    /*------------------------------------------------------------------------------

    Hyperterminal settings: 115200 bauds, 8-bit data, no parity


    This example

      - connects to a wifi network (SSID & PWD to set in mbed_app.json)

      - displays the IP address and creates a web page

      - then connect on its IP address on the same wifi network with another device

      - Now able to change the led status and read the temperature


    This example uses SPI3 ( PE_0 PC_10 PC_12 PC_11), wifi_wakeup pin (PB_13),

    wifi_dataready pin (PE_1), wifi reset pin (PE_8)

    ------------------------------------------------------------------------------*/


    /* Private defines -----------------------------------------------------------*/

    #define WIFI_WRITE_TIMEOUT 10000

    #define WIFI_READ_TIMEOUT  10000

    #define PORT           80


    /* Private typedef------------------------------------------------------------*/

    typedef enum

    {

      WS_IDLE = 0,

      WS_CONNECTED,

      WS_DISCONNECTED,

      WS_ERROR,

    } WebServerState_t;


    /* Private macro -------------------------------------------------------------*/

    static int wifi_sample_run(void);

    static void WebServerProcess(void);

    static WIFI_Status_t SendWebPage(uint8_t ledIsOn, float temperature);

    /* Private variables ---------------------------------------------------------*/

    Serial pc(SERIAL_TX, SERIAL_RX);

    static   uint8_t http[1024];

    static   uint8_t resp[1024];

    uint16_t respLen;

    uint8_t  IP_Addr[4];

    uint8_t  MAC_Addr[6];

    int32_t Socket = -1;

    static   WebServerState_t  State = WS_ERROR;

    char     ModuleName[32];

    DigitalOut led(LED2);

    AnalogIn adc_temp(ADC_TEMP);


    int main()

    {

        int ret = 0;

        led = 0;

        pc.baud(115200);

        printf("\n");

        printf("************************************************************\n");

        printf("***   STM32 IoT Discovery kit for STM32L475 MCU          ***\n");

        printf("***         WIFI Web Server demonstration                ***\n\n");

        printf("*** Copy the IP address on another device connected      ***\n");

        printf("*** to the wifi network                                  ***\n");

        printf("*** Read the temperature and update the LED status       ***\n");

        printf("************************************************************\n");


        /* Working application */

        ret = wifi_sample_run();


        if (ret != 0) {

            return -1;

        }


        while(1) {

            WebServerProcess ();

        }


    }


    int wifi_sample_run(void)

    {


        /*Initialize and use WIFI module */

        if(WIFI_Init() ==  WIFI_STATUS_OK) {

            printf("ES-WIFI Initialized.\n");


            if(WIFI_GetMAC_Address(MAC_Addr) == WIFI_STATUS_OK) {      

                printf("> es-wifi module MAC Address : %X:%X:%X:%X:%X:%X\n",    

                       MAC_Addr[0],

                       MAC_Addr[1],

                       MAC_Addr[2],

                       MAC_Addr[3],

                       MAC_Addr[4],

                       MAC_Addr[5]);  

            } else {

                printf("> ERROR : CANNOT get MAC address\n");

            }


            if( WIFI_Connect(MBED_CONF_APP_WIFI_SSID, MBED_CONF_APP_WIFI_PASSWORD, WIFI_ECN_WPA2_PSK) == WIFI_STATUS_OK) {

                printf("> es-wifi module connected \n");


                if(WIFI_GetIP_Address(IP_Addr) == WIFI_STATUS_OK) {

                    printf("> es-wifi module got IP Address : %d.%d.%d.%d\n",    

                           IP_Addr[0],

                           IP_Addr[1],

                           IP_Addr[2],

                           IP_Addr[3]);


                    printf(">Start HTTP Server... \n");

                    printf(">Wait for connection...  \n");

                    State = WS_IDLE;

                } else {   

                    printf("> ERROR : es-wifi module CANNOT get IP address\n");

                    return -1;

                }

            } else {

                printf("> ERROR : es-wifi module NOT connected\n");

                return -1;

            }

        } else {

            printf("> ERROR : WIFI Module cannot be initialized.\n");

            return -1;

        }

        return 0;

    }


    /**

      * @brief  Send HTML page

      * @param  None

      * @retval None

      */

    static void WebServerProcess(void)

    {

      uint8_t LedState = 0;

      float temp;

      switch(State)

      {

      case WS_IDLE:

        Socket = 0;

        WIFI_StartServer(Socket, WIFI_TCP_PROTOCOL, "", PORT);


        if(Socket != -1)

        {

          printf("> HTTP Server Started \n"); 

          State = WS_CONNECTED;

        }

        else

        {

          printf("> ERROR : Connection cannot be established.\n");

          State = WS_ERROR;

        }   

        break;


      case WS_CONNECTED:


        WIFI_ReceiveData(Socket, resp, 1200, &respLen, WIFI_READ_TIMEOUT);


        if( respLen > 0)

        {

          if(strstr((char *)resp, "GET")) /* GET: put web page */

          {

            temp = (adc_temp.read()*100);

            if(SendWebPage(LedState, temp) != WIFI_STATUS_OK)

            {

              printf("> ERROR : Cannot send web page\n");

              State = WS_ERROR;

            }

          }

          else if(strstr((char *)resp, "POST"))/* POST: received info */

          {

              if(strstr((char *)resp, "radio"))

              {         

                if(strstr((char *)resp, "radio=0"))

                {

                  LedState = 0;

                  led = 0;

                }

                else if(strstr((char *)resp, "radio=1"))

                {

                  LedState = 1;

                  led = 1;

                }


               temp = (adc_temp.read()*100);

                if(SendWebPage(LedState, temp) != WIFI_STATUS_OK)

                {

                  printf("> ERROR : Cannot send web page\n");

                  State = WS_ERROR;

              }

            }

          }

        }

        if(WIFI_StopServer(Socket) == WIFI_STATUS_OK)

        {

          WIFI_StartServer(Socket, WIFI_TCP_PROTOCOL, "", PORT);

        }

        else

        {

          State = WS_ERROR; 

        }

        break;

      case WS_ERROR:  

      default:

        break;

      }

    }


    /**

      * @brief  Send HTML page

      * @param  None

      * @retval None

      */

    static WIFI_Status_t SendWebPage(uint8_t ledIsOn, float temperature)

    {

      uint8_t  temp[50];

      uint16_t SentDataLength;

      WIFI_Status_t ret;


      /* construct web page content */

      strcpy((char *)http, (char *)"HTTP/1.0 200 OK\r\nContent-Type: text/html\r\nPragma: no-cache\r\n\r\n");

      strcat((char *)http, (char *)"<html>\r\n<body>\r\n");

      strcat((char *)http, (char *)"<title>STM32 Web Server</title>\r\n");

      strcat((char *)http, (char *)"<h2>InventekSys : Web Server using Es-Wifi with STM32</h2>\r\n");

      strcat((char *)http, (char *)"<br /><hr>\r\n");

      strcat((char *)http, (char *)"<p><form method=\"POST\"><strong>Temp: <input type=\"text\" size=2 value=\"");

      sprintf((char *)temp, "%f", temperature);

      strcat((char *)http, (char *)temp);

      strcat((char *)http, (char *)"\"> <sup>O</sup>C");


      if (ledIsOn)

      {

        strcat((char *)http, (char *)"<p><input type=\"radio\" name=\"radio\" value=\"0\" >LED off");

        strcat((char *)http, (char *)"<br><input type=\"radio\" name=\"radio\" value=\"1\" checked>LED on");

      }

      else

      {

        strcat((char *)http, (char *)"<p><input type=\"radio\" name=\"radio\" value=\"0\" checked>LED off");

        strcat((char *)http, (char *)"<br><input type=\"radio\" name=\"radio\" value=\"1\" >LED on");

      }


      strcat((char *)http, (char *)"</strong><p><input type=\"submit\"></form></span>");

      strcat((char *)http, (char *)"</body>\r\n</html>\r\n");


      ret = WIFI_SendData(0, (uint8_t *)http, strlen((char *)http), &SentDataLength, WIFI_WRITE_TIMEOUT);


      if((ret == WIFI_STATUS_OK) && (SentDataLength != strlen((char *)http)))

      {

        ret = WIFI_STATUS_ERROR;

      }


      return ret;

    }

    • Cancel
    • Vote Up 0 Vote Down
    • Sign in to reply
    • More
    • Cancel
  • waleedelmughrabi
    waleedelmughrabi over 4 years ago in reply to crisv22

    Hi Cristian, hope you made some progress. If it's SPI you are struggling with, the user manual specifies that changing sumpers would allow you to use UART2 instead of SPI2.

    For MBED custom target, it will help if you can be more specific to what didn't work (error code). Best approach is to report the issue to MBED, I have found their forums to be very helpful, this link is for custom targets:

    https://forums.mbed.com/c/custom-and-community-boards/48

    • Cancel
    • Vote Up 0 Vote Down
    • Sign in to reply
    • More
    • Cancel
  • crisv22
    crisv22 over 4 years ago

    any suggestions?

    • Cancel
    • Vote Up 0 Vote Down
    • Sign in to reply
    • More
    • Cancel
>
element14 Community

element14 is the first online community specifically for engineers. Connect with your peers and get expert answers to your questions.

  • Members
  • Learn
  • Technologies
  • Challenges & Projects
  • Products
  • Store
  • About Us
  • Feedback & Support
  • FAQs
  • Terms of Use
  • Privacy Policy
  • Legal and Copyright Notices
  • Sitemap
  • Cookies

An Avnet Company © 2025 Premier Farnell Limited. All Rights Reserved.

Premier Farnell Ltd, registered in England and Wales (no 00876412), registered office: Farnell House, Forge Lane, Leeds LS12 2NE.

ICP 备案号 10220084.

Follow element14

  • X
  • Facebook
  • linkedin
  • YouTube