RoadTest: Sign Up to RoadTest the Weller WXsmart Soldering Platform
Author: john.porter
Creation date:
Evaluation Type: Workshop Tools
Did you receive all parts the manufacturer stated would be included in the package?: False
What other parts do you consider comparable to this product?: There are no direct comparisons to the comprehensive WXsmart all-in-one platform. However some comparisons can be made to the Metcal CV-5210.
What were the biggest problems encountered?: The biggest issues were choosing yellow as a LED color, website inconsistencies, and issues with connectivity using the WX SmartControl software.
Detailed Review:
Weller is perhaps the most well-known and respected manufacturer of soldering equipment. Weller often leads innovation in the industry, starting with the invention of the first hand-held soldering iron and continuing with the latest state-of-the-art platform, the Weller WXsmart.

Weller presents the WXsmart platform as an all-in-one, intelligent, industrial hand soldering system - providing exceptional connectivity, traceability, and security. It’s dual channel 300-Watt power unit can support a wide array of smart devices including several irons, re-work tools, air filtration systems, and external preheating plates. Weller hits their mark easily and clearly Weller has pulled out all stops when engineering the WXsmart. The result is a modern, powerful, intuitive, intelligent, and integrated soldering/rework system that can meet or exceed any hand soldering challenge with ease.
In this review, I take a closer look at the Weller WXsmart soldering platform and explore its features, performance, and overall value while providing some comparisons to a 90-Watt Metcal GT90 and legacy Weller workhorse, the 50-Watt WESD51. I will also evaluate the security features of the platform, including a security vulnerability assessment.

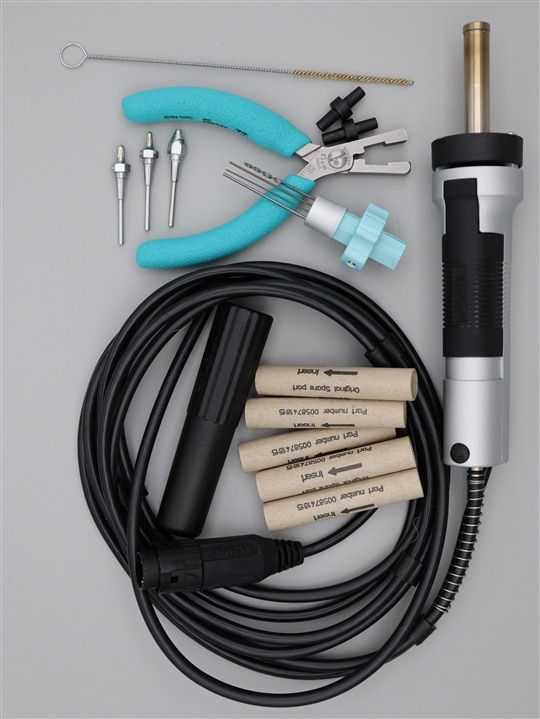
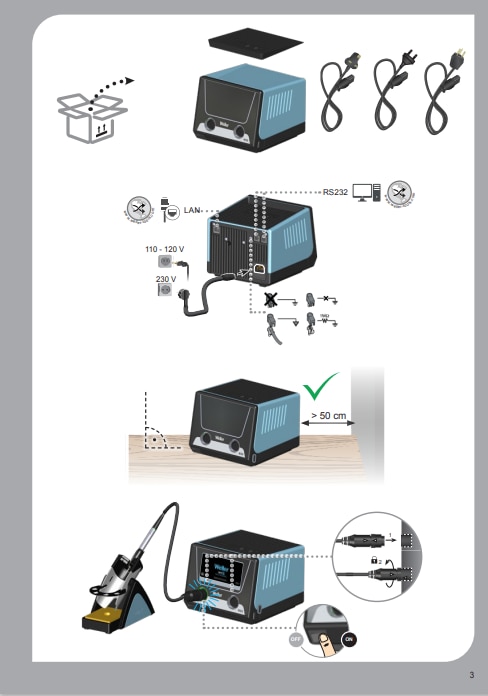
Weller provided a comprehensive WXsmart demonstration kit for this evaluation. I have made an unboxing video (here), which introduces the components and equipment of the kit. Even though I reviewed the expected contents in advance, I was still pleasantly surprised with the kit’s complete and generous assortment of equipment:
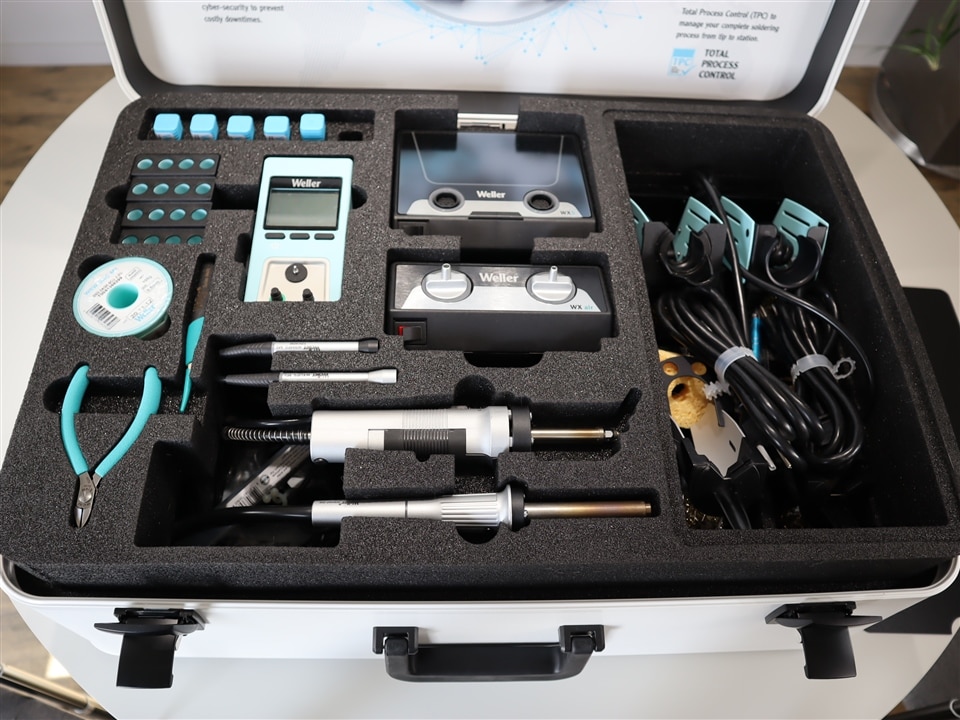

In addition to the demo kit, Weller thoughtfully provided additional equipment:

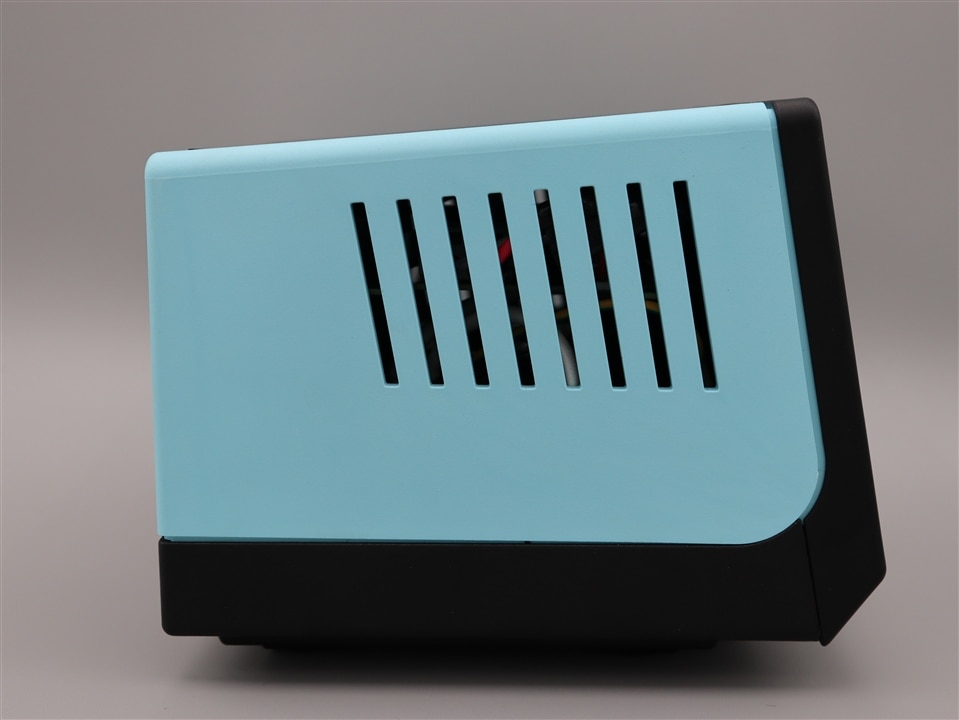
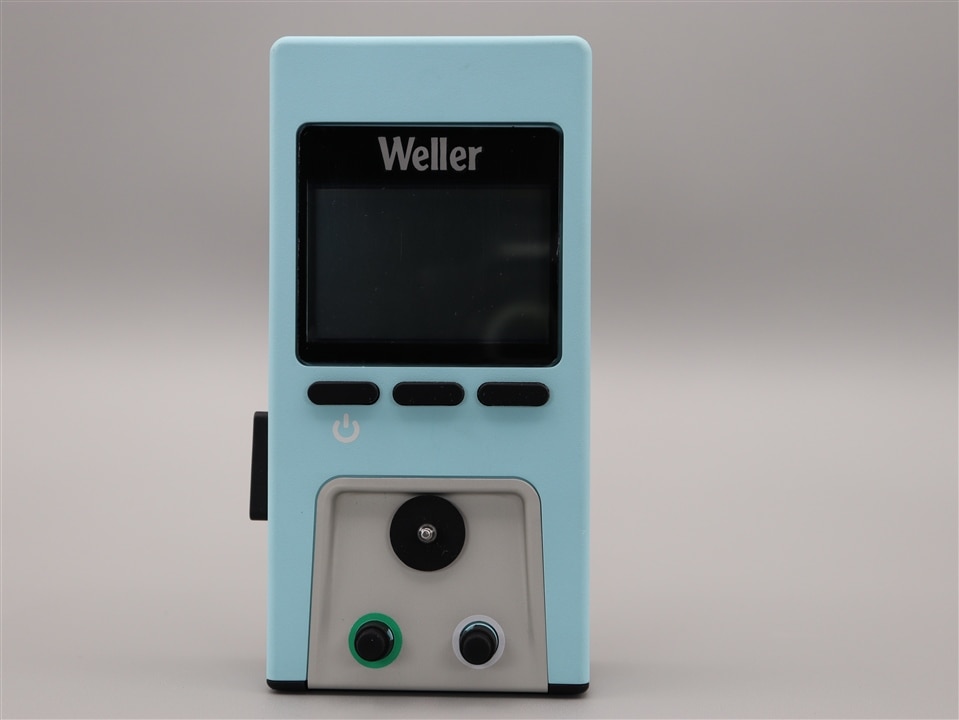
The WXS 300 power unit is the heart of the system and enables intelligent control of all connected devices. Weighing in at nearly 10lbs, this beast is better placed on your bench than in your pocket!

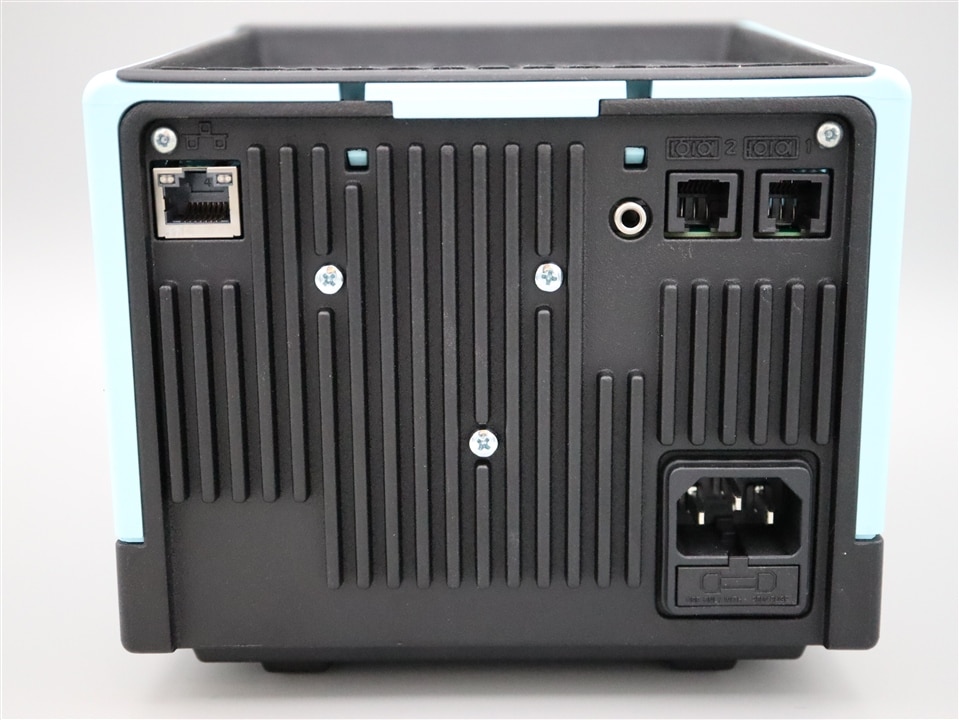
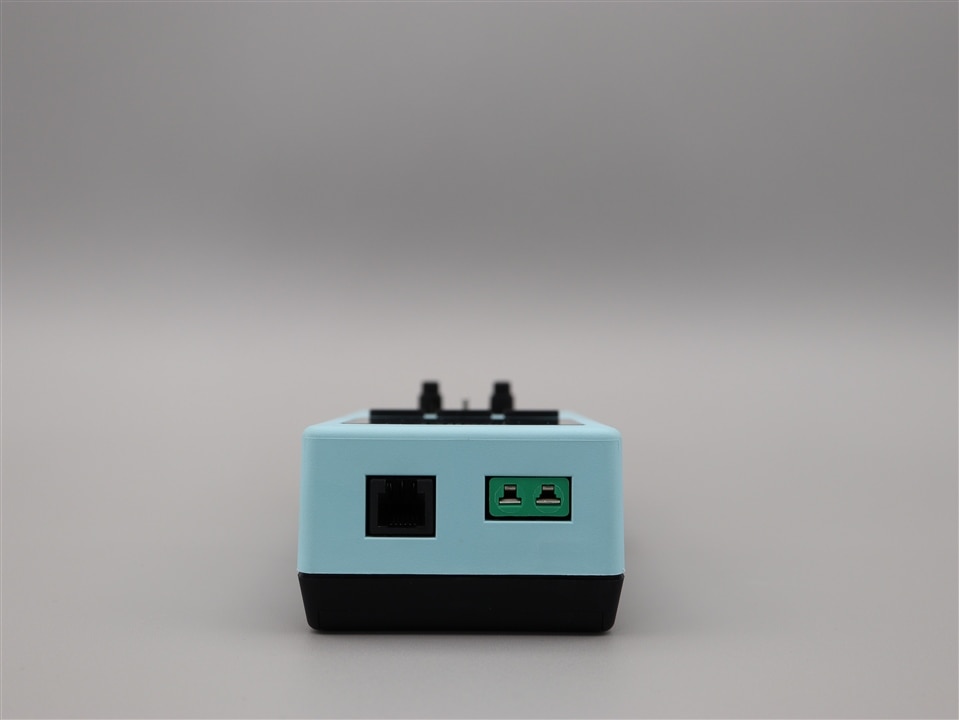
Connectivity is easy, there are two DIN connectors on the front for the hand tools. On the back are female outlets for power, ethernet, a grounding connector and two RJ6 ports that connect serial devices to the WXS 300, importantly the WXair module and the WCU temperature measure/calibration device. Nearly the entire back is a heat sink.
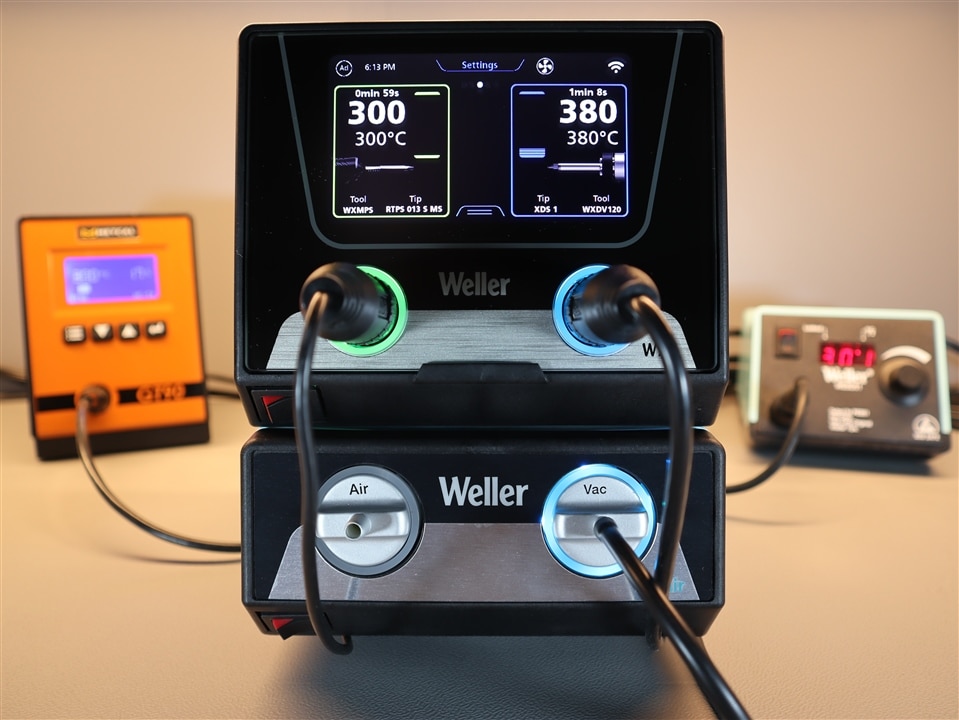
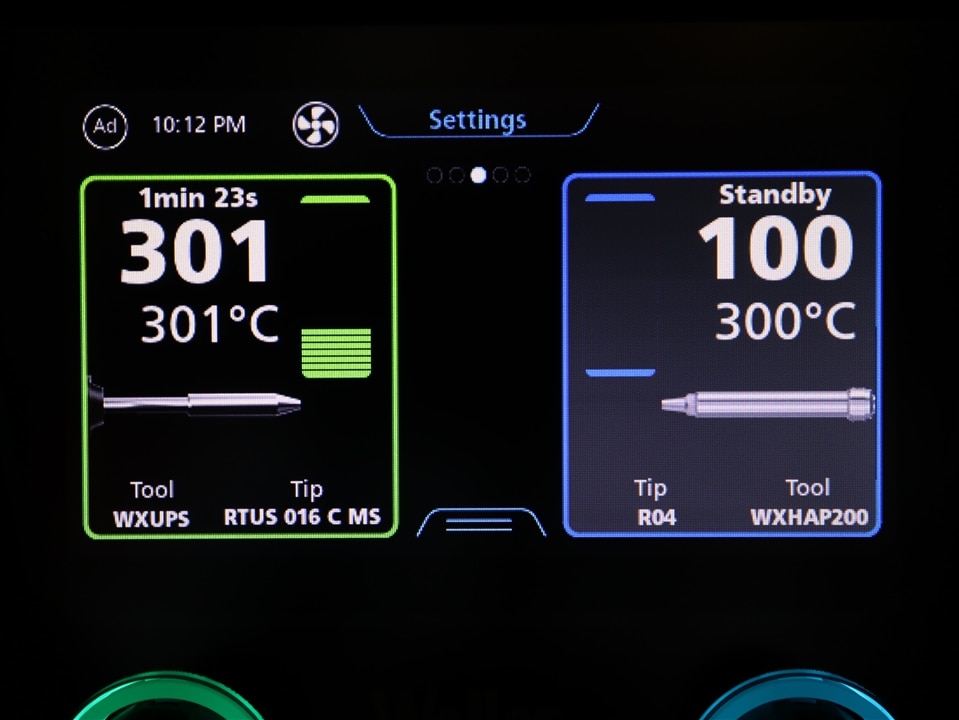
Once on, front and center is the bright 4.3” capacitive TFT color display. The informative display is crisp, nicely set out and responds quickly to a screen press or swipe. The screen is ESD safe and heat resistant for additional protection.

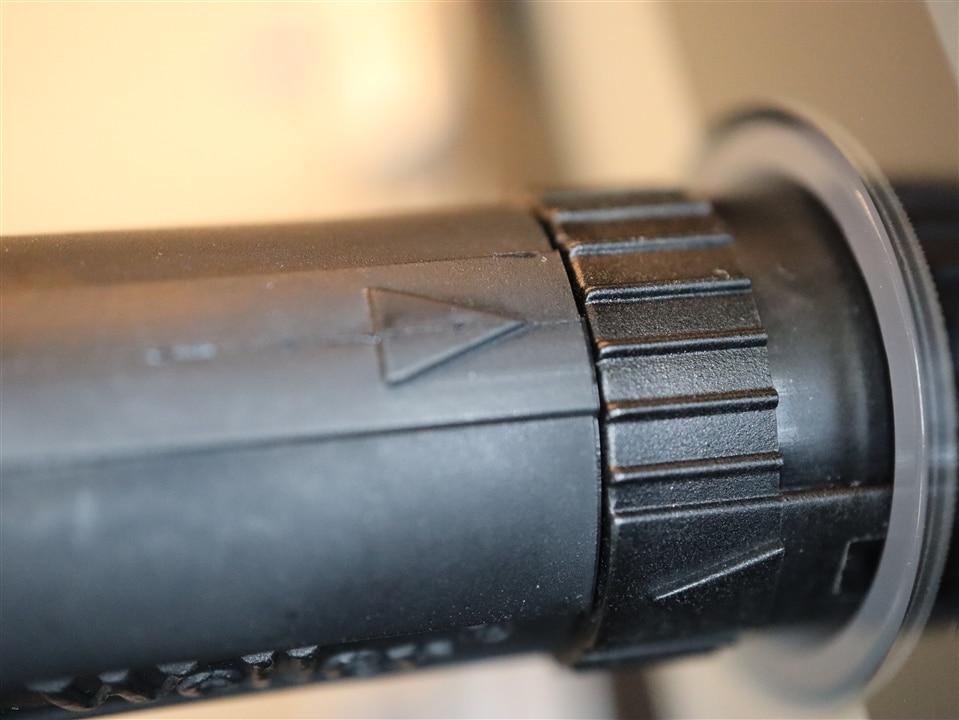
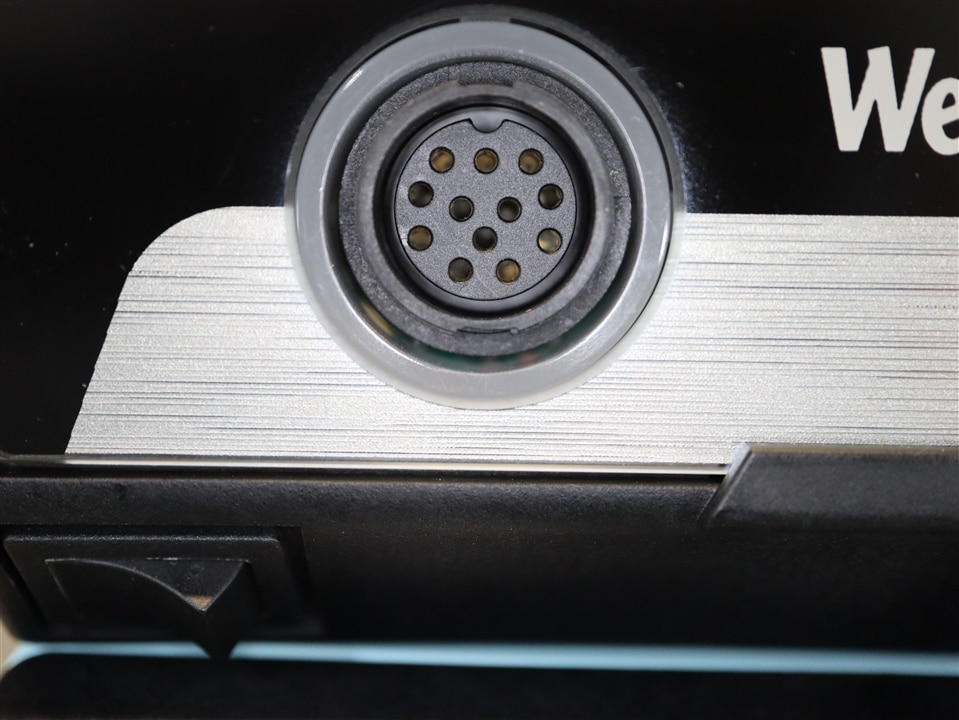
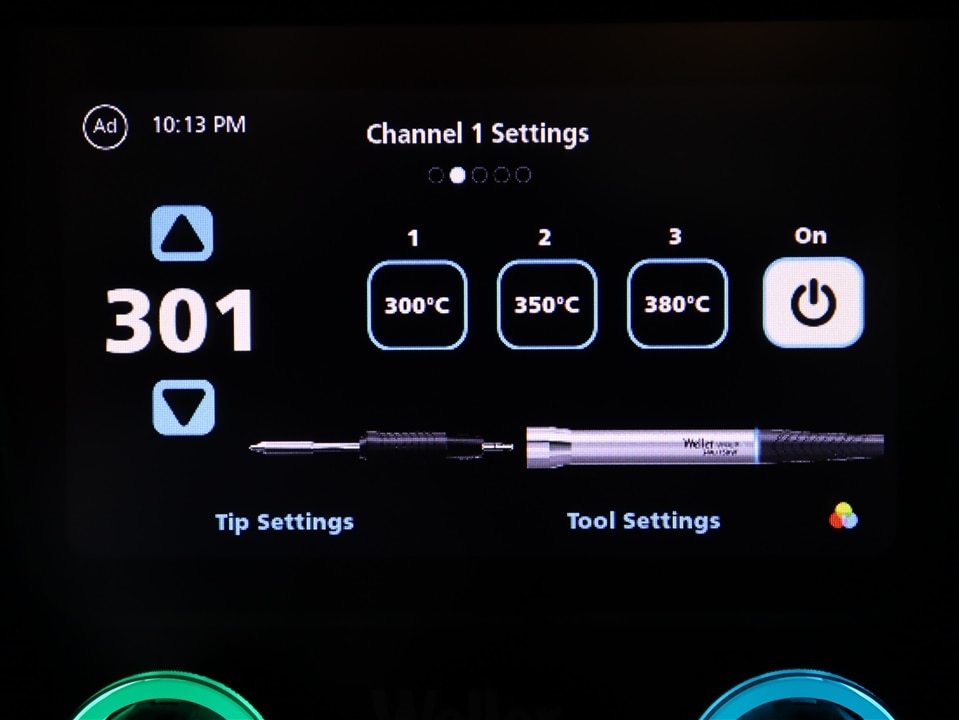
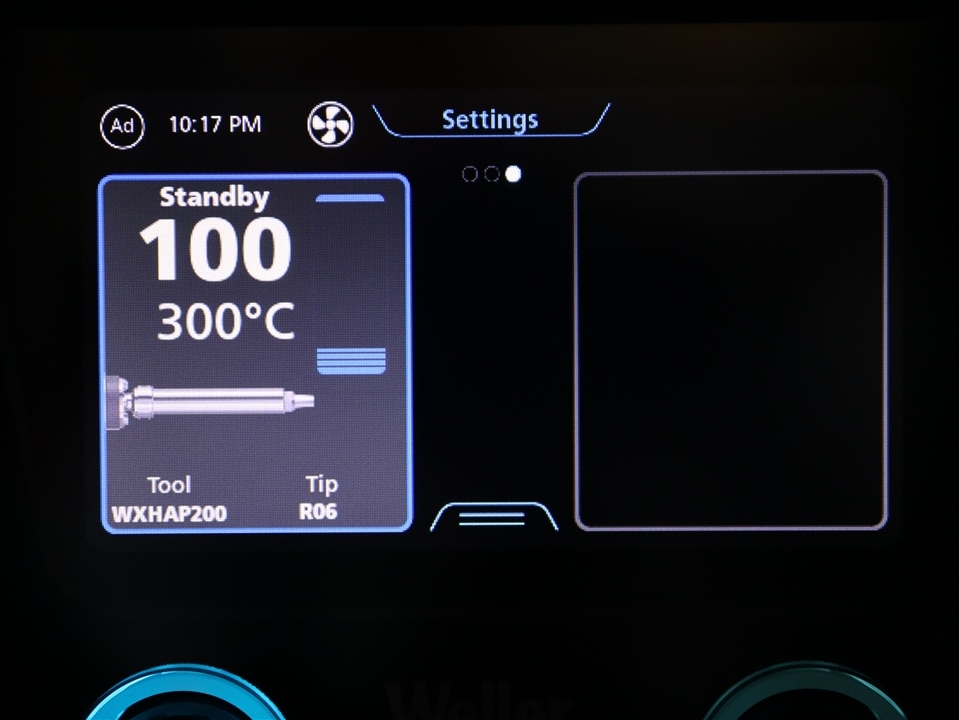
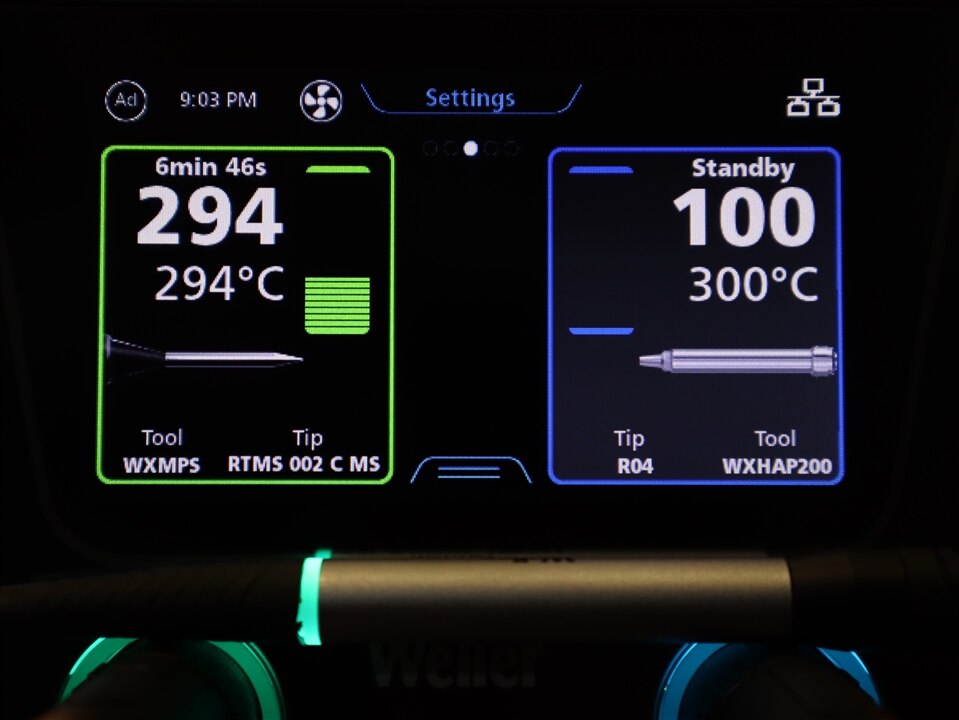
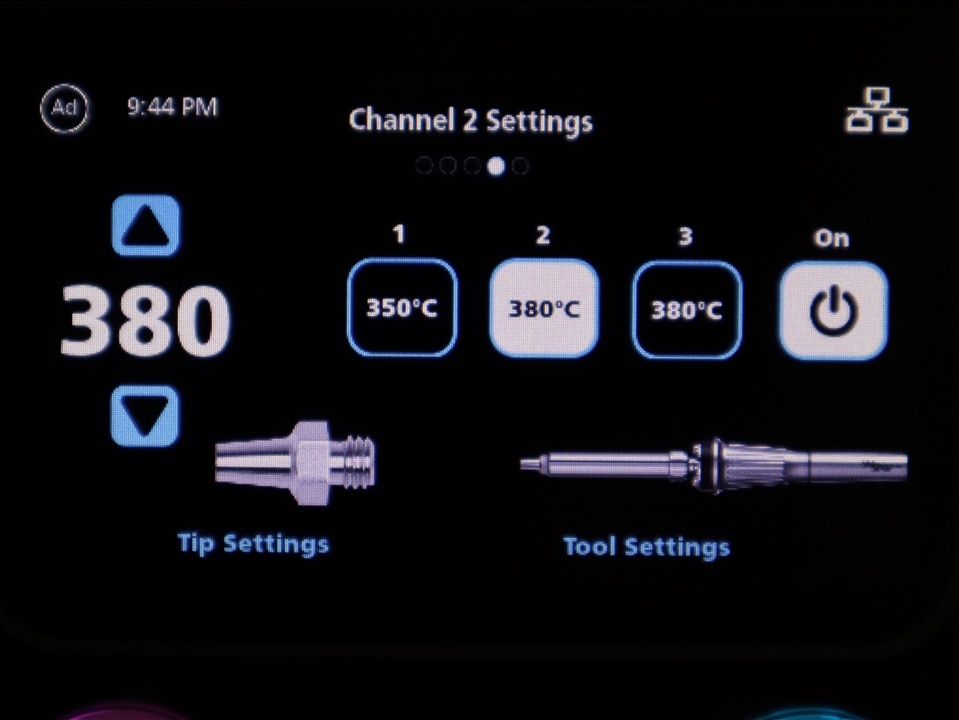
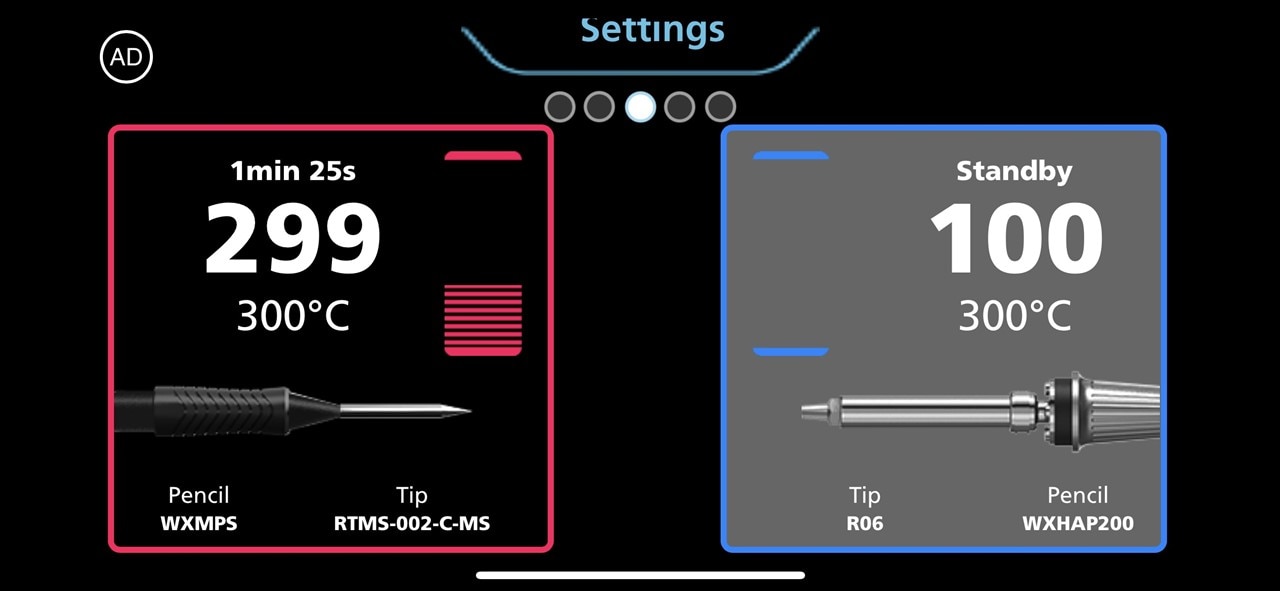
The main display provides status information, it indicates what is connected and provides additional detail for the two devices connected to the front 12-pin DIN ports. Within each colored square matching the tool’s color ring, you can find the current/set temperature, tip model, tool model, picture, and an informative power graph. The irons plug straight in and a twist of the ring locks them in place, though it normally takes two hands for this operation to ensure the arrows are in alignment when plugging the handpiece in.

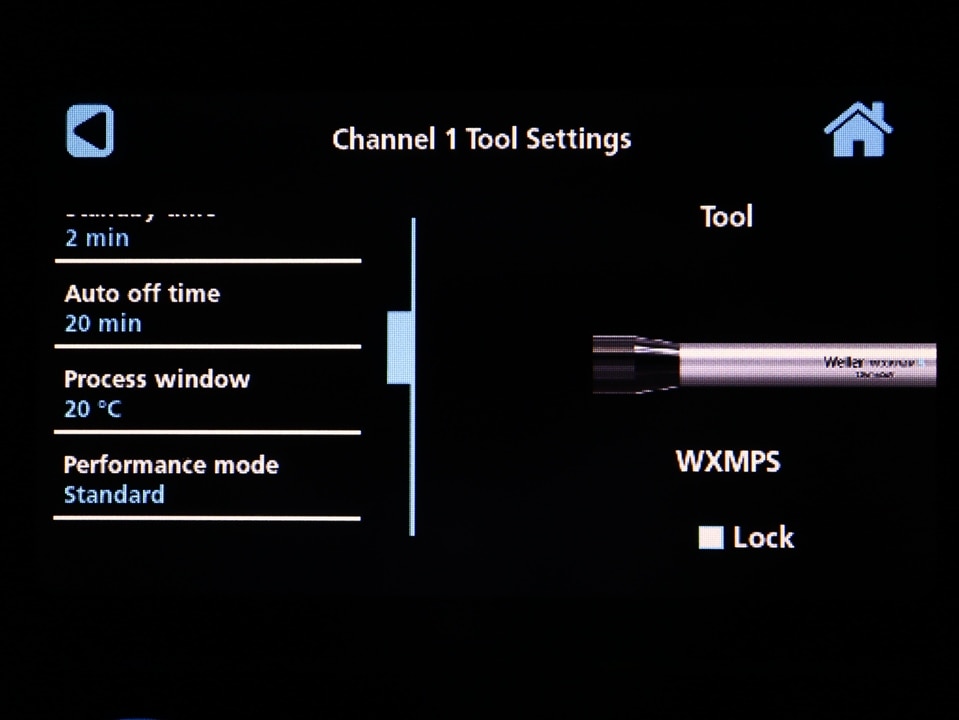
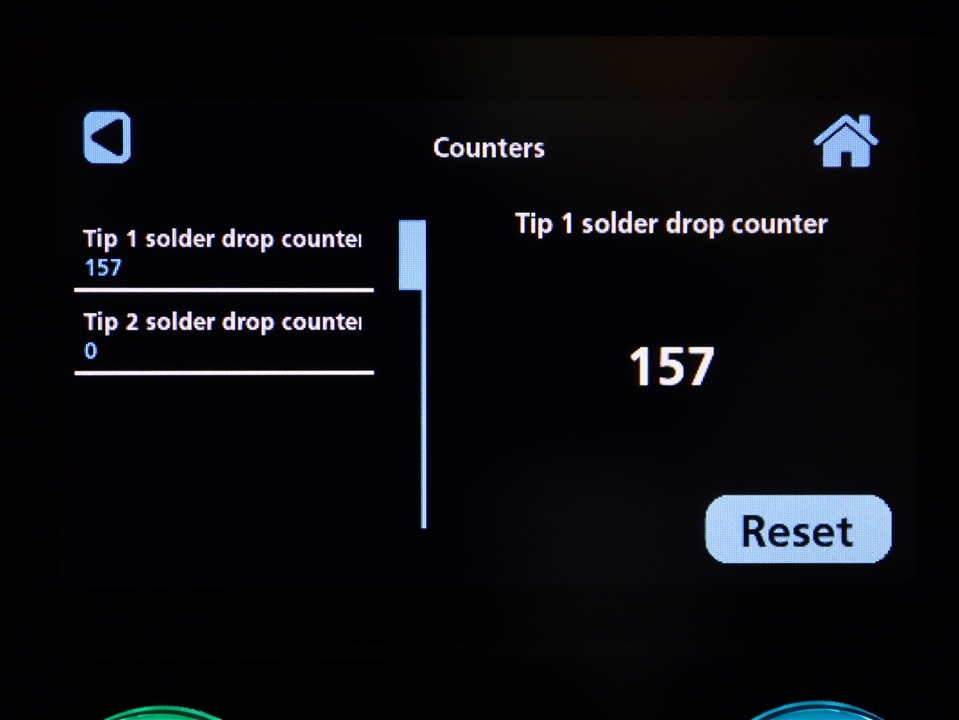
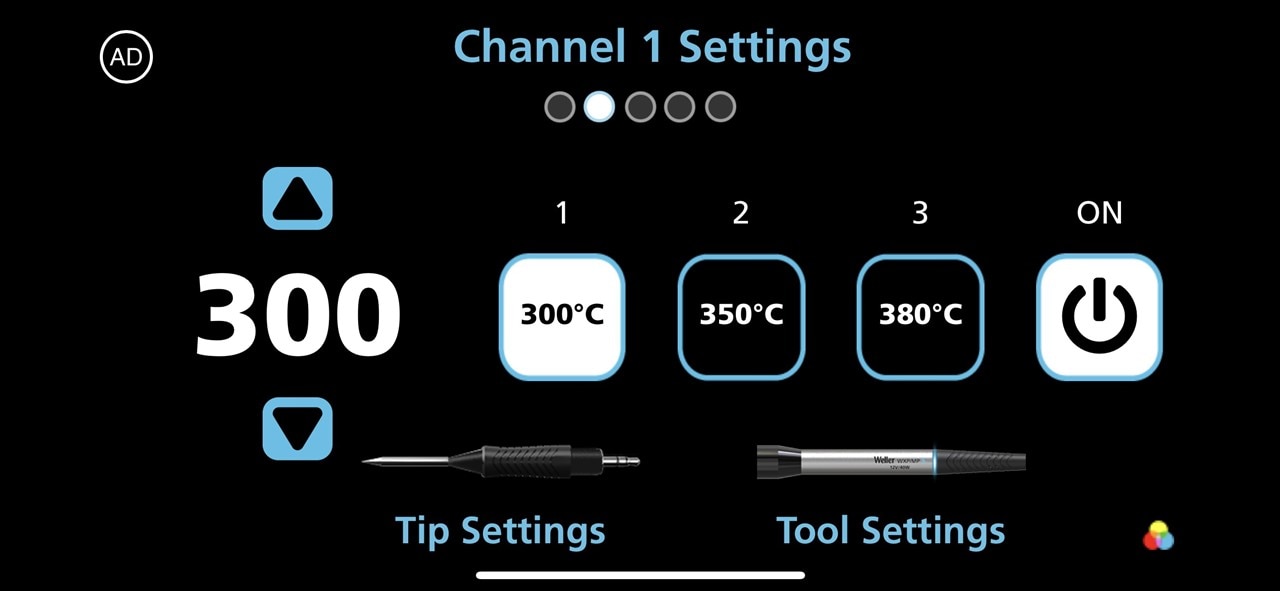
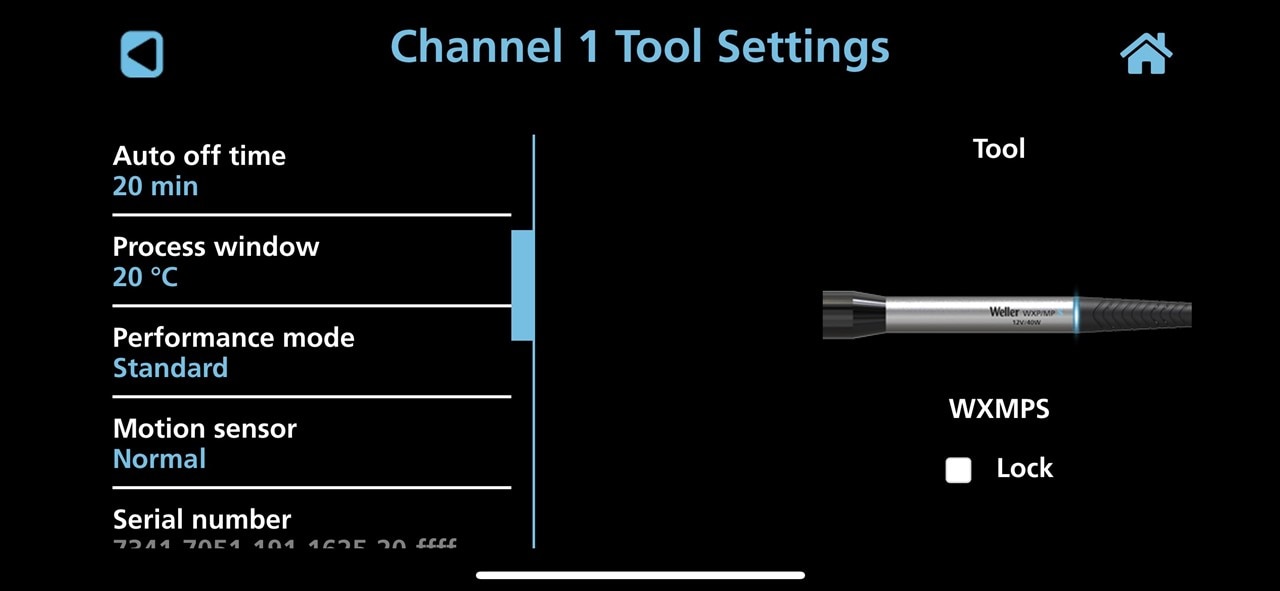
Swiping left will bring up the detailed settings screen for the tool connected to channel one. Here you can adjust the set temperature, select or set a pre-set, or configure the tool and smart tip along with detailed tracking information. Every conceivable detail and setting is available - from offset and standby settings, to drop counters, device color and calibration dates.

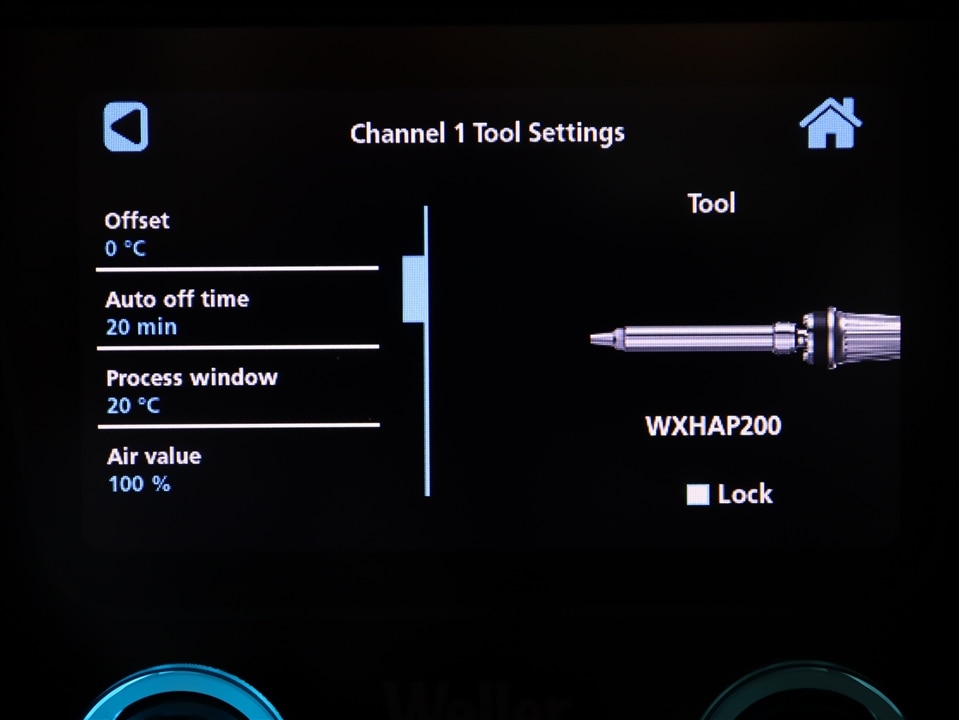
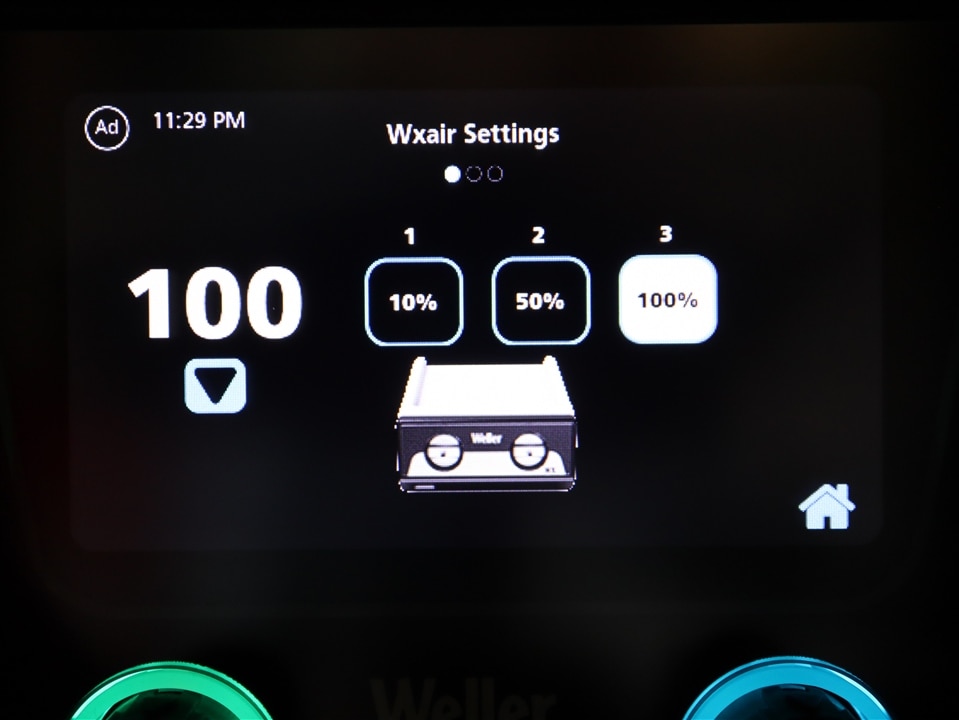
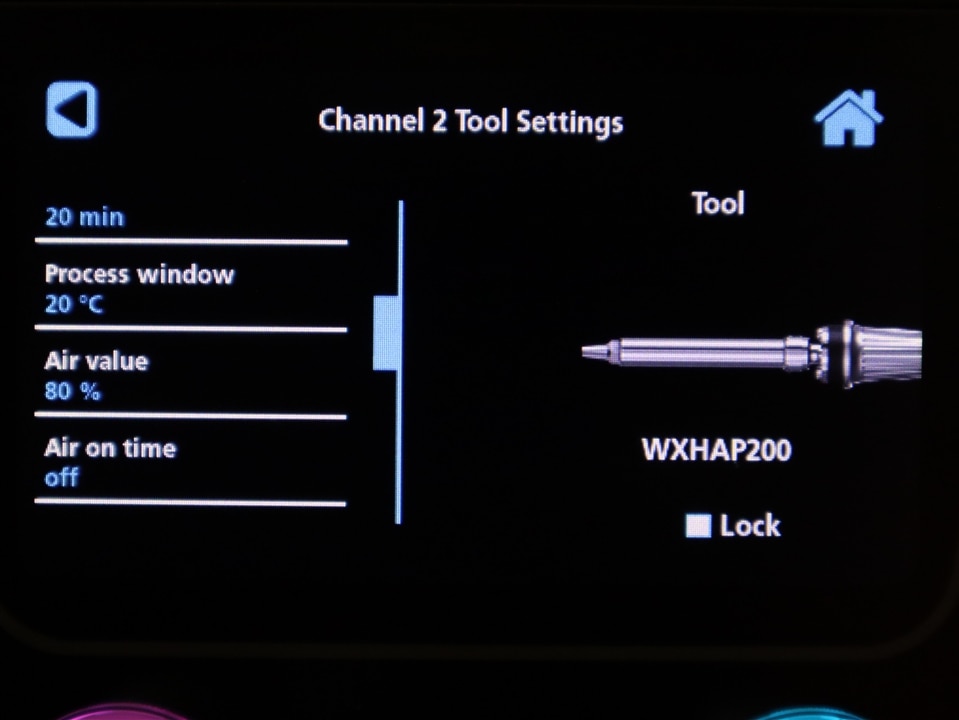
Switching handsets or tips dynamically changes the intelligent display and configurations in real-time. For example, connecting the WXHAP air tool changes the displays and presents different options including an adjustment for air value (in %).
The color for the irons can be selected here from a palette of 16, which will change the display for the rings on the iron, the ring surrounding the DIN connector and the channel's square on the control unit display. This choice is saved to the iron so that the color follows as the iron is plugged back in regardless of which channel is used – a handy visual cue. The air tools are always blue, so it is probably best to choose other colors for the two soldering handpieces.
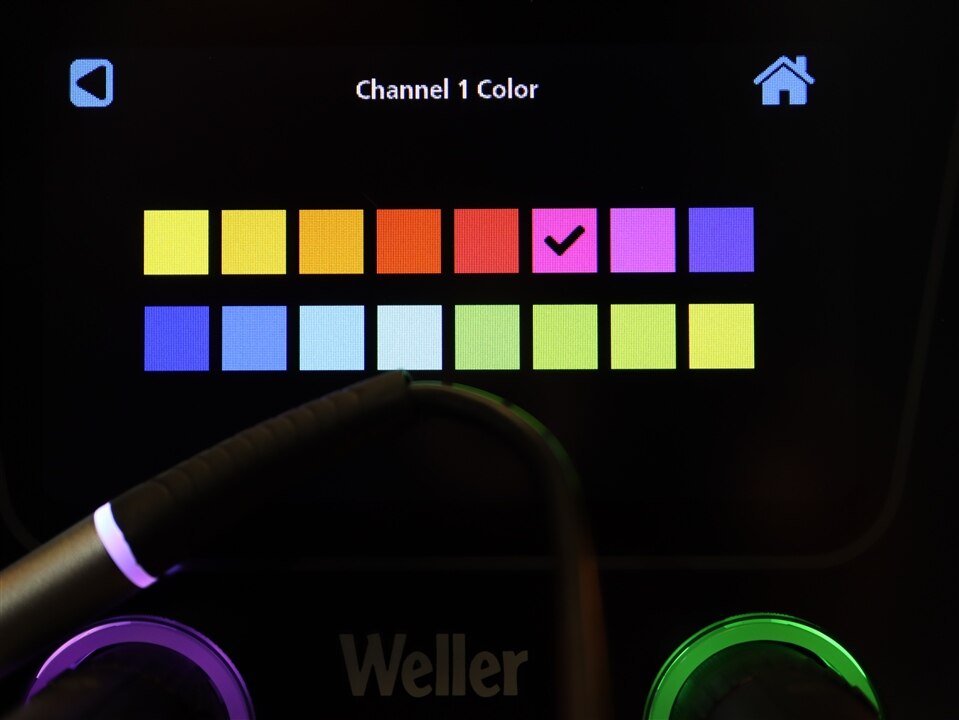
Bug
One of only a few minor bugs I discovered was here. Most of my test equipment has yellow for channel one, and green for channel two - I tried to set the WXsmart to match this pattern. However, this was not to be. Green was ok. Yellow is an option and changes the TFT display properly, however this selection will display the iron’s rings as green instead of yellow. To get yellow rings, I selected the orange display. It seems the LEDs are reacting somewhat strangely to the RGB codes. Ultimately, I gave up on a yellow channel one - the screen and rings would not match if yellow was involved in any way. The other colors display closely as expected.


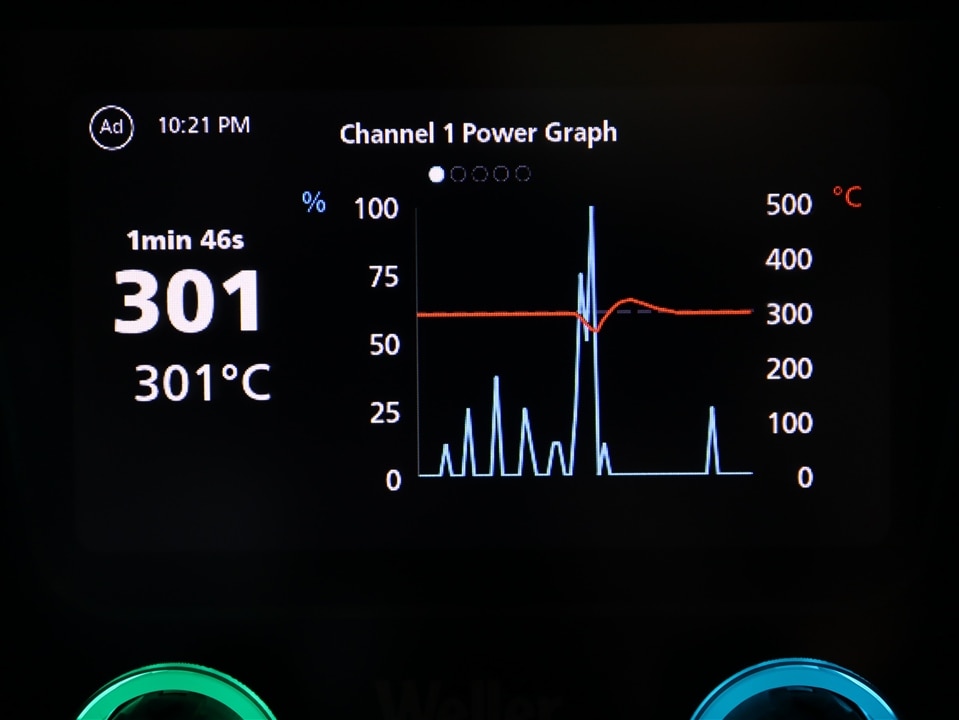
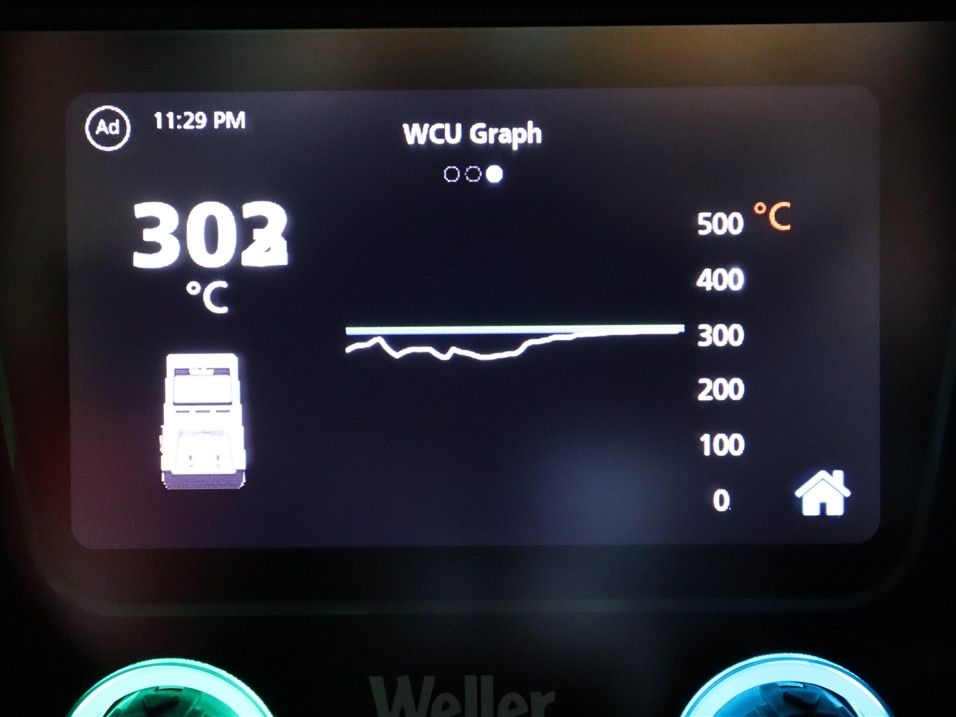
Another swipe left displays the channel one power and temperature graph, so you can visualize how the iron is performing.
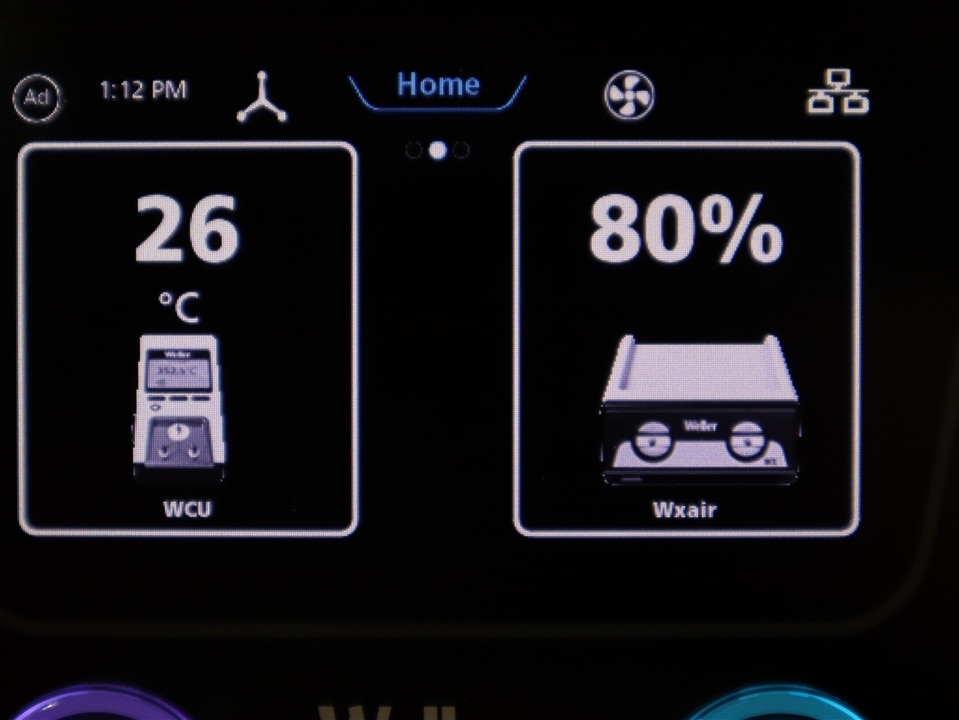
Swiping right from the main screen takes you to channel two and an identical set of screens. Pressing the ‘hamburger’ button at the bottom of the main screen will take you to the page for serial connected devices including a temperature chart for the WCU temperature/calibration device and a settings page for the WXair.
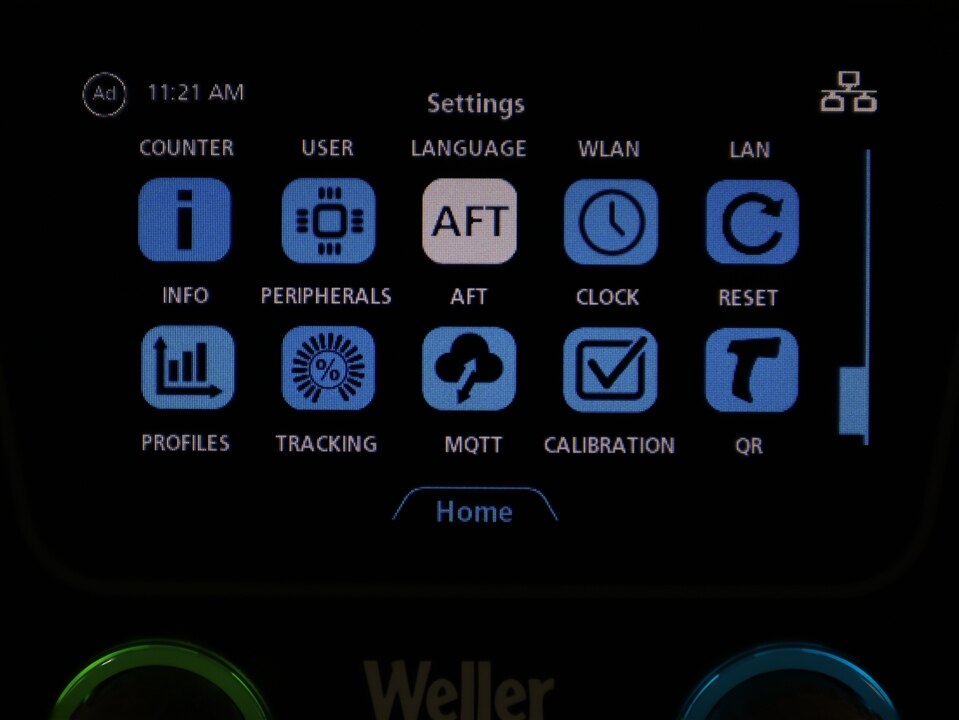
The settings button at the top of the main page opens an expansive menu.

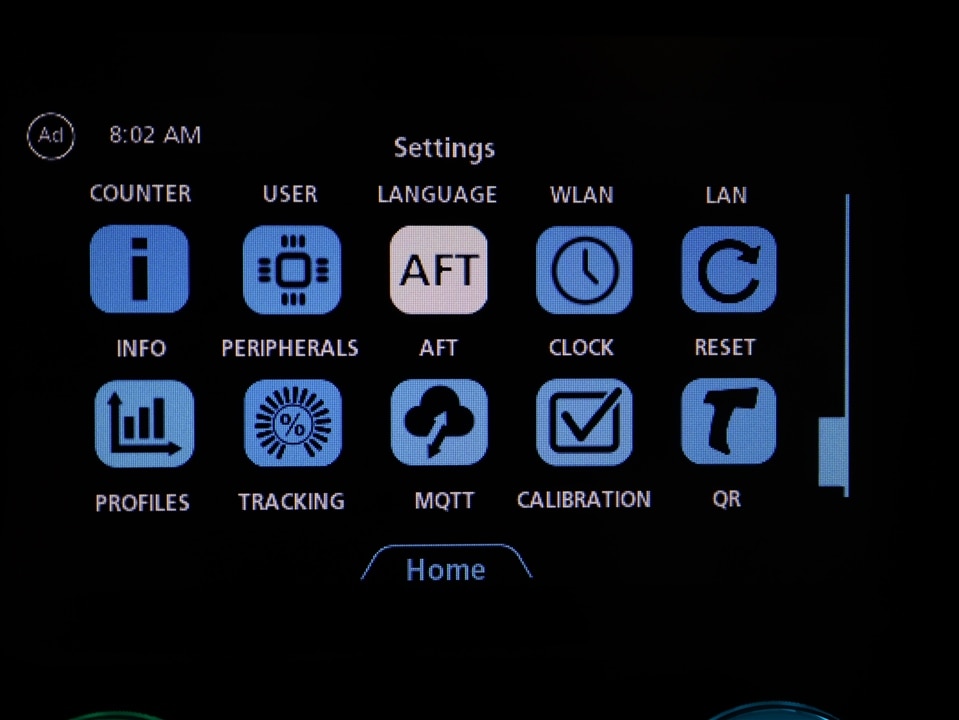
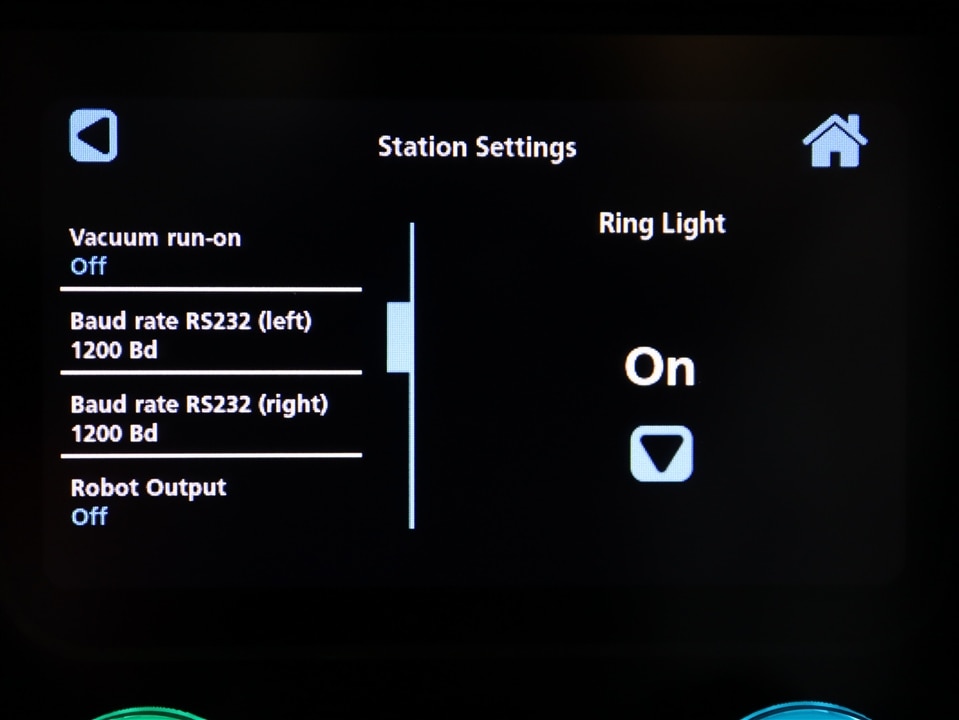
Here you can display or set most of the station's parameters:
Set station-wide settings

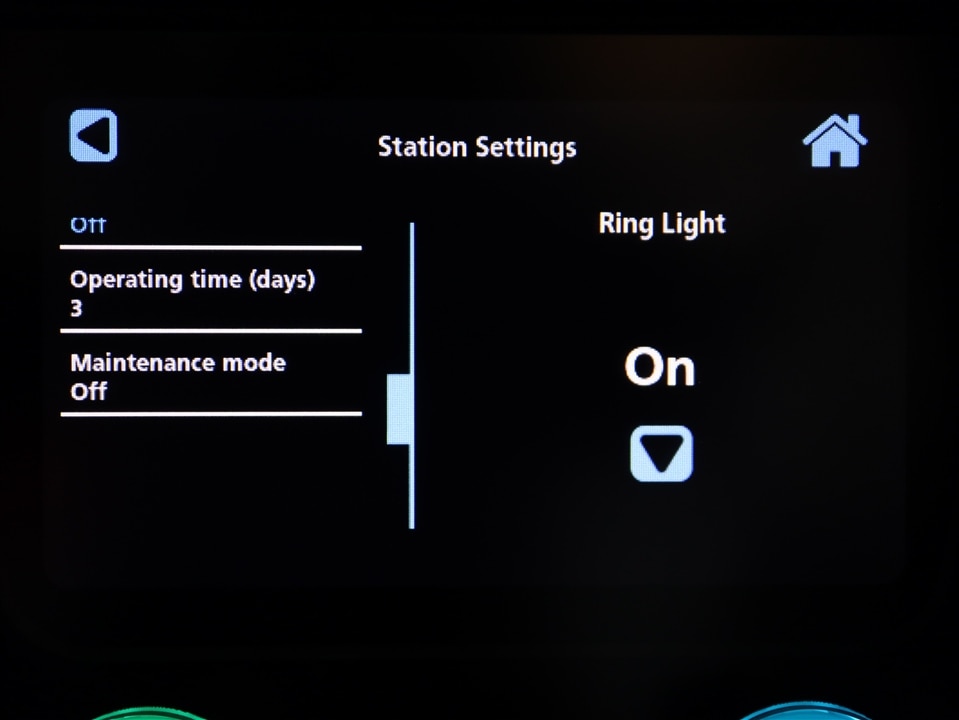
Configure tools and tips


Enter new user details and restrictions, or change the active user


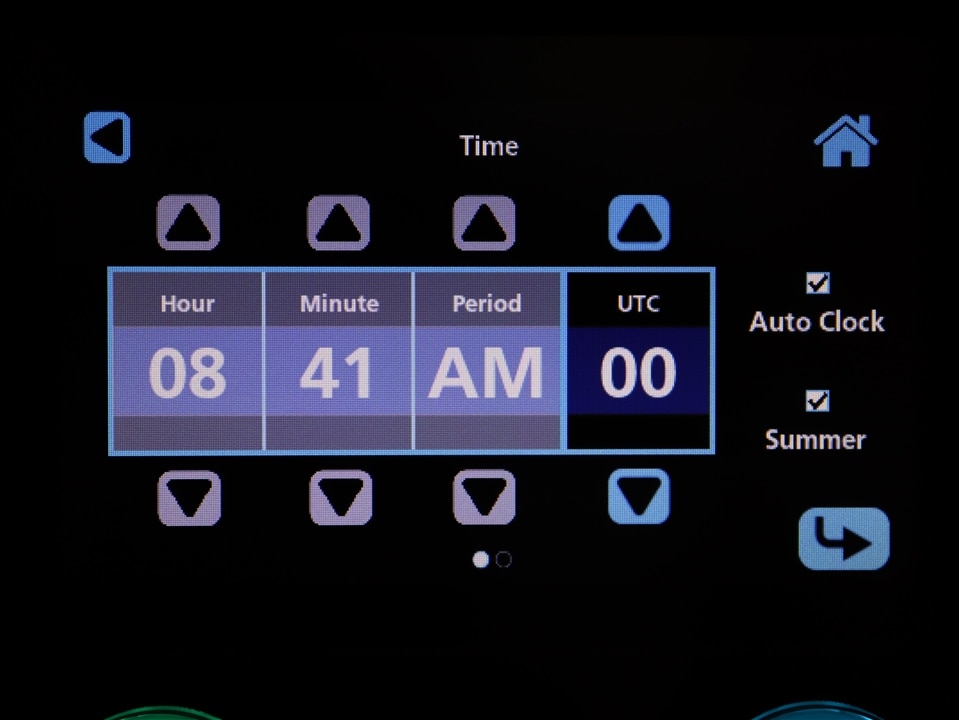
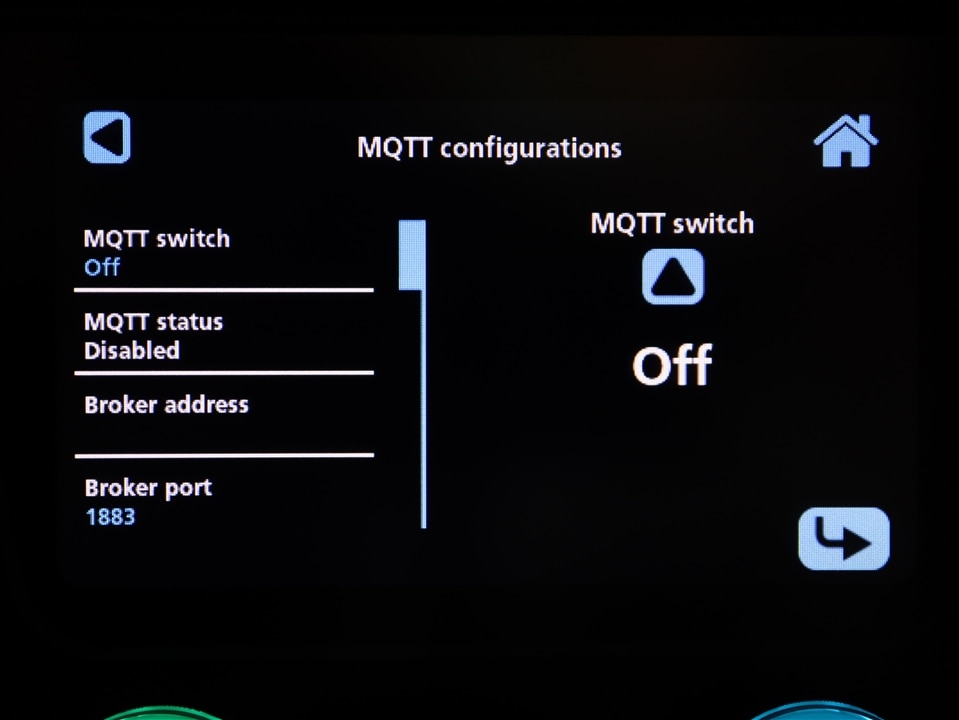
Set the language, date, networking and MQTT details


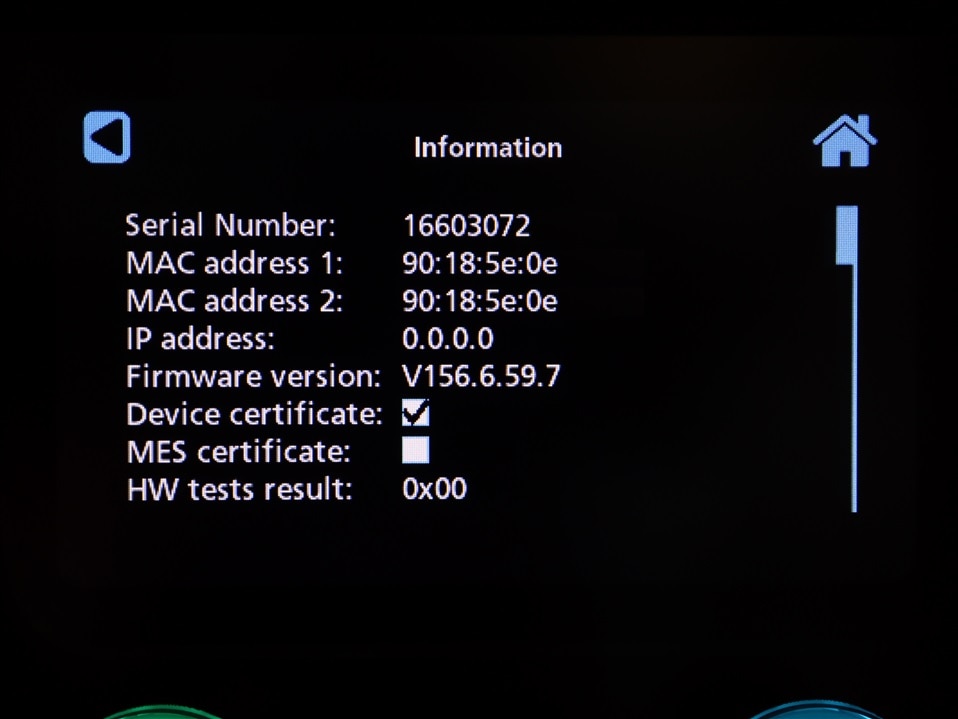
and display information, reset the station and update firmware

With an optional software upgrade, additional controls appear here for temperature/time profiles, solder joint time tracking and to enforce re-calibration intervals. The upgrade also enables QR codes which, with an external scanner, promise to allow rapid reconfiguration of the WXsmart’s settings to suit the task at hand (more on these features later)

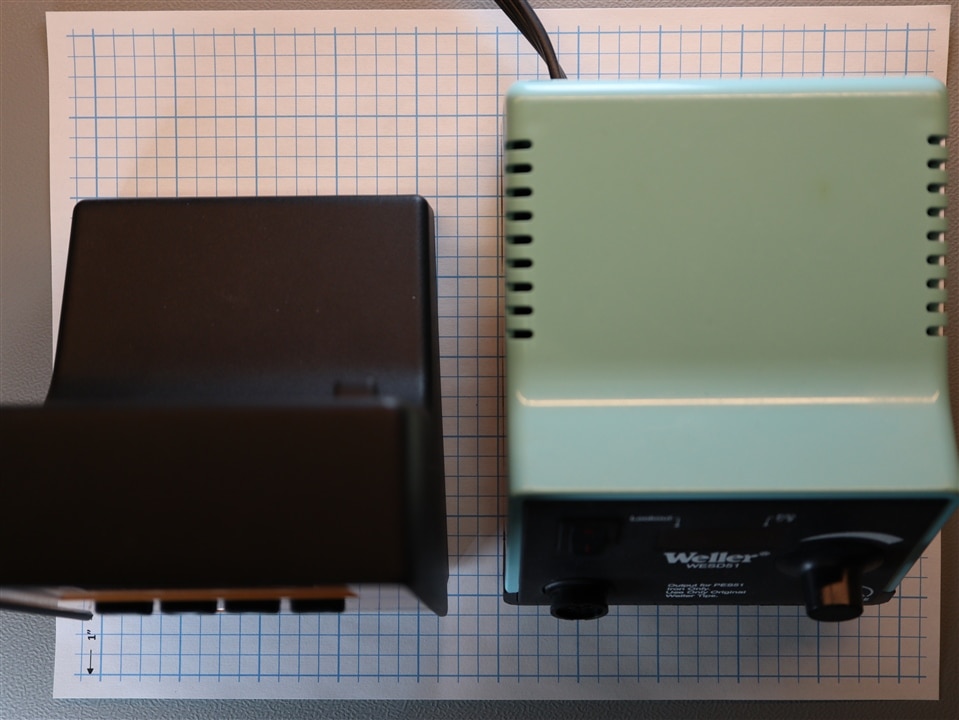
The WXsmart power unit significantly outclasses my comparison power units. The legacy Weller WESD51 offers only temperature control with a single LED display and dial. I previously reviewed the Metcal GT90 (here), which provides basic functions for temperature pre-sets, energy management and administrative control displayed on a 2.5” monochrome LCD. The larger footprint of the WXsmart is understandable - considering it is an all-in-one unit, the footprint is much smaller than four individual units would be.
I found the WXsmart power unit to be highly customizable and informative. Every setting I could think of using was readily available. Relevant information is displayed clearly. The Weller WXsmart 300 Power Unit has impressive, expansive capabilities while ensuring complexity is concealed with a presentation that is intuitive and easy-to-use.
The 40W WXMPS MS and 150W WXUPS MS irons are a great complement to the intelligent power unit. They are both very light and easy to hold. They deliver a soldering experience like writing with a finely crafted metal pencil. The other ‘pencil’ irons I have been using suddenly feel cumbersome in comparison to these new tools. A burn-proof silicone cable completes each iron.


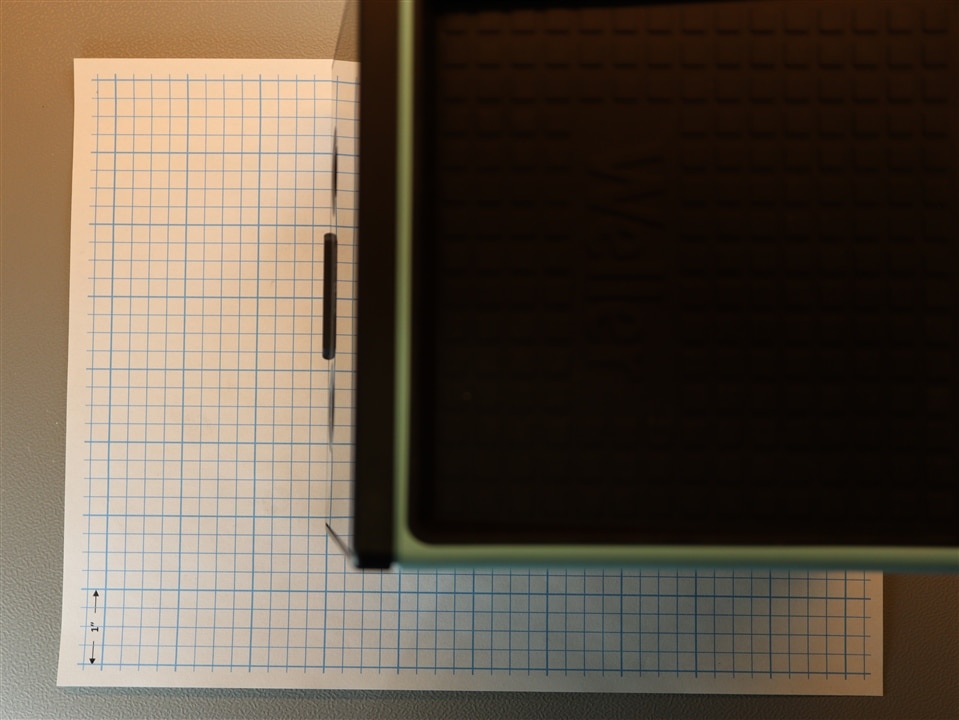
The distance from grip to tip varies based on the tip in use, however for the 40W iron, the distance is approximately 1-1/4” - nearly 1” shorter than the Metcal and 2” shorter than the WESD51. This allowed me to get very close to the solder joint with superior tip control and faster soldering. After a long solder session, the grip would get warm but remained comfortable.

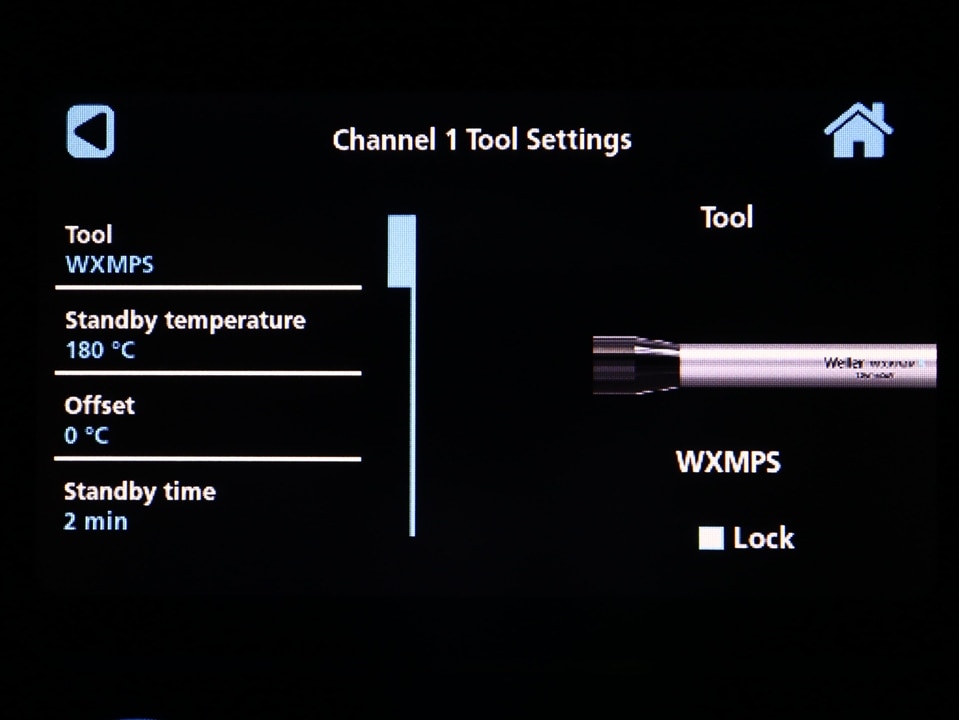
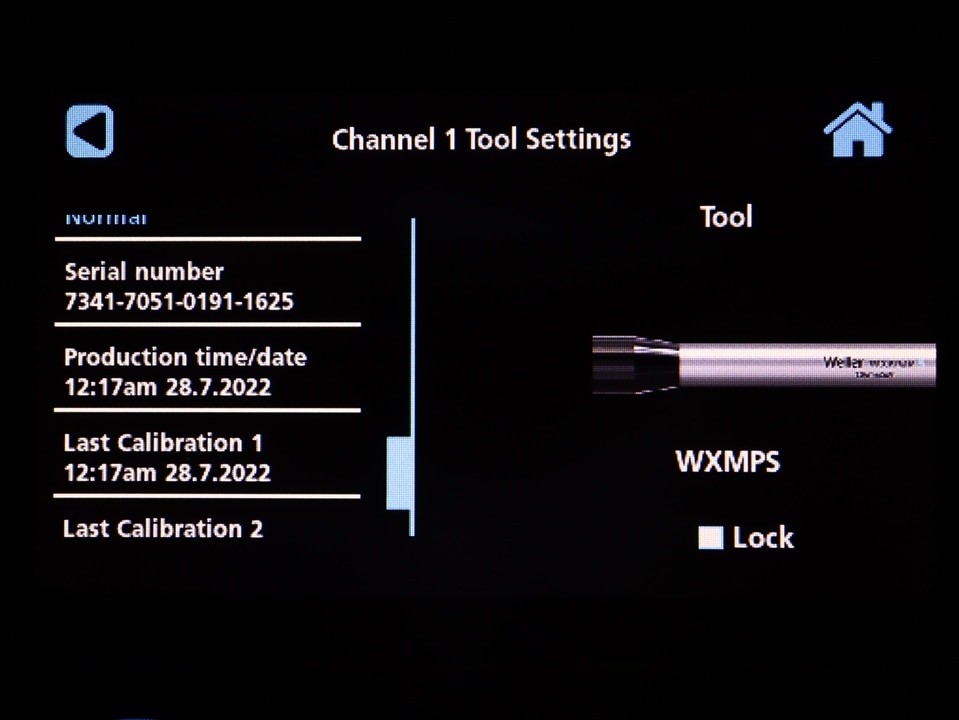
Each handpiece stores settings for tool offset, ring color, standby temperature, standby/off times, performance mode (high/normal/low) and motion sensitivity. They also store tracking information specific to the handpiece such as firmware, energy consumed, serial number and calibration dates. These settings follow the handpiece and are not bound to the channel on the station, allowing maximum flexibility during tool changes and configurations.
I am extremely impressed with the rapid heat up and recover times of these irons and tips. 50°C - 150°C in under 3 seconds for the 40W iron and 7 seconds for the 150W iron using the larger tips. Recovery times were much quicker. Below, I present videos from that demonstrate the rapid heat up of the two Weller irons along with the Metcal GT90 and legacy Weller WESD51. The Metcal boots up 2.5 seconds faster than the Weller, however the Weller irons quickly overtake and handily beat the Metcal to 300°C.
The following video demonstrates how quickly the Weller WXMPS 40 Watt iron melts Sn63Pb37 solder which is wrapped around the tip.
The legacy WESD51 has no standby option, and I had disabled the GT90 standby to ensure I was not waiting for the iron to be ready. With the WXsmart platform, it is now practical to use a short standby timeout - the irons will reliably reach temperature before I can move them from the safety rest to my work.
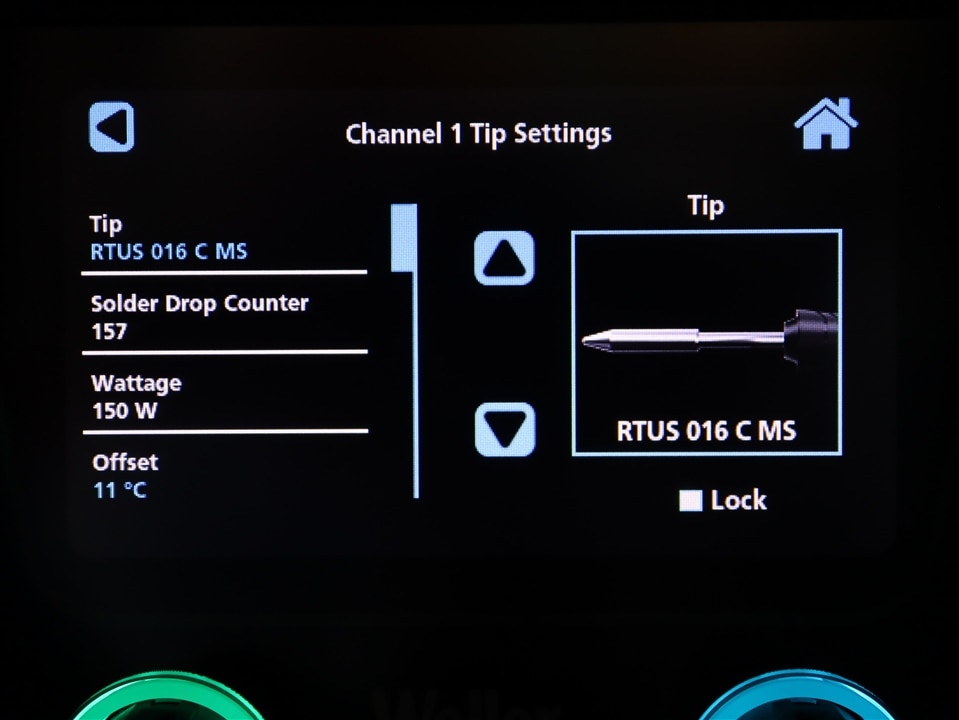
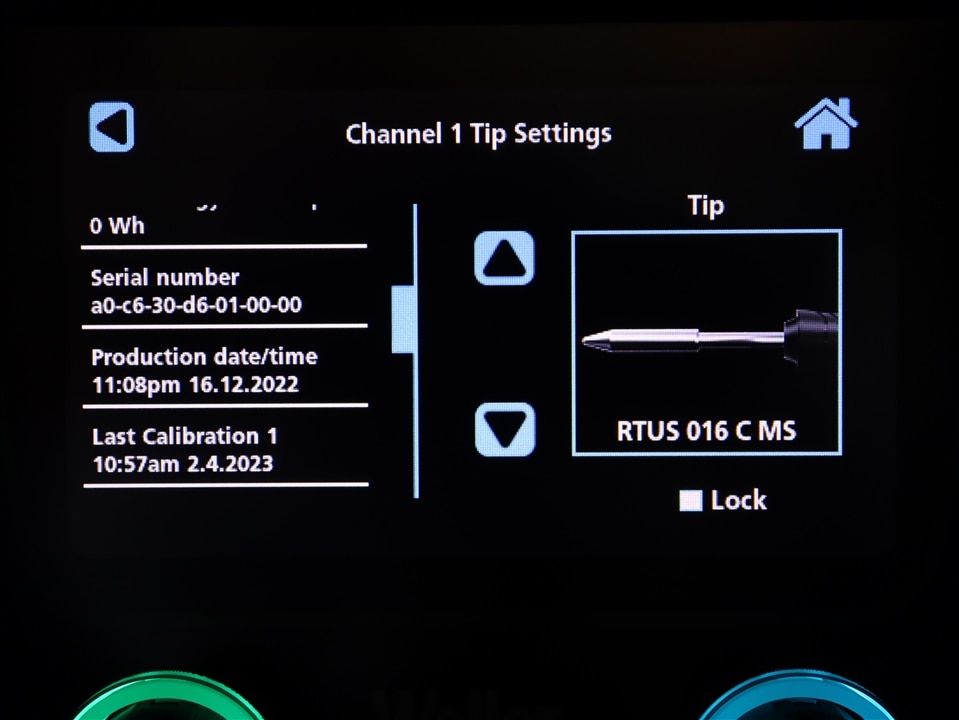
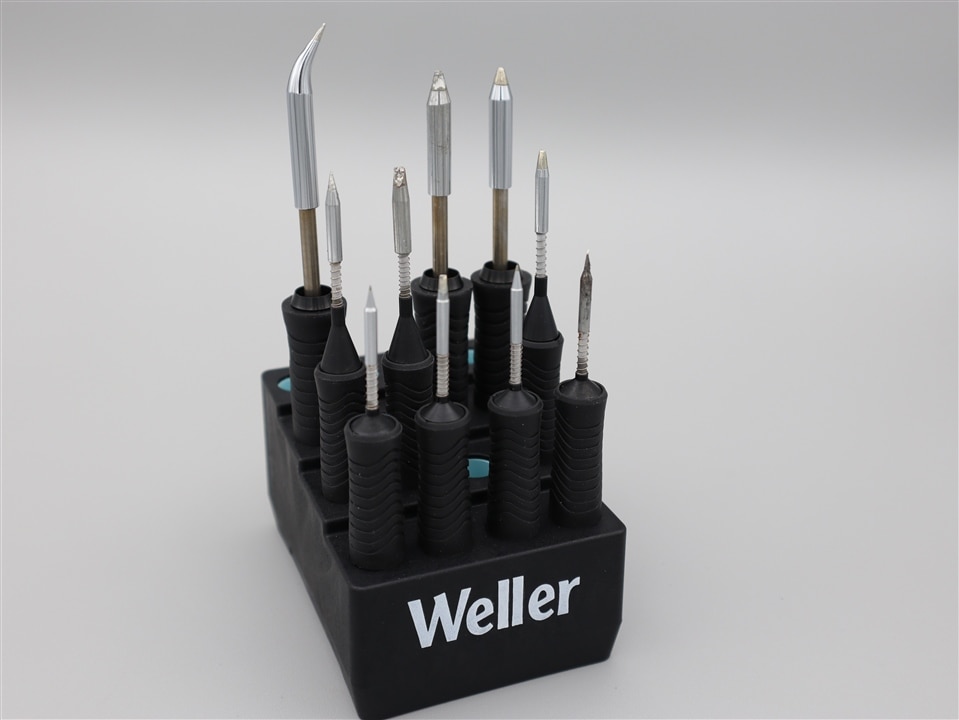
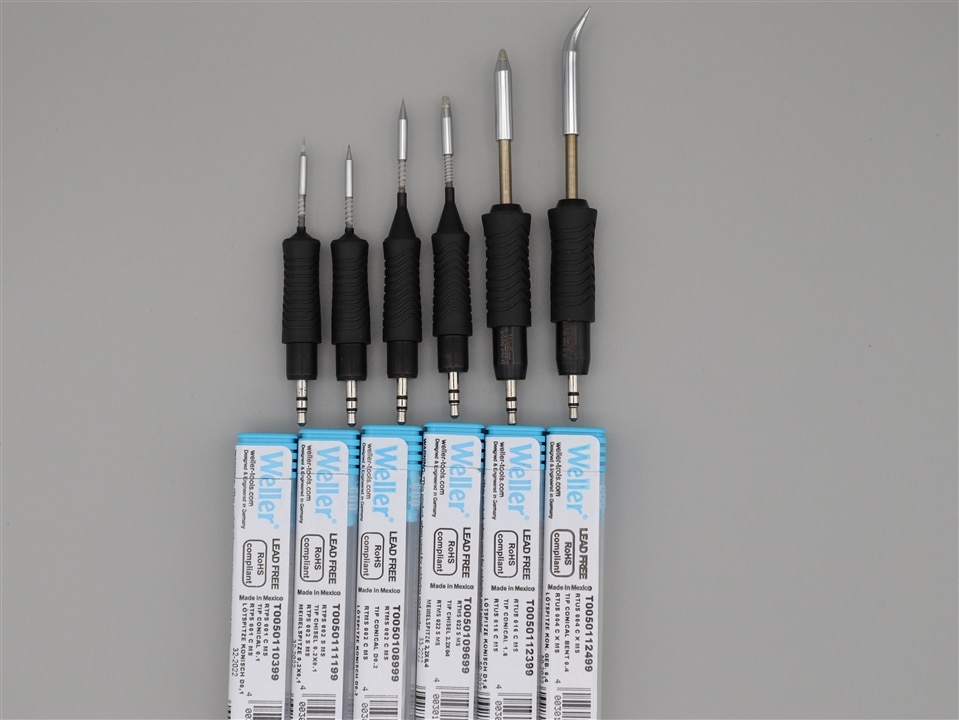
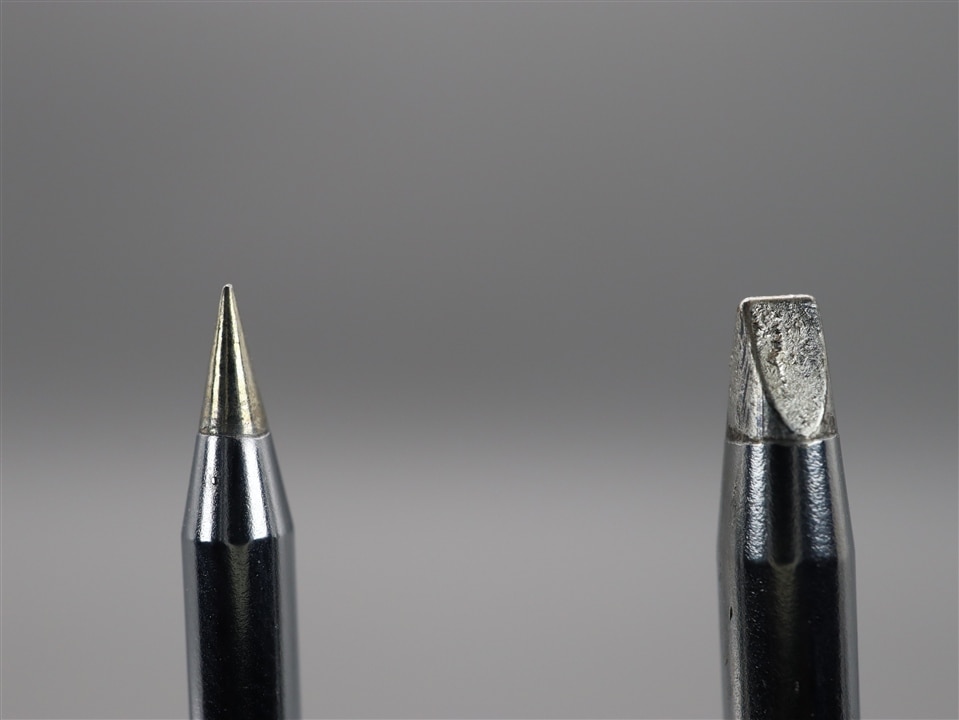
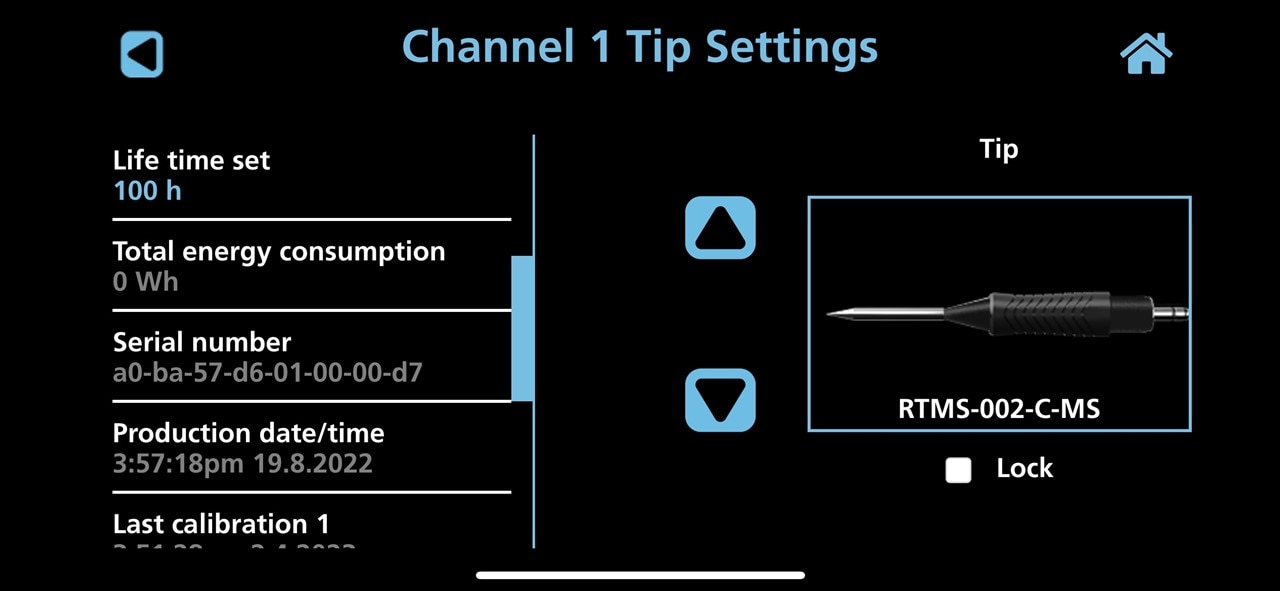
For this review, Weller included a tip stand and a generous choice of smart RT active tips to experiment with, I did tend to favor the RTPS013S and RTMS015S chisel tips for most applications. Like the handpieces, the tips store tip specific information such as solder drop counter, serial number, energy consumed and calibration dates. Combined with the software logging capabilities, full traceability is maintained from iron right down to each individual tip. The setting of a tip offset is stored in the tip which is separate from the one stored on the handpiece. I discovered that during auto calibration with the WCU calibration unit, the tip offset will be automatically configured, and the handpiece offset must be set manually. The tips for the WESD51 and GT90 are simply metal and have no intelligence nor traceability.


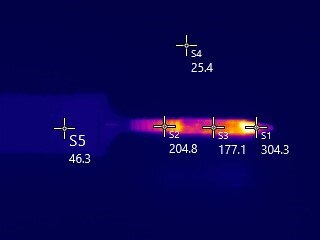
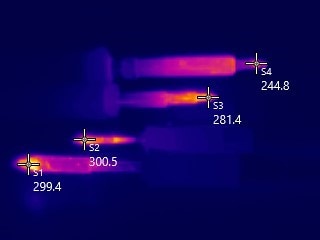
Using a Keysight thermal camera, I was able to capture some close thermal distribution images. In the 3rd image, four irons are displayed - from top to bottom are irons for the: WESD51, GT90, WXMPS, WXUPS.

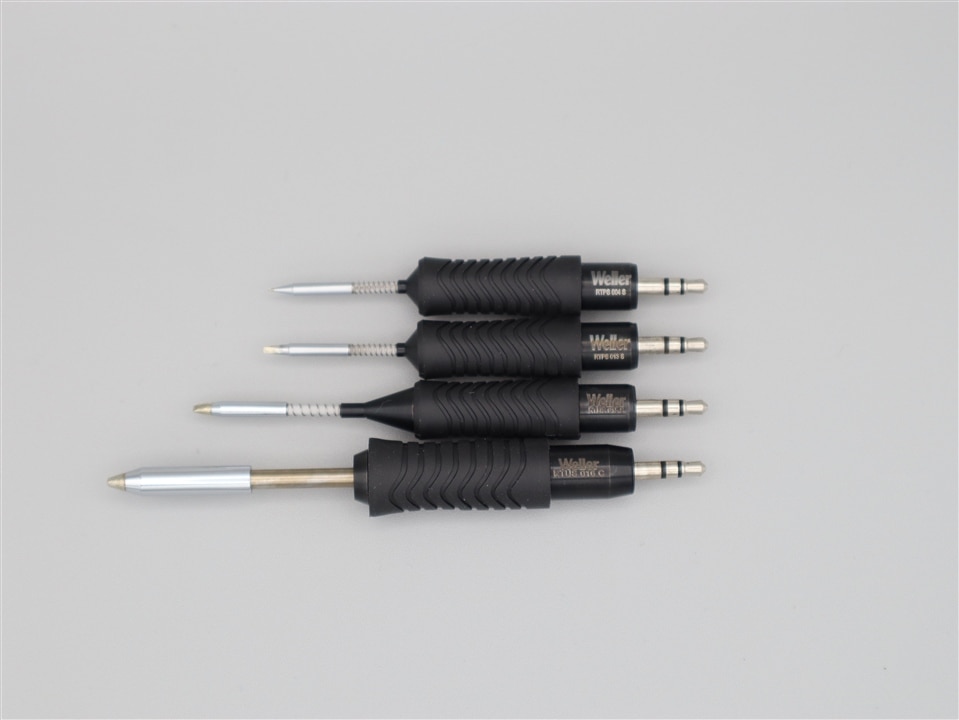
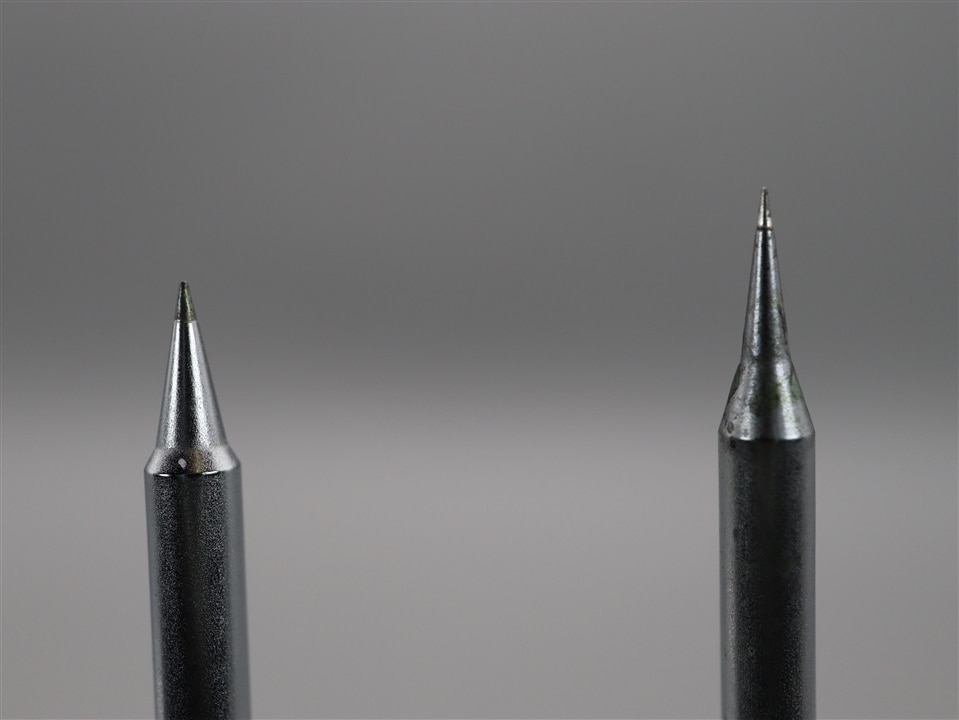
The WXMPS MS accepts the smaller RTMS (micro) and RTPS (pico) series tips, both types have an exposed coil on the tip shaft. The WXUPS holds the larger RTUS (ultra) tips. Changing tips is fast and easy, simply pull to unplug the tip’s 3.5mm TRS connector and press in a new tip - while holding by the grip to avoid burning yourself. The Weller WXsmart will automatically recognize the new tip, although I did have rare occasions where I had to re-insert the tip before it was recognized. I would not attempt this operation with the WESD51/GT90 irons, I don’t often have the patience to use a silicone pad or glove to grab the hot tip and would likely continue using the current tip until the next session. The WXsmart allows me to use the best tip for the job at hand!
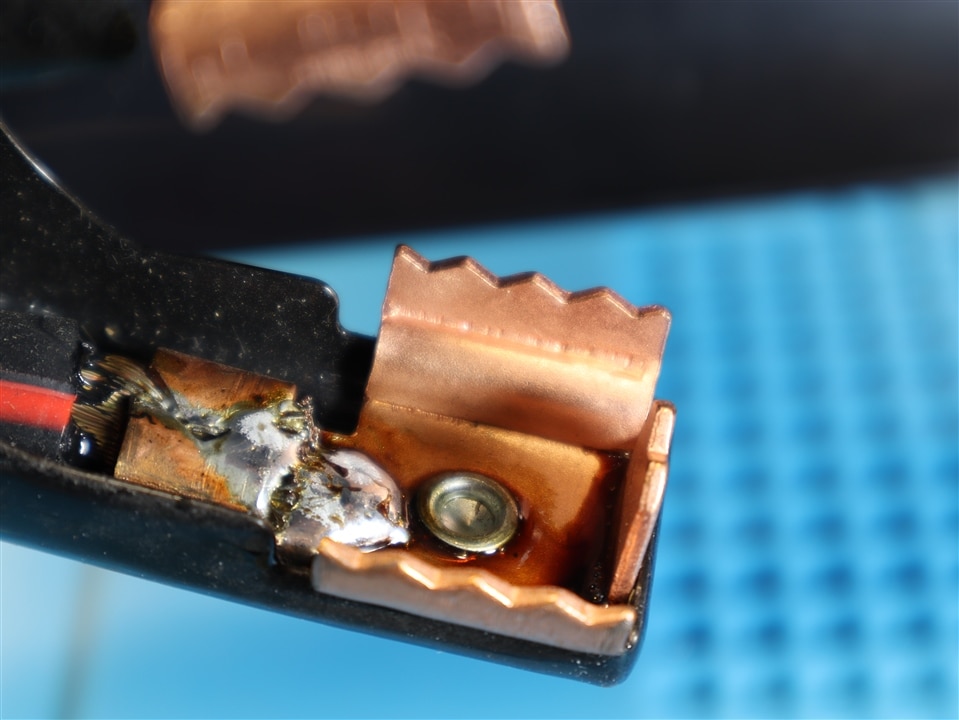
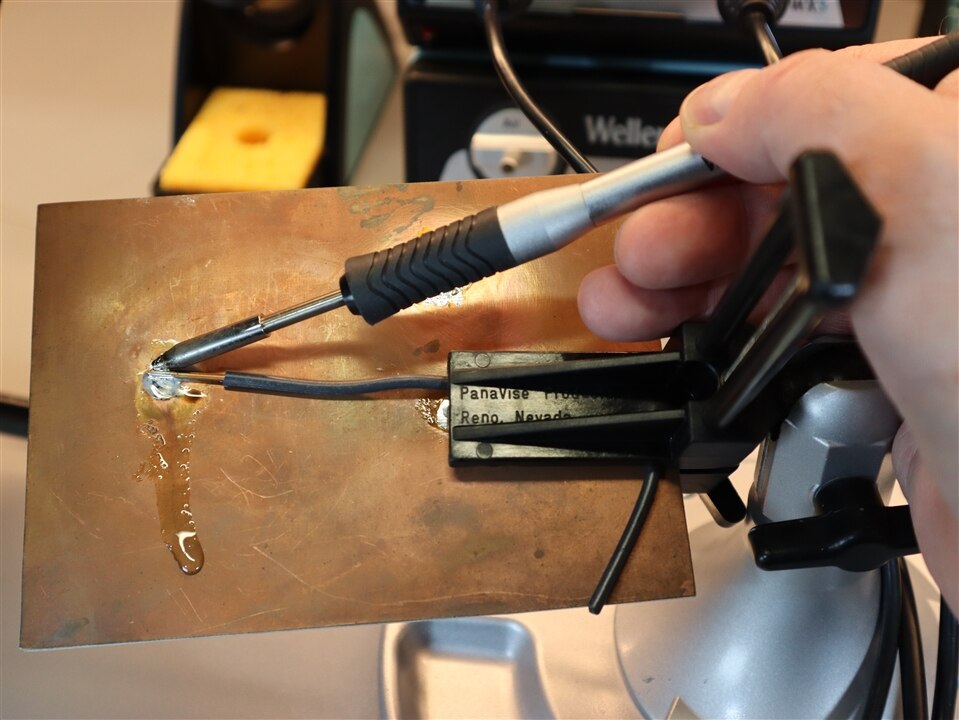
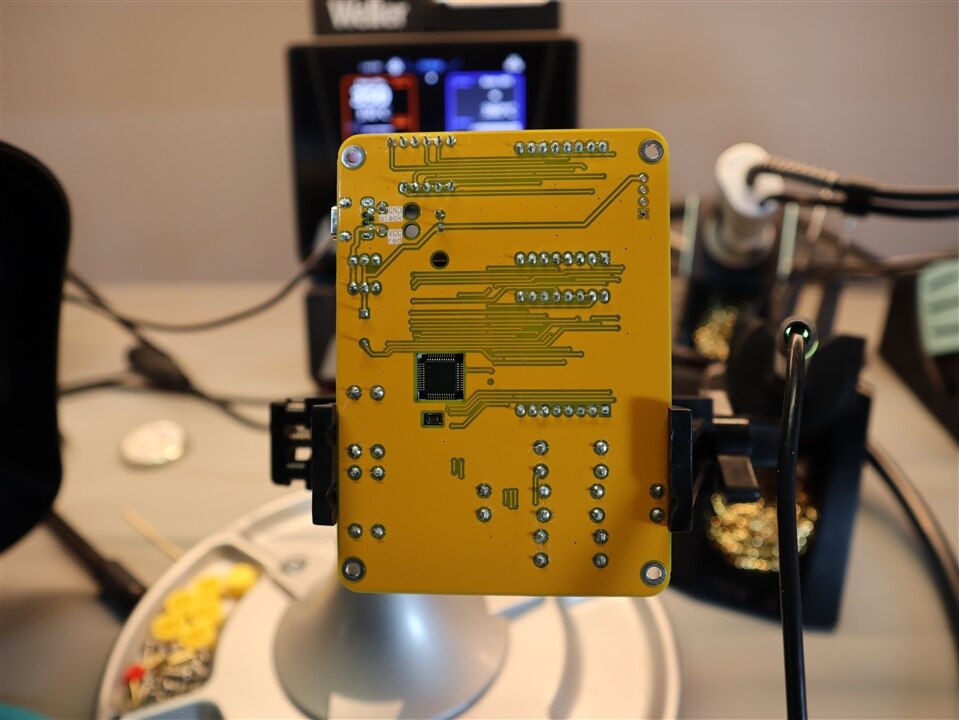
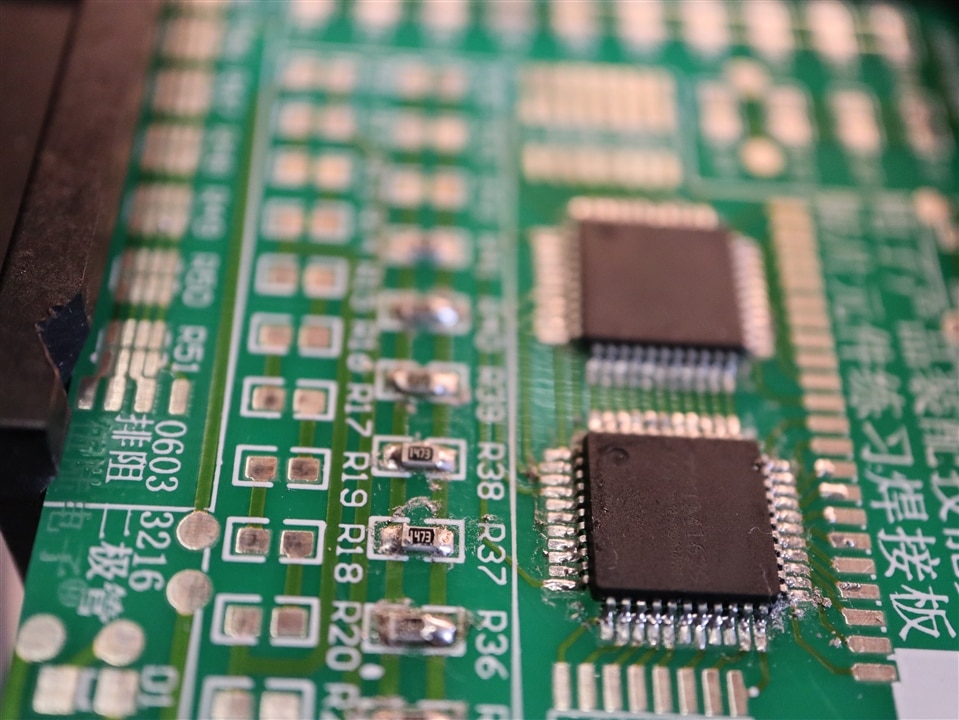
Over the course of this evaluation, I used the handpieces and various tips to solder 100’s of components, wires and connections. The Weller WXsmart handled all of these with ease and high performance. I used the smallest pico tips to solder 603 and 805 SMD components under a microscope, with the WXsmart turning a task I found difficult using the comparison irons to be easy now with the small WXMPS and pico tips. I even tried a few test cases to press the limits of the 150W iron, by soldering a 1AWG cable to a battery cable clamp and 14AWG solid wire to a flat copper board. Both tests proved successful, though I feel it would be faster to solder 1AWG wire with a torch and thick solder.
The demo kit comes with an 100g spool of WSW SAC M1 solder. This SAC305 (Sn96.5 Ag3.0 Cu0.5) solder solidifies to a dull finish, which had me temporarily second-guessing the quality of my solder joints. It has a higher liquidus point (220°C) than the more common Sn63 Pb37 solder (183°C). For the purposes of this review, and my own soldering style of hotter/quicker, either type of solder works perfectly well.

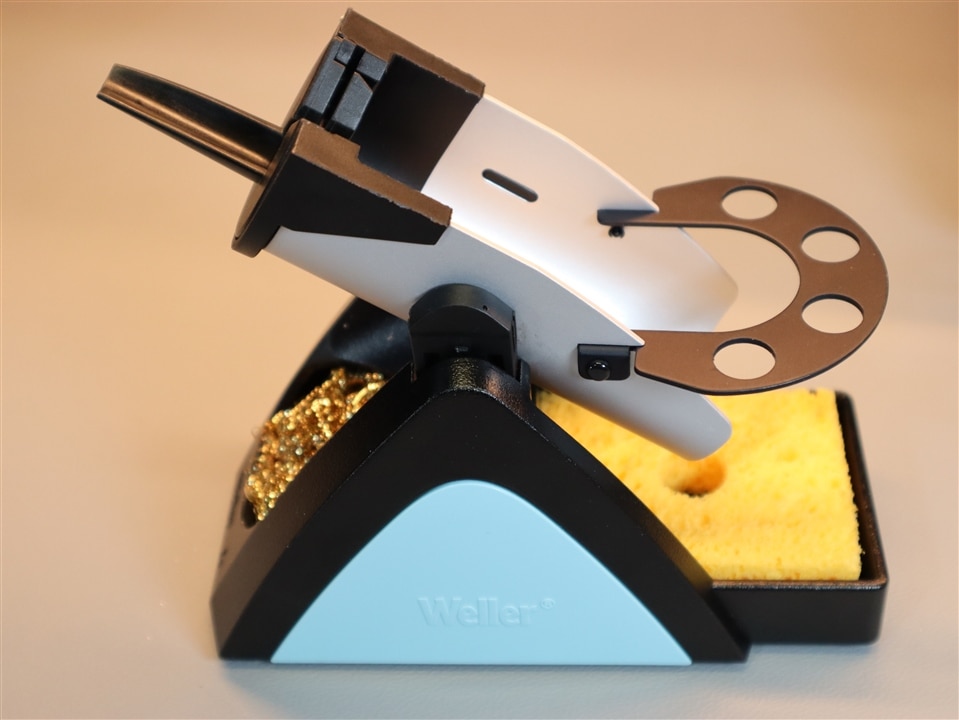
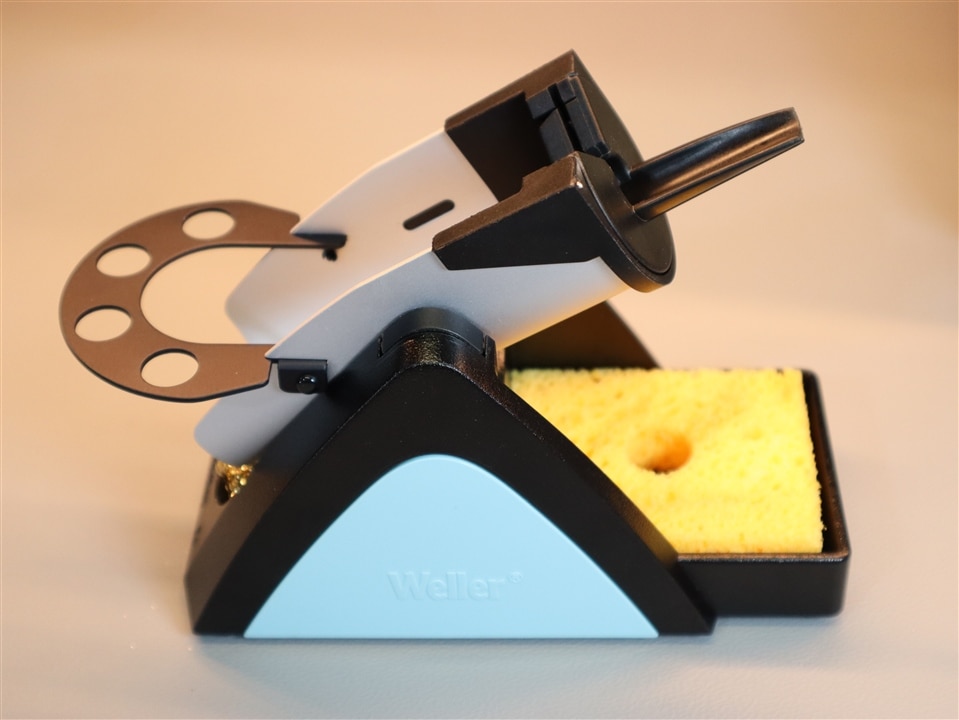
These irons rest on their own custom safety rest, which have both a wet sponge and a brass sponge. The rests are reversable depending on which sponge you would prefer to be forward facing. I reversed one to have a sponge in front and left the other with the brass sponge so that both were readily available to use (more so the brass sponge). The legacy WESD51 has only a wet sponge and the Metcal GT90 has the advantage of both sponges available from the front.

One of the most exciting areas of this review was the chance to evaluate the WXair, WXDV120 vertical desoldering iron and the WXHAP200 hot air iron. This was a new and exciting experience, and no comparison to my manual tools including copper braid and a “solder sucker” for desoldering along with a large hot air gun for shrinking heat-shrink.
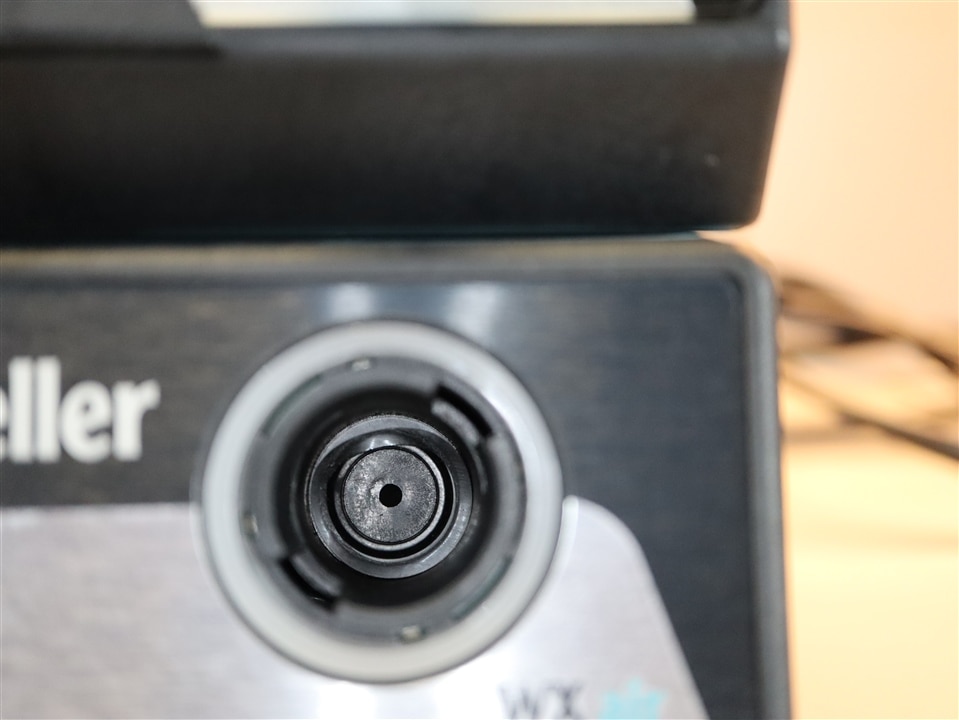
The WXair provides the air/vacuum system for the WXsmart platform with one air channel for the WXHAP200 hot air tool and one vacuum channel for the WXDV/P120 desoldering iron. It is fully controlled by the WXsmart power unit through the provided RJ6 RS232 cable. Depending on which air tool is connected, the 70W WXair will light up a blue ring surrounding the correct port. Only one air tool can be connected to the WXsmart power unit and WXair at one time. An optional foot pedal can be added for additional control.
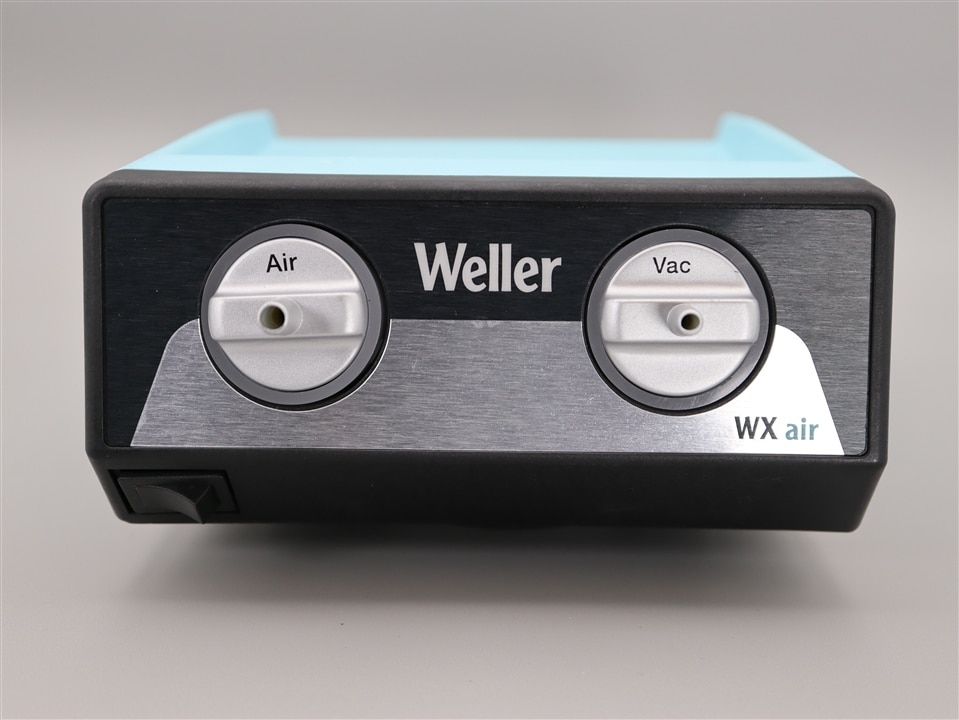


I noticed one issue, a grommit inside the WXair on the vacuum side was fitting loosely inside the port. I pushed it back in place, however, I feel this may be something to watch for when changing the filters.
The WXDV120 desoldering tool cleans up solder joints nicely - easily and quickly. It is many times faster and more thorough than manual tools are capable of. Using the WXair for vacuum, the WXDV120 was able to quickly remove solder from through-hole solder connections. This was a treat – it is now possible to un-solder almost as quickly as soldering! Integration with the WXsmart control unit makes this a breeze to control and use. The case is plastic and bulky; however, the bulkiness is to be expected with the air hose attached and air filter contained inside the handle. Changing the filter is easy. It was, however, not easy to use the WXDV120 under a microscope as the lenses get in the way of the vertical orientation. Weller does offer a horizontal desoldering iron for the WXsmart (WXDP120) which may be better suited to small precision work.

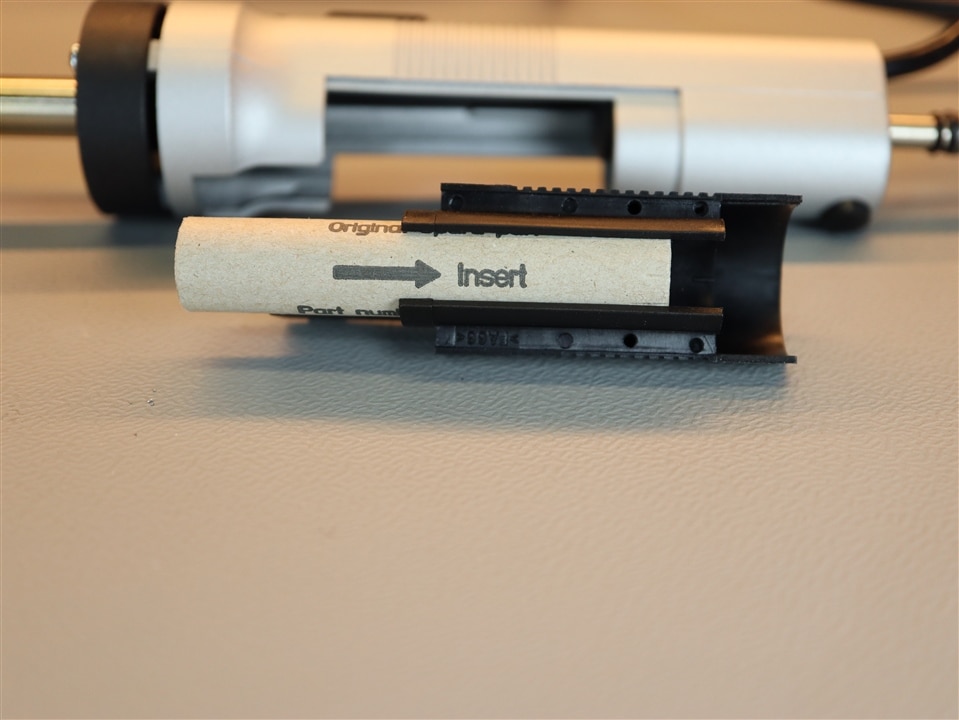
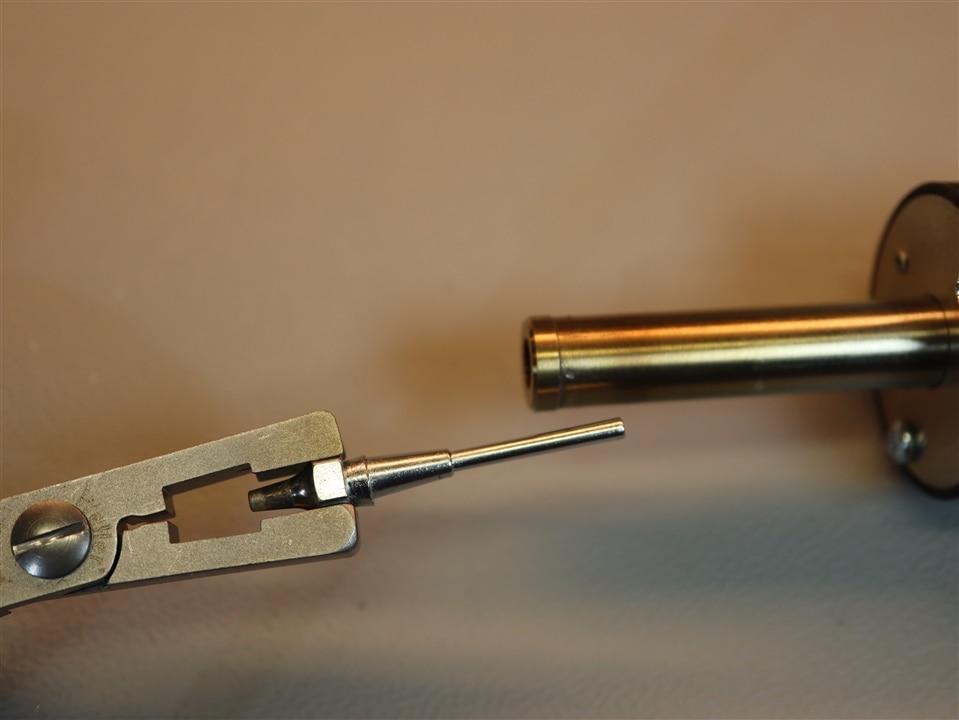
The WXDV120 included three size tips, #1, 3, and 5. These metal tips are not smart and don’t need to be. As a result, the WXsmart power unit would need to be manually adjusted to be aware of the tip change, though it is unclear if the WXsmart uses tip identification to adjust performance characteristics for the WXDV120. Also included was a Erem hand tool for removing the tips. I did get a tip stuck trying to change tips while the iron was hot, so I would not recommend trying this, but it does bring me to briefly mention the cleaning tools. One brass brush is included along with a multi-tool containing three straight rough cleaning rods and one that looks more like a drill bit for debris that needs persuasion to be removed.
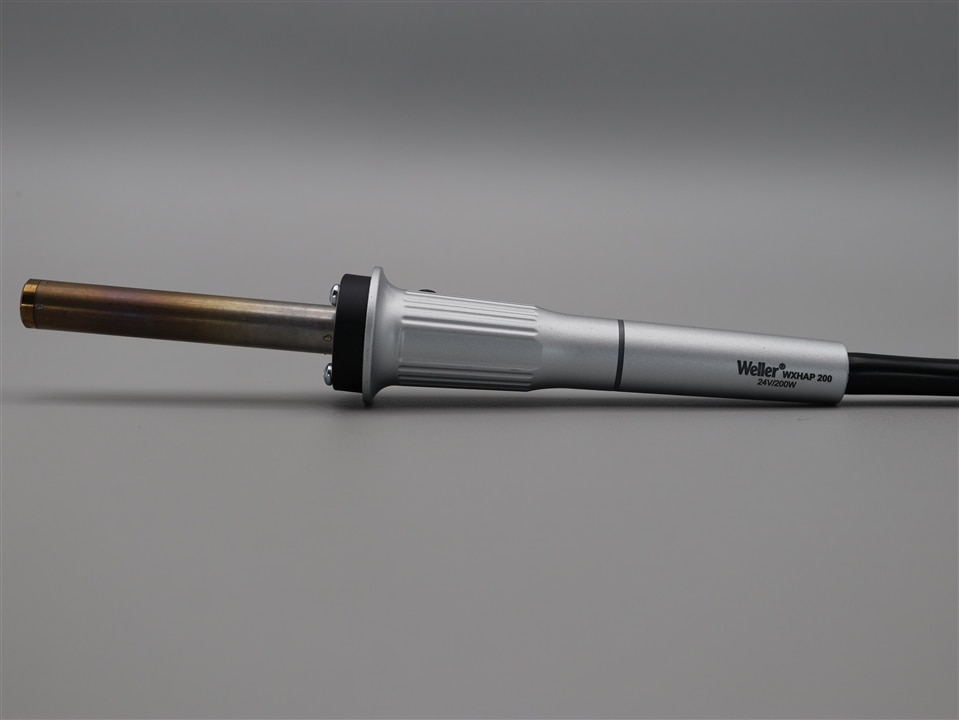
The WXHAP200 air tool is powerful and precise. The packaging is plastic, and the shape is reminiscent of a nostalgic Weller hand solder tool.

In addition to selecting the temperature, the WXsmart power unit allows you to set the airflow as a % of the maximum, from 10%-100%. You can also change the behavior of the button (momentary or latching air flow) and set a pause to allow the iron to heat up prior to flowing air.
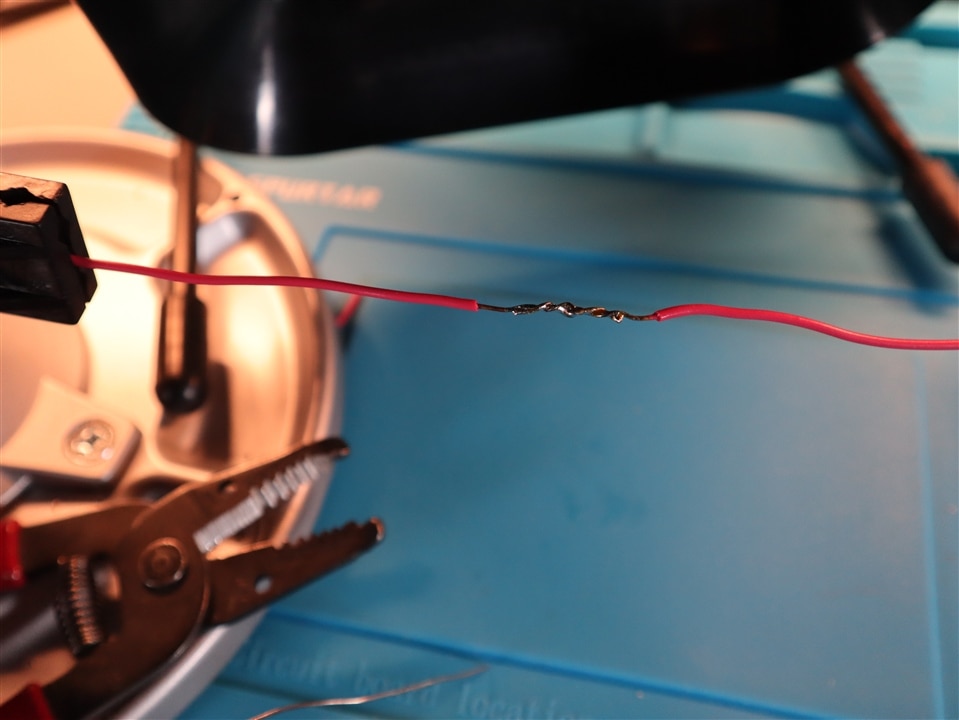
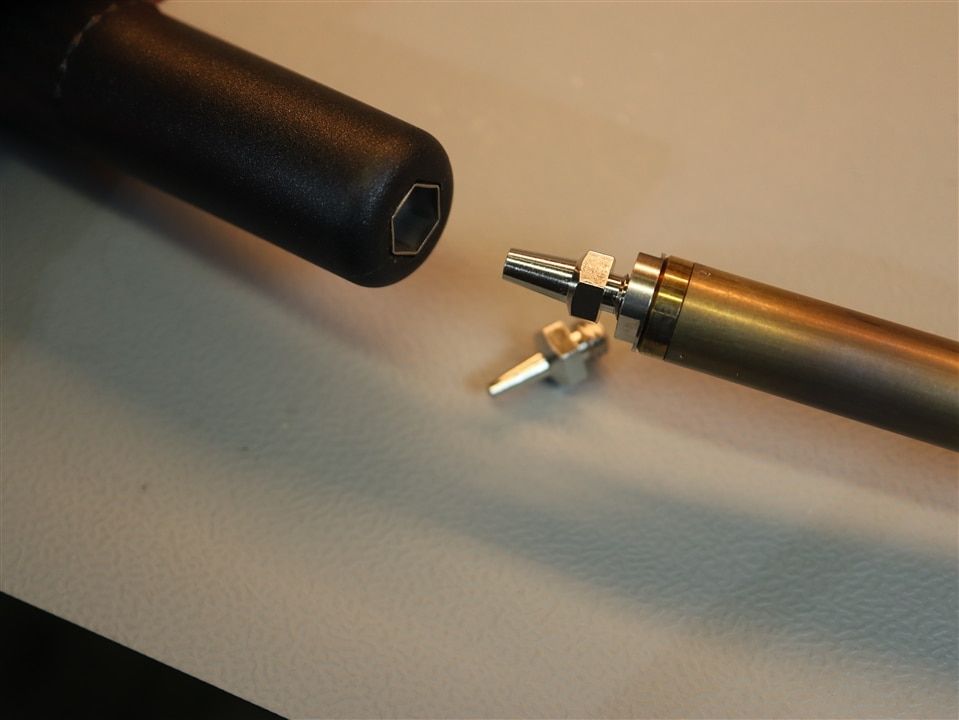
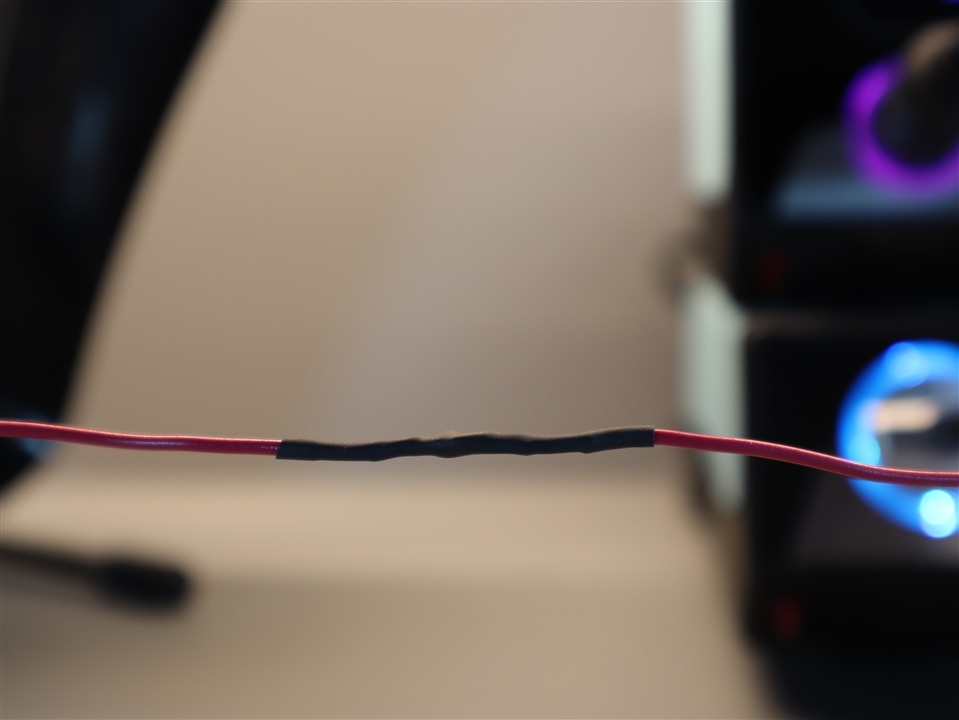
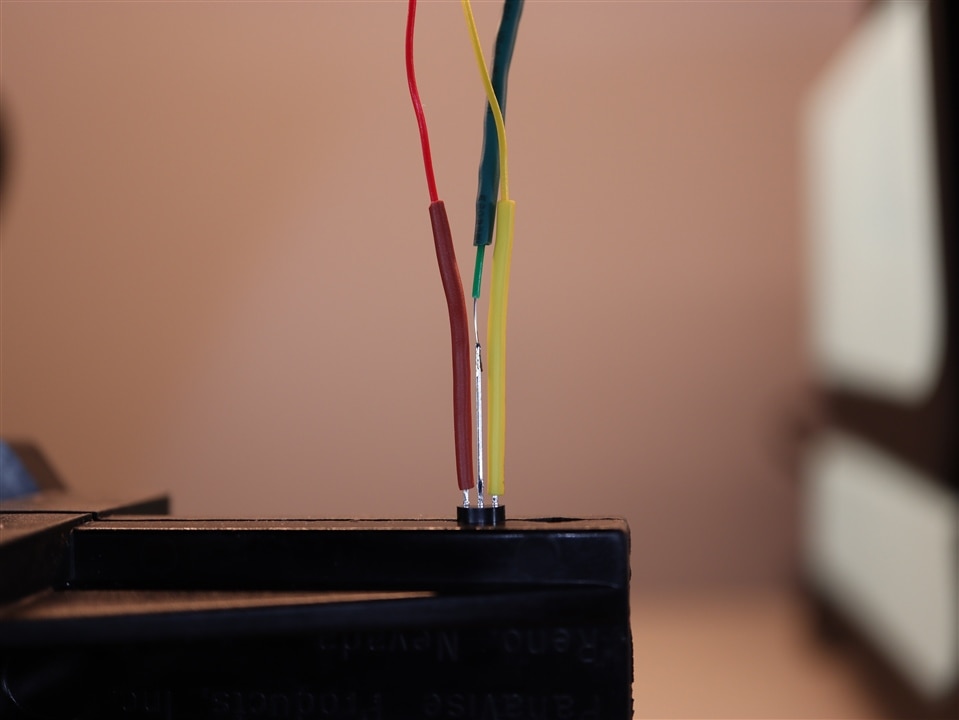
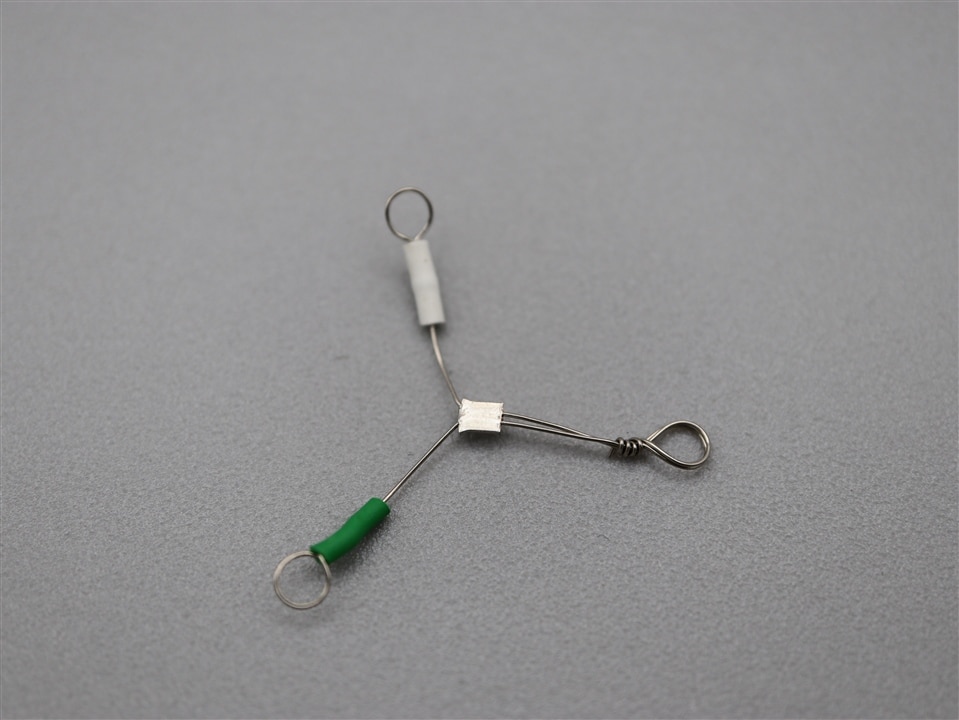
I used the WXHAP200 to shrink heat-shrink which it handled amazingly well as expected. In another experiment for precision, I was able to heat shrink the outer base and emitter leads on a TO-92 transistor package without (significantly) shrinking the centre collector lead’s wrap and without separating the leads. This took some effort but was possible due to the iron’s significant control of temperature and airflow using the small metal tip! Two tips were included, and like the WXDV120, these tips are not smart and don’t need to be.
Reflow activities are a snap with the WXHAP200, as is the removal of components that require heat applied to many leads simultaneously.
I also tried soldering SMD components with solder paste and the WXHAP200. The key word is tried. Though I was somewhat successful with low airflow and high temperatures, I still managed to blow those tiny parts around and make a general mess. Thankfully I was able to use the WXDV120 and a small smart tip to make things look better, but still generally not great. This was not due to any issues with the WXHAP200, rather this was an operator problem. More practice would help. When soldering SMD, I may just stick with the WXMPS handpiece and one of the small pico smart tips, like the tiny RTPS001.
Both air tools have their own custom safety rest with brass sponge and have tip storage holes.

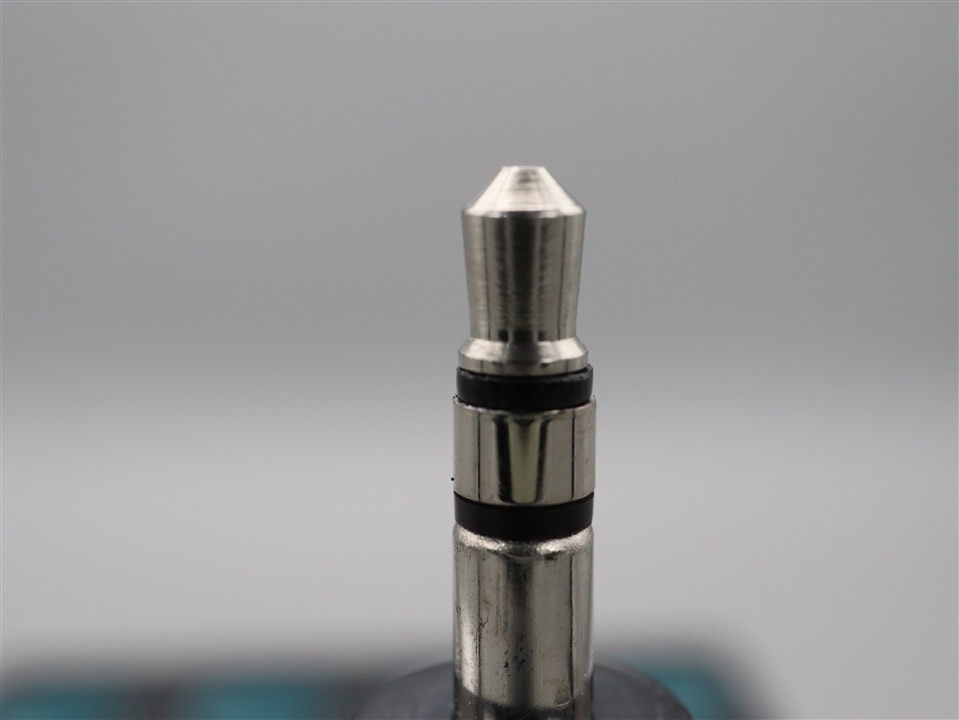
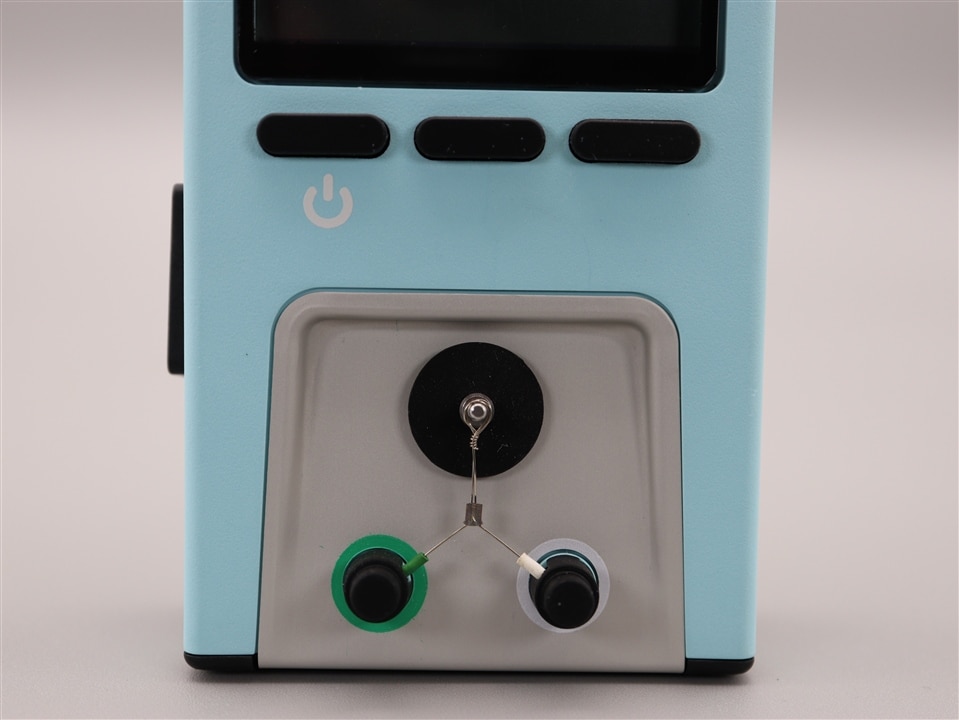
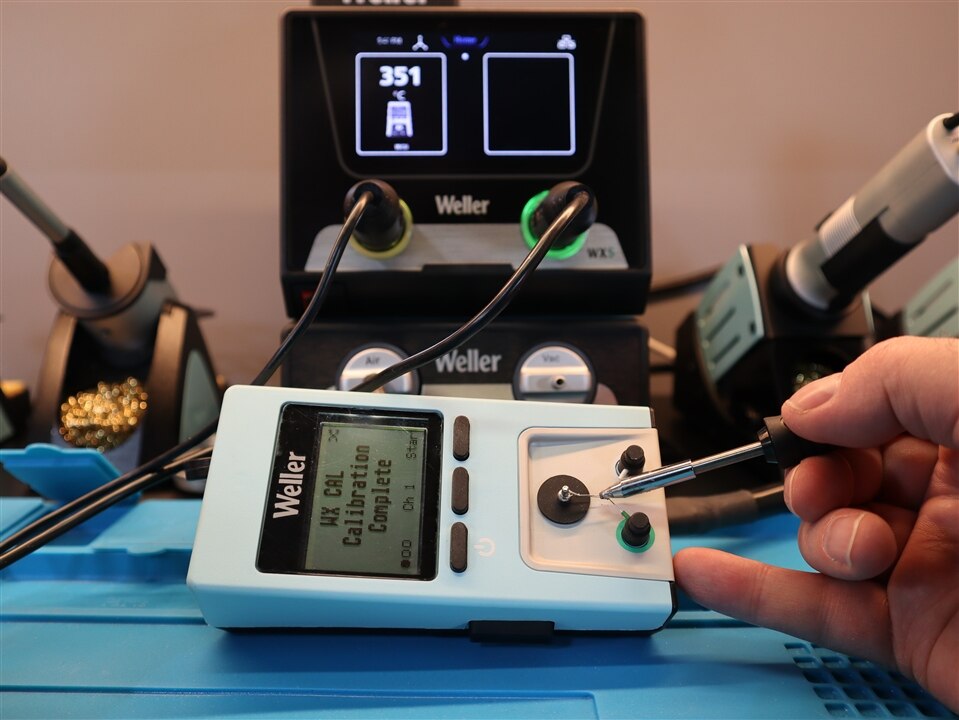
The WCU temperature measuring and calibration unit is a great addition to the platform and ensures consistent accuracy. The top mounted thermocouple is designed for specifically for soldering iron temperature measurement and is suspended in place by a tension spring. Calibration is simple and quick. Using a reverse wired RJ6 cable, the WCU can automatically calibrate the temperature offset for a smart tip on a selected channel. Or you can manually calculate the required offset. Temperature displays in °C or °F. I tested the accuracy against a 6½ digit multimeter and thermistor – the two units were within 1°C each time. An additional thermocouple can be plugged into the back for external measurement.

The WXsmart demo kit also includes the Swiss made Erem E3CSA tweezers and Erem 622N side cutters. In keeping with the rest of the WXsmart platform, these are superior quality tools. They are ESD safe and have firm but comfortable grips. The tweezers are great for working with tiny SMD components under a microscope and the side cutters were able to slice through wire like butter, with clean cuts. I have ESD safe metal tweezers along with Craftsman long needle nose pliers however the Erem are more comfortable and precise. I also have several side cutters that are comparable, including Xcelite 170M (now Xcelite by Weller), Xuron microshear 170 and Plato 170. The Erem 622N are more comfortable and the grip is firm.
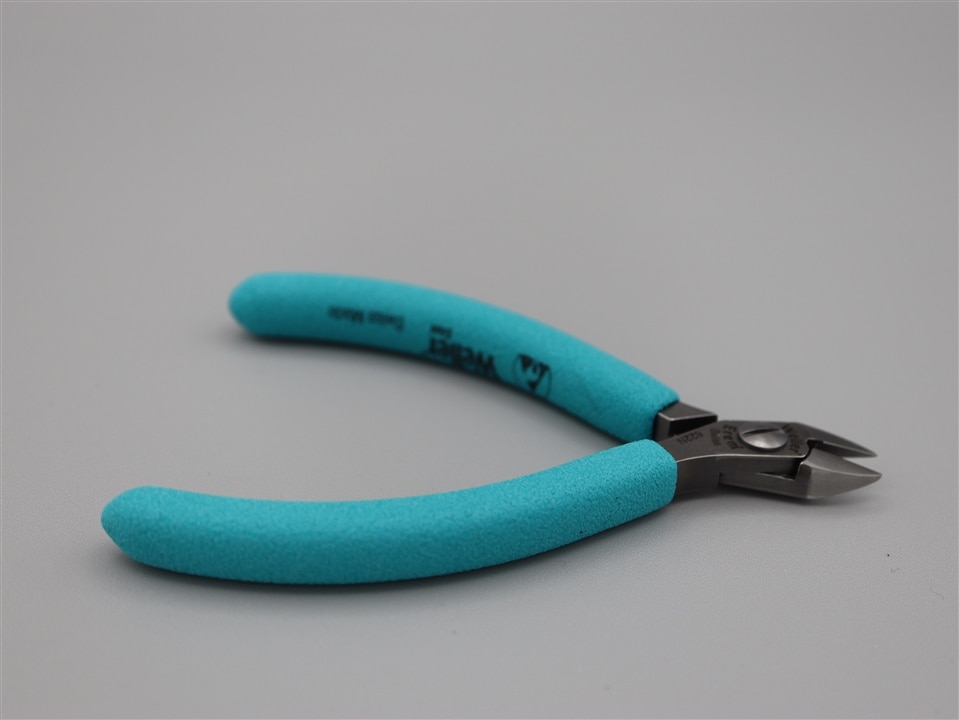
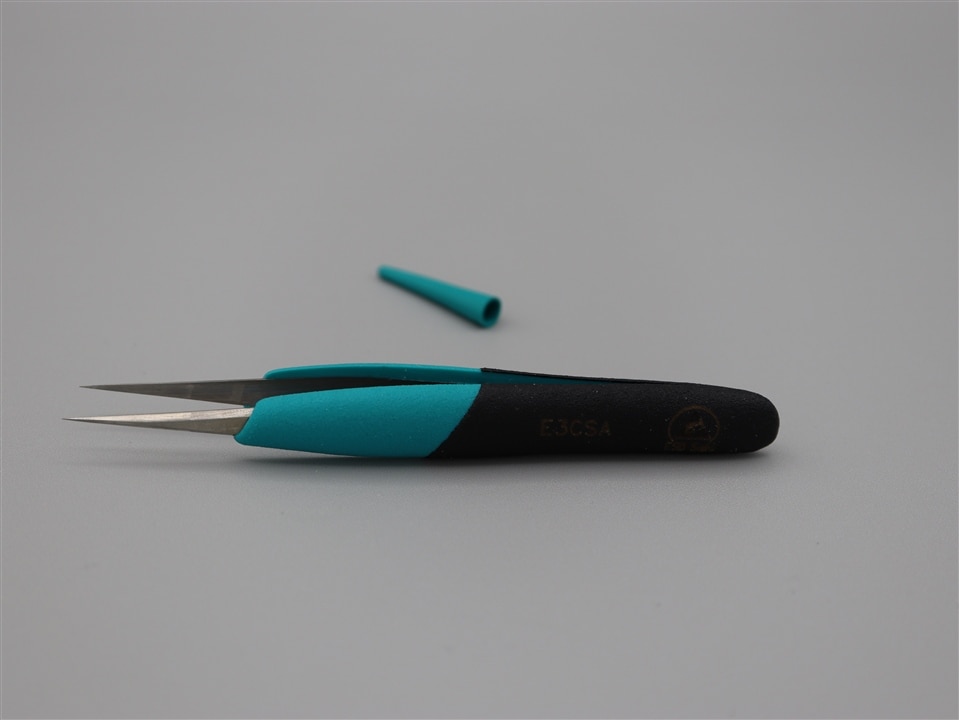
Like the soldering irons, Erem tools bring you much closer to the material for enhanced precision and control. I have strong appreciation for quality tools and the Erem have become my favorite hand tools to work with.
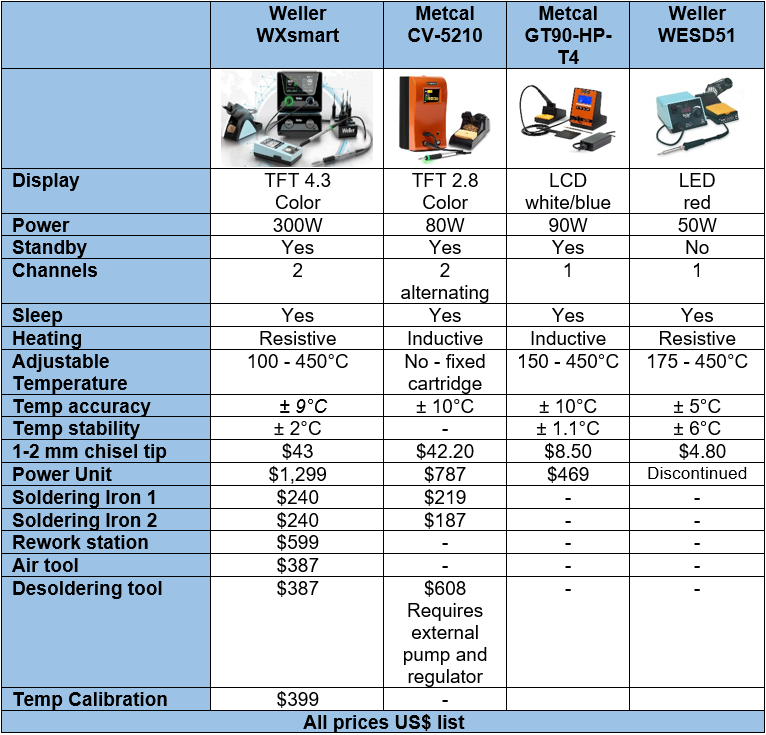
The Weller WXsmart platform is positioned for industrial use and maximum capability - it is not cheap. There are other Weller models better suited to the average student or hobbyist budget. There is no known direct all-in-one competitor to the WXsmart system, however some components can be compared as below.
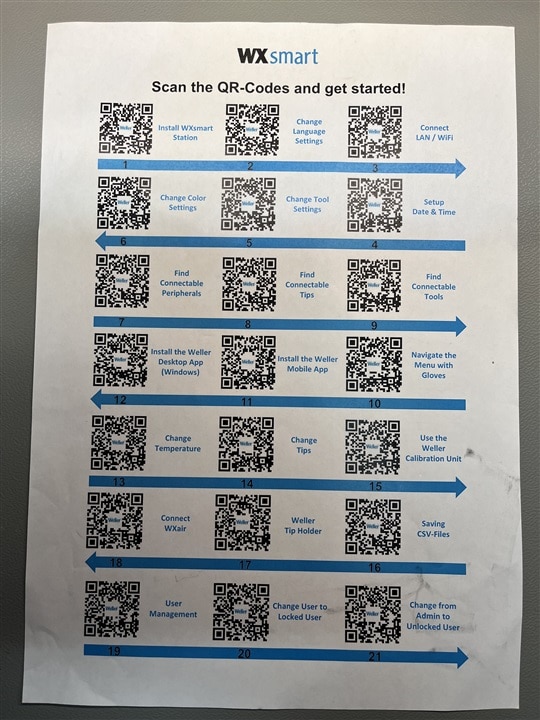
Weller provides a handy sheet with the WXsmart containing a list of topics and QR codes. Scanning a QR code will take you to a video which demonstrates how to perform one of 21 different operations. Most videos are informative however, some are not as I explain in the Software section below.
There are also some manuals available on the Weller website, these manuals use friendly pictures to explain the setup of each device. However, I did not find these to be intuitive to find on Weller’s website. The service/support page is not where to go, neither is the download page. To find the manuals, you will need to go to each individual product information page where there will be a link for a datasheet and manual. I have compiled a list here:
WXsmart 300: WXsmart | Weller Tools US (weller-tools.com)
WXair: WXair Module 100-230V | Weller Tools US (weller-tools.com)
WXHAP200: WXHAP 200 Set | Weller Tools US (weller-tools.com)
WXDV120: WXDV 120 Set | Weller Tools US (weller-tools.com)
WXUPS: WXUPS MS | Weller Tools US (weller-tools.com)
WXMPS: WXMPS MS | Weller Tools US (weller-tools.com)
WCU: WCU | Weller Tools US (weller-tools.com)
Perhaps I am old-school, however I prefer to have comprehensive instruction manuals for technical equipment and found the pictorial manuals to be lacking complete information. Some may find the pictures to provide a better approach and the WXsmart is so intuitive to use, manuals are not required to get started and operational. However some functions are more complex and would benefit from instructional material. This is a new product, and it is not entirely unexpected that additional supporting material may be in development.
I had the opportunity to use three software packages for the Weller WXsmart, the Smart Control app for Apple IOS, the Smart Control app for Windows. I also had a brief look at the QR Code Generator.
The Weller Smart Control app for Apple IOS
This is a well presented application. You can log in as any user on the system, provided you use the correct password and pass a simple two-factor authentication challenge. The main display is nearly identical to the front display on the WXsmart power unit, where you can swipe left or right to set the temperature, change tip/tool settings, change ring colors, or view a power graph for either channel. The main display includes a settings page where you can make limited changes to the WXsmart 300’s configuration.


The QR code sheet takes you to a video to ‘Install the Weller Mobile App’. It shows you how to use the app but unfortunately does not provide installation instructions. Go to the Apple store and search for “WX Smartcontrol”.
The Weller Smart Control app for Windows
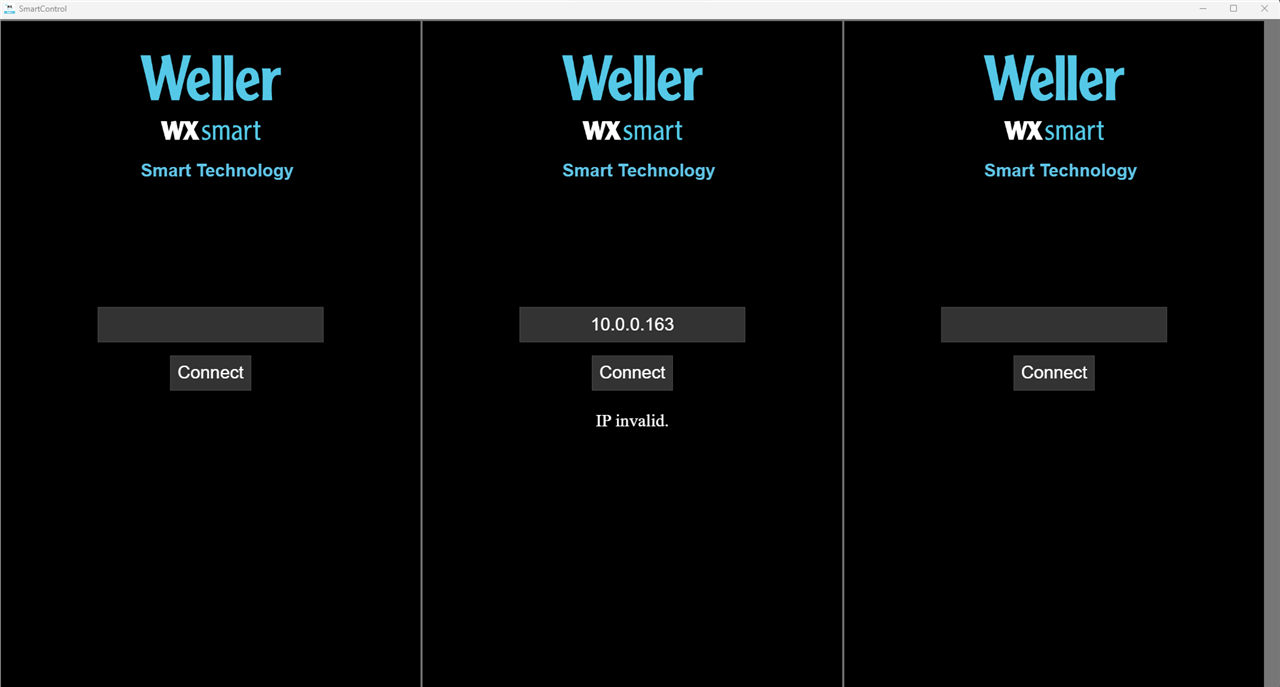
The Windows app has different functionality from the IOS app and does not allow control of the station. This app provides a nice color interface to view up to three stations simultaneously along with power graphs and temperature settings. It allows you to record and export a .CSV file of the station’s setpoint/actual temperatures with timestamps which supports the traceability of the platform - this feature is not available on the IOS app.


The QR code sheet takes you to a video to “Install the Weller Desktop App (Windows)”. This video will tell you to “Download the WX Software from the Weller website”. However, the video is out of date and the software was not found anywhere on the website. After reaching out to technical support, I was able to determine the software is available in the Microsoft Store. Search for “Weller”.
Once installed, the software would not allow connection over my home data network. The software determined that addresses on my LAN are “IP invalid.” I use a valid 10.0.0.x/24 IP address scheme and the IOS app worked fine, only the Windows app had this issue. Instead of reconfiguring my network, I used a hotspot on my iPhone to create a new network that the app supported.
Weller QR Code Generator
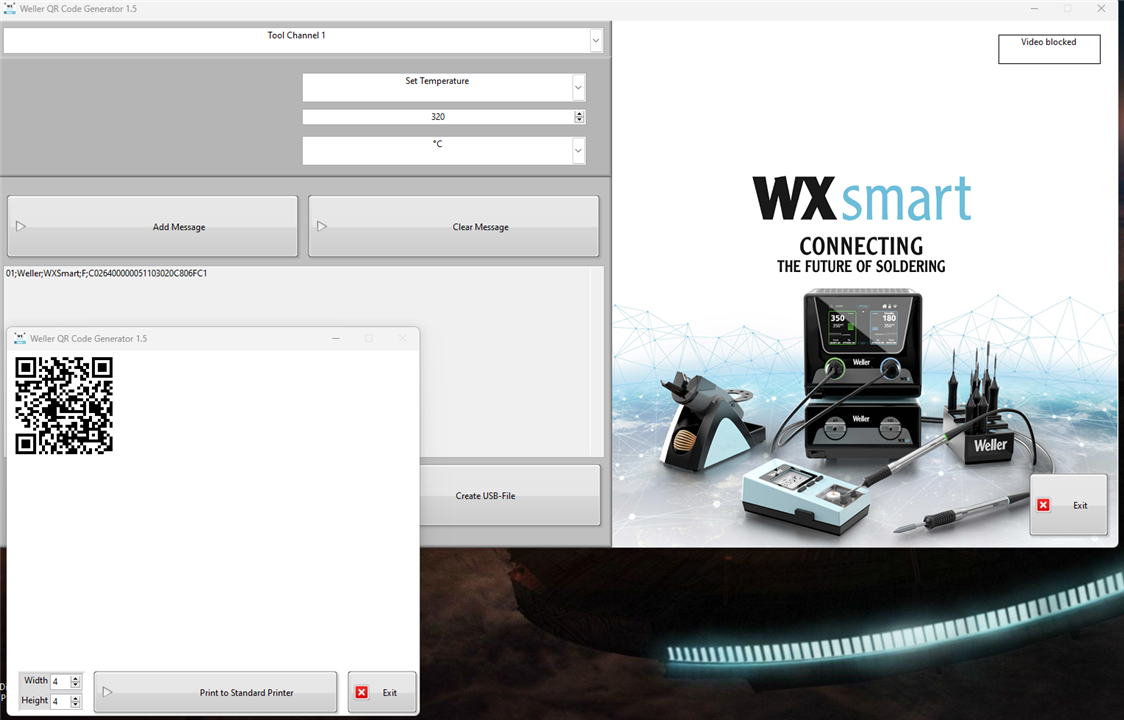
The final software package is the Weller QR Code Generator which was provided by Weller along with the optional software update. It is simple to use and allows the user to generate a list of commands which can be saved for rapid recall through a QR code or can be saved on a USB flash drive. This supports the rapid setup, recall and configuration of the WXsmart system simply by scanning the QR code with a scanner, if one is available – unfortunately I do not have a scanner and could not test the QR codes. As the Code Generator app also allows saving the codes to a file on a USB flash drive, these codes were able to successfully program the station with custom configurations in seconds.
Firmware and Software Updates
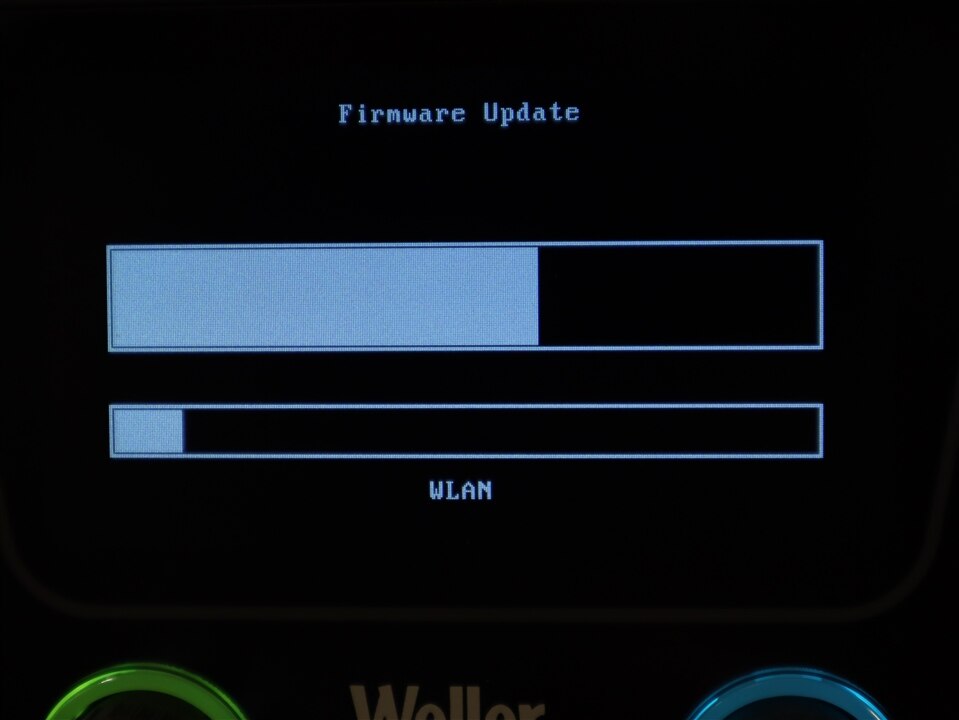
Firmware updates are easy to apply. Simply copy the update to a USB flash drive and plug it into the WXsmart power unit while logged in as an administrative user. The station takes care of the rest, and after a few screens and re-boot, the system comes up with the new software loaded. Updates are available, and surprisingly easy to find on Weller’s download page. I upgraded from version V144.6.52.7 to V156.6.59.7, which is not yet available on the website and Weller sent by email.
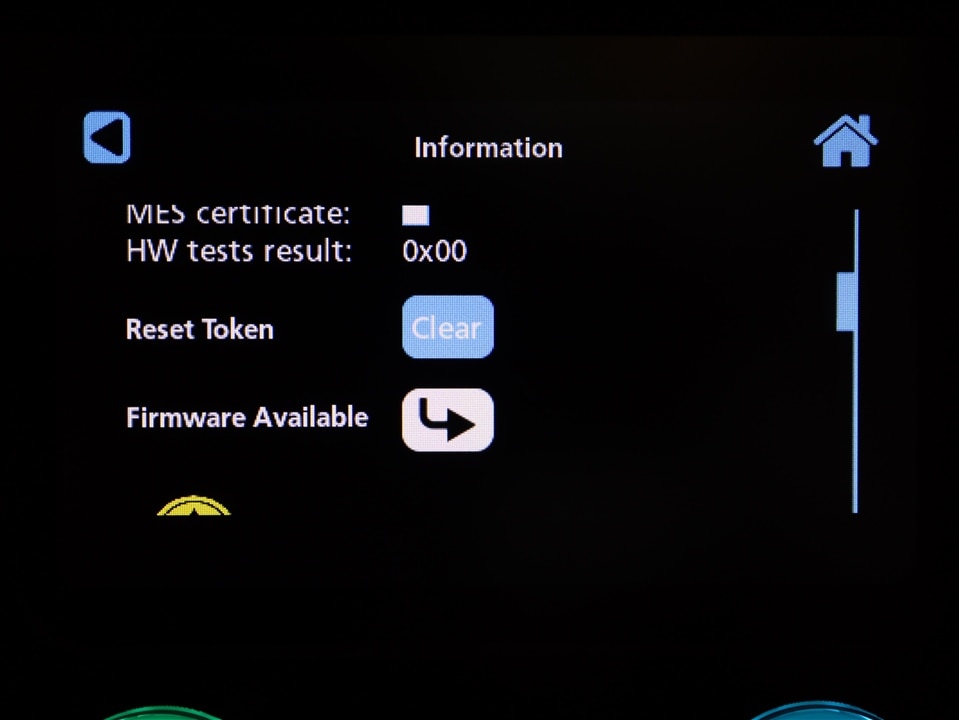
I am sure this new firmware includes several updates - I was able to see two obvious ones. There is a new icon called QR, and the system now pops up with a message of “Saving” when making changes. The system “Saving” occasionally appears on its own and the system panel is not responsive when the message is displayed. Local logging to USB is promised but does not seem to be available as of this version.

Weller also provided hot-off-the-press feature update to unlock the optional settings in the power unit. This feature update installs the same as the firmware update – easy. Previously unavailable modes for Profiles, Tracking, Calibration, and QR became available to use! While these features were not part of the formal test, I did have a look at each.
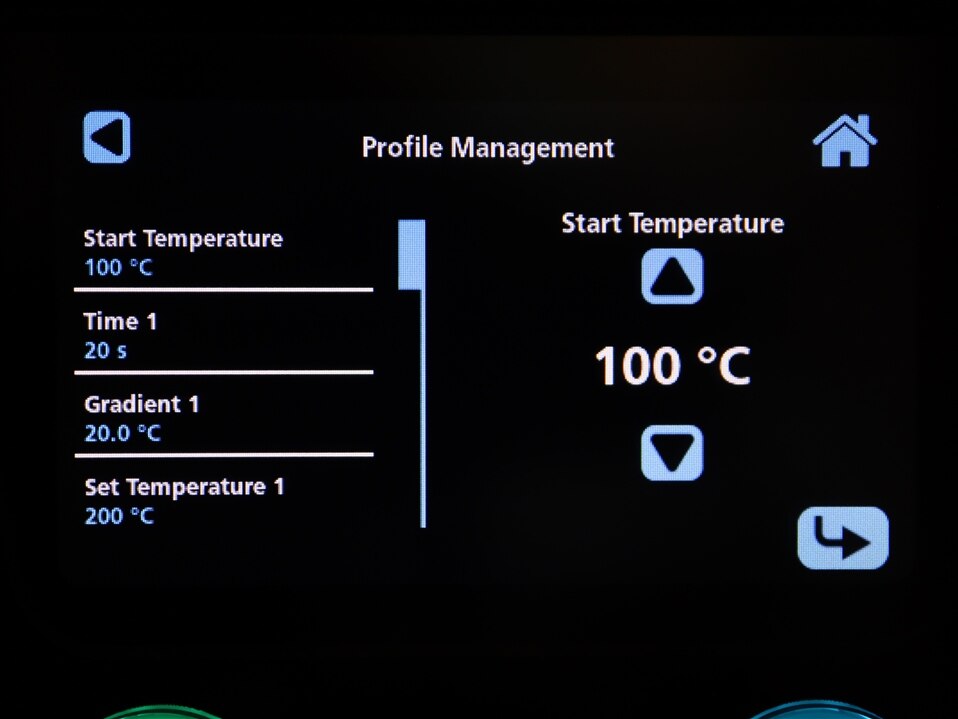
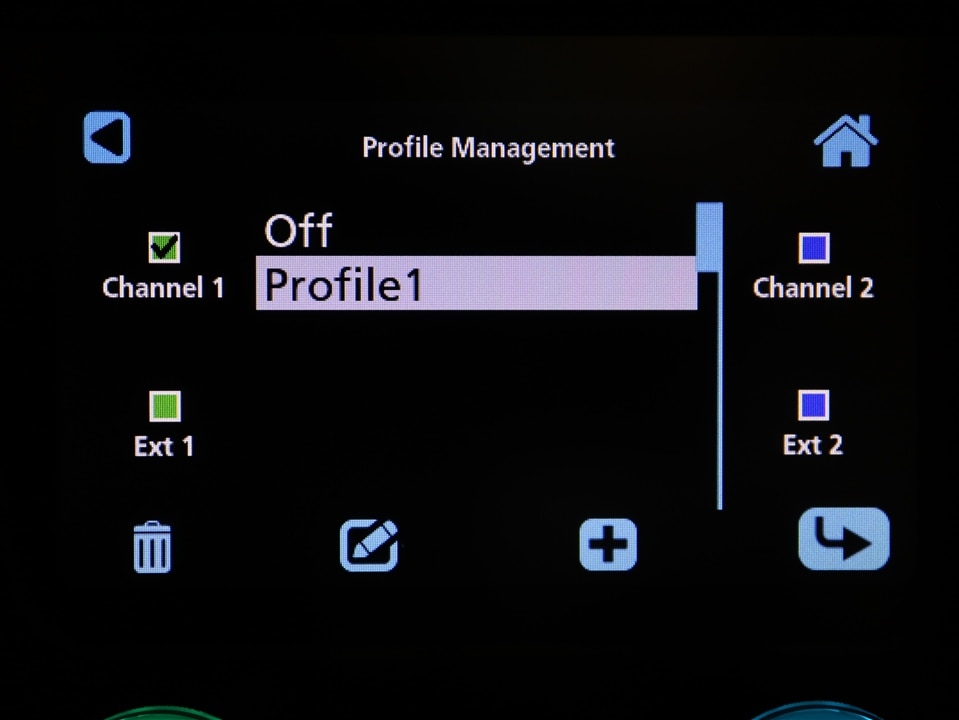
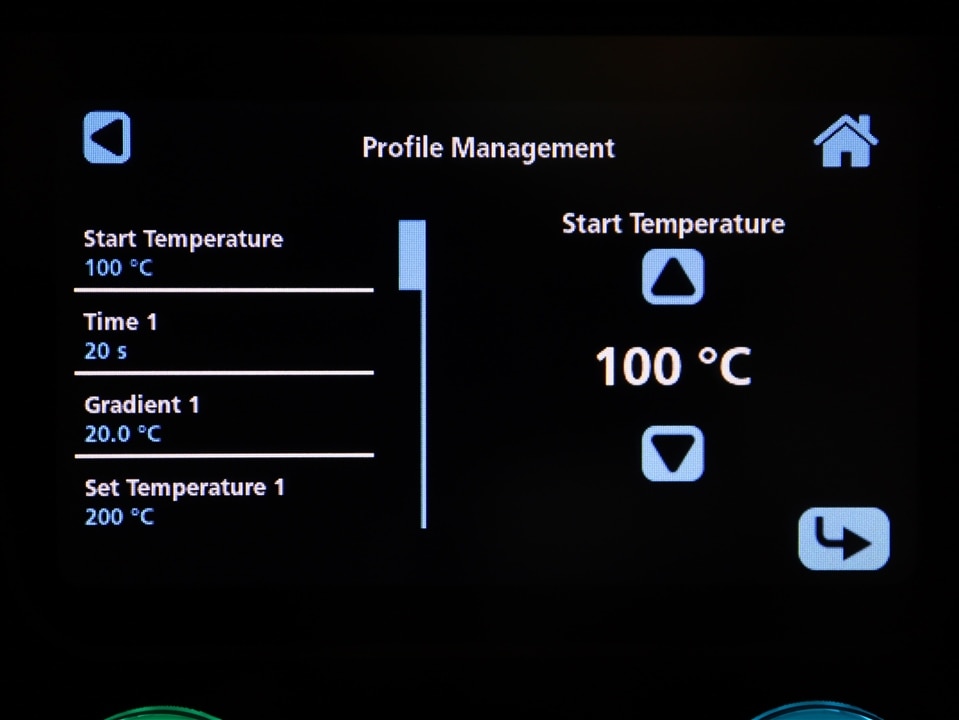
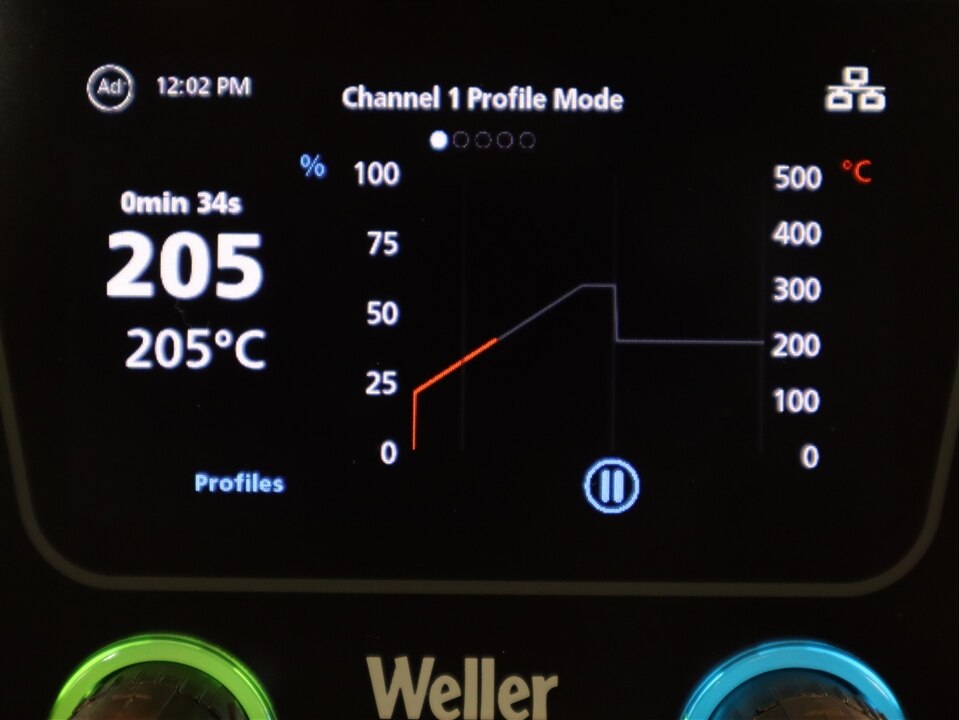
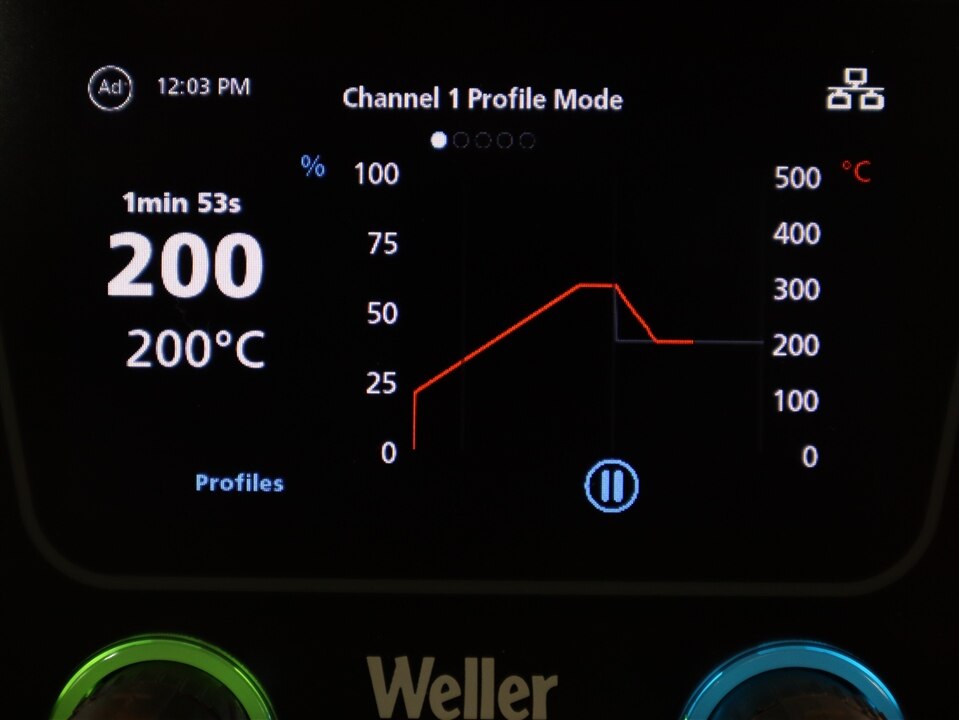
Profile allows the setting of heat profiles over time. With this mode, you can program the station to start from a set temperature and adjust through a series of up to three different temperatures, holding at each for a customizable time frame. The temperature adjustment rate can be customized for each transition.
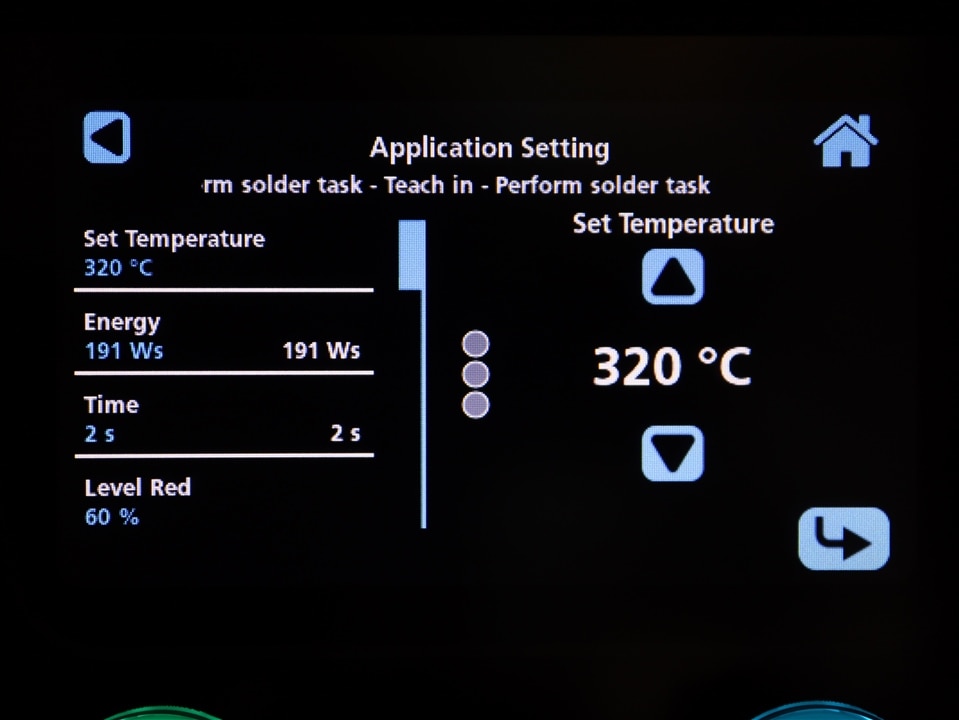
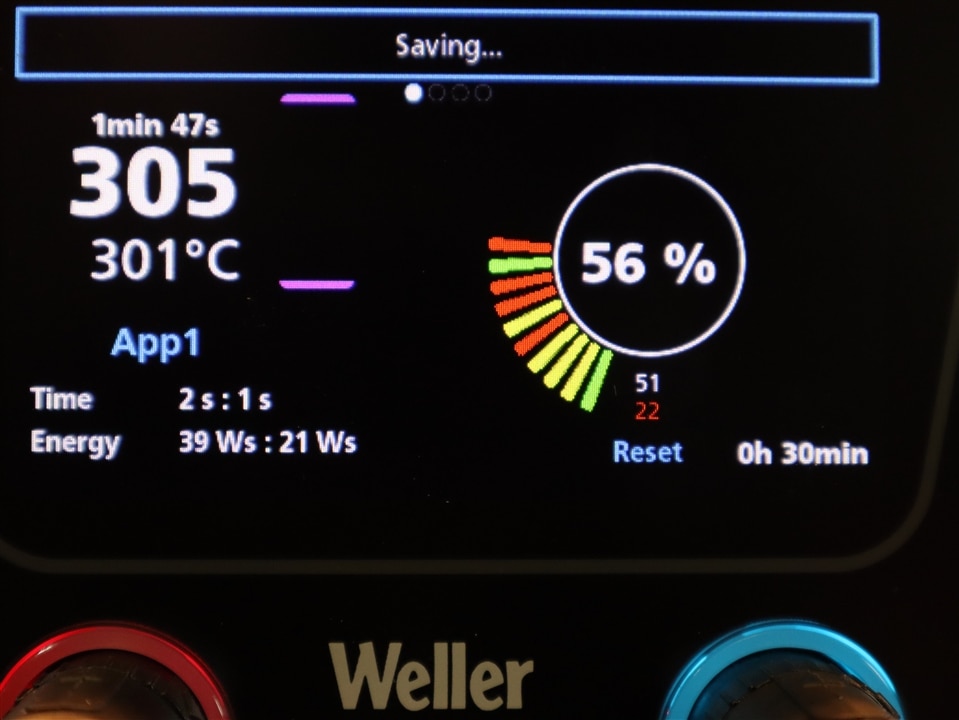
The Application settings allows the configuration of a desirable solder joint through temperature, time, power, and red-level threshold. A graphic displays the results, and the color of the iron and station rings changes to be either green or red. I received this feature near the end of my review and was quickly able to get this to work well with purposefully varied results as shown in the below photos. Presently, I am unable to duplicate my previous results as I write this, but I will spend more time with this feature to better understand the settings. There may be a bug or two to be resolved with this pre-release version of software.

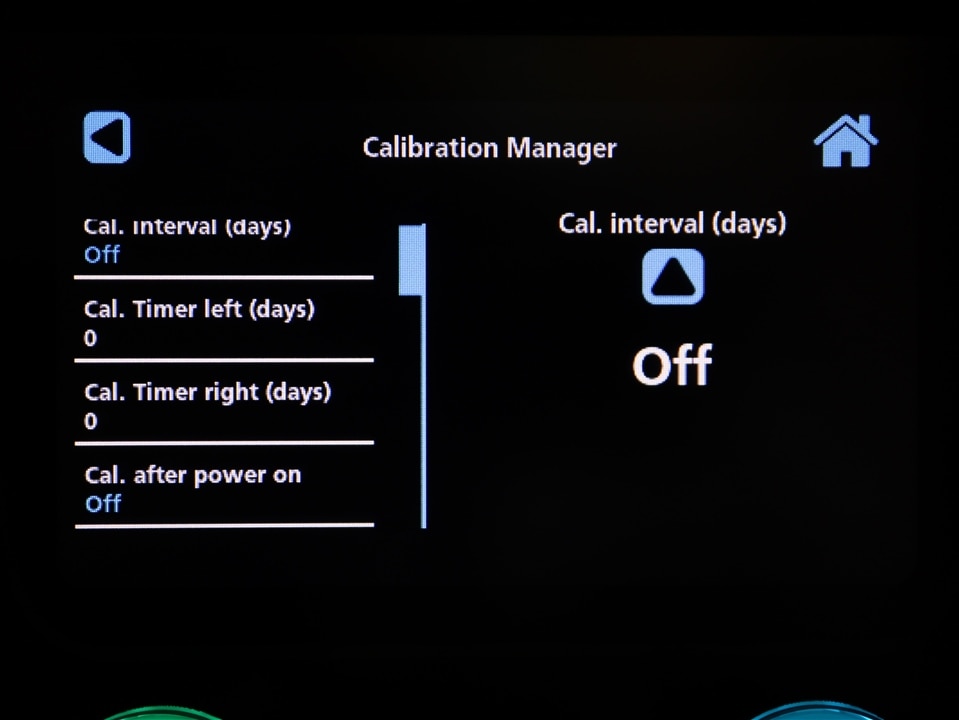
Calibration reminds the user to calibrate the tips at set intervals of days, after power on, or after tip changes. Testing with the tip change option, it reminded me to calibrate with the first tip change right away, the notification for the 2nd change was a few minutes delayed. As these features are new, a firmware update may reduce the delay.

The QR menu allows for the scanning of QR codes printed from the QR Code Generator application, however, I did not have a scanner available to verify.
The majority manufacturers of equipment have embraced IOT solutions for their higher end technology or are anxious to do so. However, I have seen some equipment without appropriate strong security controls in place. It would be dangerous to assume that equipment on customer networks would not require controls. I hold current Certified Information Systems Security Professional (CISSP) designation and have previously held certification in offensive security operations. Security is top of mind. I found Weller’s claims as the “first system with built-in cyber-security” to be both intriguing and refreshing – so I felt compelled to look further!
Using several network and vulnerability assessment tools, I conducted a thorough network vulnerability assessment of the WXsmart power unit. Vulnerabilities are rated by severity, critical-high-med-low with critical typically reserved for vulnerabilities that are common and under active exploitation. I was happy to discover that no high, medium, or even any low vulnerabilities were reported on the WXsmart!

A webserver is available on open ports 80 and 443, however only an error webpage is offered with no functionality. You are meant to use the secure apps instead. The server identifies as a SevenStax server, a niche web platform used for embedded and automotive applications.
Further analysis shows that communication between the WX Smart Control software and WXsmart power unit is encrypted through TLSv1.2 (Transport Layer Security) on TCP port 443. While TLSv1.2 is not the most recent version (latest is 1.3), it is secure provided it is properly configured to use only current encryption cipher methods. This ensures that no third party can eavesdrop or tamper with communications.
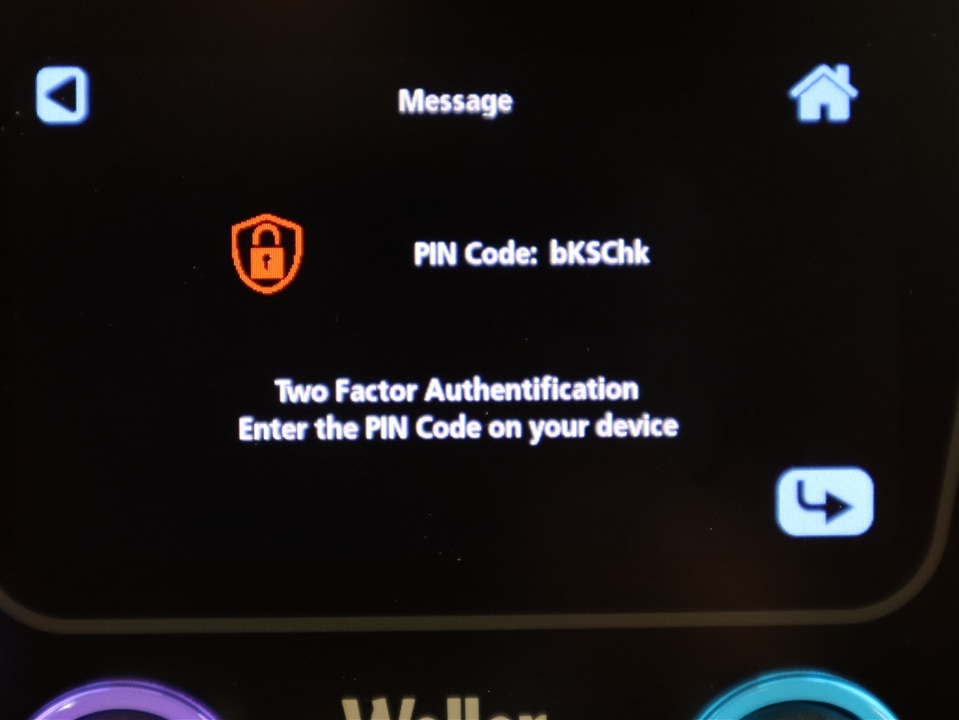
Additionally, as mentioned above, the control software uses two-factor authentication and requires both a password and random string from the WXsmart power unit to be entered into the connecting device, further strengthening the device’s security.
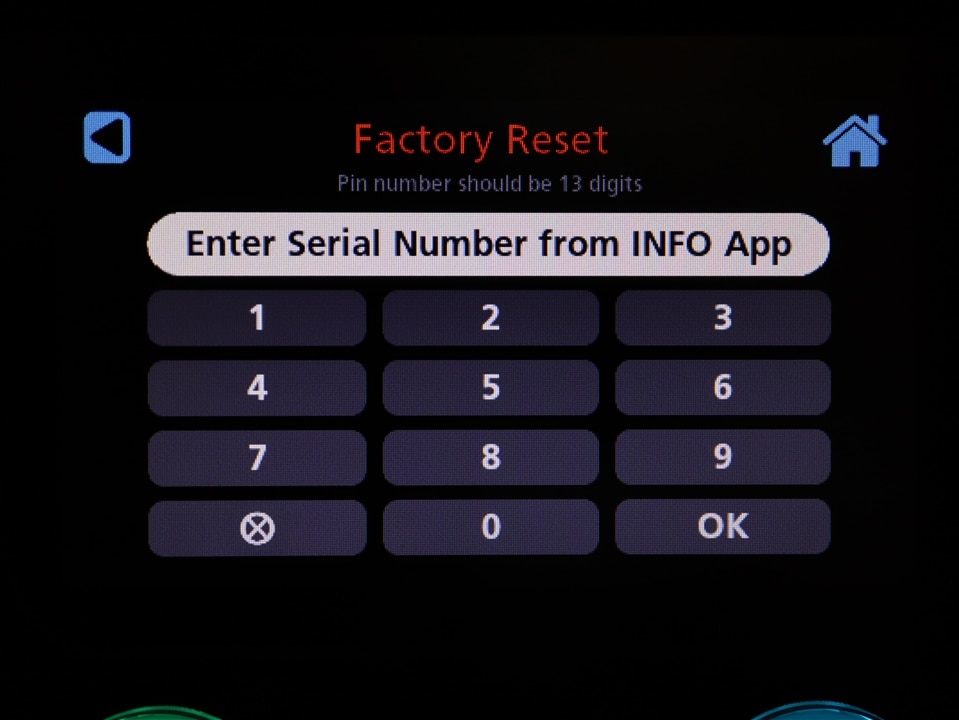
Finally, I tested to see if the QR Code Generator app could be used to circumvent user level security by adding a new administrative user through the USB port. Once again, the WXsmart controls were in place and properly prevented this from happening under the limited privilege account, requiring an administrator account to be logged in first.
With these observations, I can see that Weller has taken security seriously with the WXsmart, exactly as claimed! I can only hope other manufacturers follow suit.
Favorite features
Needs improvement
The WXsmart system is a terrific platform and I struggled to find any serious defects or bugs. While I found some areas for improvement, these are generally easy to resolve or overcome.
The Weller WXsmart sets the new benchmark for the modern, all-in-one, intelligent, industrial hand soldering platform. The WXsmart platform has little competition, however Weller did not simply rest on being the first to innovate – they deliver a powerful platform that is swift and intuitive.
The cost is reasonable considering the superior quality, performance, customizability, and intelligence of the platform. The platform is made for high-performance hand soldering and rework. The value will be immediately apparent to the professional engineer and to those with industrial requirements. Comprehensive traceability and remote control/monitoring extend its capabilities. Though hobbyists and students may find this system to be beyond the essential, the flexibility and small footprint of the WXsmart will enhance any workbench.
The Weller WXsmart hand soldering/rework platform is superior in nearly every way. Weller done, Weller!
Would you like your own WXsmart platform? Purchase here: www.newark.com – search for wxsmart-series


