RoadTest: Sign Up to Review the ADI Software-Defined Radio Learning Module ADALM-Pluto
Author: redcharly
Creation date:
Evaluation Type: Development Boards & Tools
Did you receive all parts the manufacturer stated would be included in the package?: True
What other parts do you consider comparable to this product?: Other SDRs
What were the biggest problems encountered?: No problems
Detailed Review:
I am an engineer and I am a teacher in a secondary school in Italy. I have been looking for ways to interest students in Telecommunications topics for a long time. Adalm Pluto is a device that interested me for its technical characteristics and its versatility.
My aim in this roadtest is to use the Adalm Pluto in some applications useful to better understand simple concepts related to Telecommunications.

Like every time, receiving a package from Element14 is an experience to try. It's great to open the box and to touch and use a device you've never had before.
You don't have permission to edit metadata of this video.
Let's start with the manual The first of the results found when searching for Adalm Pluto is this link from Analog Device.
Let's see what are some of the most important features of the Adalm Pluto:
Much more information can be found on the wiki page , where you can read: “The PlutoSDR allows students to better understand the real-world RF around them, and is applicable for all students, at all levels, from all backgrounds. Early learning in a hands-on manner with the PlutoSDR will ensure a solid foundation for students to build on, as they pursue science, technology, or engineering degrees.”, and: “The PlutoSDR Active Learning Module is a tool that closes the relationship between theory and practical radio frequency activities of the user. It provides a personal portable lab that, when used with a host, can augment the learning that takes place in the classroom”.
It seems that Adalm Pluto was conceived for teaching and to allow students to get to know the world of telecommunications, but there are also many radio amateurs who use it in their radio stations.
First you need to install the drivers for Windows, from the link:https://github.com/analogdevicesinc/plutosdr-m2k-drivers-win/releases
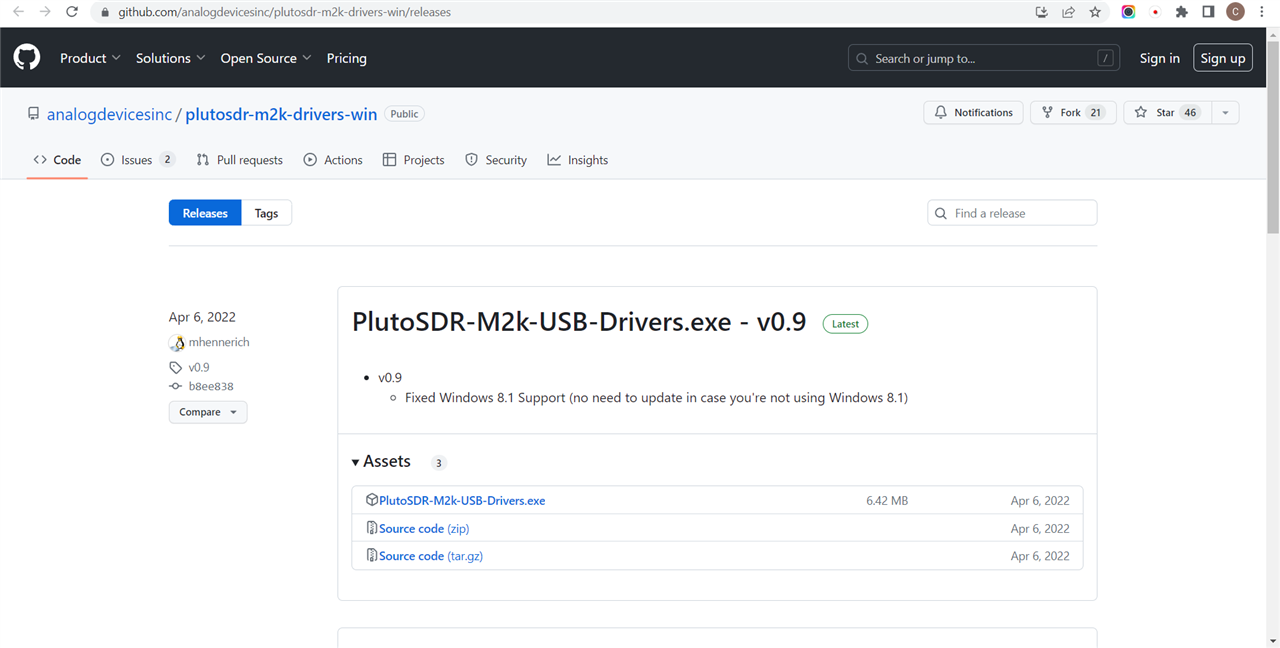
As soon as the drivers are installed on our PC, our Adalm Pluto can be connected to the PC via USB cable.
Windows should automatically recognize the PlutoSDR that creates three different USB objects:
You can see in Windows Device Manager if these interfaces have been added.
Before starting, we must remember to connect the two antennas contained in the Adalm Pluto package. We can also use the 15 cm SMA Cable to connect the transmitter and the receiver directly and without any power loss.
As for the software to use on my PC, my friend Davide, an expert radio amateur and self-builder who has been using Adalm Pluto for years, recommended me SDR Console. I downloaded it from sdr-radio.
The program is very rich in features but intuitive to use, obviously basic knowledge of telecommunications and the most used modulations is required.
You don't have permission to edit metadata of this video.
In this roadtest I want to use the Adalm Pluto to carry out a series of laboratory activities that can be of support in the Telecommunications lessons related to modulations. Analog modulations on an analog carrier are the easiest to study and understand using basic high school math. Very often the mathematics that provide the theoretical basis for this important topic make it particularly difficult and hard for students.
Being able to use a small device, which can be easily interfaced and configured from a PC, makes these topics easier to understand through laboratory activities, carried out with a PC and Adalm Pluto.
In order for a low-frequency signal, for example our voice or a piece of music (modulating signal) to be transmitted using radio waves, we need a high-frequency signal (carrier signal) and a circuit called modulator which, having received the modulating and carrier signals at the input, supplies the modulated signal at the output which has the characteristics of both input signals.

Modulator block diagram
The simplest modulation is Amplitude Modulation (AM) which modifies the amplitude of the carrier signal based on the amplitude of the carrier signal. It is a very simple modulation to implement and has been used for a long time in radio transmissions. Given the operating principle on which it is based, it is obviously very susceptible to disturbances but it is very useful to talk about it above all from an educational point of view due to its simplicity.
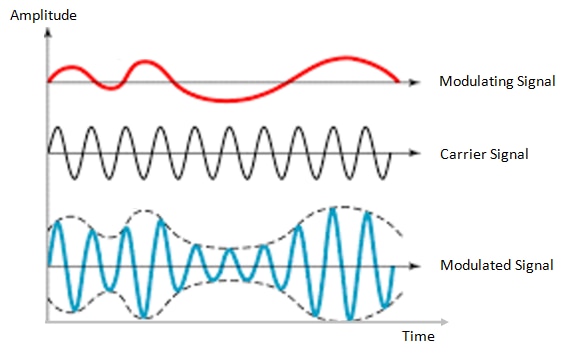 Modulation signal scheme
In order to test the amplitude modulation we need a modulating signal. Adalm Pluto allows different types of modulating signal, we can transmit one or more sinusoids with variable amplitude and frequency (Tone) or a modulated sinusoid (Tune), or, simply, the signal coming from the PC microphone.
In our first experiment, we will try to transmit a simple sine wave at a frequency of 800Hz and -3dB level.
From the transmission tab we can set the sinusoidal tone by setting its frequency and amplitude.
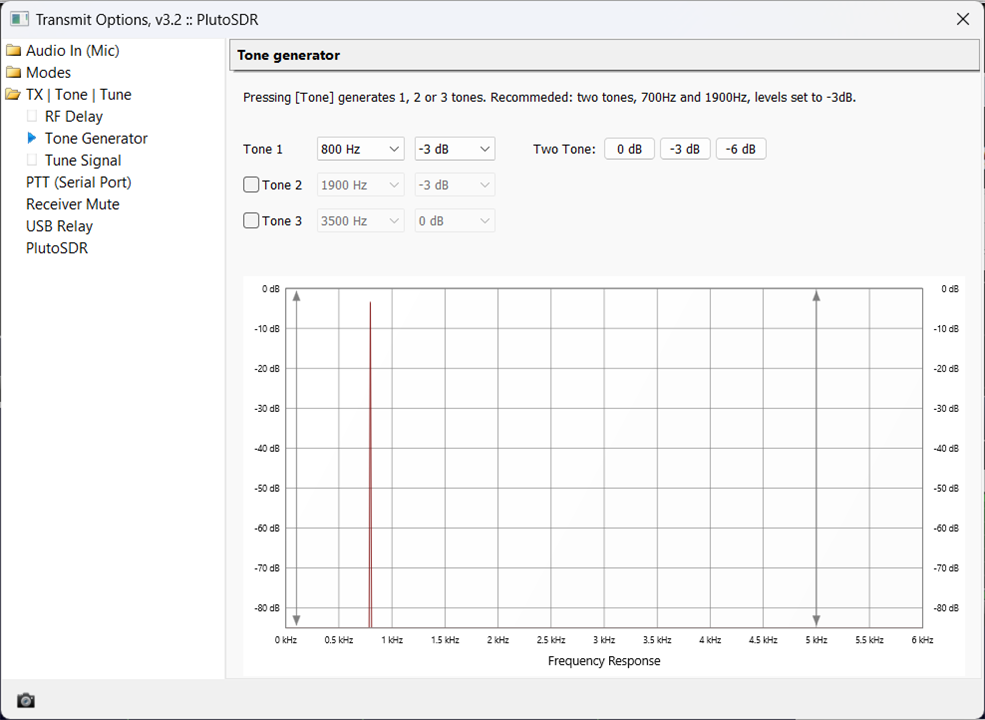
we now transmit our signal using AM modulation and a 500 MHz carrier frequency.
We can see that the modulating signal is correctly transmitted and, by analyzing the spectrum graph of the two signals, the transmitted and the received one, we will practically find what we have studied in Telecommunications books, and which we have simply tried with a few trigonometric calculations: the spectrum of the modulated signal in AM contains that of the modulating signal repeated twice, the two lateral bands, around the frequency of the carrier.
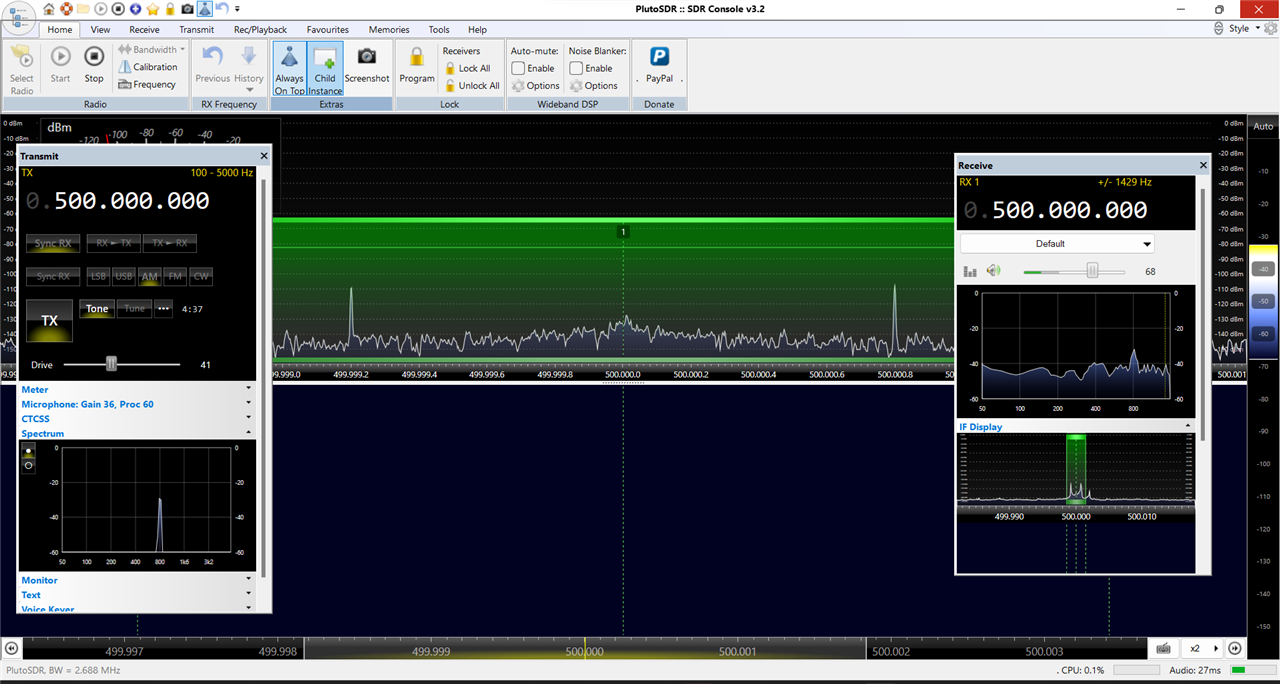
We can see that the modulated signal contains a double copy of the spectrum of the modulating signal, in practice if we are transmitting a sinusoidal signal at 800 Hz using AM and a sine wave carrier signal of 500 MHz, the modulated signal will contain two specular signals, one at 499,999,200 Hz and one at 500,000,800 Hz.
Now we will use a more complex signal, for example a signal created using three different tones at 1kHz, 2kHz, and 3.5kHz
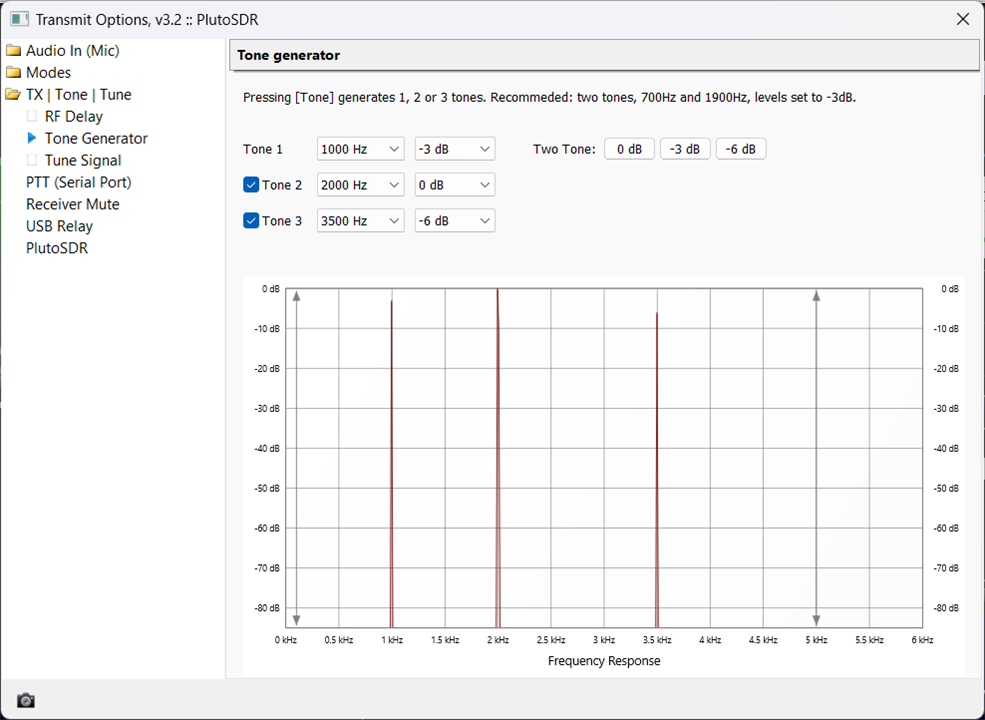
We have to remember that, when we modify tone, we have to stop and restart the software, now we will have a more complex spectrum.
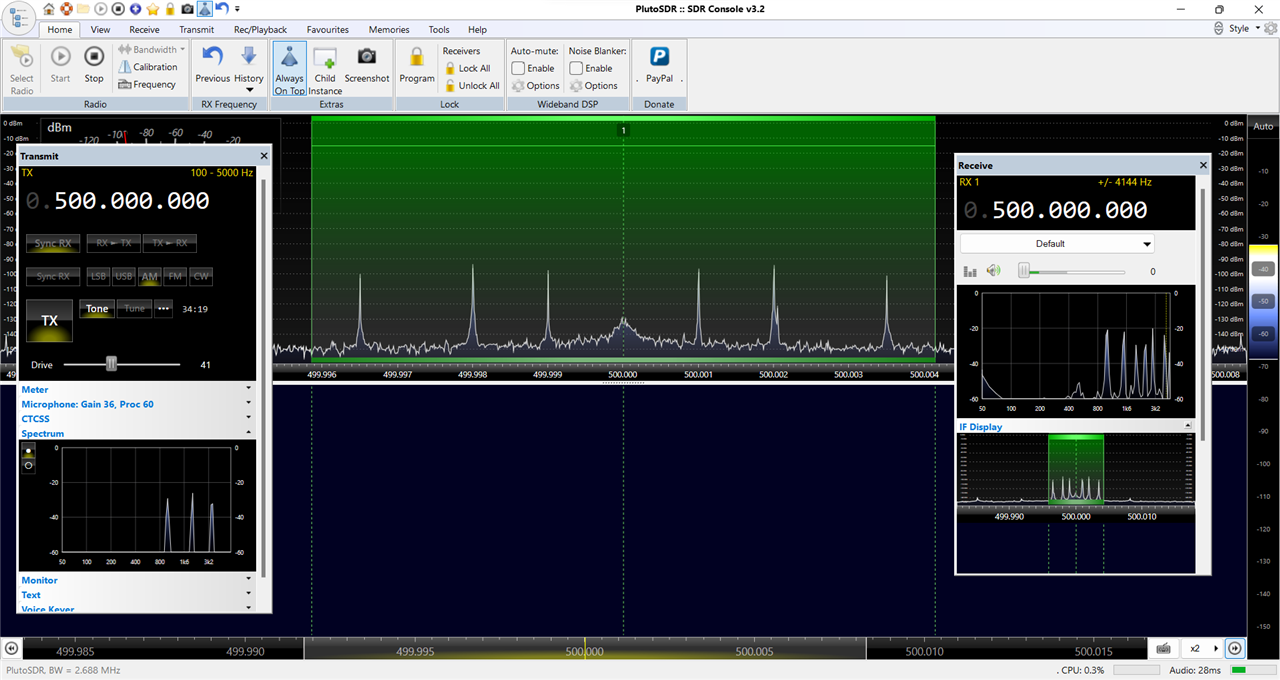
This is classic AM, used in radio broadcasting for decades.

But why is it so important to study sinusoidal signals?
Fourier's theorem states that any signal can be seen as the sum of a constant value and sinusoidal components of suitable amplitude and frequency.
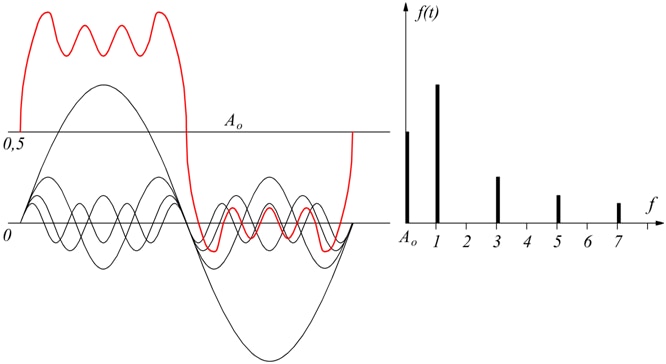
For this reason, transmitting a voice or music using amplitude modulation is like transmitting a very large number of sinusoids of different amplitudes and frequencies. The spectra of the transmitted and received signals will therefore not be composed of a few lines but will be a continuous spectra.
This concept can be easily seen using SDR Console to analyze, for example, the spectrum of the signal captured by the microphone or that of an audio signal captured on file.
Here, we can see the transmission of an audio signal (music) using AM.

We can see that the modulated signal contains a double copy of the spectrum of the modulating signal, in practice we are transmitting the same signal twice.
We can improve the performance of our transmitter using Single Side Band modulation, i.e. by transmitting only one of the two identical copies that the AM modulator produces. The Adalm Pluto allows you to perform this type of modulation by filtering the band below the carrier or the upper one, consequently we will have the Upper Side Band or the Lower Side Band. Just set the desired SSB modulation in the DSP of the transmitter to obtain the desired result.
Let's verify what has been said by defining a modulating signal with two sinusoidal tones at 1 kHz and 2 kHz with different amplitudes and let's see what happens using the LSB and USB modulations.
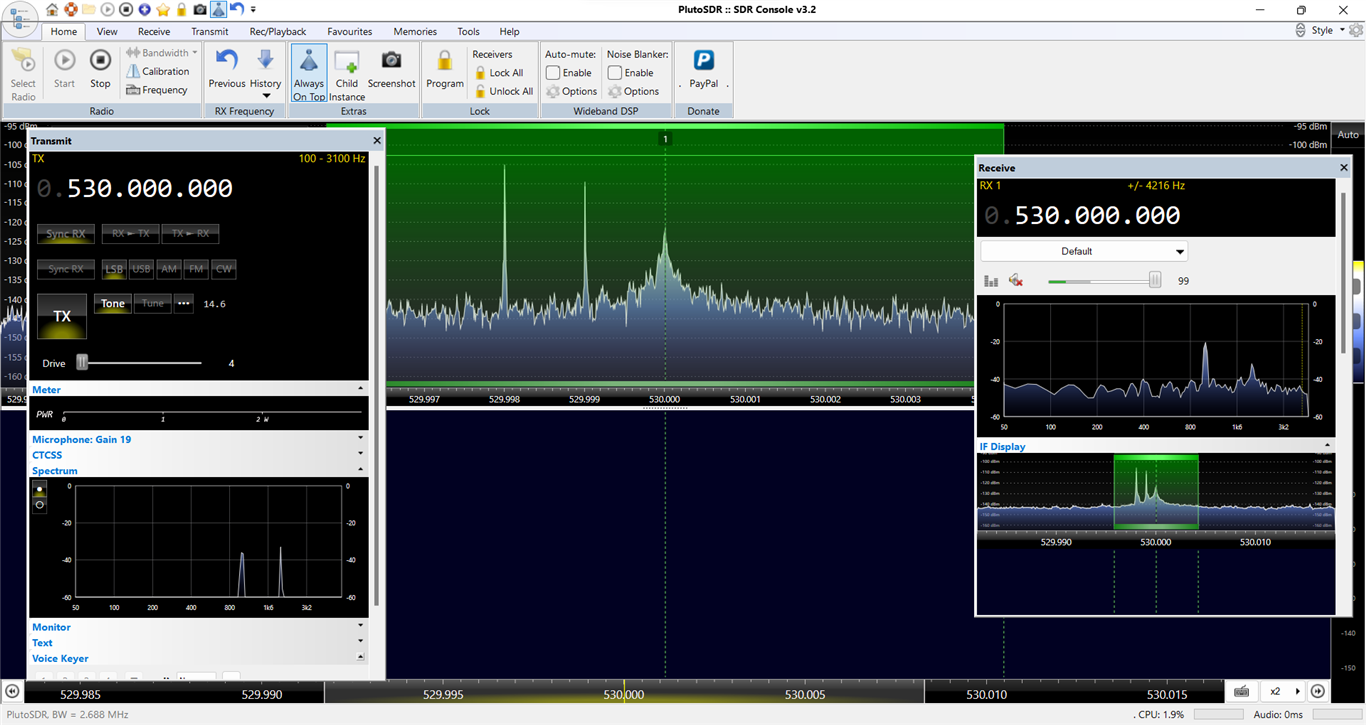
LSB Modulation
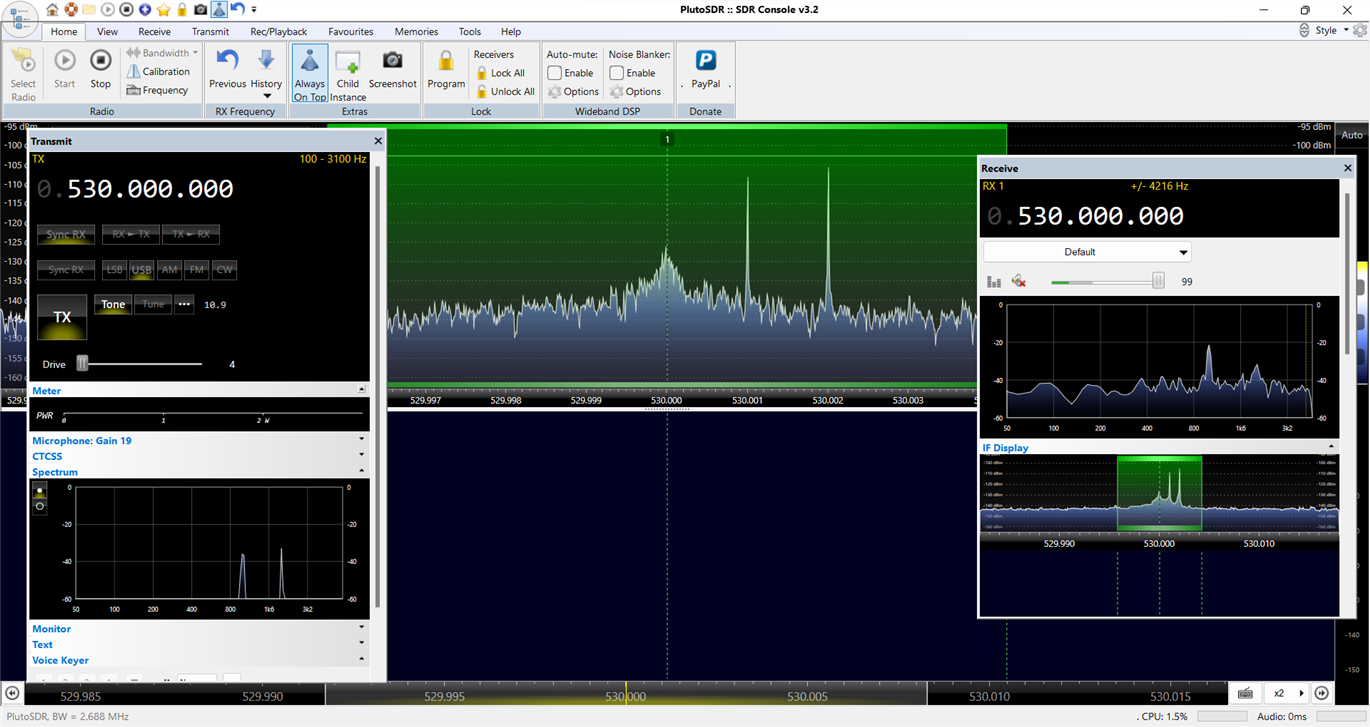
USB Modulation
If we modulate a continuous signal, for example music, using LSB or USB, we obtain the "moving" of the music spectra to the carrier frequency and we will have only use half of the band that we obtain when we use classic AM.
In this type of modulation, the modulated signal varies its frequency according to the amplitude of the modulating signal.
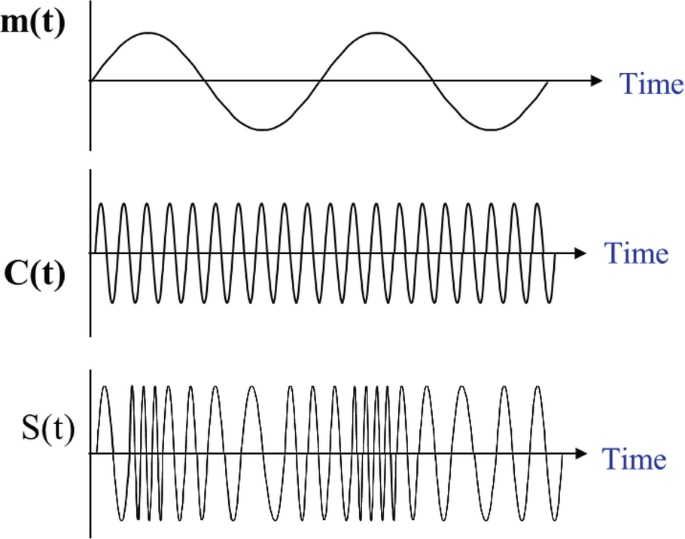
This is a more complex modulation to implement than the AM one, but it allows the transmission of signals with high interference immunity.
Suppose we want to transmit two sinusoidal signals with low frequency, let's see how the ADALM PLUTO modulates in FM.
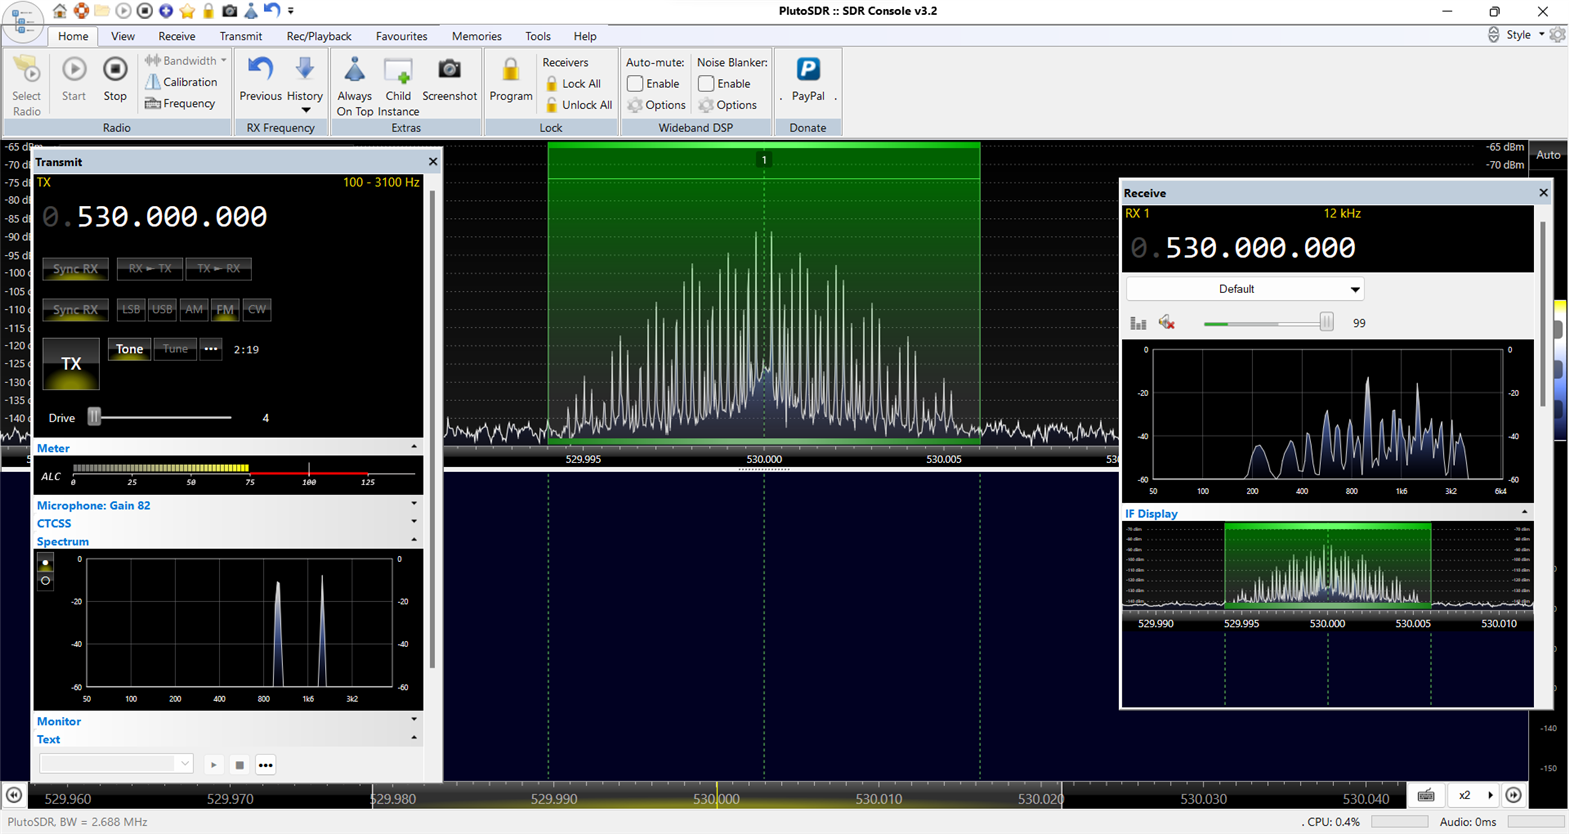
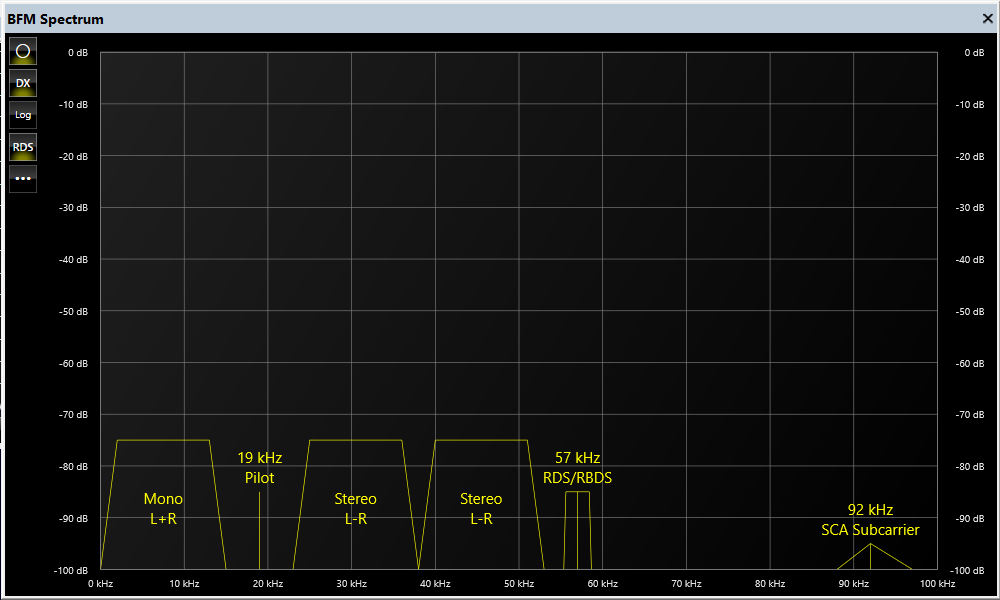
It should be noted that our PLUTO manages different types of FM modulation. it obviously manages also FM transmissions of the commercial band from 88 to 108 MHz and manages stereophony, i.e. two different channels transmitted at the same time, and RDS, i.e. the method present in FM transmissions for being able to add information to the modulating signal, for example the name of the radio, the title of the song, etc.
This roadtest was very interesting and very useful for me. It introduced me to the ADALM PLUTO, a fantastic device that makes it very easy to experiment with transmission techniques.
I just played a little with classic analog modulations and, using this wonderful device, I managed to think of laboratory activities that could be done by students using only the Adalm Pluto and a notebook.
Obviously it's just a start: the activities that can be performed using this device are many, for example I would have liked to work at low level using Python.
I believe that from September, at school, Adalm Pluto will be very useful.