RoadTest: Become a Tester of the STMicroelectronics STM32U083C-DK Discovery Kit
Author: gordonmx
Creation date:
Evaluation Type: Development Boards & Tools
Did you receive all parts the manufacturer stated would be included in the package?: True
What other parts do you consider comparable to this product?: STM32L0 & STM32L4
What were the biggest problems encountered?: Documentation was not well organized
Detailed Review:
First off, I would like to thank STMicroelectronics and Element 14 for the opportunity to evaluate the STM32U083C-DK Discovery Kit (“the Kit”).
Summary Conclusion –
NOTE: Before I start my review, as many of you already know, STMicroelectronics (STM) has been around for a while. Can anyone tell me what the letters in STM stands for? See the end of the “Summary Conclusion” for the answer.
As mentioned in the body of my review, the STM32U083C-DK Discovery Kit isn’t really a “complete” dev kit, but it still is a worthwhile board to explore design possibilities in low power, portable applications. The review kit, which I would more likely label the as an evaluation board, includes a number of useful features like a dedicated STM32U-based LCD, touch pad and user USB port controllers. After you get past the short comings of the documentation, the product works very well. I did wish there was a wireless interface, but that is what the MikroBus is for.
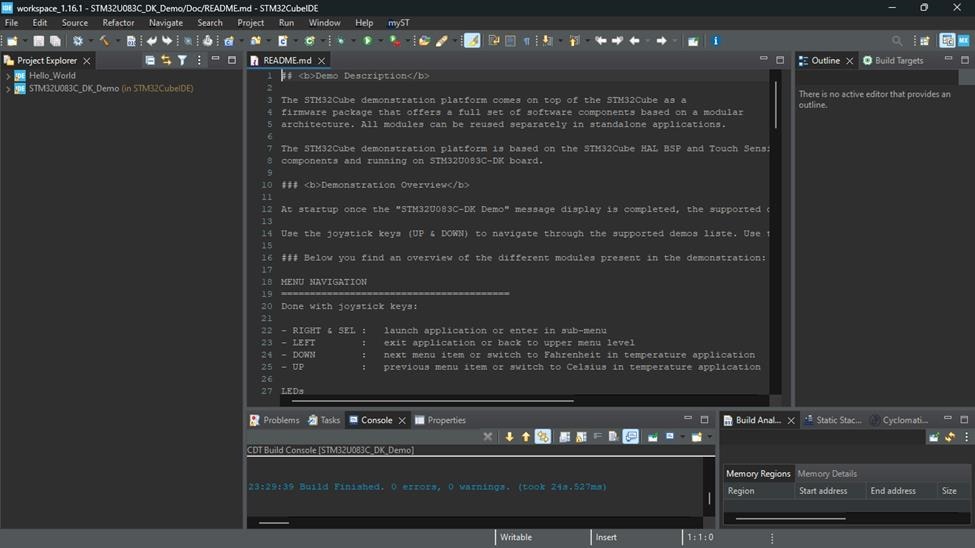
The eclipse-based IDE was easy to install and use, once you find the right documentation files. The kit has a built-in open-source serial and debug adapter (STLink) using a dedicated on-board STM32F family MCU making it easy to download and debug the software examples. The software examples were easy to load and understand. In addition, STM has an application note for using the MS Visual Code IDE. It was nice to see the extent of STM documentation, but it there can be a little learning curve finding the right path. I expected a little better documentation organization and cross referencing.
Pros –
Cons –
Overall, the design is workable and I would recommend the STM32U083C-DK Discovery Kit for a low cost and power entry level design.
Useful Documents Links-
NOTE: Logging into the respective websites may be required to access some of the documents.
NOTE: The list of documentation seems fairly long, but there is more. Be sure to check out STM’s product, Wiki and GetHub sites. More information about STM32U083MC can be found here:
Answer to today’s question: “STM” comes from the merging of two government-owned semiconductor companies in 1987. Italy-based SGS Microelectronic and French-based Thomson Semiconductor. SGS stood for Società Generale Semiconduttori or General Semiconductor Company. For further information, see https://en.wikipedia.org/wiki/STMicroelectronics.
The company resulted from the merger of two separate government-owned semiconductor companies in 1987: Thomson Semiconducteurs (Thomson Semiconductors) of France and SGS Microelettronica (SGS Microelectronic) of Italy.
-Courtesy of Wikipedia
Part IA – A Little more about STM?
Before digging into details of the “dev kit”, let’s start with a little history of STM. Once again courtesy Wikipedia (among other sources), as mentioned earlier, STM (actually SGS-Thomson semiconductor division) didn’t spring out of thin air, but as a merger between two separate government-owned companies in 1987. In 1998, Thomson sold their share of the company and STMicroelectronic or STMicro or for this review STM, was reborn. The company is currently incorporated in the Netherlands and headquartered in Switzerland and is the largest European semiconductor manufacturer. Within the global semiconductor industry, they are ranked among the top 5 companies. A true global oriented company with an eye on sustainability and the environment.
Part IB – What is the STM32U083C-DK?
Per STM’s website (see Useful Documents Links section), the STM32U083C_DK board, featuring an ARM Cortex-M0+ based STM32U083MCT6 MCU, provides an affordable and flexible way for users to try out new concepts and build prototypes by choosing from the various combinations of performance and power consumption features. Here are some highlights of the STM32U083C_DK board:
- ST-LINK USB Type-C connector
- User USB Device with USB Type-C connector
- mikroBUS connectors
- MIPI debug in connector (Arm® Cortex® 10‑pin 1.27 mm‑pitch debug connector over STDC14 footprint)
- Extension connectors for full access to all STM32 I/Os
- VBAT dedicated connector provides the capability to power the board on a battery
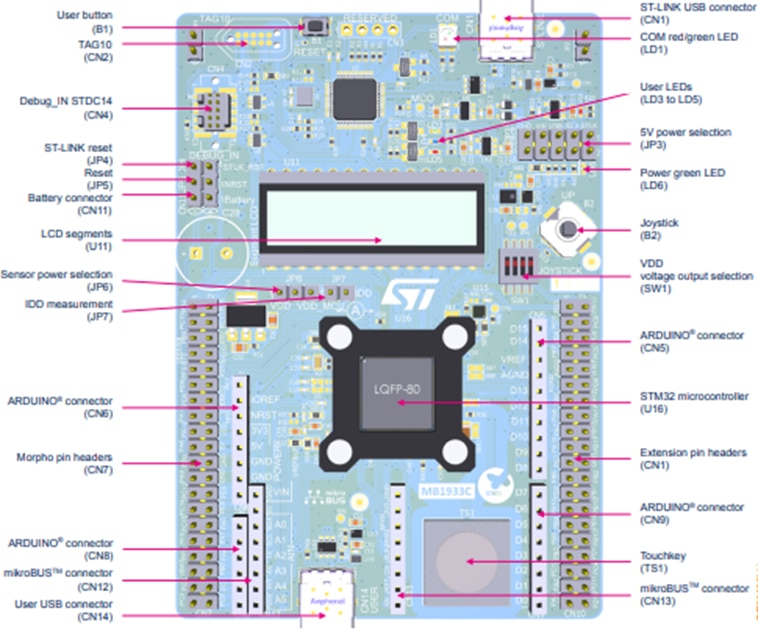
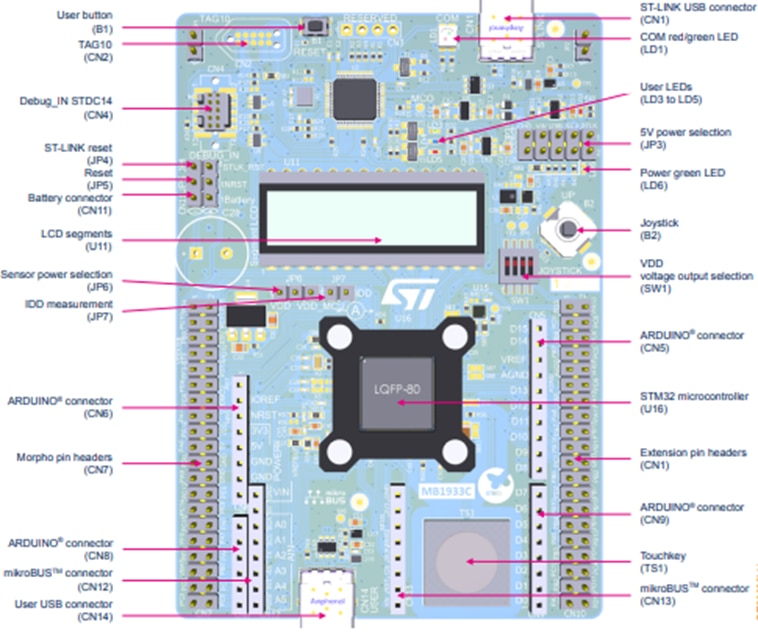
Discovery board component layout
NOTE: The smaller MCU at the top of the board is the STM32F-based STLINK controller
Digressing for a moment, the following is an attempt to define what “discovery kit” mean. All kits by nature are evaluation systems, used to highlight one or more of a manufacturer’s products. For the most part, terms in the title like board, tool, discovery kit, may be used interchangeably.
Some kits cross the line in some areas. A demo board may include some programming functionality through a USB port, but this does not make it a development kit. These boards normally are more restrictive in access to certain system lines because these lines are being used to demo or eval a feature. For our DK board the LCD display lines are used for the demo and therefore not available for developing an application.
So, what does this mean for the STM32U083C Discovery kit? The User manual states that the DK is a “complete demonstration AND development platform”, which the later may be a little bit of a stretch. I would label it more as an evaluation kit, but open to further discussion.
Part IC – What is the STM32 family and where does the STM32U083C-DK fit in?
The STM32 is a family of 32-bit ARM Cortex-Mx based microcontrollers (MCU). The family of MCUs is further divided into 4 functional area: High performance, Mainstream, Wireless and Ultra-Low power as shown in the following chart. The heart of the dev kit in this review (see highlight MCU) is part of the ultra-low power subfamily and includes a 56 MHz Corted-M0+ MCU intended for use in “entry-level, battery-powered applications” such remote sensing/monitoring devices.
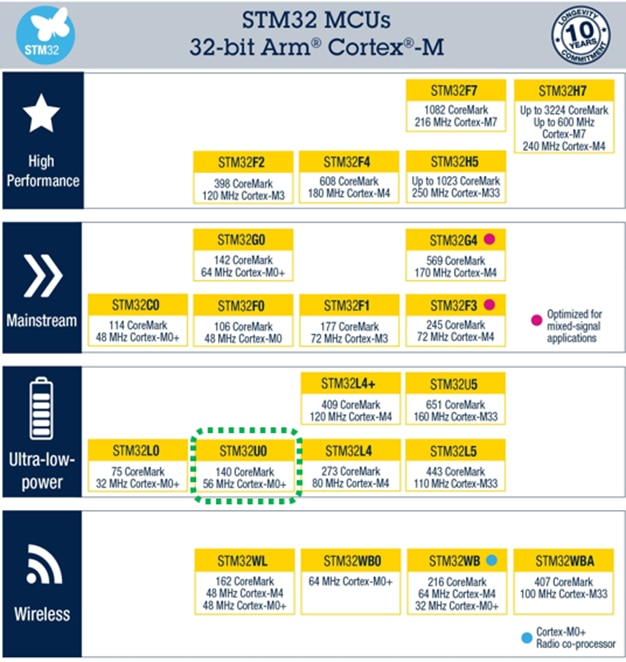
Courtesy of STMicroelectronics
The STM32U083xC devices are an ultra-low-power microcontrollers family (STM32U0 Series) based on the high-performance Arm® Cortex®-M0+ 32-bit RISC core. They operate at a frequency of up to 56 MHz.
- 52 µA/MHz Run mode (LDO mode)
- Brownout reset
 -CP-PP-CM
- 1x 16-bit advanced motor-control, 1x 32-bit and 3x 16-bit general purpose, 2x 16-bit basic, 3x low-power 16-bit timers (available in Stop mode), 2x watchdogs, SysTick timer
- RTC with hardware calendar, alarms and calibration
Part II – The Unpacking: 8^)
Welcome to the unpacking and our first look at the actual STM32U083C-DK board. I have read many different views on the value and/or importance of the unpacking segment, but I feel it is important because it is often our first glimpse into what to expect in the product and support.
I’m excited to road test the kit, not just because of STM’s expertise and extensive experience in the field of low power ARM-Cortex MCUs, but they’ve packed (no pun intended) so much unto the board.
The shipping box arrived undamaged, always a good sign, and well packed, unlike so many packages I have received from Amazon lately.
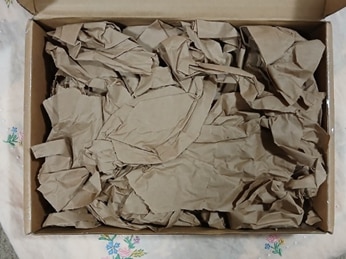


The actual board was equally packed well with loads of padding, and expected in a anti-static ponch.
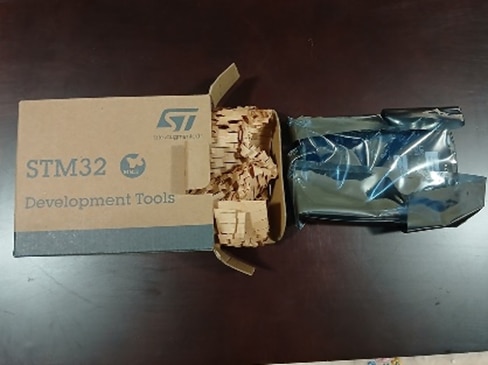
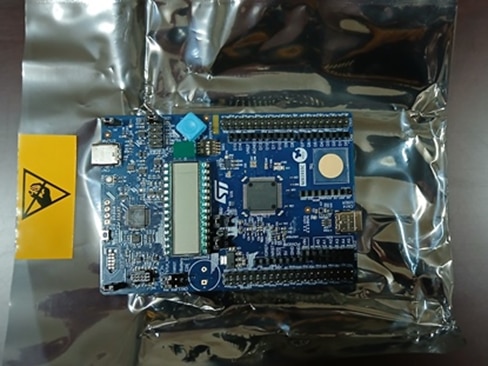
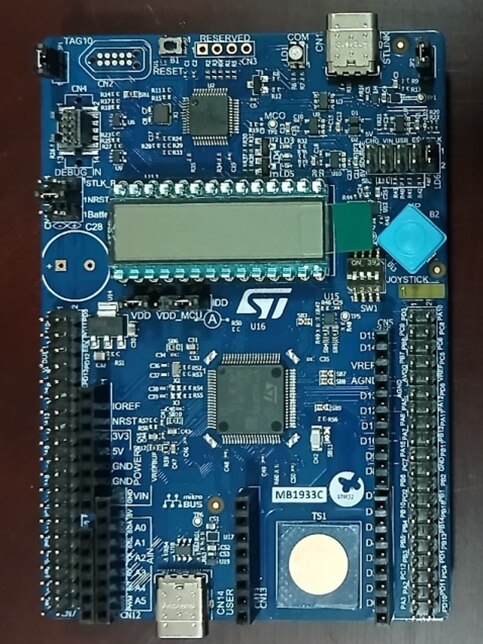
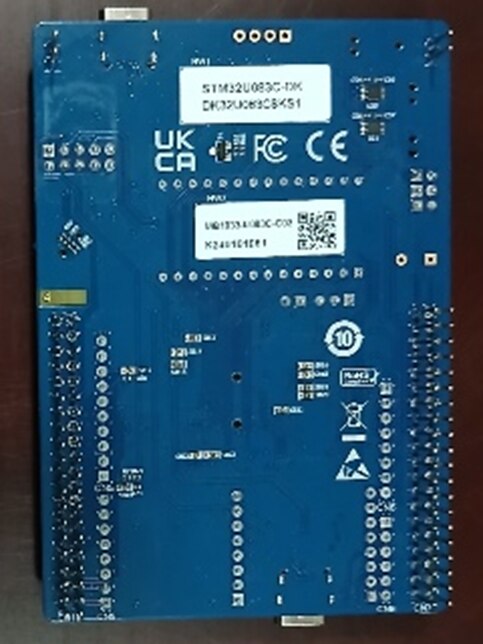
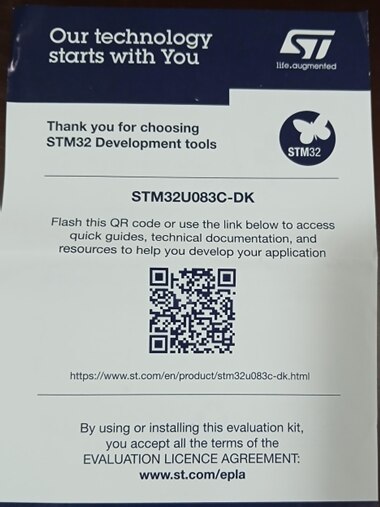

Aside from the small 4” x 5.5” note showing a QR code and the corresponding website link, you’re on your own to gather the necessary documentation. However, this not unusual as we have all seen with every dev/eval/demo kit produced for the last 10 years, all documentations are available only through download. And as you can see from the Useful Documents Links section, there is no shortage of supporting documents.
NOTE: Although the kit contains most of the materials required to run the demo software, neither the product or downloaded documentation outline what was included in each kit. The MikroBus air quality sensor is not included and you’ll have to dig a little to find the sensor part number, if interested. It would be nice for a kit to include a packing list to verify its content and include a list of additional components needed to verify the kit. Hint! Hint!
Part III – Connecting and Powering Up the Kit:
At this time, I normally power up the kit to get a feel for whether the unit will show any sign of life. The power LED (LD6) turned on and the display starts scrolling, the user LED start flashing. Very cool, but this is where things get a little fuzzy. I could use a little stronger language, but this is a family website. The user manual (UM3292), although can be helpful in some areas, in the setup and functioning of the demo seems very dated. The instructions appear to be copied from older manuals, with broken links to specific files. The link to the STLINK-V2EC USB Driver is an example of a broken link. The manual suggests installing the driver for proper operation of the board, but after searching the STM website (and Google) it was no where to be found. I finally contacted STM community forum (community.st.com) to find out the driver was included in the IDE installation and no longer available otherwise. The good news is that the forum responded very quickly to my inquiry.
Another piece of good news, although it again took a little time finding it, was the zip file (en.stm32cubeu0-v1-1-0.zip) that additional documentation and code for the demo and other example programs. Very help, but why so hard to find!
Part IV - Software Installation:
NOTE: My laptop is a Windows 11 Pro, 11th Gen Intel(R) Core (TM) i5-1135G7 @ 2.40GHz 2.42 GHz, 16 GB
Things are getting better having sorted through more documentation, so I’m feeling better and can see a light at the end of the tunnel. I started by installing STMCubeIDE, using the default settings, without an issue. My PC found the board through the Device manager.
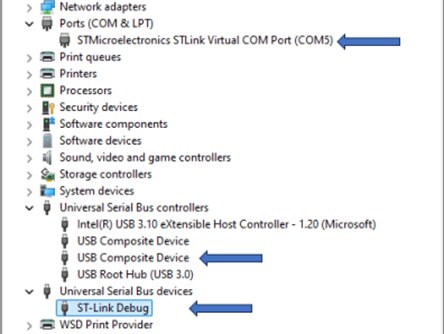

Using the demo code found in the previous mentioned .zip file, I was able to successfully build the code and install it.
Now that I’m feeling a little more confident, let's see what I can pull up with MS Visual Code.
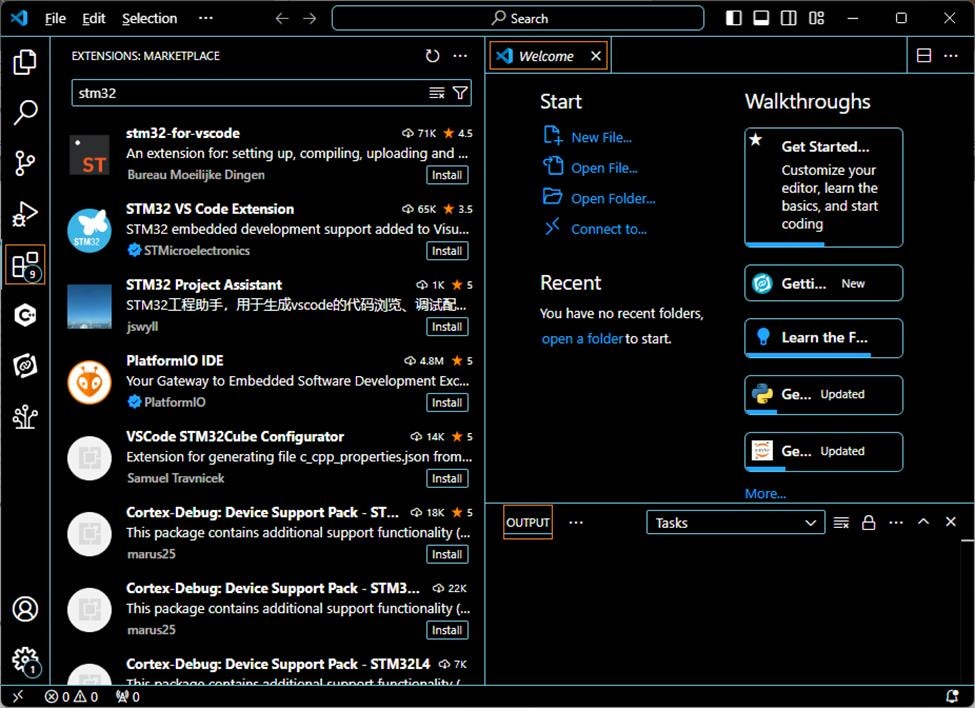
Now I’m really curious!
What I didn’t try (much) and what’s next
What I didn’t know at the submission of my application was that I was going to have a knee replacement in the next few days, so I had to wrap up this review. However, I will have a little more free time, if the pain meds don’t knock me out, so hopefully I can try some more of the example programs. I would also like to try using the MS Visual Code IDE.
If I can get around to it, I will try a little video for clarity.
Please let me know if I missed something in my review or if you have any questions. Also please pardon my typos.
Gordon Margulieux
Twin Falls, ID USA


