RoadTest: Microchip SAML10/11 Xplained Pro Evaluation Kits
Author: sparkytau
Creation date:
Evaluation Type: Development Boards & Tools
Did you receive all parts the manufacturer stated would be included in the package?: True
What other parts do you consider comparable to this product?: I imagine it would be similar to the KL82Z from NXP, and similar to the TI SimpleLink platform (minus the network connectivity)
What were the biggest problems encountered?: Finding proper documentation (my fault I'm sure), keeping track of which pin was which. I also had issues with getting the IDE to work, but I suspect that was a conflict with other development tools I had on that machine.
Detailed Review:
Before I begin, I’d like to thank the element14 and those involved in the Road Test for allowing me to do a run through of the SAML10/L11 Xplained Pro platform. Secondly, I need to apologize. The author of this amazing review at the time of this writing had a very interesting month- an incident with a broken water pipe, dead cell phone, toasted laptop, fried logic analyzer (and oscilloscope) kind of left me in a bit of a pickle. Most of the photos, code, logs and pretty screenshots I had were unfortunately lost in my re-creation of the Great Flood….
For what it is worth, I ran the L10 through its paces and was able to get it to perform really quite well with very little optimization on my part The first ‘real’ project I ran on it was a classic of mine, a stress test of the UART and SPI lines, recording data from an external device to a SD card. The test went beautifully and was dramatically faster than what I was used to (Granted, this is my first ARM microcontroller) and used dramatically less energy than I anticipated for the task. It was by far the winner as far as performance, energy use and temperature of the uC, but alas, the photos, setup and results were lost, as well as the first (extremely well written) version of this review. As a man of science I can not expect you to take my word for any of this. That being said, I was able to recover some bits and pieces and tried to do the best I could with what time I had left. Annnddd now back to the review...
I typically like to start these sorts of test drives/reviews with a quick introduction and unboxing, just so that we are all on the same page. I’ve worked with just about every computer system out there (Amiga, Solaris, AS/400, Windows, MacOS… you get the idea). I have spent a good part of my professional life in IT and in embedded hardware design. I started with the glorious PIC MCU’s, later I moved onto the Motorola/Freescale 86HC line, did a bit with the ATMega series, and as of late have been working a lot with the TI MSP430 platform. The SAML series is, therefore, my introduction into the world of ARM.
As far as unboxings go, this has been a pretty uneventful, as there was nothing in the box but the board, the antistatic sleeve it came in and a shipping manifest. There was a lot of wasted space, but not the worst example I've seen. I was slightly disappointed that it didn’t at least come with a USB cable (granted I have more than I know what to do with), or a business card that pointed to the documents/software needed. 


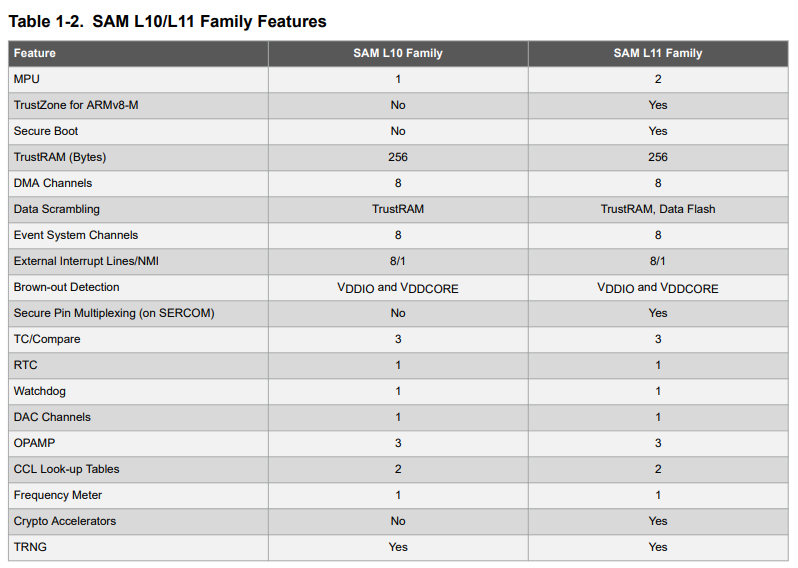
The differences between the two are fairly minor if you are not using the security features of the L11, the 30 second version is reflected below:
To save you some time as it took me longer than I would like to admit, here are the documents that were most helpful for me:
The quick start guide is here:
The SAM L10/L11 Xplained Pro User Guide was also invaluable:
http://ww1.microchip.com/downloads/en/DeviceDoc/70005359B.pdf
Also a requirement whenever working with any chip (at least for me…) the data sheet:
http://ww1.microchip.com/downloads/en/DeviceDoc/SAM-L10L11%20Family-DataSheet%20-%20DS60001513B.pdf
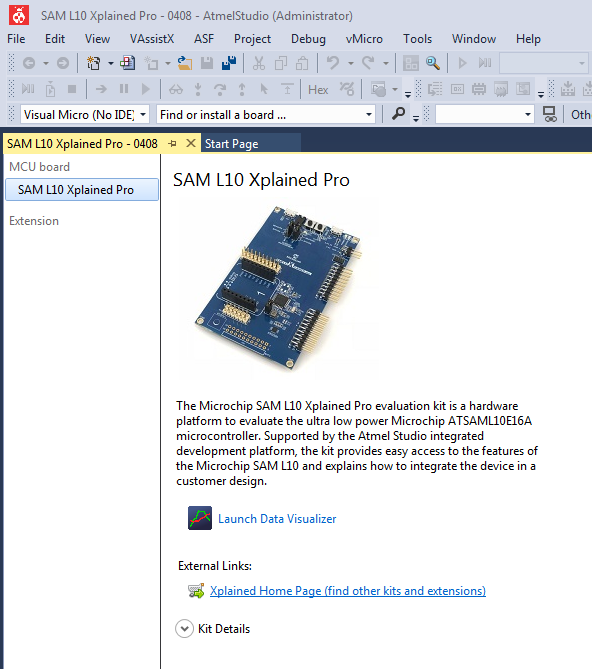
Once I had AtmelStudio installed and running, then I really off to the races.
It was quite nice to see the IDE automatically recognize the device and load the related components.
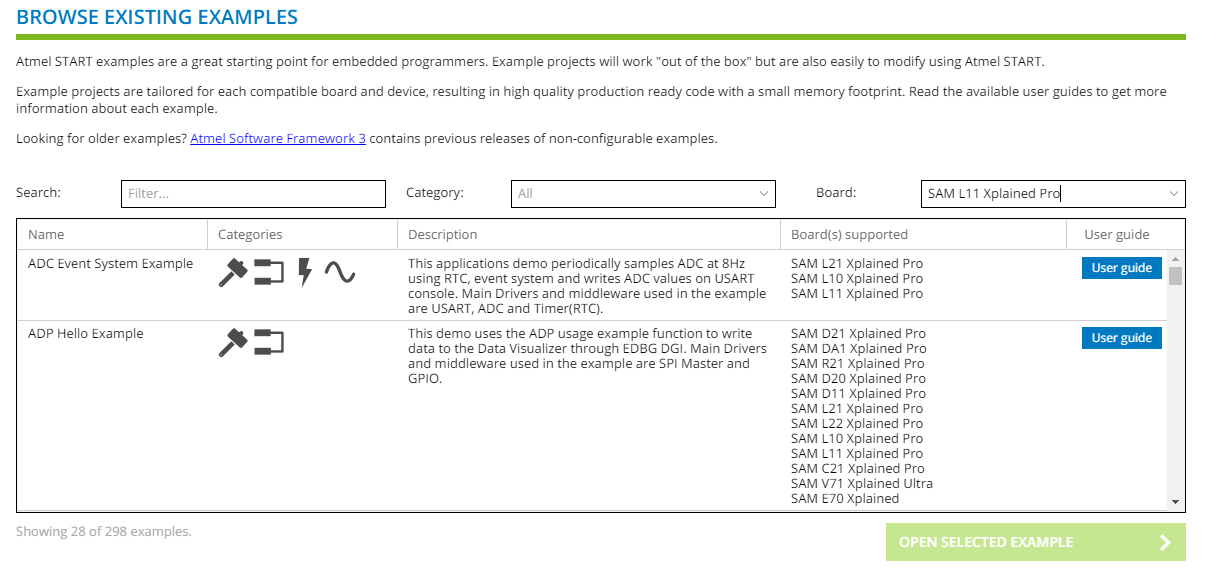
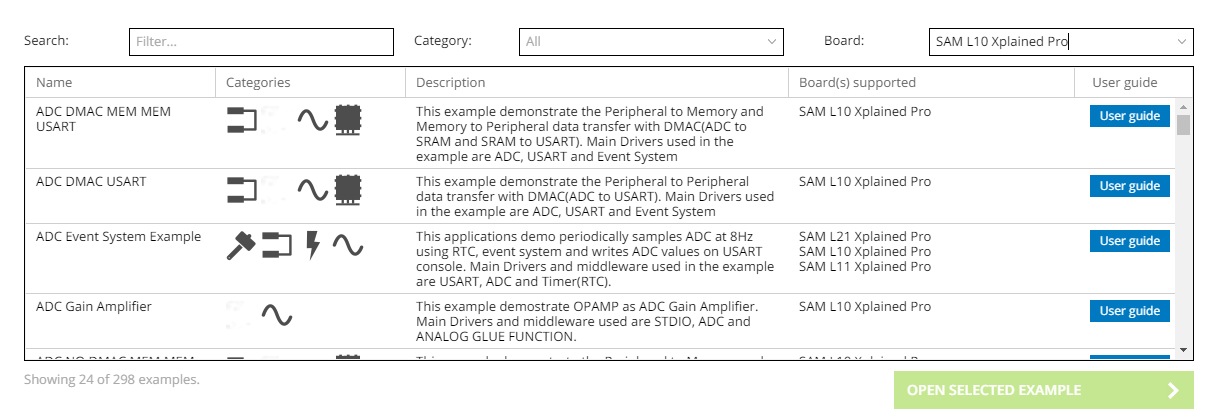
As you can see there are plenty of example projects just waiting to be played with. A slight disappointment that several of the examples require expansion boards that are required to go through all of the examples, but it is understandable.
As a side note, it appears there is a pretty significant conflict between the first two development machines I was using and the Atmel studio config, so I was forced to spin up a new development machine specifically for this test. For reference, the system I was finally able to get AtmelStudio 7 to run on was a Windows 7 x64 box that had no built in serial ports. I suspect strongly that this is not AtmelStudio’s fault, but rather a conflict from other development tools that I frequently use. I also ran into quite a few issues with AtmelStart downloading the files it needed to configure the projects, however I suspect this was related to the CenturyLink issues that were going on nationwide at the time.
I pretty quickly ran through several examples to get a feel for the board and the programming environment and although not intuitive at first, I picked it up easily enough, but I will say there are quite a few features that I am quite excited about but alas, due to the Great Flood I was not able to document or complete as many development runs through as I would have liked. Of particular interest for me are the following features:
Here is the part where I did all that work with the L10 but lost all evidence of it ;-( I did find that the L10 performed quite well, I was amazed at the performance it had even when operating under very low power conditions (sleepwalking is awesome!)
This time, however I wanted to play with the TRNG on the L11- so that’s exactly what I did. I set up the L11 to generate random numbers and send them across the serial line to my PC, and once I got enough of them, I ran them through an analyser just to see for myself.
From the datasheet:
I generated 12 megs of random data and started the heavy duty testing- I tried compressing the file with 7zip- and it did nothing for it (which is good!)
And then I got serious and ran it through the ent program from https://fourmilab.ch/random/
And was quite pleased with the results:
Entropy = 7.999986 bits per byte.
Optimum compression would reduce the size of this 12582912 byte file by 0 percent.
Chi square distribution for 12582912 samples is 241.53, and randomly would exceed this value 71.83 percent of the times.
Arithmetic mean value of data bytes is 127.5136 (127.5 = random).
Monte Carlo value for Pi is 3.139747620 (error 0.06 percent).
Serial correlation coefficient is -0.000329 (totally uncorrelated = 0.0).
I’d say that it passes the test. I've attached the random data for your own eval should you decide to take a peek
**********UPDATED****************
Evidently I didn't put quite enough detail into these, so hopefully this is more satisfactory...
In summary:
Kudos:
Gripes:
Expansion boards are relatively expensive to show off features of the chip- perhaps could include some of these on the board itself (it wouldn’t have been too difficult to put the I/O1 on the same board for instance as there is plenty of unused space on the PCB)