


When you create a new Renesas project for an RX device, you can choose C++. Let's try it out with an object oriented blinky.
For simplicity, I'm creating one class: an output pin class called io::O. It can drive a pin high and low. You assign a pin at creation time. You can drive it by assigning true or false to it:
#include "O.h"

int main(void) {
	bool state = true;
	io::O led(GPIO_PORT_H_PIN_2);  // initialise the output pin for the LED.

    while(1) {
    	led = !led;

    	// silly wait
    	for (int i = 0; i < 10000000; i++) {};

    	led != led;

    	// silly wait
    	for (int i = 0; i < 10000000; i++) {};
    }
return 0;
}
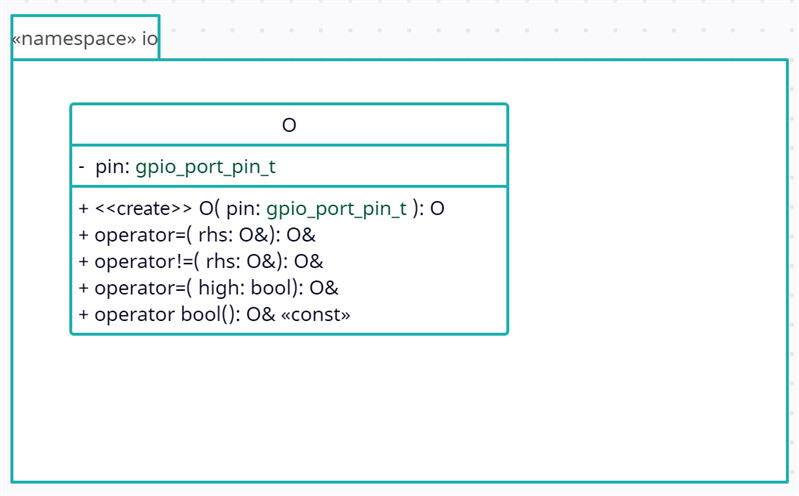
Class O
header: O.h
#ifndef O_H_
#define O_H_

extern "C" {
#include "r_gpio_rx_if.h"
}

namespace io {

typedef gpio_port_pin_t pin_t;

class O {
public:
	O(pin_t pin);
	virtual ~O();
	O &operator= (O &rhs);
    O &operator!= (O &rhs);
	O &operator= (bool high);
	operator bool() const;
protected:
  pin_t pin;
};

} // namespace io

#endif /* O_H_ */
implementation: O.cpp
#include <O.h>

using namespace io;

O::O(pin_t pin): pin(pin) {
}

O::~O() {
}

O &O::operator= (bool high) {
	R_GPIO_PinWrite(this->pin, (gpio_level_t)high);
	return *this;
}

O &O::operator!= (O &rhs) {
	R_GPIO_PinWrite(this->pin, (gpio_level_t)!((bool)rhs));
	return *this;
}

O::operator bool() const {
	gpio_level_t l = R_GPIO_PinRead(this->pin);
	return (bool) l;
}
When you run this, you have your usual blinky. I tried to make the code very simple, with just a little bit of OO encapsulation. A proof that it can be done.
mbed fans may see similarities to the DigitalXXX classes. It was definitely an inspiration, although I didn't port their code. (I've done that in the past for another controller family).
The attached e² studio project is precompiled, using GCC and the rx23e-a starter kit board. It can be used with CC-RX and any RX controller.
FIT objects used: r_bsp (board startup), Config_PORT (pin setup) and r_gpio_rx (gpio API).
rx23ea_thermocouple_cpp_gcc_20230721.zip

